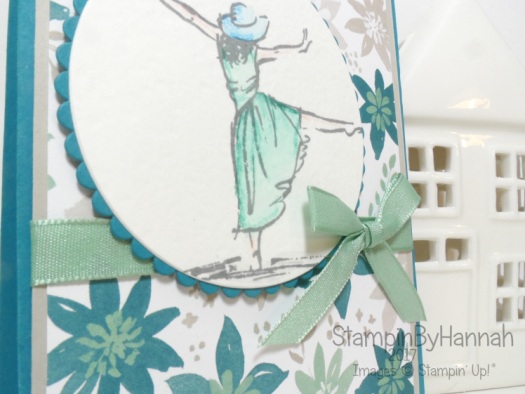
Love Hearts Week | Origami Box

Love Hearts Week Origami Box Video Tutorial using Sending Love Designer Series Paper from Stampin' Up! UK

Love Hearts sweets Video tutorials

Oh my goodness, this box looks really complicated but it is SO easy! The tutorial I found for this was on the Gathering Beauty blog, and I have re-made it using 6 x 6 Designer Series Paper.

Sending Love Designer Series paper Origami Box Stampin' Up! UK

This cute box holds two mini rolls of Love Hearts, but you could make it with any size paper you like (as long as it is square) to hold what ever you like! how cool!

Instructions:

  1. Fold you piece of Designer Series Paper in half, turn and fold in half again. Then unfold and lay with the print you want on the outside, face down.
  2. Fold the bottom edge to meet the halfway mark, rotate and repeat on the opposite side. Unfold and lay flat, you should now see 8 rectangles
  3. Fold the bottom edge to meet the top fold line, rotate and repeat on the opposide side. Unfold and lay flat, you should now see a further 8 smaller rectangles
  4. Fold the top corners to meet the 2 fold line down, and the bottom corners to meet the 2nd fold line up
  5. Rotate your paper so the fold lines are vertical, and turn your paper over so you can now see the print you want on the outside of your box
  6. Fold the bottom edge to meet the halfway mark, rotate and repeat on the opposite side. Then fold the paper edge back
  7. You have now created two flaps, lift one flap, you should see two triangles, open up the triangle to make a rectangle. Do this on both sides
  8. Turn your paper over again so that the print you want on the outside of the box is face down
  9. You need to bring the flaps you created back over so you can see them. To do this you need to fold so that the edge of the flap meets the edge of the two rectangles that you can currently see (check the video for this bit, it is easier to demonstrate that explain)
  10. To construct the box; raise the flap to create the sides, you should then be able to fold the outside flaps to fold the lids of the box. You need to take the triangles on the flaps (that we got rid of before) and fold them to the second crease on the side of the box. This should pull the top of the box up. Repeat on all four triangles
  11. To close the box you can push one side of the lid into the triangles side the other side of the lid

Love Hearts Week Origami Box Video Tutorial using Sending Love Designer Series Paper from Stampin' Up! UK

You could make a bunch of these and store them flat (so stop at instruction 9). Right I am off to make a bigger one out of a full piece of 12 x 12! Now, which paper to choose…..


Question of the day: What has been your favourite project this week?

I love them all! I LOVE this box, but the ink technique from Wednesday is something I will be playing with again I am sure 🙂


Sale-a-bration from Stampin' Up! UK


Product List


Shop Stampin' Up! UK Teesside North East Stockton on Tees

Joining Stampin' Up! UK Starter Kit

To purchase any of the items featured in my projects please use the links above. To join my team of Stampin’ Friends select ‘Join My Team’ or send me a message!

Please support StampinByHannah, and enter MK42UXHG. For orders of over £150 please do not use this code, as you are entitled to your own Hostess benefits!

Sign up to my newsletter here – http://eepurl.com/2if59

Hannah McCurley

Stampin’ Up! UK Independent Demonstrator

Love Hearts Week | Mini Lided Box Tutorial

Love Hearts Week Mini Lided Box Tutorial using Pop of Pink from Stampin' Up! UK

Love Hearts sweets Video tutorials

These boxes are so cute… I’m not sure what else you could put in it, but I’m sure some other type of cute sweetie would fit.

Love Hearts Week Mini Lided Box Tutorial using Pop of Pink from Stampin' Up! UK

I’m LOVING the pink on these, and that heat embossing….. have I ever mentioned how much I love heat embossing?

Measurements:

Box Base – 6 1/2 x 2″ (16.5 x 5 cm)

Score on the long side at 2, 3, 5, and 6″ ( 5, 7.5, 12.5 and 15 cm)

Score on the short side at 1″ (2.5 cm)

Box Lid – 2 1/16th x 3 1/16th” (5.1 x 7.6 cm)

Score at 1/2″ (1 cm) on all four sides

Love Hearts Week Mini Lided Box Tutorial using Pop of Pink from Stampin' Up! UK

Ok, so stay tuned for tomorrows video…. it is so cool! I cannot wait for you to see it!


Question of the Day: What is your favourite stamping technique?

I LOVE heat embossing, but ink blending might be a close second…. and I love me a bit of watercolouring too….. too many to choose!


Sale-a-bration from Stampin' Up! UK


Product List


Shop Stampin' Up! UK Teesside North East Stockton on Tees

Joining Stampin' Up! UK Starter Kit

To purchase any of the items featured in my projects please use the links above. To join my team of Stampin’ Friends select ‘Join My Team’ or send me a message!

Please support StampinByHannah, and enter MK42UXHG. For orders of over £150 please do not use this code, as you are entitled to your own Hostess benefits!

Sign up to my newsletter here – http://eepurl.com/2if59

Hannah McCurley

Stampin’ Up! UK Independent Demonstrator

Love Hearts Week | Distress Resist Congratulations Card

Love Hearts Week Distress Resist video tutorial using So In Love from Stampin' Up! UK

Love Hearts sweets Video tutorials

Ok, so it is Wednesday, and today – even though it is Love Hearts Week –  I have a card project for you, because I couldn’t not share this card with you almost as soon as I had made it!

One of the many ways I find inspiration on a daily basis is YouTube, and one of the very lovely people I follow is the gorgeous Jennifer McGuire (I am going to try not to sound like some sort of crazy fan-girl now….) she shares some fabulous techniques, but she doesn’t use Stampin’ Up! inks…. so I like to test out her ideas using Stampin’ Up! products. Which is what I have done today.

Love Hearts Week Distress Resist video tutorial using So In Love from Stampin' Up! UK

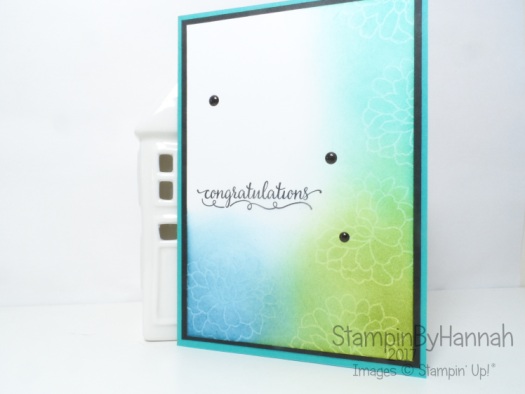
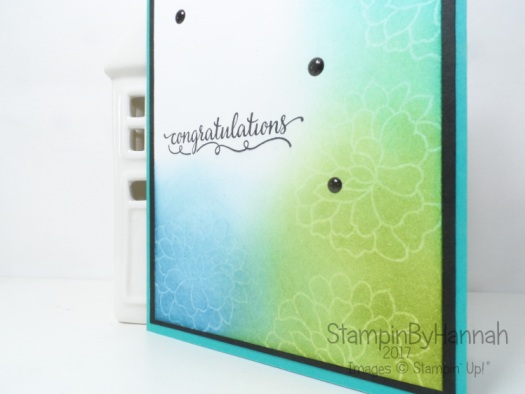
This technique is really very simple; select your stamp (always a good place to start!) I love using line images for this, but you could totally use something more solid too. Ink it up in Versamark and stamp in onto Whisper White card stock. Heat set it or leave it for a while to dry, and then sponge ink over the top to get this cool, delicate effect.

You could totally add white or clear embossing powder after the Versamark to make a more vibrant image too.

Jennifer McGuire Distress Resist Technique using inks from Stampin' Up! UK

And those blank Enamel shapes…. you’ll have to watch the video to see how I made those!


Question of the Day: What is your current favourite YouTube Channel

I don’t think I could possibly choose, I am enjoying watching fitness and diet theme-d videos at the moment


Sale-a-bration from Stampin' Up! UK


Product List


Shop Stampin' Up! UK Teesside North East Stockton on Tees

Joining Stampin' Up! UK Starter Kit

To purchase any of the items featured in my projects please use the links above. To join my team of Stampin’ Friends select ‘Join My Team’ or send me a message!

Please support StampinByHannah, and enter MK42UXHG. For orders of over £150 please do not use this code, as you are entitled to your own Hostess benefits!

Sign up to my newsletter here – http://eepurl.com/2if59

Hannah McCurley

Stampin’ Up! UK Independent Demonstrator

Love Hearts Week | Tall Skinny Sending Love Bag!

Love hearts week tall skinny gift bag using Sending Love Designer Series Paper from Stampin' Up! UK

Love Hearts sweets Video tutorials

Welcome to day 2 of a week of Love Hearts products! I think these would make lovely Valentines gifts, and a cute way to say I love you…. or maybe wedding favours to say Thank you…. or even just because!

Love hearts week tall skinny gift bag using Sending Love Designer Series Paper from Stampin' Up! UK

This Designer Series Paper may just be my favourite paper this year! On one side of each sheet is a cute Valentines print, but on the other are a selection of great patterns for all occasions…. a paper stack that takes you way beyond Valentines, actually I think that some of the patterns would be cute Christmas options!

Measurements:

Sending Love Designer Series Paper – 4 1/2 x 6″ (11 x 15 cm)

Scored on the long side at 1, 2, 3, 4″ (2.5, 5, 7.5 and 10 cm)

Score on the short side at 1″ (2.5 cm)


Question of the day: What is you current favourite Designer Series Paper

I am loving Sending Love, and the Carried Away Designer Series Paper (free during Sale-a-bration!)


Sale-a-bration from Stampin' Up! UK


Product List


Shop Stampin' Up! UK Teesside North East Stockton on Tees

Joining Stampin' Up! UK Starter Kit

To purchase any of the items featured in my projects please use the links above. To join my team of Stampin’ Friends select ‘Join My Team’ or send me a message!

Please support StampinByHannah, and enter MK42UXHG. For orders of over £150 please do not use this code, as you are entitled to your own Hostess benefits!

Sign up to my newsletter here – http://eepurl.com/2if59

Hannah McCurley

Stampin’ Up! UK Independent Demonstrator

Love Hearts Week | Masked Jar of Love Gift Bag

Love Hearts week Valentines papercraft using Jar of Love from Stampin' Up! UK

Love Hearts sweets Video tutorials

Oh I have been so looking forward to this week! A whole week of projects and videos featuring the wonders that are Love Hearts! Yay!

Love Hearts week Valentines papercraft using Jar of Love from Stampin' Up! UK

How cute are is this bag! and it is super easy to make too – all thanks the the Gift Bag Punch Board.

Measurements:

Card stock – 10 x 4 1/8″ (25.4 x 10.5 cm)

Make the gift bag following the instructions for the S sized bag.

Whisper White – 2  1/2 x 2 1/4 (6.3 x 5.4 cm)

Gift Bag Punch Board Gift Bag for Love Hearts using Jar of Love from Stampin' Up! UK

The heart mask is super easy to create too, I used the sweetheart punch to punch out a piece of Grid paper to use as a mask. Then use stamps (I used the small heart from Jar of Love) to stamp around the heart in Blushing Bride, Calypso Coral and Watermelon Wonder. Lovely!


Question of the Day: What is your favourite Valentines sweet treat?

I’m a sucker for anything chocolate-y, My Mr. usually buys me Thorntons for any occasion, although I dread to think what he is buying me this year seeing as we are both on a major diet 🙁


Sale-a-bration from Stampin' Up! UK


Product List


Shop Stampin' Up! UK Teesside North East Stockton on Tees

Joining Stampin' Up! UK Starter Kit

To purchase any of the items featured in my projects please use the links above. To join my team of Stampin’ Friends select ‘Join My Team’ or send me a message!

Please support StampinByHannah, and enter MK42UXHG. For orders of over £150 please do not use this code, as you are entitled to your own Hostess benefits!

Sign up to my newsletter here – http://eepurl.com/2if59

Hannah McCurley

Stampin’ Up! UK Independent Demonstrator

Make It Monday | Cute card using Sweet Cupcake from Stampin’ Up! UK

Make It Monday video tutorial using Sweet cupcake and watercolour pencils from Stampin' Up! UK

make-it-monday-banner

Welcome to Monday! I do hope this week is totally awesome for you…. I can make it even more awesome of course! Have you checked out my most recent Online Card Class yet? This class uses the fabulous Sweet Cupcake stamp and die bundle…. check the video to see exactly what comes in your class pack

Make It Monday video tutorial using Sweet cupcake and watercolour pencils from Stampin' Up! UK

I love the Sweet Cupcake stamp set. It is designed to work as a triple layer stamp, with both the cupcake base and the icing have 3 stamps to create a totally dimensional cupcake. However, I have only used the base layer to create this card…. and then added extra detail with Watercolour Pencils (obsessed with those!)

The watercolour pencils can be used either on their own – as regular pencils – with an Aqua Painter or a paint brush, or with a blender pen. So far my experiments with a blender pen seem to have better blended results that with an Aqua-Painter or a paint brush, but then I haven’t finished playing with them yet…

Make It Monday video tutorial using Sweet cupcake from Stampin' Up! UK

If you want to receive more information about my Online Card Classes, please complete the form below:

[contact-form][contact-field label=’Name’ type=’name’ required=’1’/][contact-field label=’Email’ type=’email’ required=’1’/][contact-field label=’Address’ type=’textarea’ required=’1’/][/contact-form]


Question of the day: What are your crafty plans for this week?

I’m working on upcoming classes and a heap of videos coming in February! very exciting!


Online Card Classes using Stampin' Up! UK Products


Product List


Shop Now button-001join Stampin' Up! Uk

To purchase any of the items featured in my projects please use the links above. To join my team of Stampin’ Friends select ‘Join My Team’ or send me a message!

Please support StampinByHannah, and join my Code Club, by using the Hostess code featured in the top right hand of my blog. For orders of over £150 please do not use this code, as you are entitled to your own Hostess benefits!

Sign up to my newsletter here – http://eepurl.com/2if59

Hannah McCurley

Stampin’ Up! UK Independent Demonstrator

Make It Monday | Balloon Adventures Birthday Tags

Make It Monday video tutorial to make birthday tags using Balloon Adventures from Stampin' Up! UK

make-it-monday-banner

Welcome to Make It Monday!

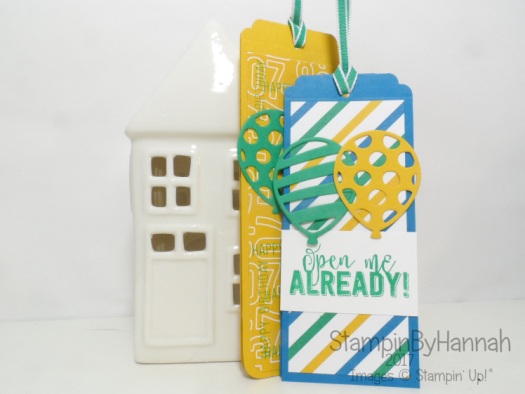
I have a quick and simple project for you today, although I am planning on doing a more techniques based video next week. I’m loving playing with the Balloon Adventures stamp and die bundle and just had to show you these cute birthday tags!

Make It Monday video tutorial to make birthday tags using Balloon Adventures from Stampin' Up! UK

The Balloon Adventures stamp set is the stamp set we are using in my Birthday Card Club! Sign up’s are still available and but I will be closing the list on the 20th (that’s Friday!). The club is a great way to guarntee that you’ll have a stash of handmade birthday card on hand during 2017! We are making 4 cards a month for 6 months using the Balloon Adventures stamp set, you can find all the sign up information HERE!

Measurements:

Card stock: 2 x 9 1/2″ (5 x 24 cm) Scored at 4 3/4″ (12 cm)

Designer Series Paper: 1 3/4 x 4 1/8″ (4.5 x 10.5 cm)


birthday-card-club-banner


Product List


Shop Now button-001join Stampin' Up! Uk

To purchase any of the items featured in my projects please use the links above. To join my team of Stampin’ Friends select ‘Join My Team’ or send me a message!

Please support StampinByHannah, and join my Code Club, by using the Hostess code featured in the top right hand of my blog. For orders of over £150 please do not use this code, as you are entitled to your own Hostess benefits!

Sign up to my newsletter here – http://eepurl.com/2if59

Hannah McCurley

Stampin’ Up! UK Independent Demonstrator

Make It Monday | Beautiful You Card Video Tutorial

Make It Monday Watercolour Card using Beautiful You from Stampin' Up! UK

make-it-monday-banner

Just a quick post from me today… as all the instructions and explanations for this card are in the video!

Make It Monday Watercolour Card using Beautiful You from Stampin' Up! UK

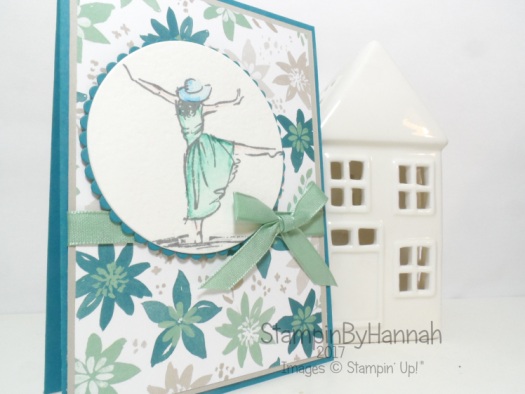
Oh, how I love the new Stampin’ Up! watercolour pencils! they are just awesome, and so easy to use too

Have you checked out my Beautiful You Online Card Class, pre-order closes on the 14th, and I wouldn’t want you to miss out

make-it-monday-watercoloured-beautiful-you-2

Hope you have a fabulous Monday, and I will see you again tomorrow…


Online Card Classes using Stampin' Up! UK Products


Product List


Shop Now button-001

join Stampin' Up! Uk

To purchase any of the items featured in my projects please use the links above. To join my team of Stampin’ Friends select ‘Join My Team’ or send me a message!

Please support StampinByHannah, and join my Code Club, by using the Hostess code featured in the top right hand of my blog. For orders of over £150 please do not use this code, as you are entitled to your own Hostess benefits!

Sign up to my newsletter here – http://eepurl.com/2if59

Hannah McCurley

Stampin’ Up! UK Independent Demonstrator

Make It Monday | Post It Note Sneak Peak

Make It Monday Sticky Note Holder Video Tutorial using Lift Me Up from Stampin' Up! UK

make-it-monday-banner

Welcome back! I am so glad to be back, have you missed me, I haven’t written a blog post or filmed a video for about 3 weeks, and I cannot wait to get back into the swing of things. I hope you had a great Christmas and a lovely New Year.

I haven’t had the past few weeks off completely though, I have been super busy packing catalogues, planning and crafting ready for the start of the Spring Summer catalogue and the start of Sale-a-bration on Wednesday! I cannot wait, this year is going to be AWESOME!

Make It Monday Sticky Note Holder Video Tutorial using Lift Me Up from Stampin' Up! UK

I always send goodies with catalogues, and this time around is no different, everyone got a super cute sticky note holder ready to mark up their shopping lists! These use the brand new Lift Me Up! bundle, and some Sale-a-bration Designer Series Paper. Check out the video for all the instructions…

Measurements: (sorry I only have metric measurements for this one)

Card stock – 9 x 5.1 cm

Score on the long side at 4 and 5 cm

Designer Series Paper – 3.5 x 4.5 cm


birthday-card-club-banner


Shop Now button-001join Stampin' Up! Uk

To purchase any of the items featured in my projects please use the links above. To join my team of Stampin’ Friends select ‘Join My Team’ or send me a message!

Please support StampinByHannah, and join my Code Club, by using the Hostess code featured in the top right hand of my blog. For orders of over £150 please do not use this code, as you are entitled to your own Hostess benefits!

Sign up to my newsletter here – http://eepurl.com/2if59

Hannah McCurley

Stampin’ Up! UK Independent Demonstrator
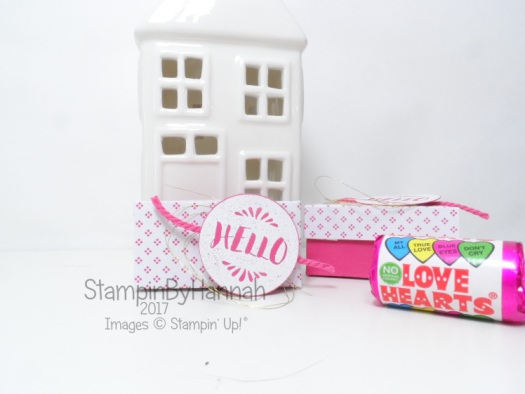
 

12 Days of Christmas | Minty Pocket Bag

12 Days of Christmas Minty Designer Series Paper Pocket bag video tutorial table favours using DSP from Stampin' Up! UK

12 days of Christmas with StampinByHannah Independent Stampin' Up! UK Demonstrator

Oh my goodness, I cannot believe we are finally nearing the end of 12 Days of Christmas! and this is my last crafty video of the year! I hope you have enjoyed this 12 days of videos as much as I have, and if there is something else you would like to see, let me know, and I might even do it all over again!

12 Days of Christmas Minty Designer Series Paper Pocket bag video tutorial table favours using DSP from Stampin' Up! UK

These cute little bags (I think they look like draw string pocket because of the closure) are totally inspired by my Friend Sam and one of her lovely projects. Check out me making them in the video below!

Yep, ribbon and twine and me are still not friends, but I am still trying!

Measurements:

Designer Series Paper – 8 1/4 x 4″ (22 x 10 cm)

Score on the long side at 2, 4, 6, and 8″ (5, 10, 15, and 20 cm)

Score on the short side at 2″ (5 cm)


Giftaway: Place your order between now and midnight on the 26th December to get a FREE roll of Copper Metallic Thread (my favourite goody from this year!)

Copper Metallic Thread 12 Days of Christmas Giftaway


Product List


Shop Now button-001join Stampin' Up! Uk

To purchase any of the items featured in my projects please use the links above. To join my team of Stampin’ Friends select ‘Join My Team’ or send me a message!

Please support StampinByHannah, and join my Code Club, by using the Hostess code featured in the top right hand of my blog. For orders of over £150 please do not use this code, as you are entitled to your own Hostess benefits!

Sign up to my newsletter here – http://eepurl.com/2if59

Hannah McCurley

Stampin’ Up! UK Independent Demonstrator