Freshly Made Sketches 195 – Cardmaking 101 Process video

Stampin' Up! UK Freshly Made Sketches Crazy About You Video tutorial


Disclaimer: I got totally ahead of myself this week, and planned this video as the final part of my Cardmaking 101 series (my brain is complete mush right now, call it Wedding brain!) I am planning something else for next weeks Cardmaking 101 (probably another process video) but I am compiling a list of card making FAQ’s, do you have a burning card making question, let me know in the comments section below and I’ll answer it next Sunday!


I thought I would show you my card making process, using a sketch from Freshly Made Sketches. I have been really enjoying using sketches in card making recently, generally because it makes me make cards I wouldn’t normally make!

Stampin' Up! UK Freshly Made Sketches

This is the sketch for this week. I always try and modify the sketch a little, and not use it completely literally – for example here I have rotated the card by 90 degrees, but I might choose a different shape, or move the sentiment a little, just to convert the sketch in to something a little more my style.

Stampin' Up! UK Freshly Make Sketches Cardmaking 101 Crazy About You

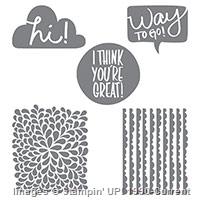
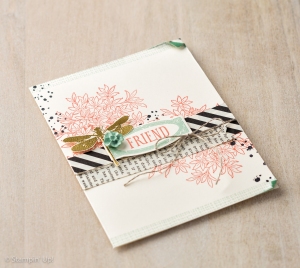
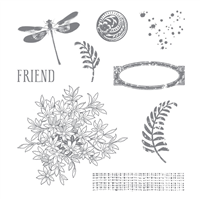
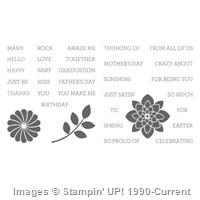
I had loads of fun making this card, even though I made several mistakes (all in the video!). I swapped the circles for these scallop circle flowers from Crazy About You, and added the leaves in the background.

Don’t forget to ask your card making questions in the comments section below.


Shop Now button-001Join my team button-001

To purchase any of the items featured in my projects please use the links above. To join my team of Stampin’ Friends select ‘Join My Team’ or send me a message!

Please support StampinByHannah, and join my Code Club, by using the Hostess code featured in the top right hand of my blog. For orders of over £150 please do not use this code, as you are entitled to your own Hostess benefits!

Sign up to my newsletter here – http://eepurl.com/2if59

Hannah Wilks

Stampin’ Up! UK Independent Demonstrator

Technique Tuesday|Layered Alphabet

Stampin' Up! UK Technique videos

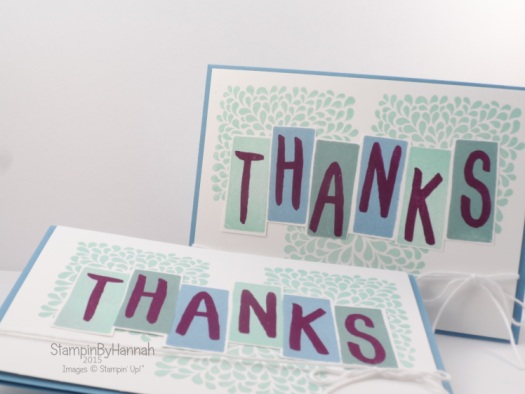
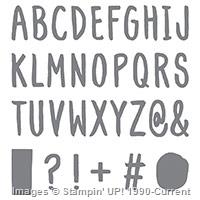
I have a slightly different Technique Tuesday for you this week. I have been loving the Layered Letters Alphabet, I’ve used it for all sorts the projects this month – Catalogue bookmarks, my swatch book, and now my customer Thank You cards for July!

If you have placed an order this month, this card will be coming to you in the post at the end of the month! If you haven’t ordered yet…. you better get ordering to get one!

Stampin' Up! UK Layered Letters Alphabet

Aren’t they cute! Check out the video for some great tips about using this stamp set!

Top tips:

– Stamp your layering pieces first! get those rectangles and ovals onto your card – using different colours for each one looks awesome!

-Lay your letters out onto a clear block, to check your spelling! (particularly important if your dyslexic like me!)

-Position your letters onto the layering spots, stamp side down, and pick them all up in one go with a large clear block – this way you can stamp them together like one big stamp!

Do you have any alphabet stamp tips? Let me know in the comments section below!


Supply List

Built for Free Using:  My Stampin Blog


Dont forget to shop using the Code Club Code to receive some great FREE product!

XEQGUA4P

I will be closing this order on the 30th July 2015


Shop Now button-001Join my team button-001

To purchase any of the items featured in my projects please use the links above. To join my team of Stampin’ Friends select ‘Join My Team’ or send me a message!

Please support StampinByHannah, and join my Code Club, by using the Hostess code featured in the top right hand of my blog. For orders of over £150 please do not use this code, as you are entitled to your own Hostess benefits!

Sign up to my newsletter here – http://eepurl.com/2if59

Hannah Wilks

Stampin’ Up! UK Independent Demonstrator

Ink Splatter Two Ways

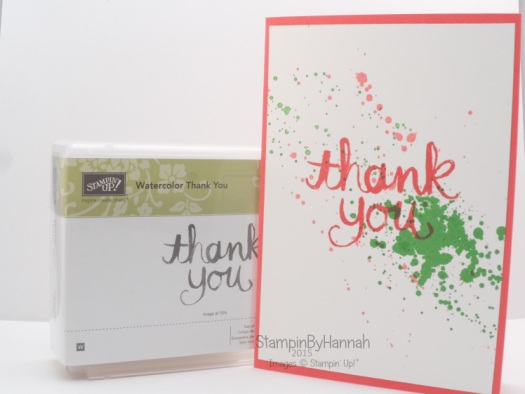
Stampin' Up! UK Ink Splatter Gorgeous Grunge Watercolour Thank you

Slightly different style of video for you today. I am going to try some different videos over the next few weeks, thinking of trying some ‘craft along’ type videos. I wanted to show you the two ways I most commonly make ink splatters. I love this look, although I don’t share it very often, I do use both of these methods to create this effect

Stampin' Up! UK Ink Splatter Gorgeous Grunge Watercolour Thank you

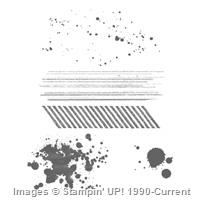
As you will see in the video I wasn’t really sure where I was going with this card. I had pulled this stamp, as well as as Cucumber Crush and Watermelon Wonder inks, the card base and a Whisper White matt.

There are two different types of ink splatter here (well, its almost three, but I want you to ignore the large Cucumber Crush Splat for the moment).

The Watermelon Wonder ink splatters are watered down ink, splattered onto the card stock with a paint brush, whilst the Cucumber Crush ones are a stamp! Can you tell the difference? because I can’t! How cool is that!

What do you think? Which is your favourite ink splat method?


Shop Now button-001Join my team button-001

To purchase any of the items featured in my projects please use the links above. To join my team of Stampin’ Friends select ‘Join My Team’ or send me a message!

Please support StampinByHannah by using the Hostess code featured in the top right hand of my blog. For orders of over £150 please do not use this code, as you are entitled to your own Hostess benefits!

Sign up to my newsletter here – http://eepurl.com/2if59

Hannah Wilks

Stampin’ Up! UK Independent Demonstrator


Card Storage Box

Stampin' Up! UK card storage box cherry on top DSP

There are a stack of these floating around on Pinterest, but I just had to put my own spin on it. The Classic Card Box. I wanted a box specifically to hold cards and envelopes while they wait to go to customers. Did you know that I always send a ‘Thank You’ card when you place an order in my store? If you have ordered and haven’t received a card it may be that you have selected ‘No Contact’ drop me an email if you think I’ve missed you.

Stampin' Up! UK card storage box video tutorial

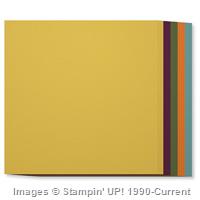
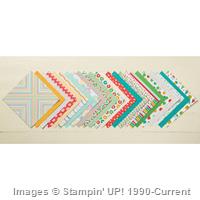
The first box uses Lost Lagoon card stock, and a piece of that lovely Neutrals Designer Series Paper Stack. Whereas the video version is in Bermuda Bay with a piece of Cherry on Top Designer Series Paper. I grabbed the Cherry on Top DSP during demonstrator Pre-Order, purely because it was available to me! Demonstrators get the chance to order from a sample of product before the big launch! and I have to say, looking at the pictures in the Catalogue, I’m not sure that I would have ordered if it hadn’t been in that pre-order selection. And I would have missed out! Because it is fabulous! Featuring Bermuda Bay, Cucumber Crush, Crushed Curry, Pool Party, Tip Top Taupe and Watermelon Wonder, and a collection of birthday themed papers with some great patterns; it would look fab as part of a Project Life album! I might even have to order a second pad!

Measurements:

Card stock – 12 x 8″ (30.5 x 20.5 cm)

Score on the long side at – 4 1/2, 5 3/4, 10 1/4, and 11 1/2″ (11.5, 14.5, 26, and 29 cm)

Score on the short side at – 1 1/4″ (3 cm) turn the card stock around and score in the wide section nearest the skinny flap at 1 1/2″ (4 cm)

Designer Series Paper – 4 1/4 x 5″ (11 X 12.5 cm)


Shop Now button-001Join my team button-001

To purchase any of the items featured in my projects please use the links above. To join my team of Stampin’ Friends select ‘Join My Team’ or send me a message!

Please support StampinByHannah by using the Hostess code featured in the top right hand of my blog. For orders of over £150 please do not use this code, as you are entitled to your own Hostess benefits!

Sign up to my newsletter here – http://eepurl.com/2if59

Hannah Wilks

Stampin’ Up! UK Independent Demonstrator
 

Stamp Layering…A Great CASE!

Stampin' Up! UK Awesomely Artistic

I’m slowly working my way through a massive list of techniques to try (anyone else write a heap of lists?) including the techniques listed in the latest Stampin’ Up! Annual Catalogue (Have you got yours yet?)

I am loving the Artistic Expression section of the catalogue, and the techniques listed there. I know I’ve done this one before, but I just love the sample in the book, and really wanted to CASE it. It’s been a whiles since I did a CASE card – Copy and Share Everything! I love doing this, particularly around a new catalogue launch, giving the samples my own twist.

Stampin' Up! Awesomely Artistic

So, that’s the Stampin’ Up! version, and I have changed it up slightly, check out the video below to see how I did!

Stampin' Up! UK Stamp Layering Awesomely Artistic Video Tutorial

I got the chance to play with this stamp set for the first time at Regional Training back in May, before it’s release! and we made a great Make and Take which I shared recently. Awesomely Artistic is one of the stamp sets designed for Stamp Layering; where you layer stamped images on top of each other to create a collage effect.

I have also used a few pieces of Designer Series Paper on this card; I’m trying really hard to use more DSP on my cards at the moment and have another using it later in the week. This card uses little pieces of the Neutral Designer Series Paper Stack (I’m sorry, I made this card before it was unavailable, but it WILL be back really soon!) and that lovely Typeset Speciality paper that I am completely in love with!

This stamp set also coordinates with a set of framelits, the Project Life Cards and Labels Framelits, but I have to say I don’t own them. However, this label is so easy to fussy cut even I did it!


Shop Now button-001Join my team button-001

To purchase any of the items featured in my projects please use the links above. To join my team of Stampin’ Friends select ‘Join My Team’ or send me a message!

Please support StampinByHannah by using the Hostess code featured in the top right hand of my blog. For orders of over £150 please do not use this code, as you are entitled to your own Hostess benefits!

Sign up to my newsletter here – http://eepurl.com/2if59

Hannah Wilks

Stampin’ Up! UK Independent Demonstrator
Marshmallow Box – Video Tutorial

Isn’t it always the way, when your doing a big ol’ deep clean that you come across something you had totally forgotten all about! well, that’s what happened to me last week. Deep cleaning my kitchen cupboards and this little box fell out on my head! First of all I thought it was a higher power being nice to me, rewarding my hard-work with Marshmallows, but alas the box was empty! However, it did inspire me to create this fab gift box – great for Marshmallows, or chocolates, a small candle, or just something little and cute!

Stampin' Up! UK Box video tutorial perpetual birthday calender

I love this box! The dots are from Perpetual Birthday Calender, while the sentiment is a retiring Hello There!

Measurements:

Card stock = 11 1/2 x 9 3/4″ (29 x 25 cm)

Score on the long side at – 2 3/4, 5 1/2, 8 1/4 and 11″ (7, 14, 21, and 28 cm)

Score on the short side at – 3/4, 3 1/2, 6 1/4, and 9″ (2, 9, 16, and 23 cm)


Shop Now button-001Join my team button-001

To purchase any of the items featured in my projects please use the links above. To join my team of Stampin’ Friends select ‘Join My Team’ or send me a message!

Please support StampinByHannah by using the Hostess code featured in the top right hand of my blog. For orders of over £150 please do not use this code, as you are entitled to your own Hostess benefits!

Sign up to my newsletter here – http://eepurl.com/2if59

Hannah Wilks

Stampin’ Up! UK Independent Demonstrator
How to use a Stamp-a-ma-jig!

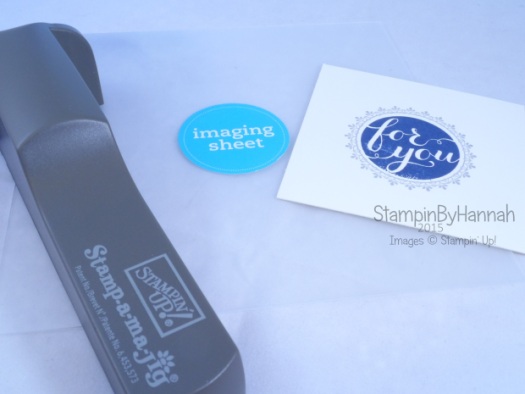
I have recently invested (not that it cost very much, but it was definitely worth the spend) in the Stamp-a-ma-jig from Stampin’ Up!

I had not realised how much I would use it, and will openly admit I bought it because I can’t tell you how useful something is without trying it first. I have to say, I think this is a tool that will definitely make it into my top 5 stampers tool kit!

Stampin' Up! UK how to use a stamp-a-ma-jig

There are so many ways to use the Stamp-a-ma-jig, but this is the way I use it most often….

Place the Acrylic Imaging Sheet with the shiny side down onto your grid paper, and butt the handle up against a corner, ensuring the corner of the imaging sheet is into the top corner of the T shape of the handle.

Ink up your stamp in a dark colour (Momento Black works particularly well). Put the corner of your stamping block into the top of the corner of the Stamp-a-ma-jig handle, slide the block down the corner to stamp onto the Imaging sheet. Your stamped image should now be on the imaging sheet

Remove the handle, position the imaging sheet onto your project, so that the image on the imaging sheet is where you want to stamp for real.

Place the handle back onto the corner of the imaging sheet in the same position it was before, and remove the imaging sheet – holding onto the handle ensuring it doesn’t move.

Ink up your stamp and stamp again, putting the corner of the stamping block into the corner of the handle, sliding the block down and back up to ensure a smudge free image.


Hannah Wilks

Stampin’ Up! UK Independent Demonstrator
If you like the project, or any of the products used, would like a catalogue, or to join my team, please contact me, or click on the ‘Shop NOW’ button at the top of the page. You can also find me on Twitter, Facebook, YouTube, Google+, About.me, and Tumblr (Links in the sidebar)

Sign up to our newsletter here – http://eepurl.com/2if59

Thank you for stopping by www.www.stampinbyhannah.co.uk today

x

Fancy Fold Friday – Waterfall card

Welcome to another Fancy Fold Friday here at StampinByHannah!

I love doing these fancy fold posts for you all, but I have to say, I need some inspiration, so, would you please be so kind as to leave a comment below with a fancy fold that you would like to see me tackle!

This card is a request from my lovely friend Kathryn.

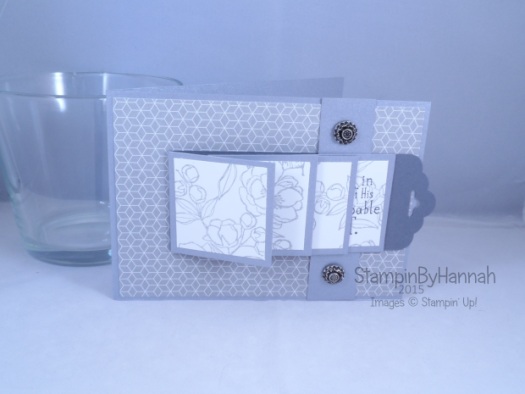
Stampin' Up! UK Waterfall card Indescribable Gift

Usually a Waterfall card is vertical, but I had to change it up a bit, and so decided to make it sideways, I think it works.

This card uses the Brushed Silver cardstock and Moonlight Designer Series Paper Stack, I love neutral colours at the moment – probably something to do with still being in winter mode – its been so very cold here!

The stamp set I have used it Indescribable Gift, one of the Easter themed sets from the Spring/Summer catalogue. I know that it has been designed with the Blendabilities in mind, but I just think it is the most beautiful line image I can’t bring myself to colour it in! Here I have stamped it in Smokey Slate onto Whisper White, and the sentiment from the same set is stamped in Momento Black (my Favourite black ink!)

Measurements:

Cardbase – cut a piece of A4 length ways – put the cardstock into your trimmer with the short side at the top and cut at 10.5 cm (4 1/8″)

Designer Series Paper – 10 x 14.2 cm (3 7/8″ x 5 1/2″)

Then there are a series of smaller pieces of cardstock –

1 piece – 2.5 x 10.5cm (1 x 4 1/8″)

4 pieces – 5 x 5 cm (2 x 2″)

Cut a piece of Whisper White to 4.5 x 18 cm (1 3/4 x 7″) and stamp along the length, then cut this piece into 4 measuring 4.5 x 4.5 cm (1 3/4 x 1 3/4″)

Cut a piece of Basic Grey cardstock to 5 x 24 cm (2 x 9 1/2″) and score at 5, 7, 9, and 11 cm (2, 2 3/4, 3 1/2, and 4 1/4″) punch the end with the Scalloped Tag Topper Punch

Check the video for full Instructions.


Hannah Wilks

Stampin’ Up! UK Independent Demonstrator
If you like the project, or any of the products used, would like a catalogue, or to join my team, please contact me, or click on the ‘Shop NOW’ button at the top of the page. You can also find me on Twitter, Facebook, YouTube, Google+, About.me, and Tumblr (Links in the sidebar)

Sign up to our newsletter here – http://eepurl.com/2if59

Thank you for stopping by www.www.stampinbyhannah.co.uk today

x

How to get 6 (metric) cards from one sheet of 12 x 12 Designer Series Paper!

I love 12 x 12 paper! I admit, I am a little addicted, and I don’t actually use it as often as I should!

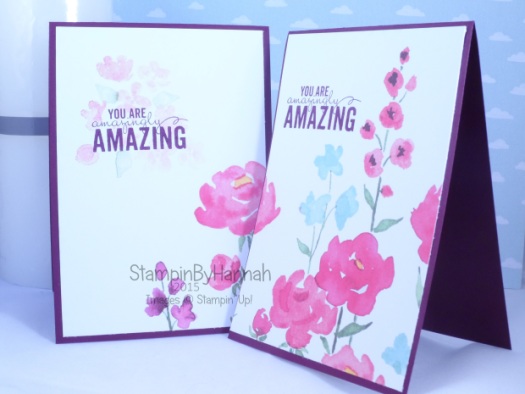
When I received the Painted Blooms Designer Series Paper I knew I was going to struggle to cut into it, its a gorgeous collection of floral themed papers all hand painted – it is stunning! But I knew I had to use this one particular piece in as large pieces as I could, and making 6 cards from one sheet of DSP was the way to do this.

I know a few US demo’s have made similar videos, but they use slightly different measurements to fit 8 1.2 x 11″ cardstock, rather than our A4

Stampin' Up! UK painted blooms petals giveaway

I just love the look of these cards, all different but definitely a set together!

And I couldn’t bear to split them up so, I’m going to give them away to you – to win these 6 cards all you have to do is place an order with me before midnight on the 28th of February 2015 – and I will select one random winner! awesome!

Stampin' Up! UK Painted Bloom Petals 6 cards from one DSP

But, how do you make them! well, I have a video for that!

Measurements:

For these cards you will need 3 sheets for A4 cardstock cut in half and folded to make 6 cards, and a sheet of 12 x 12 Designer Series Paper

Cut 1.8 cm (3/4″) from the bottom of the 12 x 12 DSP

Cut your DSP in half at 14.3 cm (5 13/16″)

Then cut each piece into 10 cm (3 7/8″) pieces, you will have two little slivers of DSP left over


Hannah Wilks

Stampin’ Up! UK Independent Demonstrator
If you like the project, or any of the products used, would like a catalogue, or to join my team, please contact me, or click on the ‘Shop NOW’ button at the top of the page. You can also find me on Twitter, Facebook, YouTube, Google+, About.me, and Tumblr (Links in the sidebar)
Sign up to our newsletter here – http://eepurl.com/2if59

Thank you for stopping by www.www.stampinbyhannah.co.uk today

x