Picture Perfect Starfish

Picture Perfect Starfish using Stampin' Up! UK products

Last week I shared a couple of cards using the Picture Perfect stamp set, and I couldn’t wait too long before making a card with the other image in the set – a fabulous starfish!

Picture Perfect Starfish using Stampin' Up! UK products
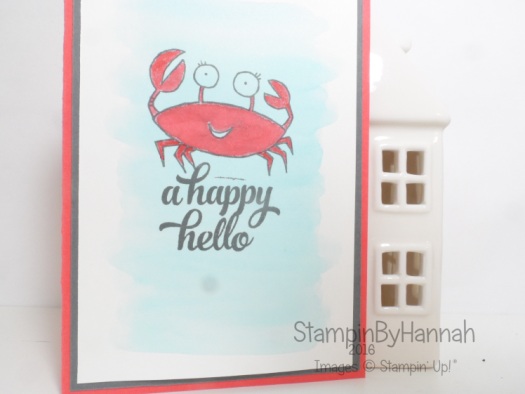
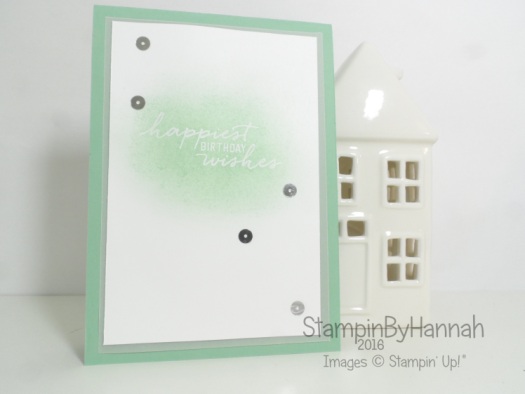
This card is super simple! You all know how much I love a super simple, quick and easy card. The sentiment could easily be swapped for a birthday, or maybe a going away type of theme, but I have used one from the same stamp set as the starfish – Picture Perfect

The starfish is stamped in 2 layers, the first in Delightful Dijon, with Calypso Coral over the to to create a dimensional sea creature.


Don’t forget to shop using the Code Club Code to receive some great FREE product!

BZNJV4Y4

I will be closing this order on the 30th May 2016


Product List


Shop Now button-001Join my team button-001

To purchase any of the items featured in my projects please use the links above. To join my team of Stampin’ Friends select ‘Join My Team’ or send me a message!

Please support StampinByHannah, and join my Code Club, by using the Hostess code featured in the top right hand of my blog. For orders of over £150 please do not use this code, as you are entitled to your own Hostess benefits!

Sign up to my newsletter here – http://eepurl.com/2if59

Hannah McCurley

Stampin’ Up! UK Independent Demonstrator

Make It Monday | Creating Backgrounds with small stamps

Make It Monday video tutorial creating backgrounds will small stamps featuring Endless Thanks from Stampin' Up!

Make It Monday with Stampin' Up!

This is technique that I use often to get the most out of the small stamps we often find in our stamp sets, using those small stamps to create fabulous backgrounds for our cards. I have a heap of this type of card in planning (mostly still in my head, but I’m sure they will find their way onto the blog at some point!)

Make It Monday video tutorial creating backgrounds will small stamps featuring Endless Thanks from Stampin' Up!

There are several techniques going on on this card. Firstly, I am still obsessed with Masking (class coming soon!) before I got to creating my own background. I first stamped the Thank You from Endless Thanks in Basic Grey, and then stamped it again onto a sticky note. This sticky note then became a Mask as I punched out the Thank You with a 1 3/8″ circle punch. The second mask was a strip of sticky note tape laid on the diagonal across the card.

Enjoy the video tutorial, and keep watching for me making a mistake as per usual! I think I recovered it pretty well though….

The key to making backgrounds with small stamps is the order in which you stamp. I find the easiest way to do this is stamp the largest image first, and the use smaller and smaller stamps to fill in the gaps. I do of course break this rule in my video tutorial, however there is a reason for my madness! I stamped the Watermelon Wonder flowers first, and then the Crushed Curry ones, before I went back to a larger stamp (the leaves) to fill in the gaps –  the reason being that I didn’t want all the leaves to be the same length. I used more masked to cover the flowers, and allow me to stamp shorter leaves.

Make it Monday Endless Thanks small stamps background using Stampin' Up! products

Measurements:

Card Base – Island Indigo – Half A4, folded in half

Basic Grey – 13.8 x 9.5 cm

Whisper White – 13.3 x 9 cm


Don’t forget to shop using the Code Club Code to receive some great FREE product!

BZNJV4Y4

I will be closing this order on the 30th May 2016


Product List


Shop Now button-001Join my team button-001

To purchase any of the items featured in my projects please use the links above. To join my team of Stampin’ Friends select ‘Join My Team’ or send me a message!

Please support StampinByHannah, and join my Code Club, by using the Hostess code featured in the top right hand of my blog. For orders of over £150 please do not use this code, as you are entitled to your own Hostess benefits!

Sign up to my newsletter here – http://eepurl.com/2if59

Hannah McCurley

Stampin’ Up! UK Independent Demonstrator

Make It Monday | 2 Step Stamping

Make It Monday Video Tutorial 2 Step Stamping Picture Perfect from Stampin' Up! UK

Make It Monday with Stampin' Up!

Welcome to another week of Make It Monday!

I have been loving playing with the Picture Perfect stamp set recently, and have a few cards to share with you using this stamp set over the next week or so. I am so pleased that this stamp set is in our new Annual catalogue too. (I do have a few spare catalogues, let me know if you want one!)

Make It Monday Video Tutorial 2 Step Stamping Picture Perfect from Stampin' Up! UK

How pretty is this rose? Little known fact about me, one of my middle names is Rose – I rebelled against it for a LONG time, but these days I love it and really embrace the Rose in my name. James went through a period a few years ago of buying me heaps of Roses (flower not chocolates, although he has bought me plenty of those too!) but recently I haven’t had any flowers, maybe I should send him this blog post as I reminder!

Video Tutorial featuring Picture Perfect from Stampin' Up!

Back to the stamping …. These roses look really complex, but are super simple to stamp. They are a 3 layer stamped image, which means that there are 3 stamps stamped one on top of the other, in different colours to create the full flower. The leaves are the formed in the same way. You can see exactly how to stamp these in the video tutorial below

I adore this colour combination, Rose Red and Crumb Cake. The roses are stamped in Blushing Bride and Rose Red, while the leaves are a combination of Pear Pizzazz and Old Olive.

Make It Monday Featuring Stampin Up Picture Perfect Video Tutorial

I arranged the flowers before I stuck everything down, I do this a lot when I’ve fussy or die cut elements, just to check my composition works. I found that this card was missing something, Stampin’ Up! have some great stamp sets for this event, but Gorgeous Grunge is my favourite! So I added some Crumb Cake spatter using Gorgeous Grunge, and that was the card complete!

Measurements:

Card Base – Rose Red – 14.85 x 21 cm (half a sheet of A4) Scored at 10.5 cm

Crumb Cake Layer – 14.3 x 10 cm

Whisper White Layer – 13.8 x 9.5 cm


Stampinbyhannah Stampin' Up! Annual Catalogue Launch Event 2016


Product List


Shop Now button-001Join my team button-001

To purchase any of the items featured in my projects please use the links above. To join my team of Stampin’ Friends select ‘Join My Team’ or send me a message!

Please support StampinByHannah, and join my Code Club, by using the Hostess code featured in the top right hand of my blog. For orders of over £150 please do not use this code, as you are entitled to your own Hostess benefits!

Sign up to my newsletter here – http://eepurl.com/2if59

Hannah McCurley

Stampin’ Up! UK Independent Demonstrator

You’re Sublime…..

A Happy Hello Card using You're Sublime from Stampin' Up! UK

I love sending cards to my friends, and will often send cards after an event to say thanks. I sent this card last week to my friend Heidi – I’m hoping that it has arrived with her before this goes live! Heidi is awesome and does some amazing boxes and fancy fold cards, you should totally check her out!

You're Sublime Friend Card Using Stampin' Up! Products

I am hoping that Heidi wasn’t too offended that I sent her a card with crabs all over it! The inside also included the crab, and I even stamped the envelope! I often forget about envelope, although I’m sure that my customers have noticed that recently I have started to add Washi Tape to my envelopes to differentiate cards from bills!

You're Sublime Friend Card Using Stampin' Up! Products

The Crab is watercoloured in Watermelon Wonder onto Shimmery White Card Stock. I created the wash of Tempting Turquoise first before stamping the crab and sentiment in Basic Grey. Did you know that our Basic Grey ink is archival the same as the Basic Black which means that it is great for watercolour too!


Don’t forget to shop using the Code Club Code to receive some great FREE product!

BZNJV4Y4

I will be closing this order on the 30th May 2016


Product List

You're Sublime Clear-Mount Stamp Set

£17.00
Shimmery White A4 Card Stock

£7.25
Watermelon Wonder A4 Cardstock

£6.50
Basic Gray A4 Card Stock

£6.50
Tempting Turquoise Classic Stampin' Pad

£6.00
Aqua Painters

£15.50
Watermelon Wonder Classic Stampin' Pad

£6.00
Basic Gray Archival Stampin’ Pad

£6.50
Whisper White C6 Envelopes

£6.00
Tin Of Cards Photopolymer Stamp Set

£15.00


Shop Now button-001Join my team button-001

To purchase any of the items featured in my projects please use the links above. To join my team of Stampin’ Friends select ‘Join My Team’ or send me a message!

Please support StampinByHannah, and join my Code Club, by using the Hostess code featured in the top right hand of my blog. For orders of over £150 please do not use this code, as you are entitled to your own Hostess benefits!

Sign up to my newsletter here – http://eepurl.com/2if59

Hannah McCurley

Stampin’ Up! UK Independent Demonstrator

Global Design Project #034 | Sketch Challenge

Global Design Project Mint Macaron Watercolour Wishes Card using Stampin' Up! products

I had so much fun with the Global Design Project Colour Challenge last week that I’m joining in again this week with their Sketch Challenge. One of the things I love about joining in with the Global Design Project is that the type of challenge changes, so its not a sketch each week. Love that!

Global Design Project #034

I love this sketch, but I think I was more inspired by the Global Design Project colour scheme this week – maybe my brain hasn’t moved on from the colour challenge last week!

Global Design Project Mint Macaron Watercolour Wishes Card using Stampin' Up! products

I have just dug out the stamp set from the Watercolour Wishes Card Kit. I really have to finish making the cards from that kit because they are gorgeous, but I realised last week that I haven’t used the stamp set included in the kit! shocking! So, seeing as it is coming back again next year, I thought I would move the stamps out of the kit and store them with the rest of my stamps!

I did think about watercolouring the background of this card, as per the sketch, but decided that I would rather sponge today. Once I had a good coverage of Mint Macaron ink I heat embossed the sentiment in White. I did add some extra ink after to make the sentiment pop.

The card was finished with a layer of vellum and a scattering of Silver sequins from my roll of sequin trim!


Product List

Mint Macaron A4 Cardstock

£6.50
Mint Macaron Classic Stampin' Pad

£6.00
Stamping Sponges

£3.25
Watercolor Wishes Card Kit

£31.50
White Stampin' Emboss Powder

£4.50
Heat Tool - Uk Plug

£27.00
Versamark Pad

£7.00
Silver Sequin Trim

£4.50
White Vellum A4 Card Stock

£6.00
Whisper White A4 Card Stock

£7.25


Shop Now button-001Join my team button-001

To purchase any of the items featured in my projects please use the links above. To join my team of Stampin’ Friends select ‘Join My Team’ or send me a message!

Please support StampinByHannah, and join my Code Club, by using the Hostess code featured in the top right hand of my blog. For orders of over £150 please do not use this code, as you are entitled to your own Hostess benefits!

Sign up to my newsletter here – http://eepurl.com/2if59

Hannah McCurley

Stampin’ Up! UK Independent Demonstrator

Make It Monday | Watercolour Lifting

Make It Monday Watercolour Lifting Using Crazy About You from Stampin' Up! UK

Make It Monday with Stampin' Up!

I loved making this card! You all know how much I love playing with ink and water, but this technique is super cool! I cannot take any credit for this, the wonderful Jennifer McGuire showcased this one a couple of months ago, and it has taken me this long to get round to having a go!

Make It Monday Watercolour Lifting Using Crazy About You from Stampin' Up! UK

I finally managed to work out what went wrong with my camera last week! I had somehow managed to change the focus setting to Macro – so nothing was in focus! sorted now, but I am still playing about with the White Balance settings so be prepared for some more interesting photography!

Luckily the ‘movie’ setting has been working just great this week, so are you ready for the video tutorial?!

As you can see the watercolour lifting technique is super simple.

  1. Watercolour a piece of Watercolour Paper, get creative use multiple colours if you fancy!
  2. Leave your Watercolour Paper to dry or speed up the process using a heat tool but make sure it is totally dry before moving on to Step 3!
  3. Stamp your desired images onto your Watercoloured piece in VersaMark ink and cover in Clear Embossing Powder, use your Heat Tool to melt the embossing powder.
  4. Grab your Stampin’ Spritzer and cover your Watercolour Piece with water, grab a few layers of Kitchen roll (or other paper towel type stuff!) and press over, this wicks away that water taking some ink with it. You can repeat this several times, to create a more dramatic effect.

Watercolour Lifting Video Tutorial using Stampin' Up! inks

Sorry for the short post today, but I will admit to having to rush to get the the video uploaded and post written today! Bank holiday weekend is always a little bit mental but I have spent most of the morning (I’m writing this on Sunday!) trying to sort my final end of year accounts, organising and packaging my April Customer thank you cards and gifts, and I still have to make a Congratulations card for my brother and sister in law before 3pm! So, time to get on. Speak again soon


Product List


Shop Now button-001Join my team button-001

To purchase any of the items featured in my projects please use the links above. To join my team of Stampin’ Friends select ‘Join My Team’ or send me a message!

Please support StampinByHannah, and join my Code Club, by using the Hostess code featured in the top right hand of my blog. For orders of over £150 please do not use this code, as you are entitled to your own Hostess benefits!

Sign up to my newsletter here – http://eepurl.com/2if59

Hannah McCurley

Stampin’ Up! UK Independent Demonstrator

Balloon Celebration Birthday

Balloon celebration birthday card using Stampin' Up! UK products

I’m still totally on a watercolour kick!

I just cannot get enough of colouring, I actually used an Aqua painter on this card, something I don’t do all that often. I tend to reserve my Aqua painters for watercolour backgrounds as I prefer the control of a ‘real’ paintbrush for more detailed work, however I really wanted a watery effect on this card.

Balloon celebration birthday card using Stampin' Up! UK products

The colour combination here is Calypso Coral, Blushing Bride, Mint Macaron and Pool Party. After stamping the balloons from Balloon Celebration in Archival Basic Black ink I coloured the Calypso Coral balloons first, then the Mint Macaron ones – allowing one colour time to dry before painting the next. Saying that I didn’t leave the largest balloon long enough as you can see an element of ‘bleeding’ – where the ink runs and blends into the next ink colour.

Once the balloons were dry the card needed something extra and so I added a background of Pool Party in a watercolour wash to help ‘ground’ the balloons onto the card. The final touch was a hint of Wink of Stella in Clear on the Blushing Bride Balloons although my camera hasn’t picked this up at all! I’m still really struggling to get crisp photos, might have a play with the camera again this afternoon


Don’t forget to shop using the Code Club Code to receive some great FREE product!

7AXEMZNA

I will be closing this order on the 30th April 2016


Product List


Shop Now button-001Join my team button-001

To purchase any of the items featured in my projects please use the links above. To join my team of Stampin’ Friends select ‘Join My Team’ or send me a message!

Please support StampinByHannah, and join my Code Club, by using the Hostess code featured in the top right hand of my blog. For orders of over £150 please do not use this code, as you are entitled to your own Hostess benefits!

Sign up to my newsletter here – http://eepurl.com/2if59

Hannah McCurley

Stampin’ Up! UK Independent Demonstrator

Watercolour Week | Live with an Open Heart

Stampin' Up! UK Watercolour technique An Open Heart

I just love this watercolour technique! It’s one I have actually it shared before, and I even have a Video Tutorial all about it! But, this card was inspired / CASE’d from the gorgeous Michelle Last and a card she created and share with us at a Team Training event back in February.

Stampin' Up! UK Watercolour technique An Open Heart

The background for this card is created using a piece of Watercolour Paper cut to 3 3/4 x 4 3/4″ (that’s a 1/4″ bigger than one of our larger clear blocks). Then you apply ink to the clear block, here I put Pool Party and Marina Mist on the top two 3rds of the block and Pear Pizzazz and Mossy Meadow near the bottom. The easiest way to do this is to literally press the inkpad onto the block – I’m sure you could get the same effect but colouring the block with markers but I haven’t the time for that! Once the block is all nice and inky you spritz the block with water (a Stampin’ Spritzer is the best thing for this!) and get the block all wet so that the ink is almost running away! The quickly turn the block over and ‘stamp’ it onto the watercolour paper. Stampin' Up! UK Acrylic Block Stamping An Open Heart

I left mine to dry but you could speed up the drying process with your Heat Tool, before using the Paper Piercer and Essentials Piercing Pack around the edge. I have used Basic Black ink to stamp the bird and sentiment both taken from An Open Heart.

I adhered the Watercolour paper onto the Crumb Cake card front, but there was just something missing. I thought about adding another layer of card stock, or some Designer Series Paper but just couldn’t decide on the colour. However, I did have a piece of this gorgeous Crumb Cake Stitched Satin ribbon sat in my ribbon scraps – Perfect. To attach it onto the now assembled card though, hmm. Simple solution, cut a slit in the folded side of the card base and tie the ribbon in a bow around the whole card front.

So pretty


Don’t forget to shop using the Code Club Code to receive some great FREE product!

7AXEMZNA

I will be closing this order on the 30th April 2016


Product List


Shop Now button-001Join my team button-001

To purchase any of the items featured in my projects please use the links above. To join my team of Stampin’ Friends select ‘Join My Team’ or send me a message!

Please support StampinByHannah, and join my Code Club, by using the Hostess code featured in the top right hand of my blog. For orders of over £150 please do not use this code, as you are entitled to your own Hostess benefits!

Sign up to my newsletter here – http://eepurl.com/2if59

Hannah McCurley

Stampin’ Up! UK Independent Demonstrator

Butterfly Basics Week – Watercolour Background

Stampin' Up! UK Butterfly Basics Watercolour Background Thinking of you card

I do hope that you have enjoyed this week of Butterfly Basics cards. I have another themed week planned for next week too – I’m away this weekend and On Stage, the 6 monthly Stampin’ Up! corporate event, and am attending a team training day on Sunday. I managed to volunteer myself into doing an inspiration station – a whole table of cards with one theme! So, next week I will share a whole heap of cards featuring one technique, but I’m going to leave you to guess which one!

While I’m talking about On Stage, don’t forget to check out my Facebook page and Instagram this weekend, as I am sure to share some photos of my adventures (but not new products, I’m not allowed to show you anything like that yet!)

Stampin' Up! UK Butterfly Basics Watercolour Background Thinking of you card

This final card in my series of card featuring Butterfly Basics is probably my favourite. Purple is my favourite colour, and so I’ve selected 3 shades here to create this background; Wisteria Wonder, Perfect Plum and Elegant Eggplant. It is super easy to create this watercolour background, the trick it to let each colour and layer dry before adding the next, and creating ‘hard edges’ but speeding up the drying process with you Heat Tool.

Stampin' Up! UK Thinking of you Watercolour Background

The butterfly is stamped in Wisteria Wonder onto more Watercolour Paper before being die cut with the coordinating die from the Butterfly thinlits dies, and it adhered to the card with a few glue dots that are also holding down the loops of Metallic thread in Gold.

I wanted a neutral background / card base for this one, and so selected Tip Top Taupe, a colour I have to admit I haven’t used all that much recently, but am starting to really enjoy – probably should add a pack of card stock to my next order!


Don’t forget to shop using the Code Club Code to receive some great FREE product!

7AXEMZNA

I will be closing this order on the 30th April 2016


Product List


Shop Now button-001Join my team button-001

To purchase any of the items featured in my projects please use the links above. To join my team of Stampin’ Friends select ‘Join My Team’ or send me a message!

Please support StampinByHannah, and join my Code Club, by using the Hostess code featured in the top right hand of my blog. For orders of over £150 please do not use this code, as you are entitled to your own Hostess benefits!

Sign up to my newsletter here – http://eepurl.com/2if59

Hannah McCurley

Stampin’ Up! UK Independent Demonstrator

Butterfly Basics Week – Make It Monday

Stampin' Up! UK Make It Monday Blender Pen colouring Butterfly Basics

Make It Monday with Stampin' Up!

Welcome to a whole week of posts focusing on Butterfly Basics. I LOVE this stamp set, its super pretty and great for a host of techniques including; watercolour, stamp layering, blender pens on vellum, and die cutting (seeing as it coordinates with TWO die sets!) and can be found on page 124 of the Annual catalogue in the Artistic Expression section. I love this part of the catalogue, its the run wild section for me, where you can find stamp sets specifically designed for techniques and where your imagination can run away with you.

Make It Monday Butterfly Basics Vellum Blender Pens

I know I did promise a video this week, but time ran away with me again – 3 shifts at work this week and then I’m off for 9 days! So, fingers crossed I get some filming done then!

Stampin' Up! UK Stamping on Vellum

So, today we are using our Blender Pens to colour on Vellum. I really enjoy this technique, and its a great way to introduce yourself to the joy of the blender pen! Blender pens contain a clear ‘ink’ that means that you can blend out the ink from your stamping, or use them to pick up coloured ink to colour an image. Blender pens work great on our Whisper White card stock, BUT you have to work fast, which is why I’ve used vellum today. Vellum is really slippy (non-porous) and ink takes much longer to dry on it, which makes it great for trying our your Blender Pens!

Stampin' Up! UK Blender Pens on Vellum

I’ve used my Stampin’ Write Markers today too. Scribble some marker onto a clear block and use the Blender Pen to pick up the ink – much less messy that doing the same with an ink pad!

Stampin' Up! UK Blender Pens Stampin' Write Makers Vellum Colouring

Ok, so after you have stamped your image onto the vellum (I’ve used our Archival Basic Black ink) allow the ink to dry and then turn the Vellum over. Then, using your blender pens, colour the reverse side of the image. I used four colours here; Wild Wasabi, Always Artichoke, Bermuda Bay and Crushed Curry.

Stampin' Up! UK Vellum tips and tricks

Because ink takes so long to dry on Vellum I used my Heat Tool to speed up the process. But you have to be super careful when heating Vellum that it doesn’t burn, use the first setting on the Heat Tool and keep taking the Vellum out of the heat every few seconds. The ink will dry much quicker this way.

Stampin' Up! UK Vellum Birthday Card

Time for some finishing touches. Attaching Vellum to card stock can be tricky. I’ve used Fast Fuse here, because its clear and I’m attaching the Vellum to Whisper White Card stock it is easily hidden under the stamping. Stampin' Up! UK Make It Monday Blender Pen colouring Butterfly Basics

The bow clip in the top corner helps to keep the free edge tidy, and I’ve added some Gold Wink of Stella to the flower to mirror the Gold in the Clip

Stampin' Up! UK Butterfly Basics Birthday Card

What do you think? I love the soft colours you get when you colour on the reverse of the Vellum. You could just as easily colour the front, you just get more vibrant colour

Thanks for stopping by for this weeks Make It Monday, check back tomorrow for another card made using the Butterfly Basics Stamp set!


Don’t forget to shop using the Code Club Code to receive some great FREE product!

7AXEMZNA

I will be closing this order on the 30th April 2016


Product List


Shop Now button-001Join my team button-001

To purchase any of the items featured in my projects please use the links above. To join my team of Stampin’ Friends select ‘Join My Team’ or send me a message!

Please support StampinByHannah, and join my Code Club, by using the Hostess code featured in the top right hand of my blog. For orders of over £150 please do not use this code, as you are entitled to your own Hostess benefits!

Sign up to my newsletter here – http://eepurl.com/2if59

Hannah McCurley

Stampin’ Up! UK Independent Demonstrator