Freshly Made Sketches 195 – Cardmaking 101 Process video

Stampin' Up! UK Freshly Made Sketches Crazy About You Video tutorial


Disclaimer: I got totally ahead of myself this week, and planned this video as the final part of my Cardmaking 101 series (my brain is complete mush right now, call it Wedding brain!) I am planning something else for next weeks Cardmaking 101 (probably another process video) but I am compiling a list of card making FAQ’s, do you have a burning card making question, let me know in the comments section below and I’ll answer it next Sunday!


I thought I would show you my card making process, using a sketch from Freshly Made Sketches. I have been really enjoying using sketches in card making recently, generally because it makes me make cards I wouldn’t normally make!

Stampin' Up! UK Freshly Made Sketches

This is the sketch for this week. I always try and modify the sketch a little, and not use it completely literally – for example here I have rotated the card by 90 degrees, but I might choose a different shape, or move the sentiment a little, just to convert the sketch in to something a little more my style.

Stampin' Up! UK Freshly Make Sketches Cardmaking 101 Crazy About You

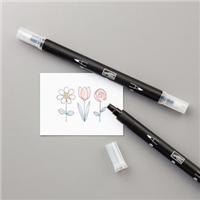
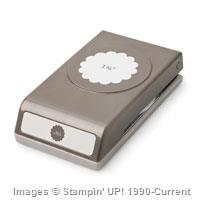
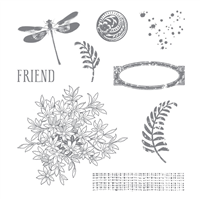
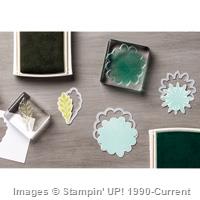
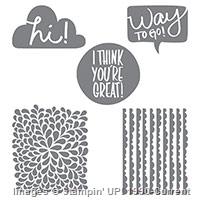
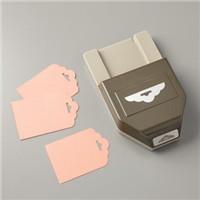
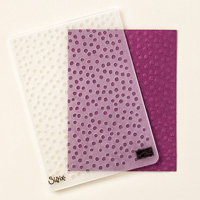
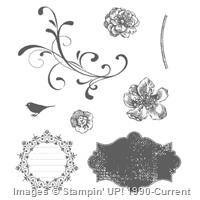
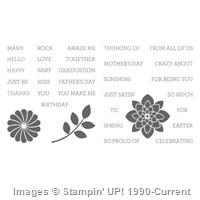
I had loads of fun making this card, even though I made several mistakes (all in the video!). I swapped the circles for these scallop circle flowers from Crazy About You, and added the leaves in the background.

Don’t forget to ask your card making questions in the comments section below.


Shop Now button-001Join my team button-001

To purchase any of the items featured in my projects please use the links above. To join my team of Stampin’ Friends select ‘Join My Team’ or send me a message!

Please support StampinByHannah, and join my Code Club, by using the Hostess code featured in the top right hand of my blog. For orders of over £150 please do not use this code, as you are entitled to your own Hostess benefits!

Sign up to my newsletter here – http://eepurl.com/2if59

Hannah Wilks

Stampin’ Up! UK Independent Demonstrator

Triangular Box

Stampin' Up! easy box quick cute

I will be the first to admit 3D papercraft is not really my forte. I am a cardmaker and a stamper, however, I do dabble in box making, and I am particularly proud of this one!

Stampin' Up! easy box quick cute

I have two versions of this super cute box! The first is a card stock version – with Everyday Chic Designer Series Paper panels, and the other a DSP version using the Neutrals Designer Series Paper Stacks. Both hold up well, and are super easy to make too!

Measurements:

Cardstock or Designer Series Paper – 5 x 7 3/4″ (12.6 x 19.5 cm)

Score on the short side at 1 1/2, 3 and 4 1/2″ (3.8, 7.6 and 11.5 cm)

Score on the long side at 1 3/8″ (3.4 cm)

One the short side mark the centre of the middle square – with the skinny score line on the left  – mark at 2 3/4″ and with the skinny score line on the right at 2 1/4″ (7.3 and 5.8)

Use these marks to create the triangles that will become the opening flap lid and base of your box.

Designer Series Paper Panels Measure – 1 1/4 x 4 1/2″ (3 x 11.5 cm)


Dont forget to shop using the Code Club Code to receive some great FREE product!

XEQGUA4P

I will be closing this order on the 30th July 2015


Shop Now button-001Join my team button-001

To purchase any of the items featured in my projects please use the links above. To join my team of Stampin’ Friends select ‘Join My Team’ or send me a message!

Please support StampinByHannah, and join my Code Club, by using the Hostess code featured in the top right hand of my blog. For orders of over £150 please do not use this code, as you are entitled to your own Hostess benefits!

Sign up to my newsletter here – http://eepurl.com/2if59

Hannah Wilks

Stampin’ Up! UK Independent Demonstrator

July Free Online Workshop – You’re Sublime

Stampin' Up! UK You're Sublime lost lagoon cute easy card

Welcome to my Free Online Workshop for July 2015

This month I’m keeping things simple – life is insane right now, my wedding is now 3 weeks away! I am so not ready yet (so much left to do, STILL trying to find the time to make the orders of service and sort the seating plan!) But I didn’t want to miss a month of Online Workshops for you…

I chose to use the You’re Sublime stamp set this month. I love the images here, they are super cute (totally the word of this workshop – watch the video to understand what I mean!), and I think you can make a heap of different cards for all occasions with these.

Stampin' Up! UK You're Sublime online workshop

In order to keep things super simple we are making 3 cards this month, rather than boxes or bags, and there are 3 super simple cards to make along with me. Saying that there are 3 pretty distinct card making looks here. I am totally in love with the ‘follow your heart’ card – those polka dots just kill me!

Follow Your Heart

This card uses a Lost Lagoon card base with a Whisper White card layer. There are only 3 colour here; Lost Lagoon, Calypso Coral and Smoky Slate, and they are added to the Whisper White layer using Sponge Daubers to stamp the colour on! What a great technique. The super sweet caravan is fussy cut, and coloured in the same colours with my Blender Pens (yes, I LOVE them!!!)

Stampin' Up! UK You're Sublime lost lagoon cute easy card


Have a Snappy Day

This is a super super simple card. Once again using those great Sponge Daubers, but this time to colour a larger area – I’ll let you watch the workshop to see what I mean

Loads of Thanks

When looking for ideas for using this stamp set, I stumbled upon this set of cards on Pinterest, and was totally inspired.

I recently received the Pretty Petals Designer Series Paper stack, and I will admit I was scared – black with flowers! frightening! But as soon as I started to use it I fell in love! The patterns are small and dainty, but really sweet, they are the perfect size for card making – and its a 6 x 6 pad – awesome!

Stampin' Up! UK You're Sublime free class online

I have a great workshop for you next month – seeing as I’m away on honeymoon, I thought a Wedding theme may be appropriate! That workshop will go live on the 12th August 2015


Dont forget to shop using the Code Club Code to receive some great FREE product!

XEQGUA4P

I will be closing this order on the 30th July 2015


Supply List

Built for Free Using:  My Stampin Blog


Shop Now button-001Join my team button-001

To purchase any of the items featured in my projects please use the links above. To join my team of Stampin’ Friends select ‘Join My Team’ or send me a message!

Please support StampinByHannah, and join my Code Club, by using the Hostess code featured in the top right hand of my blog. For orders of over £150 please do not use this code, as you are entitled to your own Hostess benefits!

Sign up to my newsletter here – http://eepurl.com/2if59

Hannah Wilks

Stampin’ Up! UK Independent Demonstrator


Card Storage Box

Stampin' Up! UK card storage box cherry on top DSP

There are a stack of these floating around on Pinterest, but I just had to put my own spin on it. The Classic Card Box. I wanted a box specifically to hold cards and envelopes while they wait to go to customers. Did you know that I always send a ‘Thank You’ card when you place an order in my store? If you have ordered and haven’t received a card it may be that you have selected ‘No Contact’ drop me an email if you think I’ve missed you.

Stampin' Up! UK card storage box video tutorial

The first box uses Lost Lagoon card stock, and a piece of that lovely Neutrals Designer Series Paper Stack. Whereas the video version is in Bermuda Bay with a piece of Cherry on Top Designer Series Paper. I grabbed the Cherry on Top DSP during demonstrator Pre-Order, purely because it was available to me! Demonstrators get the chance to order from a sample of product before the big launch! and I have to say, looking at the pictures in the Catalogue, I’m not sure that I would have ordered if it hadn’t been in that pre-order selection. And I would have missed out! Because it is fabulous! Featuring Bermuda Bay, Cucumber Crush, Crushed Curry, Pool Party, Tip Top Taupe and Watermelon Wonder, and a collection of birthday themed papers with some great patterns; it would look fab as part of a Project Life album! I might even have to order a second pad!

Measurements:

Card stock – 12 x 8″ (30.5 x 20.5 cm)

Score on the long side at – 4 1/2, 5 3/4, 10 1/4, and 11 1/2″ (11.5, 14.5, 26, and 29 cm)

Score on the short side at – 1 1/4″ (3 cm) turn the card stock around and score in the wide section nearest the skinny flap at 1 1/2″ (4 cm)

Designer Series Paper – 4 1/4 x 5″ (11 X 12.5 cm)


Shop Now button-001Join my team button-001

To purchase any of the items featured in my projects please use the links above. To join my team of Stampin’ Friends select ‘Join My Team’ or send me a message!

Please support StampinByHannah by using the Hostess code featured in the top right hand of my blog. For orders of over £150 please do not use this code, as you are entitled to your own Hostess benefits!

Sign up to my newsletter here – http://eepurl.com/2if59

Hannah Wilks

Stampin’ Up! UK Independent Demonstrator


Stamp Layering…A Great CASE!

Stampin' Up! UK Awesomely Artistic

I’m slowly working my way through a massive list of techniques to try (anyone else write a heap of lists?) including the techniques listed in the latest Stampin’ Up! Annual Catalogue (Have you got yours yet?)

I am loving the Artistic Expression section of the catalogue, and the techniques listed there. I know I’ve done this one before, but I just love the sample in the book, and really wanted to CASE it. It’s been a whiles since I did a CASE card – Copy and Share Everything! I love doing this, particularly around a new catalogue launch, giving the samples my own twist.

Stampin' Up! Awesomely Artistic

So, that’s the Stampin’ Up! version, and I have changed it up slightly, check out the video below to see how I did!

Stampin' Up! UK Stamp Layering Awesomely Artistic Video Tutorial

I got the chance to play with this stamp set for the first time at Regional Training back in May, before it’s release! and we made a great Make and Take which I shared recently. Awesomely Artistic is one of the stamp sets designed for Stamp Layering; where you layer stamped images on top of each other to create a collage effect.

I have also used a few pieces of Designer Series Paper on this card; I’m trying really hard to use more DSP on my cards at the moment and have another using it later in the week. This card uses little pieces of the Neutral Designer Series Paper Stack (I’m sorry, I made this card before it was unavailable, but it WILL be back really soon!) and that lovely Typeset Speciality paper that I am completely in love with!

This stamp set also coordinates with a set of framelits, the Project Life Cards and Labels Framelits, but I have to say I don’t own them. However, this label is so easy to fussy cut even I did it!


Shop Now button-001Join my team button-001

To purchase any of the items featured in my projects please use the links above. To join my team of Stampin’ Friends select ‘Join My Team’ or send me a message!

Please support StampinByHannah by using the Hostess code featured in the top right hand of my blog. For orders of over £150 please do not use this code, as you are entitled to your own Hostess benefits!

Sign up to my newsletter here – http://eepurl.com/2if59

Hannah Wilks

Stampin’ Up! UK Independent Demonstrator

Cookie Box

Stampin' Up! UK tag a bag cookie box

I call these Cookie Boxes, although they are really called Tag a Bag Gift Boxes, but they are food safe, and coordinate with the Tag a Bag accessory kits. I use them for all sorts of things, table bins at classes, boxes for gifts, storage for pens and gift tags and loads of other things too!

Stampin' Up! UK tag a bag cookie box

I made these for a class a few months ago, and thought they are super cute, and would look awesome in our new in colours!

Measurements:

Card stock – 10 x 2 1/2″ (25.5 x 6.5 cm)

Score on the long side at 2 1/2, 4 3/4, 7 1/4, and 9 1/2″ (6.5, 12, 18.5, ans 24 cm)

The stamps here are Flower Patch, which are a great photopolymer set that coordinate with the Flower Fair framelits. These look really complicate to line up, but if you look carefully you will find that each flower has a petal that not the same as the others and allow you to line up the stamped images with the framelits


Shop Now button-001Join my team button-001

To purchase any of the items featured in my projects please use the links above. To join my team of Stampin’ Friends select ‘Join My Team’ or send me a message!

Please support StampinByHannah by using the Hostess code featured in the top right hand of my blog. For orders of over £150 please do not use this code, as you are entitled to your own Hostess benefits!

Sign up to my newsletter here – http://eepurl.com/2if59

Hannah Wilks

Stampin’ Up! UK Independent Demonstrator

Watercolour Stamping with Stampin’ Write Markers

Stampin' Up! UK Watercolour stamping markers I think you're great

I find myself reaching for my Stampin’ Write markers often. They are the same ink as the Stampin’ Up! Classic Ink you’ll find in our ink pads, but in the convenience of a pen. There are so many techniques that use these pens; from watercolouring to stamping, using them like felt tips, or just a quick ink.

Stampin' Up! UK Watercolour stamping markers I think you're great

I use Stampin’ Write makers for technique like this one quite often, they are a great way to ink a stamp with several colours; whether you are colouring a bird or flower, or just creating a great background like this one.

The Stampin’ Write makers have two tips; a fine point great for journalling in you Project Life albums, and a brush tip wonderful for colouring images or stamps.

How To:

Select a few Stampin’ Write markers; here I have used Melon Mambo, Rich Razzleberry, Bermuda Bay and Island Indigo.

Using the brush tip of your marker on its side, scribble the colour into your stamp

Once your stamp is covered in ink, spritz with water

Stamp onto your card stock (I used Whisper White for this card, but it works wonderfully with Watercolour paper too!), holding the stamp to the card stock for a few seconds to allow the ink to soak into the paper

Stampin' Up! UK I think you're great

The sentiments used here are both from the I Think You’re Great stamp set, and are stamped in Tip Top Taupe before being fussy cut with my Paper Snips and added to the card with some Dimensionals

I think my favourite is the ‘Way to Go’ card, what about you?


Shop Now button-001Join my team button-001

To purchase any of the items featured in my projects please use the links above. To join my team of Stampin’ Friends select ‘Join My Team’ or send me a message!

Please support StampinByHannah by using the Hostess code featured in the top right hand of my blog. For orders of over £150 please do not use this code, as you are entitled to your own Hostess benefits!

Sign up to my newsletter here – http://eepurl.com/2if59

Hannah Wilks

Stampin’ Up! UK Independent Demonstrator

June Online Workshop! Butterfly Basics…and a fancy fold!

Stampin' Up! UK Butterfly Basics Corner fold card

Hello!

Welcome to another Free Online Workshop! I am loving doing these, and am hopefully going to do one every couple of months. Let me know what you think and what you would like to see featured in these longer tutorials using the comments section at the end of the post

Stampin' Up! UK Free workshop

This time I have focused on the Butterfly Basics stamp set, I was so please to find it had carried over into the brand new Annual Catalogue! You can find it in the Artistic Expression section, page 124, where it is featured with the Butterflies Thinlits dies in a great bundle that saves you 15%!

Both the cards and the tag here use the brand new In-Colours; Mint Macaron, Delightful Dijon, Watermelon Wonder, Cucumber Crush, and Tip Top Taupe. These new colours are great additions, to the current range of colours, filling in gaps in Bright colours, and adding a wonderful new neutral. In-Colours change every year, and run for 2 years, adding 10 wonderful colours to our line, and giving your more options for projects.  In Colours are available on a great deal too! You can purchase all the ink pads and a multi-pack of card stock for the price of just the ink pads – that’s free card stock folks! Awesome!

Stampin' Up! UK Corner Fold Fancy Fold card butterfly basics free workshop class

Before you get to the workshop, I just wanted to mention the great joining offer this month from Stampin’ Up! Get 2 free stamp sets with your starter kit, just for signing up! Have I mentioned the great deal that is the starter kit – If you have a wish list of over £100 I urge you to think about becoming a demonstrator, there is no pressure to sell anything, you are more than welcome to be a hobby demonstrator and just get the 20% off! But if you have a wish list of over £100, you can pay just £99 and get to pick £130 worth of great products (anything from the current catalogue!), and those two free stamp sets of your choice! how cool is that!

Fancy Fold How To:

I love this corner fold card, I have to give credit to Dawn Griffiths, I have resized the card to fit A4 card stock 🙂

Cut a piece of A4 card stock in half, and fold in half to create your card base

Unfold your card base and insert, long side at the top, into your Stampin’ Trimmer. Cut at 13 cm from 2 to 8 cm using the trimmer attachment as a guide

Turn your card base so the short side is down at the top, and cut at 8 cm from 2 to 8 cm

Fold down the corner of the card, leaving the cut corner flat.

Inside pieces:

Watermelon Wonder – 14.2 x 10 cm

Whisper White – 13.8 x 9.5 cm

Outside pieces:

Watermelon Wonder – 6 x 6 cm

Whisper White – 5.5 x 5.5 cm

Stampin' Up! UK Butterfly Basics Corner fold card


As I mentioned in the tutorial, any order placed using the Hostess Code will receive a card kit with all the card stock pieces ready for you to make these 3 projects

4REM7CHQ

Thank you for supporting StampinByHannah

Please note this is a different code to my Code Club Code! Chose your code carefully!


Shop Now button-001Join my team button-001

To purchase any of the items featured in my projects please use the links above. To join my team of Stampin’ Friends select ‘Join My Team’ or send me a message!

Please support StampinByHannah by using the Hostess code featured in the top right hand of my blog. For orders of over £150 please do not use this code, as you are entitled to your own Hostess benefits!

Sign up to my newsletter here – http://eepurl.com/2if59

Hannah Wilks

Stampin’ Up! UK Independent Demonstrator


Ink and Embossing

Stampin' Up! UK letterpress ink Embossing folders

I have been loving playing with lots of techniques recently, and you may remember a few weeks ago I shared a great stamping technique using your embossing folders. Well, I’ve been doing it again, but this time I’ve added my Big Shot!

Stampin' Up! UK letterpress ink Embossing folders


This card uses the Large Polka Dot Embossing Folder, along with the Crazy About You stamp set. I am so pleased this set has carried over into our Annual Catalogue, It has a great collection of words and phrases to create some great sentiments, and it will be featuring on my Father’s Day cards this year (Nope, I still haven’t made them yet! Eeeek!). That Crazy About You set also includes  that lovely flower image, which coordinates with the Flower Medallion Punch (another carry over item!)

Instructions:

Cut your card base and Whisper White (Or Very Vanilla) matt layer.

Grab your chosen Embossing folder, and ink up the side which presses down into the card stock when you run it through your Big Shot – in this case, I inked up the Polka Dots side of the folder. Run your ink pad carefully across the embossing folder as not to get ink on the sunken areas

Insert your card stock layer into the embossing folder, closing the folder carefully so not to move the card stock inside

Run this through your Big Shot using your normal Embossing Folder sandwich

Stampin' Up! UK embossing folders decorative dotsThe ‘Thanks’ was stamped on Whisper White, and punched out using the 1 1/4″ circle punch, and layered with the Flower Medallion with dimensionals.


Shop Now button-001Join my team button-001

To purchase any of the items featured in my projects please use the links above. To join my team of Stampin’ Friends select ‘Join My Team’ or send me a message!

Please support StampinByHannah by using the Hostess code featured in the top right hand of my blog. For orders of over £150 please do not use this code, as you are entitled to your own Hostess benefits!

Sign up to my newsletter here – http://eepurl.com/2if59

Hannah Wilks

Stampin’ Up! UK Independent Demonstrator


Hexagonal Gift Bag

Stampin' Up! UK candle gift designer series paper stack

These candles fell into my bag a few months ago during a mad dash around Ikea. I love Ikea candles, and this scent in particular is one of my very favourites – Vanilla Ice Cream, Yum! I often give them as gifts, but trying to package them is always a little awkward. Or it was, how cute is this gift bag!

Hexagonal gift bag


I adore the new Designer Series Paper Colour Collections, these use the Neutrals in Basic Grey and Sahara Sand. The collections have been re-configured this year, changing the patterns, so now each collection contains 40 sheets, 2 of each of 2 double sided designs in 10 colours (or 4 of each of 2 double-sided designs in 5 colours for the In-Colour collections). The designs are stunning; a diagonal stripe, a little floral print, a bold polka dot, and my favourite a wonderful script. They are fab!

Stampin' Up! UK candle gift designer series paper stackThese bags are quick and easy to make, as well as holding a good amount of whatever you choose. They are strong too, these both contain candles, without any danger of the bottom giving way! The base of the bag has 6 layers of DSP, making them super strong.

Measurements:

Designer Series Paper, or card stock; 11 x 8″ (28 x 20.5 cm)

Score on the long side at: 1 3/4, 3 1/2, 5 1/4, 7, 8 3/4 and 10 1/2″ (4.5, 9, 13.5, 18, 22.5 and 27 cm)

Score on the side side at: 3 and 6″ (7.5 and 15 cm)

Fold and burnish all the score lines

Holding the DSP in the landscape direction, with the fatter bit at the bottom, cut off the skinny end section, and cut up each one of the score lines to the first horizontal score.

Apply Fast Fuse to the skinny end section and fold to create a tube. This seam with be the back of the bag. Then apply Fast Fuse to 3 of the bottom sections and fold each section in to form the base.

Turn the bag so it is the right way up, pinch in the top, and make holes with the 1/8″ handheld punch.

Feed your ribbon through the holes, starting from the front of the bag and working your way around

Finish with a bow


Shop Now button-001Join my team button-001

To purchase any of the items featured in my projects please use the links above. To join my team of Stampin’ Friends select ‘Join My Team’ or send me a message!

Please support StampinByHannah by using the Hostess code featured in the top right hand of my blog. For orders of over £150 please do not use this code, as you are entitled to your own Hostess benefits!

Sign up to my newsletter here – http://eepurl.com/2if59

Hannah Wilks

Stampin’ Up! UK Independent Demonstrator