Inlay Die Cutting

Stampin' Up! UK Crazy about you Hello You diecutting

I do love a great technique, and I have been playing with this one for a few weeks (and covering myself and my desk in the process!) but the results are fabulous!

Stampin' Up! UK Inlay die cutting

I have to admit that the picture here looks better than the card does in person, I have the card in front of me and I’m looking at gluey finger prints! but it’s still a cool technique – but keep that baby wipe on hand to keep yours hands free of glue (because you WILL make a gluey mess!)

See what I mean, gluey mess! I don’t edit my videos very often, only if I’ve had an interruption like the doorbell going or my phone ringing, and so you will always get ‘live’ bloppers! I hope you enjoy them!

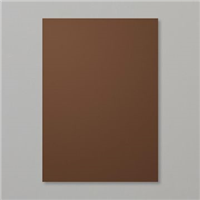
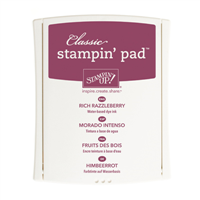
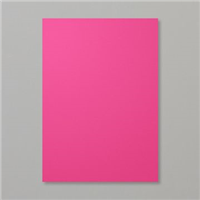
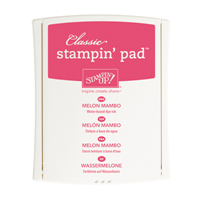
The original ‘Hello’ card uses our brand new 2015-2017 In-Colours in Watermelon Wonder and Mint Macaron, while the video version is in Marina Mist (I’m still a little obsessed with this colour!). I’m loving the new In-Colours; took me a while to get used to the super bright Watermelon and Cucumber though! what great additions to our colour collection.

Stampin' Up! UK Crazy about you Hello You diecutting

How to Inlay die cut:

Using the Hello You thinlits dies die cut your chosen word in coloured card stock.

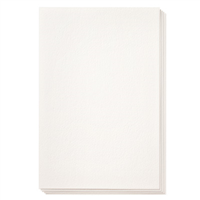
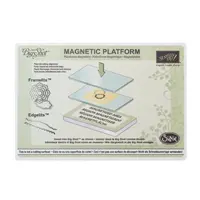
Using your Magnetic platform to ensure correct die placement, die cut the same word out of your Whisper White layering piece – remember that this is your card front to carefully place the die where you want the word to be at the end!

Make sure you keep the little pieces from the die cut, keep them safe! you will need them in a moment.

Apply your glue of choice (I use Snail) to the back of your Whisper White layering piece and attach it to your card front.

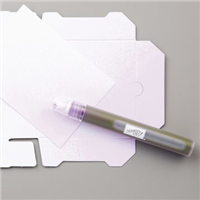
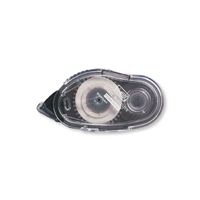
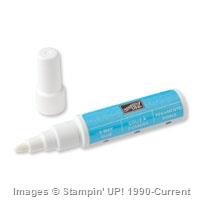
Using a 2-way Glue Pen apply glue to the back of the coloured die cut, slotting it into the space on the front of your card. I did try this with Tombow glue and made a huge mess!

Using your 2-way glue pen again apply glue into the holes in the die cut, slotting the Whisper White die pieces back into the die cut.

This gives you a completely flat card, great for posting! Awesome!


Shop Now button-001Join my team button-001

To purchase any of the items featured in my projects please use the links above. To join my team of Stampin’ Friends select ‘Join My Team’ or send me a message!

Please support StampinByHannah by using the Hostess code featured in the top right hand of my blog. For orders of over £150 please do not use this code, as you are entitled to your own Hostess benefits!

Sign up to my newsletter here – http://eepurl.com/2if59

Hannah Wilks

Stampin’ Up! UK Independent Demonstrator

Watercolour Stamping

As you may be able to tell I love watercolouring with my stamps; either sprintzing water onto my inked stamp, adding water to a stamped image or using my inks to colour an image, and I just couldn’t let this card onto the blog without a very short video!

Stampin' Up! UK watercolour butterfly basics

Isn’t this card just so pretty!

I do have a bit of a top tip for using that sentiment; use the top edge of the stamp to ensure your stamp is stamped straight, if you line the top edge of the stamp up with the top of you block when positioning, you can then line the block up with your card stock to ensure your sentiment is straight.

Stampin' Up! UK butterfly basics video tutorialHow to:

Cut your sheet of Early Espresso card stock in half, and fold in half to create your card base. Measure the front or your card and cut a piece of Stampin’ Up! watercolour paper to half a centimetre (or 1/4″) shorter and narrower

Ink the fern stamp up with Sahara Sand ink and stamp 3 times in the bottom right hand corner of your watercolour paper.

Ink you flower stamp up with Rich Razzleberry, and mist with water, the amount of water you mist the more the ink will move, causing the two different effects as seen above, stamp over the top of the ferns. Allow this to dry, either naturally or with the assistance of a heat tool.

Ink the postage label in Early Espresso and stamp three times around the flowers.

Stamp the sentiment in the bottom left using Early Espresso.

Mount the watercolour paper to the front or your card base using Fast Fuse adhesive.


Shop Now button-001Join my team button-001

To purchase any of the items featured in my projects please use the links above. To join my team of Stampin’ Friends select ‘Join My Team’ or send me a message!

Please support StampinByHannah by using the Hostess code featured in the top right hand of my blog. For orders of over £150 please do not use this code, as you are entitled to your own Hostess benefits!

Sign up to my newsletter here – http://eepurl.com/2if59

Hannah Wilks

Stampin’ Up! UK Independent Demonstrator


Bottle Labels!

Before we get into the blog post today I want to remind you about the retiring list – I know that the Designer Series Paper I have used below is on this list – it may no longer be available, and I’m sorry if it’s not – but go and check out the bargains before its too late!


I regularly give bottles of wine away as gifts – particularly at the moment where I have some wonderful people running around doing fantastic things in preparation for the wedding (really not long to go now!) But a bottle of wine on its own is boring, so I had to put my own stamp (get it!) on it!

Stampin' Up! UK wine gift tag

They are so simply to make (check out the video below!) and use a tiny piece of card stock, and an even smaller piece of Designer Series Paper, but they make such a difference to a boring bottle.

These ones use the 2014-2016 In Colours Blackberry Bliss and Hello Honey, and the now sadly retiring Moonlight Designer Series Paper stack. I really am sad to see this paper go, BUT I have seen the next Stampin’ Up! annual catalogue, and I have to say, the papers that are replacing Moonlight are AWESOME! Actually the whole catalogue is fantastic! Want to see it now? Join my team, and get to add some sneak peaks to your Starter Kit!

The stamps featured here are from You Plus Me, which really is Valentines day themed, however, I think the sentiments work well here (after all, that bottle of wine, that one, that one was mine!)

Measurements:

Card stock – 20 x 7 cm, score at 6.5 cm on the long side, and use a 1 3/8″ circle punch to make a whole in the smaller side.

Designer Series Paper – 13 x 6.5 cm


Shop Now button-001Join my team button-001

To purchase any of the items featured in my projects please use the links above. To join my team of Stampin’ Friends select ‘Join My Team’ or send me a message!

Please support StampinByHannah by using the Hostess code featured in the top right hand of my blog. For orders of over £150 please do not use this code, as you are entitled to your own Hostess benefits!

Sign up to my newsletter here – http://eepurl.com/2if59

Hannah Wilks

Stampin’ Up! UK Independent Demonstrator


Giant Tealights – a bag two ways

Last week I took a personal day, took myself off shopping – mainly for wedding things, shoes, honeymoon clothes, thank you presents, that sort of thing. But while I was out I stopped in at Ikea (I think I have a problem, I cannot just drive past, I have to go it, its like visiting an old friend!) and picked up a few items for my craft room. While I was there I had to stop in the Candle department, I love Ikea candles, its such a shame they’ve stopped doing the really big ones in glass pots though, instead I grabbed a pack of Giant Tealights, in Apple – or Wild Wasabi!

Stampin' Up! UK Ikea Giant Tealight Bag Video Tutorial

So, both bags are the same. But the Marina Mist version has been folded over near the top of the tealight inside, and the flap held closed by some now sadly retiring Chevron Ribbon. You can find out more about retiring products in my previous post. Whereas the Wild Wasabi version is held closed by one of the fabulous Clothespins (or pegs if your here in the UK!)

Measurements:

Designer Series Paper – 7 x 6″ (18 x 15 cm)

Score on the long side first at – 1, 3 3/8, 4 3/8 and 6 3/4″ (2.5, 8.5, 11 and 17 cm)

Score on the short side at – 1″ (2.5 cm)


Shop Now button-001Join my team button-001

To purchase any of the items featured in my projects please use the links above. To join my team of Stampin’ Friends select ‘Join My Team’ or send me a message!

Please support StampinByHannah by using the Hostess code featured in the top right hand of my blog. For orders of over £150 please do not use this code, as you are entitled to your own Hostess benefits!

Sign up to my newsletter here – http://eepurl.com/2if59

Hannah Wilks

Stampin’ Up! UK Independent Demonstrator

Marshmallow Box – Video Tutorial

Isn’t it always the way, when your doing a big ol’ deep clean that you come across something you had totally forgotten all about! well, that’s what happened to me last week. Deep cleaning my kitchen cupboards and this little box fell out on my head! First of all I thought it was a higher power being nice to me, rewarding my hard-work with Marshmallows, but alas the box was empty! However, it did inspire me to create this fab gift box – great for Marshmallows, or chocolates, a small candle, or just something little and cute!

Stampin' Up! UK Box video tutorial perpetual birthday calender

I love this box! The dots are from Perpetual Birthday Calender, while the sentiment is a retiring Hello There!

Measurements:

Card stock = 11 1/2 x 9 3/4″ (29 x 25 cm)

Score on the long side at – 2 3/4, 5 1/2, 8 1/4 and 11″ (7, 14, 21, and 28 cm)

Score on the short side at – 3/4, 3 1/2, 6 1/4, and 9″ (2, 9, 16, and 23 cm)


Shop Now button-001Join my team button-001

To purchase any of the items featured in my projects please use the links above. To join my team of Stampin’ Friends select ‘Join My Team’ or send me a message!

Please support StampinByHannah by using the Hostess code featured in the top right hand of my blog. For orders of over £150 please do not use this code, as you are entitled to your own Hostess benefits!

Sign up to my newsletter here – http://eepurl.com/2if59

Hannah Wilks

Stampin’ Up! UK Independent Demonstrator

Ghost Stamping

Ok, So, I think I’ve got a reasonable posting schedule plan for the time being, I’m trying two video’s a week – a Technique Tuesday, and Fun Friday! with my regular card projects between. Currently the only days I haven’t got a scheduled post planned are Wednesdays and Sundays; however, I’m leaving these free so I have some time to share the Weekly Deals and other exciting news!

With that said, it’s Technique Tuesday – so I probably should share my technique with you.

Ghost Stamping!

Stampin' Up! UK Hello Darling Ghost Stamping

I loved playing with this technique, and its super simple! Here I have used a Sahara Sand card base, with a 3″ square of Melon Mambo card stock, and a 2 3/4″ piece of Sahara Sand for stamping. The image is first stamped in Stampin’ Up! White Craft Ink. This ink is a pigment ink, and so takes a little while to dry – be warned! I tend to stamp, go away and make another card or a coffee (or check Facebook / Pinterest) and by the time I come back its dry. You can encourage the drying process with your Heat Tool too.

Then stamp your image again in your coloured ink – I’ve used Melon Mambo here. Off-set the two stamped imaged slightly to create the ghostly effect. I find that more solid stamps work better, creating that white halo, and I always use my Stamp-a-ma-jig for perfect placement when using Wood or Clear mount stamps.


Shop Now button-001Join my team button-001

To purchase any of the items featured in my projects please use the links above. To join my team of Stampin’ Friends select ‘Join My Team’ or send me a message!

Please support StampinByHannah by using the Hostess code featured in the top right hand of my blog. For orders of over £150 please do not use this code, as you are entitled to your own Hostess benefits!

Sign up to my newsletter here – http://eepurl.com/2if59

Hannah Wilks

Stampin’ Up! UK Independent Demonstrator

Heat Embossed Die Cutting

I have another technique video for you today – I was playing around a few weeks ago with heat embossing, and I am loving using my big shot at the moment – and this idea was born!

Stampin' Up! UK embossed die cutting technique video

I think I have shared a very similar card before, but this one is super special – those fabulous die cut words are shiny! I don’t think there is another stamp set I have used as much as Crazy About You, and I still adore those word thinlits too. They make such simple, versatile cards – great for mums, dads, boys, grandparents, sympathy, weddings, Easter, Christmas – Awesome – AND the die’s pop out so easily too.

Isn’t it fab! Share your creations with my in my facebook group!


Hannah Wilks

Stampin’ Up! UK Independent Demonstrator

If you like the project, or any of the products used, would like a catalogue, or to join my team, please contact me, or click on the ‘Shop NOW’ button at the top of the page. You can also find me on Twitter, Facebook, YouTube, Google+, About.me, and Tumblr (Links in the sidebar)

Sign up to our newsletter here – http://eepurl.com/2if59

Thank you for stopping by www.www.stampinbyhannah.co.uk today

x


How to get 6 (metric) cards from one sheet of 12 x 12 Designer Series Paper!

I love 12 x 12 paper! I admit, I am a little addicted, and I don’t actually use it as often as I should!

When I received the Painted Blooms Designer Series Paper I knew I was going to struggle to cut into it, its a gorgeous collection of floral themed papers all hand painted – it is stunning! But I knew I had to use this one particular piece in as large pieces as I could, and making 6 cards from one sheet of DSP was the way to do this.

I know a few US demo’s have made similar videos, but they use slightly different measurements to fit 8 1.2 x 11″ cardstock, rather than our A4

Stampin' Up! UK painted blooms petals giveaway

I just love the look of these cards, all different but definitely a set together!

And I couldn’t bear to split them up so, I’m going to give them away to you – to win these 6 cards all you have to do is place an order with me before midnight on the 28th of February 2015 – and I will select one random winner! awesome!

Stampin' Up! UK Painted Bloom Petals 6 cards from one DSP

But, how do you make them! well, I have a video for that!

Measurements:

For these cards you will need 3 sheets for A4 cardstock cut in half and folded to make 6 cards, and a sheet of 12 x 12 Designer Series Paper

Cut 1.8 cm (3/4″) from the bottom of the 12 x 12 DSP

Cut your DSP in half at 14.3 cm (5 13/16″)

Then cut each piece into 10 cm (3 7/8″) pieces, you will have two little slivers of DSP left over


Hannah Wilks

Stampin’ Up! UK Independent Demonstrator

If you like the project, or any of the products used, would like a catalogue, or to join my team, please contact me, or click on the ‘Shop NOW’ button at the top of the page. You can also find me on Twitter, Facebook, YouTube, Google+, About.me, and Tumblr (Links in the sidebar)

Sign up to our newsletter here – http://eepurl.com/2if59

Thank you for stopping by www.www.stampinbyhannah.co.uk today

x

Vellum!!! oh and a 3D project!

Ok, I have a confession to make. I have a problem. I (along with James) cannot leave anything Complimentary in a hotel room!

Recently I had a night away with James, really it was a Stampin’ Up! event, but we turned it into a romantic mid-week break. I love staying in hotels, and seeing as we haven’t had a holiday in a couple of years , we take mini-breaks instead.

But every time we stay away we come home with the hotel complimentary toiletries!

I try and use them up in the gym, but James challenged me to make a bag / box to put them in this time, and seeing as its almost Christmas, and I’m sure I’m not the only one who has a similar problem, I though you could make these as pillow gifts for you house guests over the festive season!

Stampin' Up! UK Vellum Milk carton bag

These are super cute! Don’t you love vellum! and metallic ribbon! These use the Satin Ribbon in Gold and Silver!

Measurements:

Vellum – 6 1/2 x 9″ (

Score on the long side at – 1 3/4, 4 1/4, 6, and 8 1/2 (

Score on the short side at – 1 3/4, 4 3/4, and 6″ (


DISCLAIMER – I hold no responsibility for any damage caused by anyone using my Satin Ribbon Top Tip! Use this tip with GREAT care, and hold your ribbon as far away from any cardstock/paper/vellum or any other material as you can! Never leave a lighter with a child!


Hannah Wilks

Stampin’ Up! UK Independent Demonstrator

If you like the project, or any of the products used, would like a catalogue, or to join my team, please contact me, or click on the ‘Shop NOW’ button at the top of the page. You can also find me on Twitter, Facebook, YouTube, Google+, About.me, and Tumblr (Links in the sidebar)

Sign up to our newsletter here – http://eepurl.com/2if59

Thank you for stopping by www.www.stampinbyhannah.co.uk today

x


Christmas Chocolate Treat Bags!

Another 3D project for you today! I have been LOVING making treat bags and gift packaging recently. I have made a whole heap of them for people at work!

Stampin' Up! UK Chocolate Treat bags for Christmas


These bags are so cute! The original (the back one) uses the Santa and Co. DSP, while the other uses Nordic Noel, and both the bags are held closed with pegs from the Tag a Bag Accessory Kit!

Measurements –

DSP – 6 x 6″ (15.2 x 15.2cm)

Score the 1st side at – 1, 2 3/4, 3 3/4, and 5 1/2″ ( 2.5, 7, 9.5, 14 cm)

Score the 2nd side at – 1 and 4 1/2″ (2.5 and 11.5 cm)


Hannah Wilks

Stampin’ Up! UK Independent Demonstrator

If you like the project, or any of the products used, would like a catalogue, or to join my team, please contact me, or click on the ‘Shop NOW’ button at the top of the page. You can also find me on Twitter, Facebook, YouTube, Google+, About.me, and Tumblr (Links in the sidebar)

Sign up to our newsletter here – http://eepurl.com/2if59

Thank you for stopping by www.www.stampinbyhannah.co.uk today

x