Technique Tuesday | Stamp Rolling

Stampin' Up! UK Video tutorial class workshop

Oh dear, now this post is messy 🙁 really messy. The technique is inky yes, but there is no need to make as much of a mess as me! (check out the video tutorial to see what I mean!)

Stampin' Up! UK Stamp Rolling video tutorial

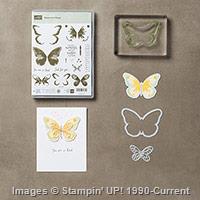
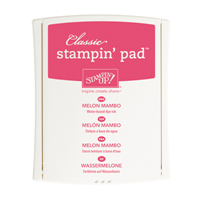
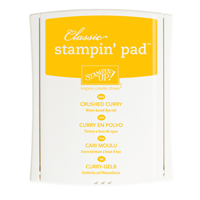
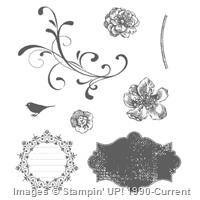
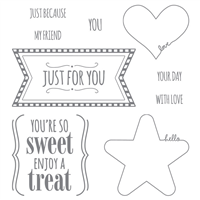
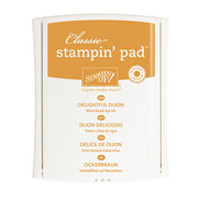
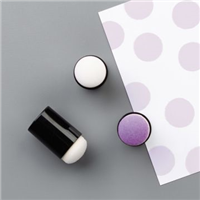
This is stamp rolling, adding more than one ink colour to a round stamp from two different ink pads. I needed a circular stamp for this and just had to use I Think You’re Great again! The first card uses Bermuda Bay and Pool Party to create a two-tone stamped image, while the card on the right uses Cherry Cobbler and Real Red.

See, isn’t it so super simple (if you manage to keep hold of your stamps, unlike me!)

Stampin' Up! UK Video tutorial class workshop

How to:

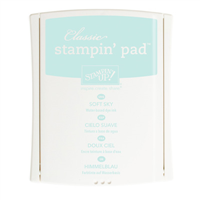
Ink you stamp with a light ink colour (I used Real Red for this card)

Take a hold of your stamp (firmly) and press the edges of the stamp into the darker ink pad in a rolling motion, ensuring you don’t touch the middle of the stamp into the ink pad

Always use the lighter colour first so you don’t get darker ink into your light ink pads


Shop Now button-001

Join my team button-001

To purchase any of the items featured in my projects please use the links above. To join my team of Stampin’ Friends select ‘Join My Team’ or send me a message!

Please support StampinByHannah, and join my Code Club, by using the Hostess code featured in the top right hand of my blog. For orders of over £150 please do not use this code, as you are entitled to your own Hostess benefits!

Sign up to my newsletter here – http://eepurl.com/2if59

Hannah Wilks

Stampin’ Up! UK Independent Demonstrator

Decorated Frames….. and some stamping too!

Stampin' Up! Decorated Frames Home decor stamping butterflies

Hi! Welcome to StampinByHannah! I hope you enjoy my blog, feel free to have a poke around, leave some likes, and follow along with some tutorials! Check out my latest Classes in the menu bar at the top of the page, and I can’t wait to hear from you!

Todays project was planned as one thing, but changed along the way to be something a little bit different! Stampin' Up! UK watercolour wings stamping tutorial

My big plan was a video tutorial decorating this photo frame. However, I started making my sample, added the two butterflies and a bow of Dotted Lace trim, and decided it as so gorgeous it didn’t really need any more – or really warrant a video tutorial either! However, the butterflies IN the frame (also beautiful!) could do with some explanation! The frame came from Asda for about £1.50

I am loving the Watercolour Wings bundle. This great stamp set, comes complete with two dies, one to cut the whole stamped butterfly and another smaller to coordinate with the Butterfly Thinlits dies.

Stampin' Up! Decorated Frames Home decor stamping butterflies

There are so many ink colours here. The framed version uses; Mint Macaron, Bermuda Bay, Delightful Dijon, Wisteria Wonder and Soft Sky. While the un-framed one uses; Lost Lagoon, Mint Macaron, Pink Pirouette, Melon Mambo and Crushed Curry.

The Watercolour Wings stamp set includes three stamps to make this butterfly (plus four to layer a smaller butterfly, some accent pieces and sentiments). The most solid stamp should be stamped first, with the detailed pieces layering over the top. This is a photopolymer stamp set, so layering up those stamped images is super easy too!

Stampin' Up! UK watercolour WIngs

I couldn’t leave without a close up of that lovely die-cut on the frame. The larger butterfly is from the Butterflies Thinlits dies set, and is die cut from Wisteria Wonder Card stock, with the smaller Mint Macaron butterfly from the Bold Butterflies thinlits layered onto with some Tombow glue. The 1″ Dotted Lace Trim ties into a beautiful bow too. I used Tombow to adhere the embellishment to the frame, and left it to dry overnight.

Beautiful!


Stampin' Up! UK classes mail order watercolour wings


Shop Now button-001Join my team button-001

To purchase any of the items featured in my projects please use the links above. To join my team of Stampin’ Friends select ‘Join My Team’ or send me a message!

Please support StampinByHannah, and join my Code Club, by using the Hostess code featured in the top right hand of my blog. For orders of over £150 please do not use this code, as you are entitled to your own Hostess benefits!

Sign up to my newsletter here – http://eepurl.com/2if59

Hannah Wilks

Stampin’ Up! UK Independent Demonstrator

August Free Workshop!

Stampin' Up! UK Wedding cards

Hello!

Welcome to my Free Online Workshop of August. Seeing as I got married on Saturday I thought it only fitting to do a wedding themed workshop while I am away!

Stampin' Up! UK Wedding cards

I have been super busy over the last few months preparing for my wedding; making wedding favours, Orders of Service, invitations, thank you cards, place settings and table plans, as well as working full time and running my Stampin’ Up! business! Things have been completely insanely crazy! and although I am currently lying on a beach you can be sure I am planning some awesome things for when I get back!

Just as I get back into working the Autumn/Winter catalogue launches! As a demonstrator I get a super awesome sneaky peak! and get to order things before it goes live on 1st September. You can get a sneaky peak now too – just by joining my team! Get a head start with your Christmas cards and festive projects, get to order the latest products first, and save money in the process! Awesome. You can find more information about joining Stampin’ Up! on my FAQ, or drop me a message (I will be replying to email while I am away I promise!)

I know, I have been really naughty with this one! Very very rarely do I use anything that is not Stampin’ Up! but I really needed some larger cards for my family Thank you’s, and these 8 x 8 cards just happened to still be in the drawer from my pre-SU crafting days (surely it would be a waste NOT to use them up, right!)

Stampin' Up! Uk Wedding thank you cards

As you can see I have a theme to my wedding projects. My Invitations were made before I became a demonstrator (yes, I really am that organised!) and so didn’t use Stampin’ Up! products! (Shocking, I know!) but they did use a map stamp. I used the World Map Background Stamp on these cards, stamped in Elegant Eggplant onto Whisper White and punched using the Sweetheart Punch, so cute!

Stampin' Up! UK Everything Eleanor Wedding thank you

Everything Eleanor just scream wedding to me, and so I couldn’t not use it on my Thank you cards. These are the cards for people that helped us with our day; the church, the hotel, the photographer etc. I love them all, and they all worked so hard! I do hope they like the cards as a special thank you

Stampin' Up! UK wedding favour mini milk carton

My 3D project this month is my wedding favours. I have to admit that these are totally not my design, they come from Papercraft Button and here wonderful YouTube tutorial from a couple of Easters ago! I made these about 18 months ago, all cut and scored, with sticky strip applied just ready for assembly. The ones on my wedding tables also featured a cute heart in that wonderful map print too, and were held together by the Stampin’ Up! clothespins (or pegs!) just like this one

Measurements:

Card stock – 6 1/2 x 4 1/2″ (17.5 x 11.5 cm)

Score on the long side at – 1 1/2, 3, 4 1/2 and 6″ (4, 8, 12 and 16 cm)

Score on the short side at – 1 1/2, 3 and 4 1/8″ (4, 8 and 10.5 cm)

*please note the metric version is slightly bigger than the imperial shown in the video*


Shop Now button-001Join my team button-001

To purchase any of the items featured in my projects please use the links above. To join my team of Stampin’ Friends select ‘Join My Team’ or send me a message!

Please support StampinByHannah, and join my Code Club, by using the Hostess code featured in the top right hand of my blog. For orders of over £150 please do not use this code, as you are entitled to your own Hostess benefits!

Sign up to my newsletter here – http://eepurl.com/2if59

Hannah Wilks

Stampin’ Up! UK Independent Demonstrator

Technique Tuesday | One Background Stamp Three Ways

Stampin' Up! UK mens cards tutorial

I had this idea a few months ago, actually before the launch of this annual catalogue, and I had a great plan for a great stamp …. that then sadly went and retired! but I couldn’t give up on the idea, and chose a different background stamp instead. I have been loving the World Map stamp recently, particularly for men’s cards.

Stampin' Up! Subtle background technique

This first card would make a great men’s birthday card. I just love this background technique, it creates a wonderful subtle backdrop for your sentiment and embellishments.

How to:

Ink the middle of your background stamp in Sahara Sand ink, carefully lay a piece of Whisper White card stock onto your background stamp. Apply light pressure using your finger tips, but only in certain areas.

Stampin' Up! UK World Map watercoloured heat embossing

If you watched the video tutorial above you will have seen this card looking a hot mess! Here the background stamp was inked in Versamark and heat embossed in Clear Stampin’ Emboss Powder onto Watercolour paper. Then, using a large round brush and a heap of water, three colours of ink were added; Soft Sky, Mint Macaron and Lost Lagoon. Once the card had been left to dry, the coloured melted back into the card stock, giving this lovely soft finish

Stampin' Up! UK world map watermelon wonderThis is the most simple of the three cards, with the World Map being inked in Delightful Dijon and stamped onto a piece of Whisper White. I had to girly this card up a bit as the other two are definitely destined for boys, by adding some of that beautiful Dotted Lace Trim in Watermelon Wonder and mounting the piece onto a Watermelon Wonder Card base.

Each card here uses the same design, but the different techniques give completely different looks. I have even kept the sentiment the same; using the You’re So Sweet Stamp set.


Supply List

Built for Free Using:  My Stampin Blog


Shop Now button-001Join my team button-001

To purchase any of the items featured in my projects please use the links above. To join my team of Stampin’ Friends select ‘Join My Team’ or send me a message!

Please support StampinByHannah, and join my Code Club, by using the Hostess code featured in the top right hand of my blog. For orders of over £150 please do not use this code, as you are entitled to your own Hostess benefits!

Sign up to my newsletter here – http://eepurl.com/2if59

Hannah Wilks

Stampin’ Up! UK Independent Demonstrator


Handbag packets!

Stampin' Up! UK Business packet

I am an independent Stampin’ Up!® demonstrator, this means that I create beautiful things with top quality card stock, ink, and rubber stamps, and share them with you! (and teach a few classes, hold a couple of parties, and attend a shed load of craft fairs!)

I recently attended a Stampin’ Up! organised training day (back in May!) and one of the demonstrator presenters (Rhoda Macpherson) presented this idea of keeping packets in your handbag, to introduce to people what it is we do! I LOVE this idea, I have carried business cards since I became a demonstrator, and even though they are hand-stamped, they didn’t really say what it was I am all about! So, thank you Rhoda, this now have pride of place in my handbag (and on my display table at classes, and on the front of my stall at fairs!)

Stampin' Up! UK Business packet


These use the Sketches Dots Tag a Bag Gift Bags. You know my love of the Tag a Bag kit items by now! Check out page 151 of the Annual Catalogue for some great gift packaging ideas, including pre-cut and scored boxes, a variety of bags and even labels and tags. They are awesome!

I paired the bags with some more detailed business cards, featuring not only my contact details, but also some information about me and what I do. This information is printed onto Whisper White card stock (yes it sales through my printer without any issues) and matted onto a piece of Bermuda Bay. They had to have some stamping too, so I grabbed out one of my current favs, Endless Thanks.

Stampin' Up! UK sketched dots tag a bag business cardsI have been loving the colours from the Cherry on Top Designer Series Paper stack – Bermuda Bay, Crushed Curry, Cucumber Crush, Hello Honey, Pool Party, Tip Top Taupe, Watermelon Wonder and Whisper White – and so I have used these colours here too!


Shop Now button-001Join my team button-001

To purchase any of the items featured in my projects please use the links above. To join my team of Stampin’ Friends select ‘Join My Team’ or send me a message!

Please support StampinByHannah, and join my Code Club, by using the Hostess code featured in the top right hand of my blog. For orders of over £150 please do not use this code, as you are entitled to your own Hostess benefits!

Sign up to my newsletter here – http://eepurl.com/2if59

Hannah Wilks

Stampin’ Up! UK Independent Demonstrator


Technique Tuesday | Craft Ink and Stencils

Stampin' Up! UK Dots and Stripes Stencil Craft Ink Video Tutorial

I love this technique! I think its one of those techniques I’ve picked up from YouTube, but I can’t remember who from or when! I know, really useful! but its OK because as always on a Tuesday I have a video tutorial for you!

Stampin' Up! UK Dots and Stripes Stencil Craft Ink Video Tutorial

This card uses our Whisper White Craft Ink, along with the Dots and Stripes Decorative Masks to create this completely flat, yet 3D effect! What to see how, check the tutorial below

How To:

Create your card base by cutting a piece of Melon Mambo Card stock in half, and folding in half

Using sticky notes, or re-positionable adhesive, stick the card base to your grid paper. Lay your decorative mask over the top and use sticky notes (or tape) to hold in place

Using Whisper White Craft Ink and a Sponge Dauber, dab the ink over the holes in the mask. Once your card front is covered remove and clean the mask.

Leave the card base to dry

Once the Whisper White Craft Ink has dried, lay the mask back over your card base, off setting it slightly. Ink in the same way using Melon Mambo Ink

The card is finished with that fabulous Die Cut ‘Thanks’ from the Hello You Thinlits dies, and three Birthday Blossoms punched with the Pansy Punch


Don’t forget to shop using the Code Club Code to receive some great FREE product! 

2JTHMV6W

I will be closing this order on the 30th August 2015


Shop Now button-001Join my team button-001

To purchase any of the items featured in my projects please use the links above. To join my team of Stampin’ Friends select ‘Join My Team’ or send me a message!

Please support StampinByHannah, and join my Code Club, by using the Hostess code featured in the top right hand of my blog. For orders of over £150 please do not use this code, as you are entitled to your own Hostess benefits!

Sign up to my newsletter here – http://eepurl.com/2if59

Hannah Wilks

Stampin’ Up! UK Independent Demonstrator

Tall Tealight box using Pretty Petals

Stampin' Up! UK tealight box

I have had these tea-lights sat on my desk for months! I found these beautiful Pink Pirouette coloured tea-lights in Primark, for £1! and had to bring them home to make a box! I love it when I find items that perfectly match Stampin’ Up! colours, it makes gift giving so damn easy!

Stampin' Up! UK box tutorial pretty petals

These boxes hold 6 supermarket sized tea-lights, and are super quick and easy to make. Check out the video tutorial below if you don’t believe me!

Measurements:
(I’m sorry I haven’t got the metric measurements for this one, yet!)

Base –

Card stock – 7 x 4 1/2″

Score on the long side first at 1 5/8, 3 1/4, 4 7/8 and 6 1/2″

Score on the short side at 1 5/8″

Lid –

Card stock – 5 11/16 x 5 11/16″ (this measurement is really important to make sure your lid slips over your base!)

Score on all four sides at 2″

Designer Series Paper –

1 piece that measures 1 1/2 x 1 1/2″

4 pieces that measure 1 1/2 x 1 3/4″

Stampin' Up! UK tealight box

I can’t believe I have got this far into the blog post without mentioning that adorable Designer Series Paper! I did not think that this DSP was for me – it has a weird colour combination; Basic Black (which is what put me off!) Calypso Coral, Mint Macaron, Old Olive, Pacific Point and Very Vanilla. I am very much a Whisper White girl; I use Very Vanilla occasionally but I go through miles more Whisper White. So between the Basic Black and the Very Vanilla – I had decided that the Pretty Petals DSP stack was not for me! that was until I received a sample in a product share – I am converted! These papers are gorgeous! You have got to grab a pack (its only £7.25) and find out for yourself!


Shop Now button-001Join my team button-001

To purchase any of the items featured in my projects please use the links above. To join my team of Stampin’ Friends select ‘Join My Team’ or send me a message!

Please support StampinByHannah, and join my Code Club, by using the Hostess code featured in the top right hand of my blog. For orders of over £150 please do not use this code, as you are entitled to your own Hostess benefits!

Sign up to my newsletter here – http://eepurl.com/2if59

Hannah Wilks

Stampin’ Up! UK Independent Demonstrator

Cardmaking 101 – Lets Make a Card!

Stampin' Up! UK Freshly Made Sketches

Hello!

Did you catch my mistake last week? I have complete wedding brain at the moment and managed to film this video on the wrong week! magic! but its ok, because I’ve filmed another tutorial for you this week!

I love using sketches as a quick and easy way to make a card, I will often hit Pinterest or check the latest challenges on some of my favourite challenge blogs. Sketches make card making so super quick and easy, and also stretch my card making into areas I would never have explored. Do you ‘get’ how much I love sketches! and I would love you to love sketches too!

So, this is a Cardmaking 101 – but one with a difference, because today we are actually going to make a card! So far we have explored tools, adhesives, and accessories. We have talked about stamps and stamping. But we have never actually made a card! until today. This is also the last Cardmaking 101 for a couple of months, but it will return bigger and better than ever in the Autumn – is there something you really want to learn? or a technique you would love to try but just don’t know where to start? Let me know so I can feature them as part of my next Cardmaking 101 series (or should that be Cardmaking 102?!)

Ok, so shall I stop waffling and get on with making a card!

Freshly Made Sketches #196 Cardmaking  101

This is our sketch for today, Sketch #196 from Freshly Made Sketches!

I always start by looking at the sketch, turning it around and changing the shapes. The key to using sketches is not to think of the shapes as boxes (or flowers, or butterflies) but just as shapes, shapes that your stamps can fill

Next I turn to my stamp shelves, trying to place my stamps into that shape. Sometimes I will use a stamp and punch combination for this, or sometimes I just use my current favourite!

Once I have collected my supplies and grab the sketch again. Cut my card stock, and begin to assemble my card

Stampin' Up! UK Cardmaking 101 Watercolour thank you

Here I have used the Watercolor Thank You, along with a piece of the Neutrals Designer Series Paper. I recently received a pack of the Metal Rimmed Peals, and just HAD to find away of using them!

So, what do you think? I would love to see your latest make, show me on my Facebook page!


Shop Now button-001Join my team button-001

To purchase any of the items featured in my projects please use the links above. To join my team of Stampin’ Friends select ‘Join My Team’ or send me a message!

Please support StampinByHannah, and join my Code Club, by using the Hostess code featured in the top right hand of my blog. For orders of over £150 please do not use this code, as you are entitled to your own Hostess benefits!

Sign up to my newsletter here – http://eepurl.com/2if59

Hannah Wilks

Stampin’ Up! UK Independent Demonstrator


Gift Bag Punch Board Bag with Flap

Gift bag punch board project

I’m sorry, I know the title of this post is a bit of a mouthful. However, I’m at a bit of a loss of what else to call it!

I’m loving the new Gift Bag Punch Board! I think it’s proving to be almost as versatile as the Envelop Gift Board (that I truly adore!) and I have several projects and videos coming in the next few weeks!

Stampin' Up! UK Gift bag punch board

I am also sorry for my terrible bows! That satin ribbon is still my nemesis! however, the 1″ dotted lace trim (in the new In-Colours) tied like a dream! I think I need to watch some more bow tying tutorials to master that satin ribbon though!

Measurements:

Card stock (although, this would work just as well with Designer Series Paper) – 10″ x 8 1/4″ (25.5 x 21 cm) or a piece of A4 cut on the long side to 10″ (25.5 cm)

Follow the instructions on the Gift Bag punch board to make a Small bag

Once you have the basic gift bag punched and scored, turn your card stock around and repeat the steps in reverse order, so that you end up with symmetrical flaps on both sides

Fold the flaps down on one side and use the other side of the punch board to punch holes as described on the board

Stampin' Up! UK gift bag with flap

These bags are super simple to make, although I’m sure I have made it look trickier than it is in the video (lots of ‘bloopers’ recently!), why not grab your board and have a go, I would love to see what you create!

Pop over and post your creations on my Facebook page


Dont forget to shop using the Code Club Code to receive some great FREE product!

XEQGUA4P

I will be closing this order on the 30th July 2015


Shop Now button-001Join my team button-001

To purchase any of the items featured in my projects please use the links above. To join my team of Stampin’ Friends select ‘Join My Team’ or send me a message!

Please support StampinByHannah, and join my Code Club, by using the Hostess code featured in the top right hand of my blog. For orders of over £150 please do not use this code, as you are entitled to your own Hostess benefits!

Sign up to my newsletter here – http://eepurl.com/2if59

Hannah Wilks

Stampin’ Up! UK Independent Demonstrator

Technique Tuesday | Blender Pens on Vellum

Stampin' Up! UK Blender Pens on vellum

Hello and welcome to another Technique Tuesday, I have recently been playing with my Blender Pens, and thought I would share the easiest way to use them!

I love the Blender Pens, they make colouring images so super quick and easy, but they take a little bit of practice particularly on Whisper White card stock. However, they are really easy to use on vellum.

So, what is a Blender Pen?

A Blender Pen is a pen that contains a special clear solution, that helps inks to move on paper. They create a similar effect to watercolouring, but without the mess of water everywhere. These pens work best on smooth surfaces; Whisper White card stock, Shimmery White card stock, or Vellum. This is because the ink still needs to be a little wet for the solution to move the ink. I find that they work best on vellum, this is because the ink takes longest to dry, giving you plenty of time to get a smooth colour blend

Stampin' Up! UK Blender Pens on vellum

I had some issues during the filming of this one! So, as usual you get a couple of ‘live bloopers!’ My camera ran out of battery (I’d filmed about 8 videos in one day!), but I hope it doesn’t effect your enjoyment of the tutorial

Top Tips for using Blender Pens on Vellum;

– I prefer to use Stazon Black on Vellum, as it is designed for smooth surfaces and dries to a nice crisp Black

– Use on colour at a time, here I coloured all the leaves first, then the flower centres and then the petals

– Scribble off your Blender Pen onto some scrap paper between each colour. The tip of your Blender Pen may stain, but this won’t effect the colour once you have scribbled off the excess

– Play and have fun!

Stampin' Up! UK Birthday Blossoms Vellum

Once the vellum is coloured I turn the vellum over, and use Fast Fuse Adhesive to stick the vellum to the card. I love Fast Fuse for this, because it is a clear tape you can’t see it, but I also apply the tape to the coloured areas. This way you can’t see when it is attached, I like the look of the vellum loose at the edges, but you could use glue dots in each corner and cover them with Candy Dots or Pearls.

What’s your favourite way of attaching Vellum to your cards?


Dont forget to shop using the Code Club Code to receive some great FREE product!

XEQGUA4P

I will be closing this order on the 30th July 2015


Shop Now button-001Join my team button-001

To purchase any of the items featured in my projects please use the links above. To join my team of Stampin’ Friends select ‘Join My Team’ or send me a message!

Please support StampinByHannah, and join my Code Club, by using the Hostess code featured in the top right hand of my blog. For orders of over £150 please do not use this code, as you are entitled to your own Hostess benefits!

Sign up to my newsletter here – http://eepurl.com/2if59

Hannah Wilks

Stampin’ Up! UK Independent Demonstrator