Technique Tuesday| Acrylic Block Stamping

Stampin' Up! UK Butterfly Basics Watercolour Stamping

Watercolour is BIG news at the moment in card-making. Watercoloured backgrounds and images are really popular. At Stampin’ Up!® we have a great kit featuring the watercolour look (Watercolour Wishes) and have several stamp sets that allow you to look like a watercolour master without any of the mess – which is awesome, but I love playing with ink and water! But I understand that it can be a tricky look to pull off.

Well, today I have  quick and easy watercolour background technique for you that doesn’t even need a paint brush!

Stampin' Up! UK Acrylic Block Stamping Technique Tuesday Video Tutorial

This technique is super simple, but as always I have created a video tutorial for you.

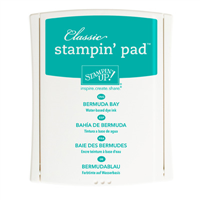
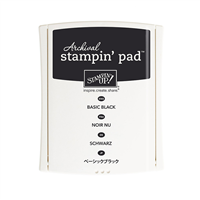
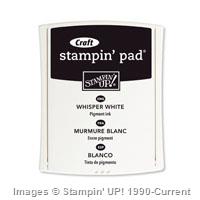
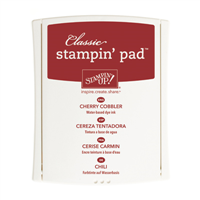
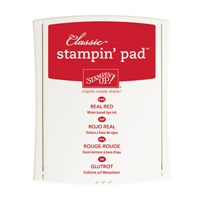
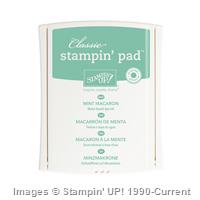
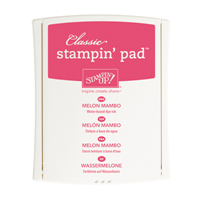
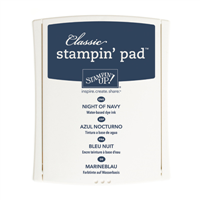
The new Basic Black Archival Ink is great for this technique, it gives a crisp true black image, great for sentiments and silhouette images like the ones on the card above. But also it is awesome for watercolour techniques as it doesn’t bleed or run with water, and so has become my go to black for stamped imaged that I am planning to watercolour. This card would have worked just as well if I had used Memento or Stazon as the black stamping is done after the watercolour panel is dry.

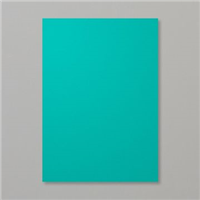
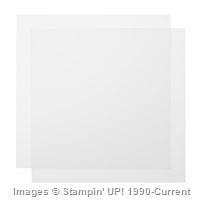
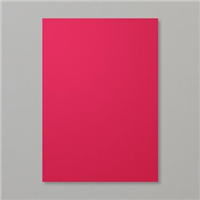
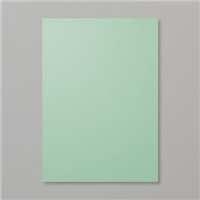
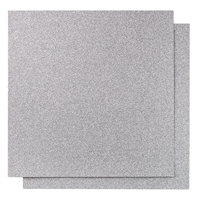
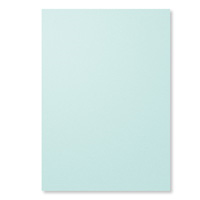
My favourite card stock for this technique is the Shimmery White, as its slightly thicker than our standard Whisper White card stock, and allows you a little more time before the ink dries than Watercolor Paper. Plus, you get that lovely shimmery finish! I can see another packet of this coming home with me really soon!

Stampin' Up! UK Butterfly Basics Watercolour Stamping

Top Tips:

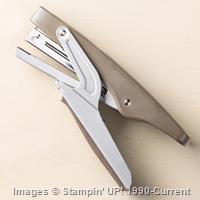
  • Pull out your Stampin’ Pierce matt to stamp on, to ensure a full block of colour
  • Ink up your Acrylic Block and stamp directly onto your card stock without water for a darker, more textured look
  • Add water to your inked Acrylic Block before stamping to create the watercolour effect
  • Allow the water to dry naturally, hit it with your heat gun, or dab off the water with a clean cloth for different effects
  • Stamp over your watercolour panel with a black inked imaged for a cool silhouette effect

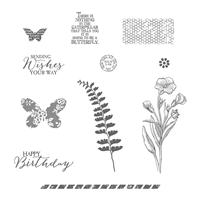
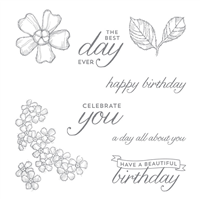
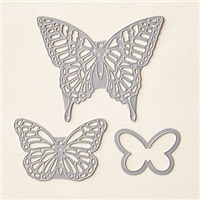
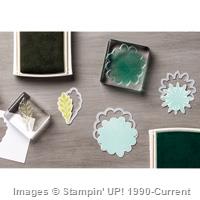
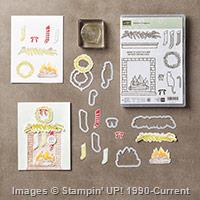
The stamp set I have used on this card is Butterfly Basics – definitely one of my favourites this year – lovely for feminine birthdays and other occasions, and it coordinated with two die sets and several other sets of stamps too!


Stampin' Up! Starter Kit offer


Shop Now button-001Join my team button-001

To purchase any of the items featured in my projects please use the links above. To join my team of Stampin’ Friends select ‘Join My Team’ or send me a message!

Please support StampinByHannah, and join my Code Club, by using the Hostess code featured in the top right hand of my blog. For orders of over £150 please do not use this code, as you are entitled to your own Hostess benefits!

Sign up to my newsletter here – http://eepurl.com/2if59

Hannah Wilks

Stampin’ Up! UK Independent Demonstrator

Halloween Shaker Card and Pillow Box

Stampin' Up! Halloween Pillow Box

I will admit now, I’m not really one of Halloween. I’m not a fan of dressing up at the best of times, and the idea of then going out in the cold – no thanks! And seeing as I live in a 3rd floor flat, I don’t really get trick or treaters either (all the more sweeties for me!) but I couldn’t resist making this card and pillow box combo.

Stampin' Up! Halloween Pillow Box

The Square Pillow Box die is definitely one of my favs from the latest catalogue, made with card stock it’s just so clean and crisp. This one is a little different, with those cute pumpkins die cut from the front and some Tangelo Twist card stock added behind. Oh, and can you see the sneaky spiders, they are stamped in Versamark for a tone on tone look.

Stampin' Up! Halloween Shaker Card

The card also uses the same dies, the window is cut from the larger of the two squares in the collection, and the shaker pieces are those same pumpkins cut from Tangelo Twist and Basic Black card stock. I am loving the shaker card craze at the moment (have you seen our Shaker Card Kit?! It is AWESOME!) and they are so easy using the edge pieces from Dimensionals.

Trick of Treat is taken from A Little Something – the stamp set that you can buy with the Square Pillow Box die for 15% off! – and is stamped in Whisper White Craft Ink, punched with the 1 3/8″ circle punch


Shop Now button-001Join my team button-001

To purchase any of the items featured in my projects please use the links above. To join my team of Stampin’ Friends select ‘Join My Team’ or send me a message!

Please support StampinByHannah, and join my Code Club, by using the Hostess code featured in the top right hand of my blog. For orders of over £150 please do not use this code, as you are entitled to your own Hostess benefits!

Sign up to my newsletter here – http://eepurl.com/2if59

Hannah Wilks

Stampin’ Up! UK Independent Demonstrator

12 Weeks of Christmas – Gift Card Gift Box!

Stampin' Up! UK Gift Card Gift Box video tutorial

Stampin' Up! 12 weeks of Christmas

Welcome to my Christmas project series this year! Each and every Sunday between now and the Big Day I be sharing a fun Christmas project; from cute gift packaging, to cards and even some home decor!

I love giving the gift of shopping (especially to awkward 15 year old girls! or boys who just want Games consoles!) but sticking a gift card into a card is super boring! Last year I made pop up gift card cards, but they just didn’t have the right amount of wow factor for me. I wanted a box, and that is what I have for you today.

Stampin' Up! UK Gift Card Gift Box video tutorial

Actually, this box is a really handy size for home-made chocolates, tealights or soaps too – just leave out the gift card insert. Check out the video tutorial for complete instructions, although the measurements can be found at the bottom of this post.

I’ve kept the decoration on this one fairly simple, with a piece of Designer Series Paper. Timeless Elegance on the Cherry Cobbler version, and Everyday Chic on the Real Red one. With some stamped and punched accent pieces (Don’t you just LOVE that bow!)

I’ve loving a bit of red this Christmas, but choosing between Real Red and Cherry Cobbler is proving to be a bit of a problem – they are both so beautiful! – so I have used them both here. The Cherry Cobbler Version is also made as a fold flat variation, to allow you to make a few of these and have them stored flat ready for assembly when needed.

Stampin' Up! UK Christmas gift card box

The gift card holder section of this box is an insert, punched with the Decorative Label punch to hold the card.

Measurements:

Box:

Card stock – 11 x 6″ (27.5 x 15 cm)

Score on the long side at 1, 5, 6 and 10″ (2.5, 12.5, 15, and 25 cm)

Score on the short side at 1 and 5″ (2.5 and 12.5 cm)

Insert:

Card stock – 10 x 4″ (25 x 10 cm)

Score on the long side at 3 and 7″ (7.5 x 17.5 cm)

Flip the cardstock over, and score again at 5″ (12.5 cm)

Designer Series Paper – 3 3/4 x 3 3/4″ (9.5 x 9.5 cm)


Shop Now button-001Join my team button-001

To purchase any of the items featured in my projects please use the links above. To join my team of Stampin’ Friends select ‘Join My Team’ or send me a message!

Please support StampinByHannah, and join my Code Club, by using the Hostess code featured in the top right hand of my blog. For orders of over £150 please do not use this code, as you are entitled to your own Hostess benefits!

Sign up to my newsletter here – http://eepurl.com/2if59

Hannah Wilks

Stampin’ Up! UK Independent Demonstrator

Sweet Lil’ Things Card

Stampin' Up! UK Sweet Lil Things Card

I have been loving playing with Designer Series Paper recently. Usually I buy it, and it sits in my craft room, looking very pretty but without any purpose! Stampin' Up! UK Sweet Lil Things Card

I think this paper is so cute, those foxes melt my heart. I have another project coming next week featuring those strawberries too (actually that’s where this card came from, that piece of Strawberry paper is an off cut! waste not want not!)

The stamp on this one comes from a Project Life by Stampin’ Up! set, Remember This, and it fits wonderfully into the Washi Label punch. Well, it does, but its a little long. No problem, just punch it out as normal and then insert the punched label back into the punch, line it up again and make it shorter – good hey?

What do you think?


Supply List

Built for Free Using:  My Stampin Blog


Shop Now button-001Join my team button-001To purchase any of the items featured in my projects please use the links above. To join my team of Stampin’ Friends select ‘Join My Team’ or send me a message!

Please support StampinByHannah, and join my Code Club, by using the Hostess code featured in the top right hand of my blog. For orders of over £150 please do not use this code, as you are entitled to your own Hostess benefits!

Sign up to my newsletter here – http://eepurl.com/2if59

Hannah Wilks

Stampin’ Up! UK Independent Demonstrator

Vellum Pillow Box

I am still loving the Square Pillow Box die! I could make these all day, they are so simple and quick to put together. I was sat in my craft room the other day thinking of other variations of this great die, and realised that I hadn’t made an all vellum version! Shocking!

Stampin' Up! UK Square Pillow box top tips

This vellum is stunning (my photo does not do it justice!). I have been playing around with my photo skills again, and am trying natural light and some props at the moment, still needs work I think!

Ok, so Square Pillow Box top tips!

  • The die will cut two pieces of Designer Series Paper or Vellum, but only one piece of card stock at a time.
  • Fold and burnish the pieces well with your fingers, and a bone folder on the straight edges
  • Use Tear & Tape to ensure the whole length of the tabs are covered with adhesive
  • Lie the two pieces of the Pillow Box face down on your desk next to each other, and line up one edge at a time
  • Use Glue dots to stick the flaps together if needed
  • Make them super pretty by using the extra dies and coordinating stamp set!


Shop Now button-001Join my team button-001

To purchase any of the items featured in my projects please use the links above. To join my team of Stampin’ Friends select ‘Join My Team’ or send me a message!

Please support StampinByHannah, and join my Code Club, by using the Hostess code featured in the top right hand of my blog. For orders of over £150 please do not use this code, as you are entitled to your own Hostess benefits!

Sign up to my newsletter here – http://eepurl.com/2if59

Hannah Wilks

Stampin’ Up! UK Independent Demonstrator

Have a Beautiful Birthday

Stampin' Up! UK Birthday Blossoms 2nd Generation Stamping

I know I mentioned this earlier in the month, but I have quite a few family birthdays coming up, and I know that the most commonly made type of greetings card is a birthday card, so you will be seeing many more birthday care inspiration coming from me over the next few months (when I’m not thinking about Christmas!)

Stampin' Up! UK Birthday Blossoms 2nd Generation Stamping

This card uses the Birthday Blossoms Stamp Set, that I quite simply just adore! It is the perfect mix of delicate and sketchy, and it coordinates with a couple of punches too!

I kept this card super simple, sticking to just Mint Macaron ink and Whisper White card stock, with the variation in colour coming from the stamping technique used. This card features Second Generation Stamping, to create a layered effect with the flowers and leaves. This is super simple to do; ink up your chose stamp and stamp it off once (or twice for an even paler version) onto some scrap paper before stamping onto your project.

Keeping it simple with a sentiment from the stamp stamp set and three trio’s of Jewel Rhinestones

A beautiful card for James’ Beautiful Grandma


Shop Now button-001Join my team button-001

To purchase any of the items featured in my projects please use the links above. To join my team of Stampin’ Friends select ‘Join My Team’ or send me a message!

Please support StampinByHannah, and join my Code Club, by using the Hostess code featured in the top right hand of my blog. For orders of over £150 please do not use this code, as you are entitled to your own Hostess benefits!

Sign up to my newsletter here – http://eepurl.com/2if59

Hannah Wilks

Stampin’ Up! UK Independent Demonstrator

Technique Tuesday | Faux In-lay Die Cutting

I have recently fallen head of heals in love with my Big Shot machine again. My Big Shot was one of those big ticket items I bought when I started crafting 5 years ago, and I have to admit it didn’t get the love and attention it deserved. However, since becoming a Stampin’ Up! demonstrator last year, the amount of use my Big Shot gets keeps increasing, and I am the first to admit that its starting to get tired through over use! I am in desperate need of new cutting plates since my current set are now sporting the ‘stained glass’ effect, and I am forever tightening the handle. I might have to buy it some Christmas presents this year!

Stampin' Up! UK Faux InLay Die Cutting Technique Tuesday

I really enjoy the In-lay die cutting technique, but trying to get all those pieces back into the paper can be a bit of a pain. I have recently tried a few different types of Faux In-Lay Die Cutting, using both the big shot AND punches!

There is a Big Shot add on that is a must for this one, the Premium Crease Pad. Designed to help form the creases when using Bigz Dies, the crease pad stops the die from cutting all the way through your card stock, leaving an embossed effect. This works on both detailed dies, like the Hello You Thinlits, and Butterflies Thinlit dies (love those!) as well as framelit dies, like the Flower Fayre dies that coordinated with the Flower Patch stamps

Stampin' Up! UK Faux In Lay Die cutting video tutorial

In-layed punching is super simple, and is really effective with stamped images, or Designer Series Paper. Keep your eyes on a blog for some more of this technique for sure!


Don’t forget to shop using the Code Club Code to receive some great FREE product!

JNUHVBUJ

I will be closing this order on the 30th September 2015


Supply List

Built for Free Using:  My Stampin Blog


Shop Now button-001Join my team button-001To purchase any of the items featured in my projects please use the links above. To join my team of Stampin’ Friends select ‘Join My Team’ or send me a message!

Please support StampinByHannah, and join my Code Club, by using the Hostess code featured in the top right hand of my blog. For orders of over £150 please do not use this code, as you are entitled to your own Hostess benefits!

Sign up to my newsletter here – http://eepurl.com/2if59

Hannah Wilks

Stampin’ Up! UK Independent Demonstrator

The Wonderland of Northern Lights

Stampin' Up! UK Wonderland Ink blending Christmas Card

Hi there! Welcome to a brand new week of inspirational projects here at StampinByHannah. I hope you checked out the blog hop over the weekend, I have to say the girls put on an amazing show of projects and ideas this time around, and I will be planning another hop soon I’m sure.

If you are new here I post cards and inspiration almost every day of the week, and this week is super exciting as my 12 Weeks to Christmas starts on Saturday!

Stampin' Up! UK Wonderland Ink blending Christmas Card

I have to admit this card was a bit of a happy accident.

I made a batch of these for some lovely ladies who requested an Autumn/Winter Catalogue from me a few weeks ago, and I made a spare to keep and photograph for you my lovely blog readers. It’s a super simple ink blended background of Mint Macaron, Island Indigo and Night of Navy, with the Trees from Wonderland stamped across the bottom in our brand new Archival Black Ink. This particular sample sat on my desk for a week or so while waiting to be photographed, and when I came to take this picture I noticed the bleached dots! I’m guessing that we have had some rain come in through the open window above my desk, which has reactivated the ink and wicked away the colour. At first I was horrified, but the more I look at it, the more I really like the effect it has created.

Don’t you just love a happy accident!


Stampin' Up! Uk at home class Wonderland vellum cardmaking workshop


Shop Now button-001Join my team button-001

To purchase any of the items featured in my projects please use the links above. To join my team of Stampin’ Friends select ‘Join My Team’ or send me a message!

Please support StampinByHannah, and join my Code Club, by using the Hostess code featured in the top right hand of my blog. For orders of over £150 please do not use this code, as you are entitled to your own Hostess benefits!

Sign up to my newsletter here – http://eepurl.com/2if59

Hannah Wilks

Stampin’ Up! UK Independent Demonstrator

Pootlers Blog Hop | Decorating your Christmas Table

Stampin' Up! UK pillow box Christmas favour


bog hop-001

Hello! Welcome to the 3rd Pootler’s Team Blog Hop! I am so pleased you could join us! Everyone has worked so hard to create wonderful projects for you, please follow the hop around and leave comments on the fabulous blogs to come to.

Thanks


I have to admit that although I have been organising this hop for a couple of months, I only managed to actually create my project on Monday! but, never mind, I’m here now

Stampin' Up! UK pillow box designer series paper

If you are one of my regular readers you will know that my box of pre-order goodies sat lonely in my office for 3 weeks while I went off and got married. Coming back from honeymoon and getting back into crafting has taken a few weeks, and several days of playing with the new products, but this pillow box was one of the first things I made. I love cute packaging, but making my own boxes isn’t something that comes naturally to me, so this pillow box die is awesome! Anyway, when it came time to make my Blog Hop project (a littler later than planned) I looked around my craft room for inspiration and came across this little box, and I fell in love all over again!

Stampin' Up! UK pillow box Christmas favour

I made a second pillow box from Cherry Cobbler card stock this time, using the Seasons of Cheer Designer Series Paper as an accent. I will admit that the trees were a bit of an after thought, but they tie the pillow box favour into the rest of the project

Stampin' Up! UK Christmas Table Pootles Blog Hop

If I ever get a Christmas day at home, this is totally what my table is going to look like!

Stampin' Up! UK pillow box cutlery holder

The pillow box die is really versatile. Here I cut the tabs off one end, to create a cutlery holder. I adore this Designer Series Paper, I believe it was hand painted by one of the fabulously talented ladies at the Stampin’ Up! Home Office in Utah, and it is stunning! This tree paper has some wonderful Poinsettias on the reverse that are going to have to find their way onto the centre stage of a project or two! This pillow box is finished with a belly band of Vellum and Silver Glimmer Paper, with a tag and three vellum flowers punched from the Itty Bitty Accents Punch Pack

Stampin' Up! UK Christmas tag

Christmas just wouldn’t be with a tag. Last year I created 12 Tag of Christmas, and I have been thinking about doing something similar again this year, but I’m not sure yet. (Whatever I do will have to start soon though!). This tag features the same Designer Series Paper, Vellum and Glimmer paper combination, with those cute Itty Bitty flowers and the Love Peace Joy Stamp from A Little Something (the stamp set that comes bundled with the pillow box die).

Actually I can’t believe I have got to the end of my blog post without mentioning the Stamps! Shocking!

Hope you enjoy the rest of the hop, hop forward and check out what the wonderful Caroline has created this time.

See you again soon!

bog hop_2-001 bog hop_2_2-001


Shop Now button-001

Join my team button-001

To purchase any of the items featured in my projects please use the links above. To join my team of Stampin’ Friends select ‘Join My Team’ or send me a message!

Please support StampinByHannah, and join my Code Club, by using the Hostess code featured in the top right hand of my blog. For orders of over £150 please do not use this code, as you are entitled to your own Hostess benefits!

Sign up to my newsletter here – http://eepurl.com/2if59

Hannah Wilks

Stampin’ Up! UK Independent Demonstrator


Festive Fireplace Week – Tealight Holder

Stampin' Up! UK Festive Fireplace Tealights

Stampin Up! Festive Fireplace Week

Welcome to the final post in my Festive Fireplace week blog series, I do hope you have enjoyed it and found some inspiration. You can find all the other projects in this weeks worth of posts by searching for ‘Festive Fireplace’ in my search bar

Stampin' Up! UK Festive Fireplace Candles cat Christmas

This project comes with a bit of a disclaimer – DO NOT put real tealights inside! Please use electric tealights for this, I will not be held responsible for any accidents caused by this project!

Right, with that out of the way, fancy making one?

They are really simple to make, and I am loving the cat with the bow collar too. The Chocolate Chip version uses Very Vanilla, Cherry Cobbler and Tip Top Taupe, while the Soft Sky version uses Whisper White, Pear Pizzazz and Sahara Sand

Stampin' Up! UK Festive Fireplace Tealights

Measurements:

Card stock – 11 3/4 x 3″ (29 x 7.5 cm)

Score on the long side at 5″ (12.5 cm) rotate by 180 degrees and score 5″ again

Stamp your fireplace on both sides, lining the bottom edge up with the score lines you have just made, and cut out the centre of the fireplaces with a craft knife and metal ruler

Use Tear’n’Tape to attach vellum behind the fireplaces, and add mantle pieces, cats and any other decor items.

Form into a tent shape, rounding the corner with the Project Life by Stampin’ Up! corner punch, and joining the tops together with a staple.

Cover the staple with a bow, and insert your electric tealight


Stampin' Up! Uk at home class Wonderland vellum cardmaking workshop


Shop Now button-001Join my team button-001

To purchase any of the items featured in my projects please use the links above. To join my team of Stampin’ Friends select ‘Join My Team’ or send me a message!

Please support StampinByHannah, and join my Code Club, by using the Hostess code featured in the top right hand of my blog. For orders of over £150 please do not use this code, as you are entitled to your own Hostess benefits!

Sign up to my newsletter here – http://eepurl.com/2if59

Hannah Wilks

Stampin’ Up! UK Independent Demonstrator