CASing the Artisan Design Team!

Stampin' Up! UK Artisan Design Team Sprinkles of Life Happy Birthday CASE card

There are so many great things about being a Stampin’ Up!® demonstrator, one being the amazing about of inspiration – not only does each demonstrator regularly receive an Exclusive magazine filled with ideas and tips, but also the worldwide community of demonstrators share so many wonderful ideas through our Exclusive Social network – Stampin’ Connection. And then there is the Stampin’ Up! Artisan Design Team, a group of demonstrators hand-picked by Stampin’ Up! to provide inspiration to us and you!

I have been loving following the Design Team blog hops this year, and have taken a huge amount of inspiration from each and every one of them, but I have never copied a card – until now!

Stampin' Up! UK Artisan Design Team Sprinkles of Life Happy Birthday CASE card

I’ll let you follow the link to Alison’s original version of this card, from where I have taken my inspiration today.

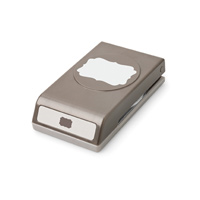
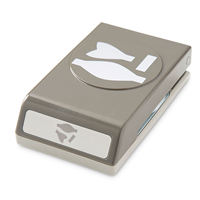
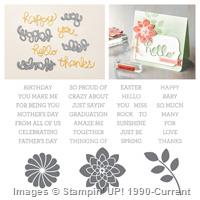
This card uses the wonderful Sprinkles of Life stamp set – this years Ronald MacDonald House Charities Stamp Set – on watercolour paper to create a lovely watercoloured look, and punched out with the coordinating Tree Builder Punch (without a tree in sight!)

The Ice Cream itself is watercoloured using Marina Mist ink, while the cone is in Hello Honey. And the Blushing Bride watercolour circle is a bit of a cheat! I have yet to invest in the Circle Thinlits dies (though they are way up there on my list) so this circle is actually hand cut, using the base of a refill bottle of Stampin’ Mist as a template!


Shop Now button-001Join my team button-001

To purchase any of the items featured in my projects please use the links above. To join my team of Stampin’ Friends select ‘Join My Team’ or send me a message!

Please support StampinByHannah, and join my Code Club, by using the Hostess code featured in the top right hand of my blog. For orders of over £150 please do not use this code, as you are entitled to your own Hostess benefits!

Sign up to my newsletter here – http://eepurl.com/2if59

Hannah Wilks

Stampin’ Up! UK Independent Demonstrator

12 Weeks of Christmas – Gift Card Gift Box!

Stampin' Up! UK Gift Card Gift Box video tutorial

Stampin' Up! 12 weeks of Christmas

Welcome to my Christmas project series this year! Each and every Sunday between now and the Big Day I be sharing a fun Christmas project; from cute gift packaging, to cards and even some home decor!

I love giving the gift of shopping (especially to awkward 15 year old girls! or boys who just want Games consoles!) but sticking a gift card into a card is super boring! Last year I made pop up gift card cards, but they just didn’t have the right amount of wow factor for me. I wanted a box, and that is what I have for you today.

Stampin' Up! UK Gift Card Gift Box video tutorial

Actually, this box is a really handy size for home-made chocolates, tealights or soaps too – just leave out the gift card insert. Check out the video tutorial for complete instructions, although the measurements can be found at the bottom of this post.

I’ve kept the decoration on this one fairly simple, with a piece of Designer Series Paper. Timeless Elegance on the Cherry Cobbler version, and Everyday Chic on the Real Red one. With some stamped and punched accent pieces (Don’t you just LOVE that bow!)

I’ve loving a bit of red this Christmas, but choosing between Real Red and Cherry Cobbler is proving to be a bit of a problem – they are both so beautiful! – so I have used them both here. The Cherry Cobbler Version is also made as a fold flat variation, to allow you to make a few of these and have them stored flat ready for assembly when needed.

Stampin' Up! UK Christmas gift card box

The gift card holder section of this box is an insert, punched with the Decorative Label punch to hold the card.

Measurements:

Box:

Card stock – 11 x 6″ (27.5 x 15 cm)

Score on the long side at 1, 5, 6 and 10″ (2.5, 12.5, 15, and 25 cm)

Score on the short side at 1 and 5″ (2.5 and 12.5 cm)

Insert:

Card stock – 10 x 4″ (25 x 10 cm)

Score on the long side at 3 and 7″ (7.5 x 17.5 cm)

Flip the cardstock over, and score again at 5″ (12.5 cm)

Designer Series Paper – 3 3/4 x 3 3/4″ (9.5 x 9.5 cm)


Shop Now button-001Join my team button-001

To purchase any of the items featured in my projects please use the links above. To join my team of Stampin’ Friends select ‘Join My Team’ or send me a message!

Please support StampinByHannah, and join my Code Club, by using the Hostess code featured in the top right hand of my blog. For orders of over £150 please do not use this code, as you are entitled to your own Hostess benefits!

Sign up to my newsletter here – http://eepurl.com/2if59

Hannah Wilks

Stampin’ Up! UK Independent Demonstrator

Sweet Lil’ Things Card

Stampin' Up! UK Sweet Lil Things Card

I have been loving playing with Designer Series Paper recently. Usually I buy it, and it sits in my craft room, looking very pretty but without any purpose! Stampin' Up! UK Sweet Lil Things Card

I think this paper is so cute, those foxes melt my heart. I have another project coming next week featuring those strawberries too (actually that’s where this card came from, that piece of Strawberry paper is an off cut! waste not want not!)

The stamp on this one comes from a Project Life by Stampin’ Up! set, Remember This, and it fits wonderfully into the Washi Label punch. Well, it does, but its a little long. No problem, just punch it out as normal and then insert the punched label back into the punch, line it up again and make it shorter – good hey?

What do you think?


Supply List

Built for Free Using:  My Stampin Blog


Shop Now button-001Join my team button-001To purchase any of the items featured in my projects please use the links above. To join my team of Stampin’ Friends select ‘Join My Team’ or send me a message!

Please support StampinByHannah, and join my Code Club, by using the Hostess code featured in the top right hand of my blog. For orders of over £150 please do not use this code, as you are entitled to your own Hostess benefits!

Sign up to my newsletter here – http://eepurl.com/2if59

Hannah Wilks

Stampin’ Up! UK Independent Demonstrator

Technique Tuesday | Faux In-lay Die Cutting

I have recently fallen head of heals in love with my Big Shot machine again. My Big Shot was one of those big ticket items I bought when I started crafting 5 years ago, and I have to admit it didn’t get the love and attention it deserved. However, since becoming a Stampin’ Up! demonstrator last year, the amount of use my Big Shot gets keeps increasing, and I am the first to admit that its starting to get tired through over use! I am in desperate need of new cutting plates since my current set are now sporting the ‘stained glass’ effect, and I am forever tightening the handle. I might have to buy it some Christmas presents this year!

Stampin' Up! UK Faux InLay Die Cutting Technique Tuesday

I really enjoy the In-lay die cutting technique, but trying to get all those pieces back into the paper can be a bit of a pain. I have recently tried a few different types of Faux In-Lay Die Cutting, using both the big shot AND punches!

There is a Big Shot add on that is a must for this one, the Premium Crease Pad. Designed to help form the creases when using Bigz Dies, the crease pad stops the die from cutting all the way through your card stock, leaving an embossed effect. This works on both detailed dies, like the Hello You Thinlits, and Butterflies Thinlit dies (love those!) as well as framelit dies, like the Flower Fayre dies that coordinated with the Flower Patch stamps

Stampin' Up! UK Faux In Lay Die cutting video tutorial

In-layed punching is super simple, and is really effective with stamped images, or Designer Series Paper. Keep your eyes on a blog for some more of this technique for sure!


Don’t forget to shop using the Code Club Code to receive some great FREE product!

JNUHVBUJ

I will be closing this order on the 30th September 2015


Supply List

Built for Free Using:  My Stampin Blog


Shop Now button-001Join my team button-001To purchase any of the items featured in my projects please use the links above. To join my team of Stampin’ Friends select ‘Join My Team’ or send me a message!

Please support StampinByHannah, and join my Code Club, by using the Hostess code featured in the top right hand of my blog. For orders of over £150 please do not use this code, as you are entitled to your own Hostess benefits!

Sign up to my newsletter here – http://eepurl.com/2if59

Hannah Wilks

Stampin’ Up! UK Independent Demonstrator

Gift Bag Punch Board Bag with Flap

Gift bag punch board project

I’m sorry, I know the title of this post is a bit of a mouthful. However, I’m at a bit of a loss of what else to call it!

I’m loving the new Gift Bag Punch Board! I think it’s proving to be almost as versatile as the Envelop Gift Board (that I truly adore!) and I have several projects and videos coming in the next few weeks!

Stampin' Up! UK Gift bag punch board

I am also sorry for my terrible bows! That satin ribbon is still my nemesis! however, the 1″ dotted lace trim (in the new In-Colours) tied like a dream! I think I need to watch some more bow tying tutorials to master that satin ribbon though!

Measurements:

Card stock (although, this would work just as well with Designer Series Paper) – 10″ x 8 1/4″ (25.5 x 21 cm) or a piece of A4 cut on the long side to 10″ (25.5 cm)

Follow the instructions on the Gift Bag punch board to make a Small bag

Once you have the basic gift bag punched and scored, turn your card stock around and repeat the steps in reverse order, so that you end up with symmetrical flaps on both sides

Fold the flaps down on one side and use the other side of the punch board to punch holes as described on the board

Stampin' Up! UK gift bag with flap

These bags are super simple to make, although I’m sure I have made it look trickier than it is in the video (lots of ‘bloopers’ recently!), why not grab your board and have a go, I would love to see what you create!

Pop over and post your creations on my Facebook page


Dont forget to shop using the Code Club Code to receive some great FREE product!

XEQGUA4P

I will be closing this order on the 30th July 2015


Shop Now button-001Join my team button-001

To purchase any of the items featured in my projects please use the links above. To join my team of Stampin’ Friends select ‘Join My Team’ or send me a message!

Please support StampinByHannah, and join my Code Club, by using the Hostess code featured in the top right hand of my blog. For orders of over £150 please do not use this code, as you are entitled to your own Hostess benefits!

Sign up to my newsletter here – http://eepurl.com/2if59

Hannah Wilks

Stampin’ Up! UK Independent Demonstrator

Triangular Box

Stampin' Up! easy box quick cute

I will be the first to admit 3D papercraft is not really my forte. I am a cardmaker and a stamper, however, I do dabble in box making, and I am particularly proud of this one!

Stampin' Up! easy box quick cute

I have two versions of this super cute box! The first is a card stock version – with Everyday Chic Designer Series Paper panels, and the other a DSP version using the Neutrals Designer Series Paper Stacks. Both hold up well, and are super easy to make too!

Measurements:

Cardstock or Designer Series Paper – 5 x 7 3/4″ (12.6 x 19.5 cm)

Score on the short side at 1 1/2, 3 and 4 1/2″ (3.8, 7.6 and 11.5 cm)

Score on the long side at 1 3/8″ (3.4 cm)

One the short side mark the centre of the middle square – with the skinny score line on the left  – mark at 2 3/4″ and with the skinny score line on the right at 2 1/4″ (7.3 and 5.8)

Use these marks to create the triangles that will become the opening flap lid and base of your box.

Designer Series Paper Panels Measure – 1 1/4 x 4 1/2″ (3 x 11.5 cm)


Dont forget to shop using the Code Club Code to receive some great FREE product!

XEQGUA4P

I will be closing this order on the 30th July 2015


Shop Now button-001Join my team button-001

To purchase any of the items featured in my projects please use the links above. To join my team of Stampin’ Friends select ‘Join My Team’ or send me a message!

Please support StampinByHannah, and join my Code Club, by using the Hostess code featured in the top right hand of my blog. For orders of over £150 please do not use this code, as you are entitled to your own Hostess benefits!

Sign up to my newsletter here – http://eepurl.com/2if59

Hannah Wilks

Stampin’ Up! UK Independent Demonstrator

Card Storage Box

Stampin' Up! UK card storage box cherry on top DSP

There are a stack of these floating around on Pinterest, but I just had to put my own spin on it. The Classic Card Box. I wanted a box specifically to hold cards and envelopes while they wait to go to customers. Did you know that I always send a ‘Thank You’ card when you place an order in my store? If you have ordered and haven’t received a card it may be that you have selected ‘No Contact’ drop me an email if you think I’ve missed you.

Stampin' Up! UK card storage box video tutorial

The first box uses Lost Lagoon card stock, and a piece of that lovely Neutrals Designer Series Paper Stack. Whereas the video version is in Bermuda Bay with a piece of Cherry on Top Designer Series Paper. I grabbed the Cherry on Top DSP during demonstrator Pre-Order, purely because it was available to me! Demonstrators get the chance to order from a sample of product before the big launch! and I have to say, looking at the pictures in the Catalogue, I’m not sure that I would have ordered if it hadn’t been in that pre-order selection. And I would have missed out! Because it is fabulous! Featuring Bermuda Bay, Cucumber Crush, Crushed Curry, Pool Party, Tip Top Taupe and Watermelon Wonder, and a collection of birthday themed papers with some great patterns; it would look fab as part of a Project Life album! I might even have to order a second pad!

Measurements:

Card stock – 12 x 8″ (30.5 x 20.5 cm)

Score on the long side at – 4 1/2, 5 3/4, 10 1/4, and 11 1/2″ (11.5, 14.5, 26, and 29 cm)

Score on the short side at – 1 1/4″ (3 cm) turn the card stock around and score in the wide section nearest the skinny flap at 1 1/2″ (4 cm)

Designer Series Paper – 4 1/4 x 5″ (11 X 12.5 cm)


Shop Now button-001Join my team button-001

To purchase any of the items featured in my projects please use the links above. To join my team of Stampin’ Friends select ‘Join My Team’ or send me a message!

Please support StampinByHannah by using the Hostess code featured in the top right hand of my blog. For orders of over £150 please do not use this code, as you are entitled to your own Hostess benefits!

Sign up to my newsletter here – http://eepurl.com/2if59

Hannah Wilks

Stampin’ Up! UK Independent Demonstrator


Week In Review – Classes and Workshops!

Stampin' Up! Weekly Deals Week in Review

Hey there folks! hope you are having a great week, its super busy around here this week as I prepare for my team training event on Saturday! I am so excited to share some great projects with my team, I’m sure I’ll show you what we made next week!

Weekly Deals

As always I’ll start my Week In Review with this weeks Weekly Deals, these items are available on a special offer for this week only! This deal is always available, but the products change from week to week, they are always worth checking out!

Stampin' Up! Weekly Deals Week in Review

This week not only have they selected 3 great stamp sets! (I am loving that Six-Sided Sampler, there are some awesome ideas for that one on Pinterest!), but also that punch is one of my favourites! It coordinates with the Crazy About You stamp set that I just adore! I can’t live without my Fast Fuse, I am sure it will be hitting my basket this week!

What’s on your next order?

Classes and Workshops

Have you seen that I have added an extra tab under ‘Classes and Workshops’? I thought it might be nice for you to see at a glance all the classes I currently have available for the following month!

There is now less that a week until booking closes for my July technique class. This month we are using An Open Heart to make 5 (yes, that’s more cards that usual!) gorgeous cards for all occasions.

Stampin' Up! UK July Technique Class 2015 An Open Heart

I am also offering two other classes in July; a kit class, this month making the wonderful Perpetual Birthday Calendar, and a Stamp-a-Stack – making 10 easy to make birthday cards in a flash!

Check out the full details under Classes and Workshops

What have I been up to?

Well, heaps actually! I worked at the day job last weekend, so have been spending the first few days of this week playing catch-up. I have a super exciting post coming on Saturday that I have been working really hard to sort out, which is now ready to go! eeek! I am so excited about that one! As well as planning for Team Training, and starting to get ahead with the blog ready for being away for 3 weeks!

Wedding plans are also really taking shape now, less that 7 weeks to go! We’ve been on a bit of a crash diet this week, trying to get ready for that bikini on the honeymoon! I must get back to the shop to try my dress on again. My Orders of Service are arriving today so I really should get on with making the covers, but I think I’ll save that for Sunday when the madness has calmed.

Before I go…

Just wanted to make a final reminder that the Stampin’ Up! joining offer runs until the 30th June – get yourself 2 FREE stamp sets when you sign up and pay just £99! I have a full post about it HERE or jump straight to the FAQ and SIGN UP!

Stampin' Up! UK Free stamps

Have a great week!


Shop Now button-001Join my team button-001

To purchase any of the items featured in my projects please use the links above. To join my team of Stampin’ Friends select ‘Join My Team’ or send me a message!

Please support StampinByHannah by using the Hostess code featured in the top right hand of my blog. For orders of over £150 please do not use this code, as you are entitled to your own Hostess benefits!

Sign up to my newsletter here – http://eepurl.com/2if59

Hannah Wilks

Stampin’ Up! UK Independent Demonstrator

Freshly Made Sketches #191 – It’s Your Birthday

Stampin' Up! UK Freshly Made Sketches Endless Birthday Wishes

Oh yes, It’s that time again! Playing along with Freshly Made Sketches again this week with #191!

Freshly Made Sketches 191

This sketch scared the pants off me! So much white space! I love white space, I really do, and most of my cards feature expanses of white space, but to see a sketch with so much white was just frightening!

Stampin' Up! UK Freshly Made Sketches Endless Birthday Wishes

I’ve had a stack of card stock sat out on my shelf this week, and the Real Red piece shouted at me for this card. As soon as I saw the two little strips on the sketch I knew I wanted to use some Designer Series Paper, so I pulled Typeset – I love this paper, its so pretty but I hadn’t used it on a card before! I know, its shocking, but putting DSP on cards is something I struggle with – I am a total stamper at heart.

Initially I grabbed Guy Greetings for my sentiment, but I quickly changed my mind to the lovely new Endless Birthday Wishes. I uses a ruler and pencil to draw a line across the piece of Very Vanilla card stock, and I stamped the sentiment in Real Red on the line. Sometimes I find this way to get a straight line quicker than pulling out my Stamp-a-ma-jig!

I almost thought the card was finished, but it just felt a little too clean! I’ve been playing with the Birthday Blossoms preparing for my Stamp-a-Stack for July, so pulled it again for these awesome flowers punched with the Pansy Punch.

Thanks for stopping by today, see you again soon

x


Shop Now button-001Join my team button-001

To purchase any of the items featured in my projects please use the links above. To join my team of Stampin’ Friends select ‘Join My Team’ or send me a message!

Please support StampinByHannah by using the Hostess code featured in the top right hand of my blog. For orders of over £150 please do not use this code, as you are entitled to your own Hostess benefits!

Sign up to my newsletter here – http://eepurl.com/2if59

Hannah Wilks

Stampin’ Up! UK Independent Demonstrator

How to use the Stampin’ Up! Gift Bag Punch Board

Stampin' Up! UK Gift bag punch board tutorial

I love a simple gift bag, and with the Gift Bag Punch Board Stampin’ Up!® has made making super cute bags super easy! I know I will be using this punch board lots in the coming months (and even more around Christmas!) but I wanted to give you a quick guide to using the board before we drive into more complex projects with it!

How To:

The gift box punch board has the instructions printed onto it so you can refer back at each use, but I thought I would share some tips.

The punch board includes a great scoring tool / bone folder – always store it back into the board so you don’t loose it! It is so easy to loose a great tool like this in your crafty mess

The width of the paper or card stock is important: a small gift back uses 10″ (25.4 cm) wide DSP, and the S line on the board. A medium sized bag uses 11″ (27.9 cm) wide DSP and the M line on the board. A Large bag uses 12″ (30.5 cm) wide DSP and the L line on the board. The length of the DSP (or card stock) is not important, and just varies the height of the final bag, the board suggests using lengths between 4″ (10 cm) and 12″ (30.5 cm) In the video the card stock that I used was 10 x 6″ (25.4 x 15 cm)

The punch may be a little stiff, use the board on a table and stand to punch.

Have fun!


Shop Now button-001Join my team button-001

To purchase any of the items featured in my projects please use the links above. To join my team of Stampin’ Friends select ‘Join My Team’ or send me a message!

Please support StampinByHannah by using the Hostess code featured in the top right hand of my blog. For orders of over £150 please do not use this code, as you are entitled to your own Hostess benefits!

Sign up to my newsletter here – http://eepurl.com/2if59

Hannah Wilks

Stampin’ Up! UK Independent Demonstrator