Love Hearts Week | Masked Jar of Love Gift Bag

Love Hearts week Valentines papercraft using Jar of Love from Stampin' Up! UK

Love Hearts sweets Video tutorials

Oh I have been so looking forward to this week! A whole week of projects and videos featuring the wonders that are Love Hearts! Yay!

Love Hearts week Valentines papercraft using Jar of Love from Stampin' Up! UK

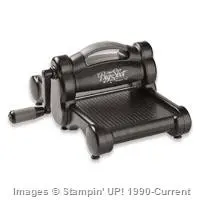
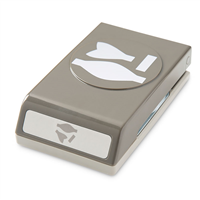
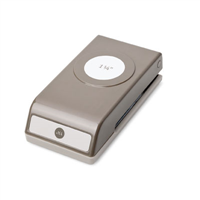
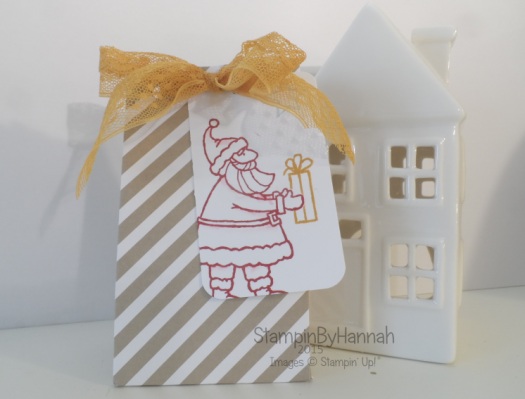
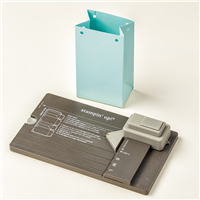
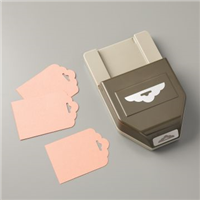
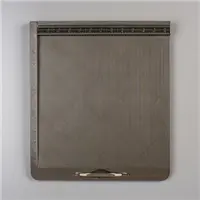
How cute are is this bag! and it is super easy to make too – all thanks the the Gift Bag Punch Board.

Measurements:

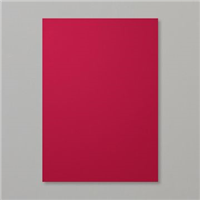
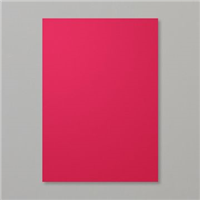
Card stock – 10 x 4 1/8″ (25.4 x 10.5 cm)

Make the gift bag following the instructions for the S sized bag.

Whisper White – 2  1/2 x 2 1/4 (6.3 x 5.4 cm)

Gift Bag Punch Board Gift Bag for Love Hearts using Jar of Love from Stampin' Up! UK

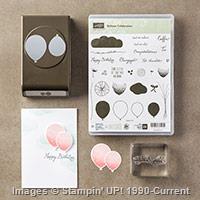
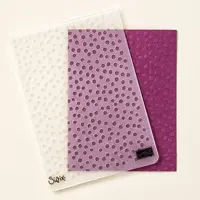
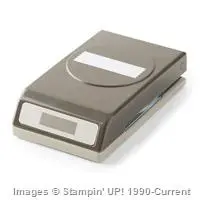
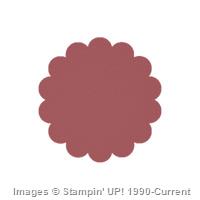
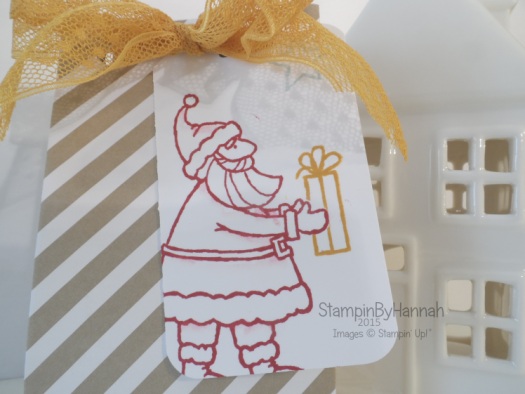
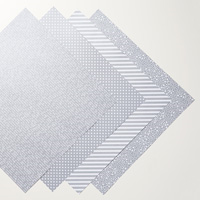
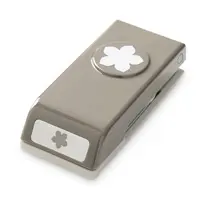
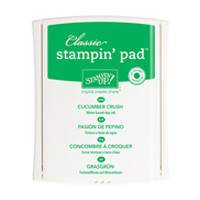
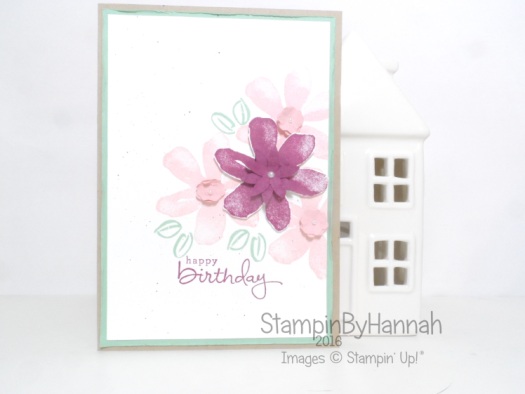
The heart mask is super easy to create too, I used the sweetheart punch to punch out a piece of Grid paper to use as a mask. Then use stamps (I used the small heart from Jar of Love) to stamp around the heart in Blushing Bride, Calypso Coral and Watermelon Wonder. Lovely!


Question of the Day: What is your favourite Valentines sweet treat?

I’m a sucker for anything chocolate-y, My Mr. usually buys me Thorntons for any occasion, although I dread to think what he is buying me this year seeing as we are both on a major diet 🙁


Sale-a-bration from Stampin' Up! UK


Product List


Shop Stampin' Up! UK Teesside North East Stockton on Tees

Joining Stampin' Up! UK Starter Kit

To purchase any of the items featured in my projects please use the links above. To join my team of Stampin’ Friends select ‘Join My Team’ or send me a message!

Please support StampinByHannah, and enter MK42UXHG. For orders of over £150 please do not use this code, as you are entitled to your own Hostess benefits!

Sign up to my newsletter here – http://eepurl.com/2if59

Hannah McCurley

Stampin’ Up! UK Independent Demonstrator

Global Design Project 057 – Colour Challenge

Global Design Project Colour Challenge using Garden in Bloom from Stampin' Up! UK

Hello! I am loving the colour challenge over at the Global Design Project this week; a great combination of Rich Razzleberry, Blushing Bride and Mint Macaron

gdp057

Now, you guys no how much I love a bit of white space, and so White always features on my projects, but this time I just couldn’t picture using one of these colours for my card base either; so I have added a touch of Crumb Cake to ground my design. Now, I’m sure that adding a neutral was allowed by the GDP, but now I can’t find it in the guidelines, oh well! Here is my card anyway

Global Design Project Colour Challenge using Garden in Bloom from Stampin' Up! UK

I’m still holding onto the last moments of summer, even though it is getting distinctly cold around here, I’m just not ready for Winter and Christmas yet! And this colour combination felt summer-y to me, so I grabbed for Garden in Bloom and made a summer-y Birthday card!

The Rich Razzleberry flower was stamped separately and fussy cut, before being added to the card with a dimensional.

The sentiment is from the Endless Birthday Wishes stamp set, I’m still loving the combination of those fonts, so pretty.

Global Design Project 057 using Garden in Bloom from Stampin' Up! UK

The flower centres are super easy to do too – punched out using the Blossom Builder Punch, and then I used to Faux Suede technique to create these cute dimensional flowers (video on that one coming soon!)

Thanks for visiting StampinByHannah today, hope to see you here again soon!


Product List


Shop Now button-001Join my team button-001

To purchase any of the items featured in my projects please use the links above. To join my team of Stampin’ Friends select ‘Join My Team’ or send me a message!

Please support StampinByHannah, and join my Code Club, by using the Hostess code featured in the top right hand of my blog. For orders of over £150 please do not use this code, as you are entitled to your own Hostess benefits!

Sign up to my newsletter here – http://eepurl.com/2if59

Hannah McCurley

Stampin’ Up! UK Independent Demonstrator

Sprinkles of Life Birthday Card

Sprinkles of Life Playful Backgrounds Birthday card using Stampin' Up! UK products

Making Birthday cards for our Young Adults are some of the trickiest cards I make all year, and it’s only made harder when that person is a boy! My brother-in-law turned 15 over the weekend, and I’m sure this card had no impact on his day, but I enjoyed making it anyway!Sprinkles of Life Playful Backgrounds Birthday card using Stampin' Up! UK products

This card uses Sprinkles of Life, and the coordinating Tree Builder Punch, with the ice-cream stamped in Tip Top Taupe, Chocolate Chip, So Saffron and Flirty Flamingo – Neapolitan anyone?!

Sprinkles of Life Playful Backgrounds Birthday card using Stampin' Up! UK products

I put this card together, but it was a little bit plain. So I added a background stamped using Playful Backgrounds in Soft Sky.


Product List


Shop Now button-001Join my team button-001

To purchase any of the items featured in my projects please use the links above. To join my team of Stampin’ Friends select ‘Join My Team’ or send me a message!

Please support StampinByHannah, and join my Code Club, by using the Hostess code featured in the top right hand of my blog. For orders of over £150 please do not use this code, as you are entitled to your own Hostess benefits!

Sign up to my newsletter here – http://eepurl.com/2if59

Hannah McCurley

Stampin’ Up! UK Independent Demonstrator

Today is a Perfect Day …

Perfect Day Wedding Congratulations card using Bunch of Blossoms from Stampin' Up! UK

Ok, so, it may be raining (or not, I’m writing this in advance as usual!) but I have the Perfect congratulations card for you today!

I am just loving the new Bunch of Blossoms stamp set and coordinating punch. I have mentioned this many many times but one of the things that made me fall in LOVE with Stampin’ Up! is the coordinating products; the stamps with matching dies and punches, the sentiments that fit perfectly into the punches, the ribbon / embellishments / card stock / Designer Series Paper that match the ink colours. Fabulous! And this card is one of those that uses a Stamp / Punch bundle

Perfect Day Wedding Congratulations card using Bunch of Blossoms from Stampin' Up! UK
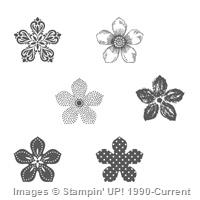
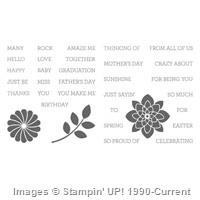
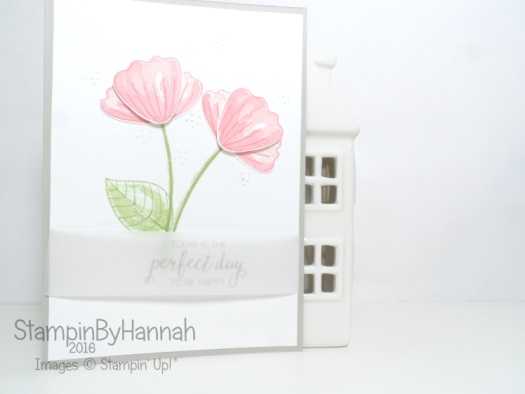
This great stamp set not only has a coordinating punch, but uses 2-step stamping to create this pretty faux-watercolour look. I’m a sucker for a good technique, and as you know I LOVE watercolour, but having stamps to do all the hard work for you is simply awesome!

Here I have stamped the flowers in Blushing Bride and Flirty Flamingo, while the leaves are Pear Pizzazz and Old Olive.

Punch Stamp Bunch of Blossoms Stampin' Up! UKI think that my favourite part of this card though is the heat embossed sentiment on Vellum. This soft look is created by stamping with Smoky Slate onto the Vellum, and because the ink dries very slowly on the Vellum you have time to add clear embossing powder and heat setting it! So pretty


Don’t forget to shop using the Code Club Code to receive some great FREE product! 

9ADF6XSX

I will be closing this order on the 30th July 2016


Product List


Shop Now button-001Join my team button-001

To purchase any of the items featured in my projects please use the links above. To join my team of Stampin’ Friends select ‘Join My Team’ or send me a message!

Please support StampinByHannah, and join my Code Club, by using the Hostess code featured in the top right hand of my blog. For orders of over £150 please do not use this code, as you are entitled to your own Hostess benefits!

Sign up to my newsletter here – http://eepurl.com/2if59

Hannah McCurley

Stampin’ Up! UK Independent Demonstrator

Balloon Birthdays

Stampin' Up! UK Balloon birthday card

I’m making heaps of birthday cards at the moment – have you seen the awesome hashtag on social media? #imbringingbirthdaysback – its a great idea started by the lovely Shannon West from Stampin’ Up! home office in Utah, we don’t send enough birthday cards anymore, its just too easy to sent a birthday message when facebook reminds us its someone’s birthday – but I’m determined to get out of that habit! I am aiming to get myself organised and a stack of cards made this week so they are ready to write and send.

Stampin' Up! UK Balloon birthday card

This card really pops! Melon Mambo and Pink Pirouette – BOOM!

I’m loving the Balloon Bouquet punch, and used it lots here to get this fabulous balloons. I sponged one side of all the balloons to create the illusion of dimension and added them to a piece of Pink Pirouette card stock embossed with the decorative dots embossing folder.

Stampin' Up! UK Balloon Celebration Birthday card

I wasn’t sure about the ‘strings’ on these balloons, I’m still not sure if a Basic Grey or Smoky Slate marker might have been a better choice than black – never mind it is what it is. This card was made specially for a nursing home that I donate a lot of birthday cards to, they love a simple card without too much detail and bright coloured cards are loved by their residents with Dementia.


Don’t forget to shop using the Code Club Code to receive some great FREE product!

NCWC9FM6

I will be closing this order on the 23rd February 2016


Shop Now button-001Join my team button-001

To purchase any of the items featured in my projects please use the links above. To join my team of Stampin’ Friends select ‘Join My Team’ or send me a message!

Please support StampinByHannah, and join my Code Club, by using the Hostess code featured in the top right hand of my blog. For orders of over £150 please do not use this code, as you are entitled to your own Hostess benefits!

Sign up to my newsletter here – http://eepurl.com/2if59

Hannah McCurley

Stampin’ Up! UK Independent Demonstrator

Simply Sketched Saturday Challenge #3

Stampin' Up! UK Simple Sketched Challenge Season of Cheer

Stampin' Up! Sketch Challenge

Thank you for joining us for another Simply Sketched Saturday Challenge! We’re so excited to be sharing this hop with you.  The products used are all available in the current Annual, or seasonal, Stampin’ Up!® Catalogues*.  Simply use the buttons at the bottom of the post to keep hopping!


Its time for another Simply Sketched Saturday Challenge! and another sketch which caused my great difficulty!

Simply Sketched Saturday Stampin Up! Challenge

I very rarely use ribbon on cards, and tying a big bow on the front of a card definitely isn’t me! I did consider changing the bow for a different image, but then couldn’t think of anything to change it to! But I still didn’t want to use ribbon, well then Stampin’ Up!® came to my rescue with the Bow Builder Punch!

Stampin' Up! UK Simple Sketched Challenge Season of Cheer

There are some retiring products on this card, and I really hope you can grab them before they sell out! I’ve LOVED used the Season of Cheer Designer Series Paper featured on the bottom half of this card, its a perfect blend of colours and watercolour effect for the perfect Christmas feel.

The sentiment comes from the Festive Fireside stamp set, also on the retiring list, stamped in Cherry Cobbler, surrounded by a Wreath of Mossy Meadow

Before I go, I have a few Bow Builder Punch Tips!

  • punch all your pieces first (that’s two punches!) and curl them with your bone folder to prevent creases in your bow
  • stick your bow together with glue dots, but attach the completed bow to your project with Tombow Liquid Glue. I also find that my bow holds together better if I add some Tombow to the underside of the bow before I stick it down
  • Stampin’ Up!® have a great video on the assembling the bow on their YouTube channel

Simply Sketched Next

Simply Sketched Previous


Shop Now button-001Join my team button-001

To purchase any of the items featured in my projects please use the links above. To join my team of Stampin’ Friends select ‘Join My Team’ or send me a message!

Please support StampinByHannah, and join my Code Club, by using the Hostess code featured in the top right hand of my blog. For orders of over £150 please do not use this code, as you are entitled to your own Hostess benefits!

Sign up to my newsletter here – http://eepurl.com/2if59

Hannah McCurley

Stampin’ Up! UK Independent Demonstrator

12 Weeks of Christmas | Santa Punch Art Tag

Stampin' Up! UK Santa punch art

Stampin' Up! 12 weeks of Christmas

I will be the first to admit, punch art isn’t usually my thing, and this is totally CASe’d from another blogger, but I just loved this tag idea.

Stampin' Up! UK Santa punch art

This cute Santa is  made using a small selection of punched and a few scraps of card stock. I have two versions, on where Santa has a full head of hair, and one where he has a little bald spot going on. I’m swaying more towards baldy Santa, but I love them both!


Measurements:

Card stock – 2 x 8 1/2″ (5 x 21.5 cm), folded in half

Stampin' Up! UK Punch art Christmas tag


Shop Now button-001Join my team button-001

To purchase any of the items featured in my projects please use the links above. To join my team of Stampin’ Friends select ‘Join My Team’ or send me a message!

Please support StampinByHannah, and join my Code Club, by using the Hostess code featured in the top right hand of my blog. For orders of over £150 please do not use this code, as you are entitled to your own Hostess benefits!

Sign up to my newsletter here – http://eepurl.com/2if59

Hannah McCurley

Stampin’ Up! UK Independent Demonstrator

On Stage Live | Team Gift

Stampin' Up! On Stage Live team gift

Hello!

As your reading this I am in Brussels at this years On Stage Live event with Stampin’ Up!®. I have been looking forward to this since last November! I love attending Stampin’ Up!® events, they really know how to throw a great party!

I am posting heaps of pictures of my travels on Instagram and Facebook, so pop over and take a look

Stampin' Up! UK On Stage Live swaps

I’ll be sharing my main swap tomorrow, but today I thought I’d share my little team gift. Us demonstrators love to share, and swap ideas and inspiration. I’ve made a few of these simple gift bags using the Gift Bag Punch Board for some of the girls in the same team as me (plus my wonderful upline Pootles!)

They just contain a few mint sweeties (all the excitement, we are going to NEED some extra sugar) and are super simple to put together, In actual fact I cut and scored these at home, ready for a bit of hotel room crafting on arrival in Brussels – don’t think these would travel well.

Stampin' Up! On Stage Live team gift

The bags themselves are all made from the Neutrals Designer Series Paper stack, and tied with a piece of Delightful Dijon (Gold!) Dotty Lace Trim. The tag is a piece of Whisper White cut to 2 x 3 1/2″ punched with the Scalloped Tag Topper Punch.  The bag is the small sized gift bag, as the instructions on the Gift Bag Punch Board suggest, with Designer Series Paper cut to 6 x 10″ (15 x 25.5 cm)

I’ve pulled out my favourite Christmas stamp set again – Santa’s Gifts – and stamped Santa in Cherry Cobbler, with a Delightful Dijon present, and Soft Sky Star.


Shop Now button-001Join my team button-001

To purchase any of the items featured in my projects please use the links above. To join my team of Stampin’ Friends select ‘Join My Team’ or send me a message!

Please support StampinByHannah, and join my Code Club, by using the Hostess code featured in the top right hand of my blog. For orders of over £150 please do not use this code, as you are entitled to your own Hostess benefits!

Sign up to my newsletter here – http://eepurl.com/2if59

Hannah McCurley

Stampin’ Up! UK Independent Demonstrator

Vaseline Gift Box

Stampin' Up! UK box tutorials

I’ve been thinking a lot recently about pillow gifts and table favours, not sure if that’s because I’m still in Wedding mode or that I’m preparing for Christmas, but it means that when I’m shopping I’m constantly looking at little bits and bobs and thinking of ways to make them pretty!

Stampin' Up! UK box tutorials

These both hold Vaseline Lip Therapy Lip Balm tins, in coordinating colours of course!

I’m still loving the Cherry on Top Designer Series Paper stack, the 6 x 6″ size is so convenient for card making and little projects like this one, particularly when you pair it with the coordinating Card Stock pack or Washi Tape.

I’ve made this style of box before. I love the pizza box styling, its so simple to put together. If you are struggling to open the box you can also add a little notch in the front edge with a 1″ circle punch. This one is finished with the Petite Petals stamps and punch combo, and a couple of Itty Bitty accents flowers in the same colour.

Stajmpin' Up! UK Vaseline box video tutorial

Measurements:

Card stock – 6 1/2 x 3 5/8″ (17 x 9.5 cm)

Score on the long side at  3/4, 2 7/8, 3 5/8, and 5 3/4″ (2, 7.5, 9.5, 14.5 cm)

Score on the short side at 3/4 and 2 7/8″ (2 and 7.5 cm)

Designer Series Paper measures 1 7/8 x 1 7/8″ (5 x 5 cm)


Stampin' Up! Starter Kit offer


Shop Now button-001Join my team button-001

To purchase any of the items featured in my projects please use the links above. To join my team of Stampin’ Friends select ‘Join My Team’ or send me a message!

Please support StampinByHannah, and join my Code Club, by using the Hostess code featured in the top right hand of my blog. For orders of over £150 please do not use this code, as you are entitled to your own Hostess benefits!

Sign up to my newsletter here – http://eepurl.com/2if59

Hannah Wilks

Stampin’ Up! UK Independent Demonstrator


Technique Tuesday | Using the Precision Base Plate

Stampin' Up! Butterfly thinlit Precision base plate how to

One of the things in the Autumn / Winter catalogue I was looking forward to more than anything else was the Precision Base Plate. I love cutting intricate dies with my Big Shot; the Butterfly thinlits or those stunning Delicate Ornaments, but getting all those little pieces out is a pain and needing to run things through the machine several time to ensure a good cut is annoying – but no more! Stampin' Up! UK Die cutting video tutorial

The Precision Base Plate is a steel plate deigned to replace one of your Clear Cutting Plates when using intricate dies. It works by providing a super hard surface for your dies to work against, giving a crisper, cleaner cut. I have to say though, I wouldn’t use this plate all the time – it just isn’t required for basic shapes, but the difference it makes on detailed dies makes this a must have accessory for my Big Shot Machine

This card was super easy to make with the Big Shot and precision base plate, the video is only 8 minutes and that’s with all my waffle! The Designer Series Paper on both cards was the inspiration for the colour schemes here, the Bohemian Designer Series Paper pack features some pretty loud patterns but the reverse sides are lovely and delicate with some great tone on tone looks.

Stampin' Up! Butterfly thinlit Precision base plate how to

Precision Base Plate top tips:

  • Use the Precision plate with your Multi-purpose platform fully closed, just as you would for thinlits dies and Clear plates
  • Make sure you are cutting on the correct side – the label should be face down (not showing) and you cut into the Black side of the plate
  • It may take a little more force to get this plate through your Big Shot, but DO NOT force it! check your sandwich and try again
  • This plate replaced a Clear Cutting Plate in your standard die sandwich – Multi-purpose Platform (on tab 2), Precision Base Plate (label side DOWN), card stock, die, Clear Cutting Plate

StampinByHannah Parties at home Teesside Stockton on Tees Craft Cardmaking Classes


Shop Now button-001Join my team button-001

To purchase any of the items featured in my projects please use the links above. To join my team of Stampin’ Friends select ‘Join My Team’ or send me a message!

Please support StampinByHannah, and join my Code Club, by using the Hostess code featured in the top right hand of my blog. For orders of over £150 please do not use this code, as you are entitled to your own Hostess benefits!

Sign up to my newsletter here – http://eepurl.com/2if59

Hannah Wilks

Stampin’ Up! UK Independent Demonstrator