How to use the Stampin’ Up! Gift Bag Punch Board

Stampin' Up! UK Gift bag punch board tutorial

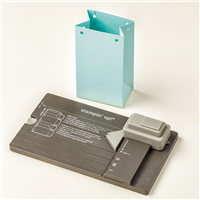
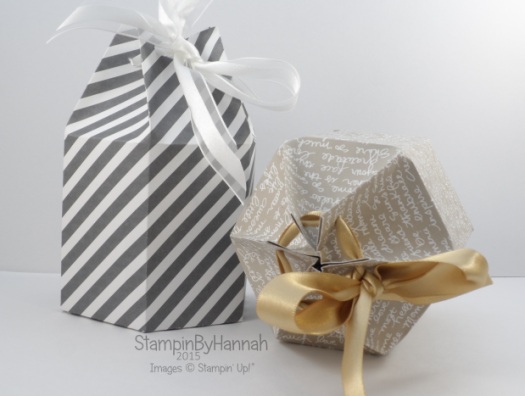
I love a simple gift bag, and with the Gift Bag Punch Board Stampin’ Up!® has made making super cute bags super easy! I know I will be using this punch board lots in the coming months (and even more around Christmas!) but I wanted to give you a quick guide to using the board before we drive into more complex projects with it!

How To:

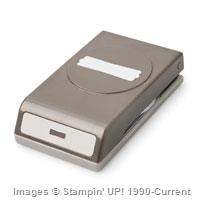
The gift box punch board has the instructions printed onto it so you can refer back at each use, but I thought I would share some tips.

The punch board includes a great scoring tool / bone folder – always store it back into the board so you don’t loose it! It is so easy to loose a great tool like this in your crafty mess

The width of the paper or card stock is important: a small gift back uses 10″ (25.4 cm) wide DSP, and the S line on the board. A medium sized bag uses 11″ (27.9 cm) wide DSP and the M line on the board. A Large bag uses 12″ (30.5 cm) wide DSP and the L line on the board. The length of the DSP (or card stock) is not important, and just varies the height of the final bag, the board suggests using lengths between 4″ (10 cm) and 12″ (30.5 cm) In the video the card stock that I used was 10 x 6″ (25.4 x 15 cm)

The punch may be a little stiff, use the board on a table and stand to punch.

Have fun!


Shop Now button-001Join my team button-001

To purchase any of the items featured in my projects please use the links above. To join my team of Stampin’ Friends select ‘Join My Team’ or send me a message!

Please support StampinByHannah by using the Hostess code featured in the top right hand of my blog. For orders of over £150 please do not use this code, as you are entitled to your own Hostess benefits!

Sign up to my newsletter here – http://eepurl.com/2if59

Hannah Wilks

Stampin’ Up! UK Independent Demonstrator


Hexagonal Gift Bag

Stampin' Up! UK candle gift designer series paper stack

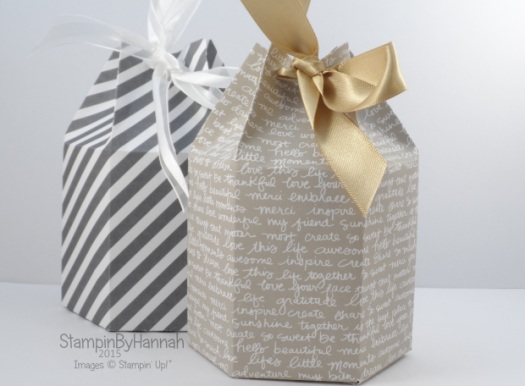
These candles fell into my bag a few months ago during a mad dash around Ikea. I love Ikea candles, and this scent in particular is one of my very favourites – Vanilla Ice Cream, Yum! I often give them as gifts, but trying to package them is always a little awkward. Or it was, how cute is this gift bag!

Hexagonal gift bag


I adore the new Designer Series Paper Colour Collections, these use the Neutrals in Basic Grey and Sahara Sand. The collections have been re-configured this year, changing the patterns, so now each collection contains 40 sheets, 2 of each of 2 double sided designs in 10 colours (or 4 of each of 2 double-sided designs in 5 colours for the In-Colour collections). The designs are stunning; a diagonal stripe, a little floral print, a bold polka dot, and my favourite a wonderful script. They are fab!

Stampin' Up! UK candle gift designer series paper stackThese bags are quick and easy to make, as well as holding a good amount of whatever you choose. They are strong too, these both contain candles, without any danger of the bottom giving way! The base of the bag has 6 layers of DSP, making them super strong.

Measurements:

Designer Series Paper, or card stock; 11 x 8″ (28 x 20.5 cm)

Score on the long side at: 1 3/4, 3 1/2, 5 1/4, 7, 8 3/4 and 10 1/2″ (4.5, 9, 13.5, 18, 22.5 and 27 cm)

Score on the side side at: 3 and 6″ (7.5 and 15 cm)

Fold and burnish all the score lines

Holding the DSP in the landscape direction, with the fatter bit at the bottom, cut off the skinny end section, and cut up each one of the score lines to the first horizontal score.

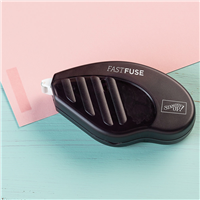
Apply Fast Fuse to the skinny end section and fold to create a tube. This seam with be the back of the bag. Then apply Fast Fuse to 3 of the bottom sections and fold each section in to form the base.

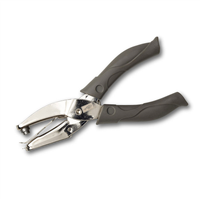
Turn the bag so it is the right way up, pinch in the top, and make holes with the 1/8″ handheld punch.

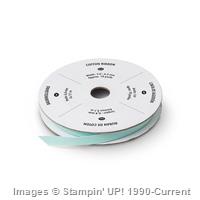
Feed your ribbon through the holes, starting from the front of the bag and working your way around

Finish with a bow


Shop Now button-001Join my team button-001

To purchase any of the items featured in my projects please use the links above. To join my team of Stampin’ Friends select ‘Join My Team’ or send me a message!

Please support StampinByHannah by using the Hostess code featured in the top right hand of my blog. For orders of over £150 please do not use this code, as you are entitled to your own Hostess benefits!

Sign up to my newsletter here – http://eepurl.com/2if59

Hannah Wilks

Stampin’ Up! UK Independent Demonstrator

Wedding Week – Wedding Favours

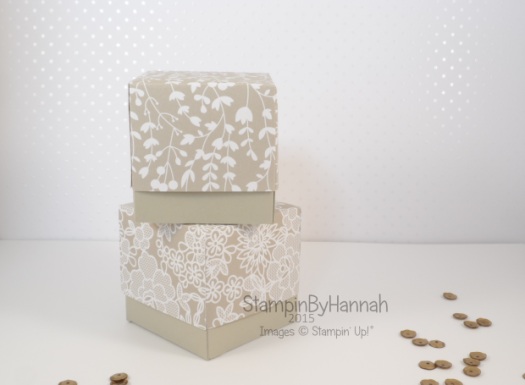
Stampin' Up! UK lided box video tutorial

I have recently put together my wedding favours, and I wish I could say that these are they, but they’re not. They are super cute little milk cartons, and I absolutely love them, but they are not these.

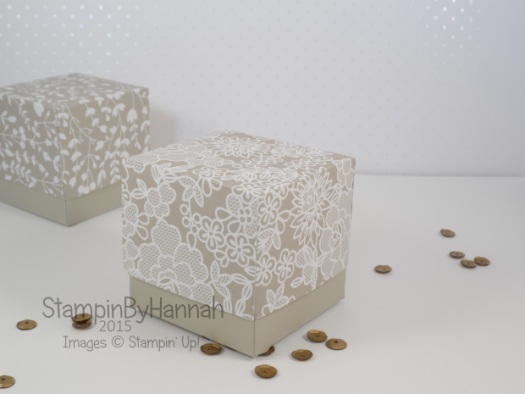
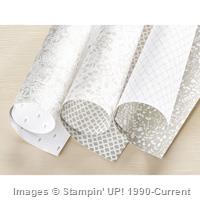
These would be perfect as Wedding Favours, and would hold a good amount of sugared almonds or other confectionery. I have once again pulled out the Something Borrowed Designer Series Paper – this paper retires on the 2nd June (that’s next Tuesday!) so grab it now while you still have the chance.

Stampin' Up! UK wedding favours something borrowed designer series paper

I love a monotone look for weddings, simple colours to make sure people are looking in the right place i.e.: at the bride and groom! and this paper is just perfect for that, detailed enough to be stunning, but not too complex that it shouts too loud.

Measurements:

Base – Card stock = 6 x 6 ” (15 x 15 cm)

score on all 4 sides at 2 ” (5 cm)

Lid – Designer Series Paper = 5 1/16 x 5 1/16″ (12.8 x 12.8 cm)

score on all 4 side at 1 1/2″ (3.8 cm)

Stampin' Up! UK lided box video tutorial


Shop Now button-001Join my team button-001

To purchase any of the items featured in my projects please use the links above. To join my team of Stampin’ Friends select ‘Join My Team’ or send me a message!

Please support StampinByHannah by using the Hostess code featured in the top right hand of my blog. For orders of over £150 please do not use this code, as you are entitled to your own Hostess benefits!

Sign up to my newsletter here – http://eepurl.com/2if59

Hannah Wilks

Stampin’ Up! UK Independent Demonstrator
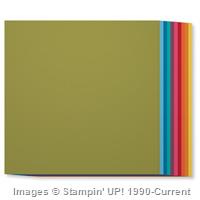
Wedding Week – Create your own Envelopes

Stampin' Up! UK Envelope Punch Board Something Borrowed

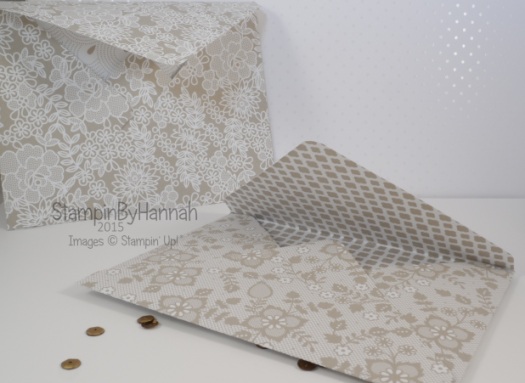
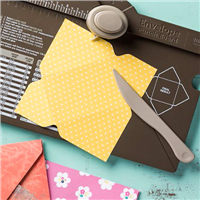
I think the Envelope Punch Board is awesome! I really do, it’s such a great tool and I use it all the time; not only for envelopes but boxes and bows too! I was putting together the blog posts for this week, and realised how perfect it would be to have all your wedding stationary completely coordinating – even down to the envelopes. And then I thought, we have the most perfect tool for that! So, here we are; How to Make an Envelope using the Envelope Punch Board!

Stampin' Up! UK Envelope Punch Board Something Borrowed

What great Designer Series Paper to work with too, I have been loving this Sahara Sand / Whisper White combination recently, and I think it makes great neutral wedding stationary. In fact I have some of this paper hoarded away ready for the Wedding Album! (Its getting rather close now!)

Measurements:

To create an envelope perfectly sized for a A6 card, you will need a piece of Designer Series Paper that measures 8 1/4 x 8 1/4″.

Now, I know, normally I try to give you both metric and imperial measurements, however, when your using the Envelope Punch Board, the imperial measurements are much easier to see and use, so this time, I’m sticking with inches!

Insert you Designer Series Paper into your punch board punch, and line the left hand side of the paper up with the 3 5/8″ mark.

Punch and score using the scoring tool provided.

Turn your Designer Series Paper a quarter turn and line the previously made score line up with the guide on the punch, and punch and score again. Repeat this on all 4 sides.

Turn your Envelope Punch Board around and use the reverse side of the punch to round the corners of your envelope.

Fold and burnish your score lines using the side of the scoring tool.

Use your adhesive of choice to stick your envelope together, using a glue dot to secure the top flap (once your handmade card is inside, of course!)


Shop Now button-001Join my team button-001

To purchase any of the items featured in my projects please use the links above. To join my team of Stampin’ Friends select ‘Join My Team’ or send me a message!

Please support StampinByHannah by using the Hostess code featured in the top right hand of my blog. For orders of over £150 please do not use this code, as you are entitled to your own Hostess benefits!

Sign up to my newsletter here – http://eepurl.com/2if59

Hannah Wilks

Stampin’ Up! UK Independent Demonstrator
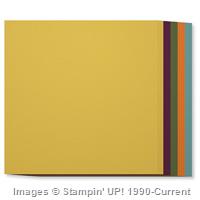
 

Freshly Made Sketches #187 – Just For You!

Hello!

I am so sorry I missed my challenge Saturday last week, but I was at Stampin’ Up! Regional Training (having heaps of fun!) and in my excitement I completely forgot! Shocking I know, But I am back this week playing along with Freshly Made Sketches #187, and this fabulous sketch:

FMS Final 187-001


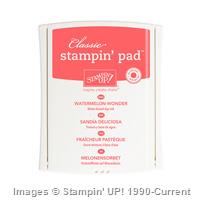
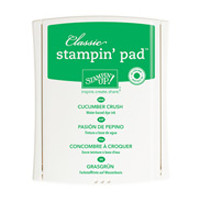
I love this sketch, it really pushed me. I’ve been stuck in a bit of a craft rut recently, or, as my darling mother said the other day “your cards are always muted!” (thanks mother!), and so I grabbed for a set of super bright colours; the new In Colours Watermelon Wonder and Cucumber Crush!

I will admit to being a little scared of the brightness of these two; Watermelon Wonder is an almost Neon Corally Orange, while Cucumber Crush is a vivid green, definitely not colours I would have chosen of my own accord, but absolutely one of the reasons I love Stampin’ Up! and playing along with challenges, so….

The Card!

Stampin' Up! UK Freshly Made Sketches Cherries on top

I decided seeing as I was using new colours, I might as well go the whole hog and use new stamps and Designer Series Paper too!

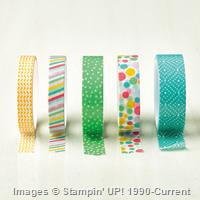
The Designer Series Paper is Cherry on Top; and is a fabulous mix of bright colours and birthday prints, paired with the coordinating Washi Tape. While the stamp set is called You’re So Sweet – I love this set, its great for adding a special something to a present, or using as a card accent, and it coordinates (and is available bundled with….) the Mini Treat Bag Thinlits dies! Awesome!

The heart is punched from Watermelon Wonder card stock and adhered with half a dimensional before I covered it in Crystal Effects for a super shiny look.

All these products will be available to purchase from the 2nd June (or now if you choose to become a demonstrator!). I will be sending catalogues this coming week, to get your FREE copy (UK only – sorry) fill in this form!

speak again soon


Shop Now button-001Join my team button-001

To purchase any of the items featured in my projects please use the links above. To join my team of Stampin’ Friends select ‘Join My Team’ or send me a message!

Please support StampinByHannah by using the Hostess code featured in the top right hand of my blog. For orders of over £150 please do not use this code, as you are entitled to your own Hostess benefits!

Sign up to my newsletter here – http://eepurl.com/2if59

Hannah Wilks

Stampin’ Up! UK Independent Demonstrator
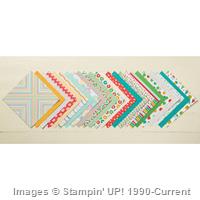
Stampin’ Up! UK Regional Training Swaps

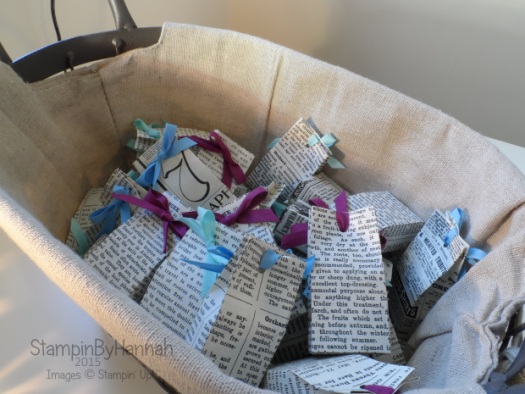
One of the many many great things about being a demonstrator for Stampin’ Up! is the opportunity to attend Stampin’ Up! organised events. This past weekend I drove the 180+ miles to Telford for this years demonstrator training event. I will share the full details with your soon (well, as much as I can!) but for now, I thought I would share what I made for my Swaps!

Stampin' Up! UK Telford swaps 2015

Swapping is another great part of being a demonstrator. Each time we get together we make things to share; they are a great way of getting inspiration when you’ve lost your crafty mojo, and are a wonderful way of meeting new people. I found some cute little chocolates during a recent dash to Home Bargains (there’s one at the end of my road, perfect for those chocolate emergencies! they sell other stuff to, but chocolate is my main reason for a visit!) and knew they would have to be part of my swap!

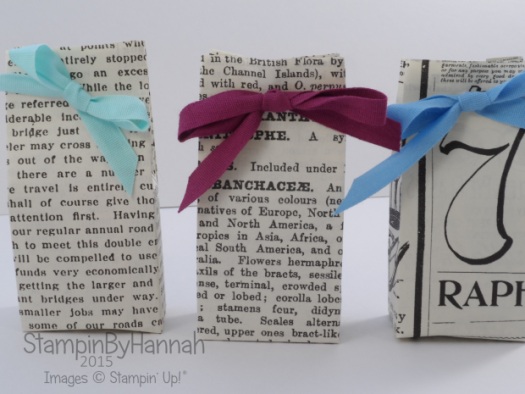
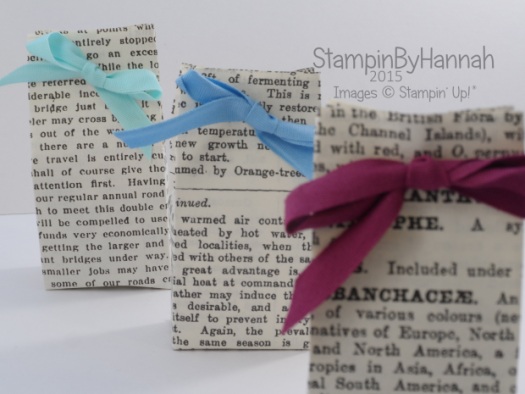
Stampin' Up! UK Telford swap mini chocolate gift bag

Aren’t they just adorable! I loved making them, although the Typeset Designer Series Paper is interesting to work with! Its a lovely thin weight, and acts a little bit like vellum when you score it. You have to keep a tight hold otherwise it has a habit of moving and shifting – resulting in wonky bags!

Measurements:

Designer Series Paper – 4 3/4 x 3 1/2″ (12 x 9 cm)

Score on the long side first with the print facing the right way at 1 3/8, 2 1/8, 3 1/2 and 4 1/4″ (1, 4.5, 6.5 ad 10 cm)

Score on the short side at 3/4″ (2 cm)

Cut the little rectangle from the bottom corner, and cut up the other score lines just to the horizontal score

Use Fast Fuse to stick your bags together, applying the glue along the long thin edge. Then work out which side is the back (the one with the seam), fold in the bottom – sides first, then the back, then the front – applying Fast Fuse to the inside of the front flap.

Insert your chocolates

Use the 1/8″ Handheld punch to create a hole in the middle near the top.

Thread your ribbon from the inside through to the front, and then over the top and in through the back and through to the front. You should end up with both ends of the ribbon at the front.

Tie a bow! (I know, that makes it sound a whole lot easier than it is!)

Stampin' Up! Telford swaps basket

I couldn’t leave you without showing you my swaps basket (it doubles as my Bargain Basket!), don’t they look cute!


Shop Now button-001Join my team button-001

To purchase any of the items featured in my projects please use the links above. To join my team of Stampin’ Friends select ‘Join My Team’ or send me a message!

Please support StampinByHannah by using the Hostess code featured in the top right hand of my blog. For orders of over £150 please do not use this code, as you are entitled to your own Hostess benefits!

Sign up to my newsletter here – http://eepurl.com/2if59

Hannah Wilks

Stampin’ Up! UK Independent Demonstrator
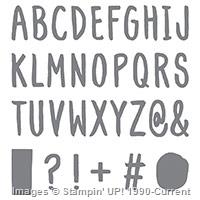
Large Gift Bag Video Tutorial!

Hello! It’s finally Friday! I’m all set for a weekend of crafts and fun at Stampin’ Up! regional training tomorrow! I am so excited!

I love attending Stampin’ Up! events, they are always so much fun! And we always come away with heaps of inspirational ideas (as well as some free swag! Yay!)

Anyway, on with this weeks Friday Tutorial…..

I made this bag (and filmed it) back in February! I needed a bag quickly to gift a friend a bottle of her favourite tipple (a spirit that comes in a rectangular bottle) and came up with this.

Stampin' Up! UK large gift bag video tutorial

I apologise for the state of that photo, but they were just too tall to fit into my light box!

Measurements:

Designer Series Paper – 12 x 12″ (30.5 x 30.5 cm)

Score on the first side at 2 1/4″ (5.5 cm)

Score on the second side at 2 1/4, 5 1/4, 7 1/2 and 11″ (5.5, 13.5, 19 and 27 cm)


Shop Now button-001Join my team button-001

To purchase any of the items featured in my projects please use the links above. To join my team of Stampin’ Friends select ‘Join My Team’ or send me a message!

Please support StampinByHannah by using the Hostess code featured in the top right hand of my blog. For orders of over £150 please do not use this code, as you are entitled to your own Hostess benefits!

Sign up to my newsletter here – http://eepurl.com/2if59

Hannah Wilks

Stampin’ Up! UK Independent Demonstrator12

Sale-a-bration on Sunday

Ok, so I will admit I had sort of forgotten about Sale-a-bration on Sunday this week! So I apologise for the quality of the photo, but it is all a little bit last minute!

This week has been a little crazy round here – a long overdue visit to the grandparents at the beginning of the week, followed by a manic two days in the office, wedding stationary consultations, fabulous one-to-one training with my wonderful upline, a friends wedding, and a craft fair (today) has seen me slightly out of the game. I have had to cancel my Crafty Crop this month, as I just can’t be in two places at once. I’m so sorry, and but I have made a bonus blog project next week to make up for it!

So, card for today. Today is the very last card for Sale-a-bration on Sunday! I cannot believe how quickly the last 3 months have gone! you still have a week to get your Sale-a-bration orders in, and next week I shall round up all the things I have made with the lovely Sale-a-bration goodies this year

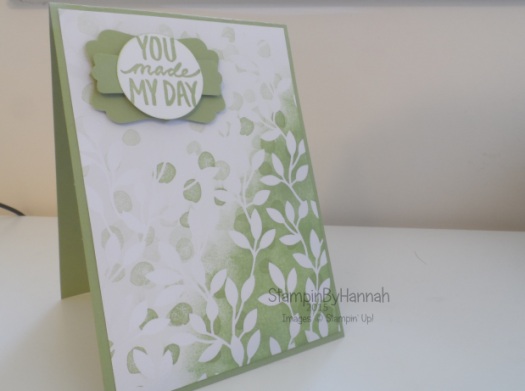
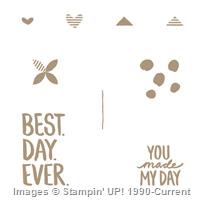
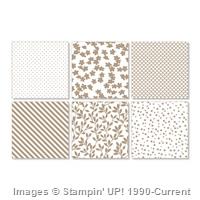
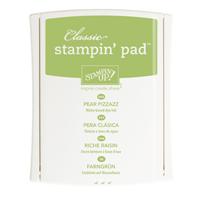
Stampin' Up! UK Sale-a-bration Irresistibly yoursI could not let Sale-a-bration end without using the Irresistibly Yours Designer Series Paper one last time! This time, Its sponged with Pear Pizzazz Ink, and the stamped using the Best Day Ever Stamp set.

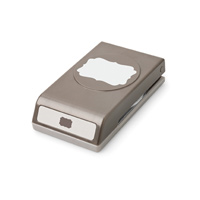
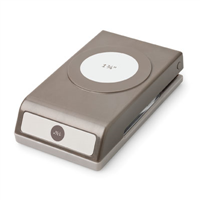
I love the layers under the sentiment too – Decorative Label, Modern Label and then the sentiment on a 1 3/4″ circle

A vision in green!


Hannah Wilks

Stampin’ Up! UK Independent Demonstrator
If you like the project, or any of the products used, would like a catalogue, or to join my team, please contact me, or click on the ‘Shop NOW’ button at the top of the page. You can also find me on Twitter, Facebook, YouTube, Google+, About.me, and Tumblr (Links in the sidebar)

Sign up to our newsletter here – http://eepurl.com/2if59

Thank you for stopping by www.www.stampinbyhannah.co.uk today

x


Best Day Ever … Everyday with Sale-a-bration!

Sale-a-bration is the 3 month long BIG sale from Stampin’ Up! Finishing on 31st March 2015, it gives you a choice of 14 FREE items to choose from when you order £45, and each £45 spend gives you an extra item – so if you spend £90 you choose 2 gifts, £130 – 3 gifts etc. etc. Check out my Sale-a-bration page for more information!


One of the great things about this years Sale-a-bration is the coordination between the Sale-a-bration products (as well as the coordination with Stampin’ Up! regular items!) and the Best Day Ever suite of items is awesome!

Stampin' Up! UK Best Day Ever Sale-a-bration In Colours

I love this stamp set! It doesn’t look like much in the catalogue, but once you get stamping, it makes it so simple to create really stunning inky projects! I’ve used a couple of the stamps to create a sort of stamped Bokah effect (more on that later in the week!)

This stamp set is one of the growing selection of Stampin’ Up! stamp sets that come in all three stamp types – Wood, Clear and photopolymer! Awesome! and its FREE!

But what other products coordinate? well, we also have some lovely Designer Series Paper and and fab accessory pack!

This beautiful stamp set could be yours for FREE when you order £45! LOVE it!


Hannah Wilks

Stampin’ Up! UK Independent Demonstrator
If you like the project, or any of the products used, would like a catalogue, or to join my team, please contact me, or click on the ‘Shop NOW’ button at the top of the page. You can also find me on Twitter, Facebook, YouTube, Google+, About.me, and Tumblr (Links in the sidebar)

Sign up to our newsletter here – http://eepurl.com/2if59

Thank you for stopping by www.www.stampinbyhannah.co.uk today

x

How to get 6 (metric) cards from one sheet of 12 x 12 Designer Series Paper!

I love 12 x 12 paper! I admit, I am a little addicted, and I don’t actually use it as often as I should!

When I received the Painted Blooms Designer Series Paper I knew I was going to struggle to cut into it, its a gorgeous collection of floral themed papers all hand painted – it is stunning! But I knew I had to use this one particular piece in as large pieces as I could, and making 6 cards from one sheet of DSP was the way to do this.

I know a few US demo’s have made similar videos, but they use slightly different measurements to fit 8 1.2 x 11″ cardstock, rather than our A4

Stampin' Up! UK painted blooms petals giveaway

I just love the look of these cards, all different but definitely a set together!

And I couldn’t bear to split them up so, I’m going to give them away to you – to win these 6 cards all you have to do is place an order with me before midnight on the 28th of February 2015 – and I will select one random winner! awesome!

Stampin' Up! UK Painted Bloom Petals 6 cards from one DSP

But, how do you make them! well, I have a video for that!

Measurements:

For these cards you will need 3 sheets for A4 cardstock cut in half and folded to make 6 cards, and a sheet of 12 x 12 Designer Series Paper

Cut 1.8 cm (3/4″) from the bottom of the 12 x 12 DSP

Cut your DSP in half at 14.3 cm (5 13/16″)

Then cut each piece into 10 cm (3 7/8″) pieces, you will have two little slivers of DSP left over


Hannah Wilks

Stampin’ Up! UK Independent Demonstrator
If you like the project, or any of the products used, would like a catalogue, or to join my team, please contact me, or click on the ‘Shop NOW’ button at the top of the page. You can also find me on Twitter, Facebook, YouTube, Google+, About.me, and Tumblr (Links in the sidebar)
Sign up to our newsletter here – http://eepurl.com/2if59

Thank you for stopping by www.www.stampinbyhannah.co.uk today

x