Yes, It is Monday, while your lamenting the end of the weekend, why not join in with my Make It Monday, check out the video tutorial (and maybe make along with me) and I hope that you start to feel better about the new week!
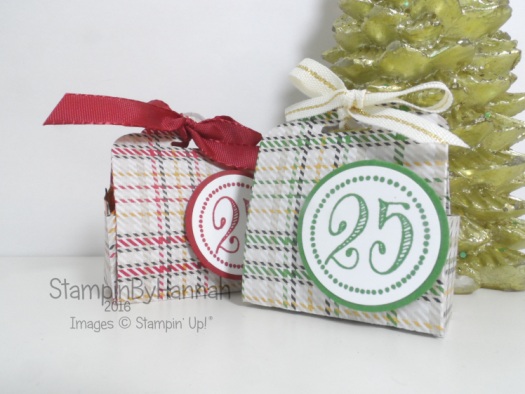
How cute are these! They each hold 3 Chocolates from a popular Children’s chocolate manufacturer.
Measurements:
Designer Series Paper – 4 1/2 x 6″ (12 x 15 cm)
Score on the Long side at 1″ (2.5 cm)
Score on the short side at 1, 2, 3, and 4″ (2.5, 5, 7.5, 10 cm)
I am loving this Designer Series Paper, its the Floral Boutique DSP (and the spotty pattern makes me think of Snow falling!) and it is one of the papers that you can get for FREE this month, Buy 3 get one FREE on Designer Series Papers all month long.
To purchase any of the items featured in my projects please use the links above. To join my team of Stampin’ Friends select ‘Join My Team’ or send me a message!
Please support StampinByHannah, and join my Code Club, by using the Hostess code featured in the top right hand of my blog. For orders of over £150 please do not use this code, as you are entitled to your own Hostess benefits!
Sorry for the late start of my Stamp of the Month club this month. I have been running the club for a few months now and haven’t been happy with how it has been running, so I’ve made a couple of little changes.
The club runs a fresh each month, there is no monthly commitment – allowing you to choose whether you take part or not each and every month. Club runs for a full calendar month, meaning that you can join in at any point and get the same benefits as everyone else in the club that month.
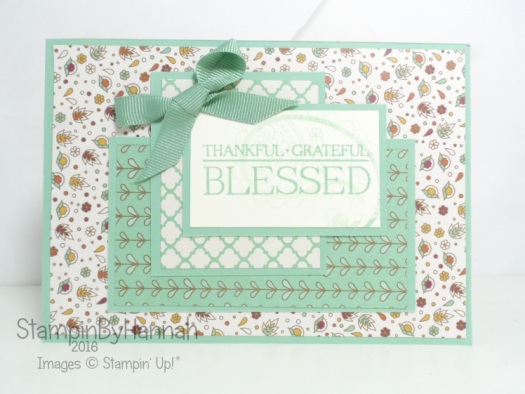
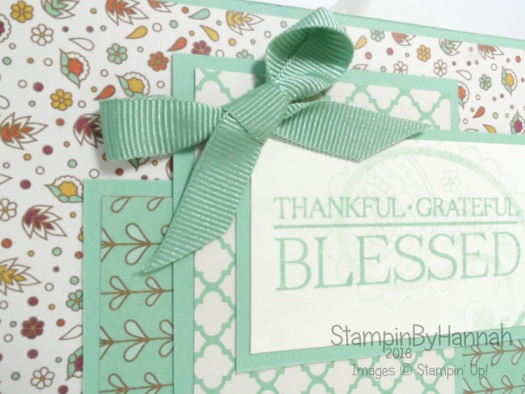
This month’s Stamp of the Month is the Paisleys and Posies.
What do I get as part of the Stamp of the Month Club?
Club members receive an Online card making class delivered via email, class includes videos for at least 4 projects as well as an instruction sheet. Club members also receive a kit of pre-cut card stock, envelopes and embellishments to complete the projects for that month delivered directly to their door. Kits are posted once club closes on the last day of the month
How do I join?
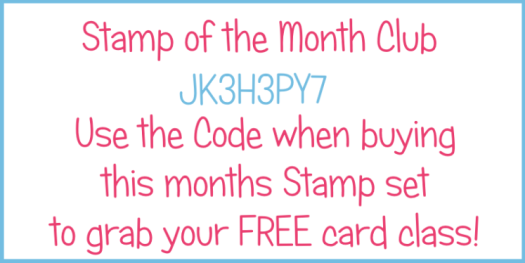
Joining is really easy! All you have to do is use the code when you order this months Stamp of the Month via my Stampin’ Up! webstore. Simple!
This months Stamp of the Month Code =
JK3H3PY7
So, Want else can I add to my order?
Well, anything, just as long as it includes this months Stamp of the Month stamp set! but I would suggest a few other things that will coordinate:
To purchase any of the items featured in my projects please use the links above. To join my team of Stampin’ Friends select ‘Join My Team’ or send me a message!
Please support StampinByHannah, and join my Code Club, by using the Hostess code featured in the top right hand of my blog. For orders of over £150 please do not use this code, as you are entitled to your own Hostess benefits!
I have a bonus video tutorial for you this week! I know, I probably should have saved this for a Make It Monday, but I just couldn’t wait, these are just too cute (and I really wanted to eat the chocolate!)
Plus, how cute are these!
Measurements:
Designer Series Paper – 6 x 4″ (15 x 10 cm), scored on the short side at 1 and 3″ (2.5 and 7.5 cm) and on the long side at 2 1/2 and 3 1/2″ (6.5 and 8.5 cm)
Have you seen by Christmas Designer Series Paper shares? they are a awesome way to get your Christmas crafting going, with 6 x 6 samples of every single Christmas paper in both current catalogues. You can find more information on my Paper Shares HERE
To purchase any of the items featured in my projects please use the links above. To join my team of Stampin’ Friends select ‘Join My Team’ or send me a message!
Please support StampinByHannah, and join my Code Club, by using the Hostess code featured in the top right hand of my blog. For orders of over £150 please do not use this code, as you are entitled to your own Hostess benefits!
One of my favourite days of the month is the first, this is the day of the month I grab all your orders from Stampin’ Up! and make each and every one of you a Thank You card (and sometimes even an extra something!). Your orders are processed once you place them, that is all handled by Stampin’ Up! but I love to send you an extra special something when you choose me as your demonstrator.
I have been loving playing with our Designer Series Paper recently (as you may have noticed!) and although this particular pack isn’t included in the Fabulous Buy 3 Get 1 Free offer, I still think it is gorgeous! and you can get a sample of it in my Paper Share this week!
Warmth and Cheer is a cute mixture of traditional Christmas, meets the current crafting obsession for anything stitched! But my favourite sheets in this 6 x 6 paper stack are these 3, simple Crumb Cake and Black in patterns that really, could be used for any occasion (loving those stars!)
The Thank You is taken from a bigger stamp in the Me = Grateful stamp set, the stamp usually reads ‘Thank You for seeing me through some Dark Days’ but I’ve used a Basic Black Stampin’ Write Marker to just ink the ‘Thank You’ – isn’t that font just lovely!
In addition to the cards that I send to each and every customer, I send extra special gifts to those who use my Code Club! Each month I release a new Code Club Code, and when you enter the code at the checkout I send you an extra special something, it varies from month to month, some times its stamps, other times I send embellishments or accessories, but you will always get an extra something for using the club!
To purchase any of the items featured in my projects please use the links above. To join my team of Stampin’ Friends select ‘Join My Team’ or send me a message!
Please support StampinByHannah, and join my Code Club, by using the Hostess code featured in the top right hand of my blog. For orders of over £150 please do not use this code, as you are entitled to your own Hostess benefits!
Hello! I am super excited to announce this years Christmas Designer Series Paper shares!
Available for 1 week only, this is a great opportunity to grab a sample of each of the Christmas themed Designer Series Papers across both Annual and Autumn / Winter catalogues.
In order to run the Paper share I require 4 participants per group. Please use the Paypal button below to purchase your share!
The Cost
To get a share of each pack of the Christmas themed Designer Series Paper will cost £15 including Postage and Packing. Each pack of paper will be packaged seperately, with a label on each with the name of the paper and the colours used too!
Want more info?
[contact-form][contact-field label=’Name’ type=’name’ required=’1’/][contact-field label=’Email’ type=’email’ required=’1’/][contact-field label=’Comments’ type=’textarea’/][contact-field label=’Do you want a copy of the Catalogue?’ type=’checkbox’/][/contact-form]
If you wish to receive a FREE copy of the 2016 Autumn / Winter catalogue, please include your Postal Address in the comments section of the form above.
Please note: Product Shares are only available in the UK
To purchase any of the items featured in my projects please use the links above. To join my team of Stampin’ Friends select ‘Join My Team’ or send me a message!
Please support StampinByHannah, and join my Code Club, by using the Hostess code featured in the top right hand of my blog. For orders of over £150 please do not use this code, as you are entitled to your own Hostess benefits!
I spent the a weekend with a few of my Stampin’ Sisters, crafting a few weeks ago, and one of the projects we made was a fabulous note card and tag box – which I will admit I still haven’t finished! But it did inspire me to make something a little simpler this week.
The original box, in Mint Macaron, uses the Christmas Pines stamp set and coordinating Presents and Pinecones Designer Series Paper, while the video version is in Fruit Stand with the Fresh Fruit Stamp set.
Box Measurements:
Box Base – 9 1/2 x 4″, score on the long side at 1, 4 1/2, 5 1/2 and 9″ and the short side at 1″
Box Lid – 9 3/4 x 3″, score on the long side at 1 1/8, 4 5/8, 5 11/16, 9 1/4″, and the short side at 1″
Designer Series Paper – 1 piece 3/4 x 3 1/4″, 2 pieces 3/4 x 1 3/4″, and 2 pieces 1 3/4 x 3 1/4″
The note cards in this set at 3 x 4″ cards, created by cutting card stock to 4 x 6″ and scoring at 3″. The Designer Series Paper is cut to 2 3/4 x 3 3/4. Have I mentioned about the Designer Series Paper yet? No! For the month of October if you buy 3 packs of Designer Series Paper, you can choose another pack for FREE! isn’t that awesome?!
The final part of this project is the envelopes. I make no secret of the fact that I adore the Envelope Punch Board, and I couldn’t make a project with Designer Series Paper without making my own custom envelopes! The punch board lists all the measurements you need for heaps of different card sizes, and so just by looking at the board I found that for 3 x 4″ note cards, you need a piece of 6 x 6″ Designer Series Paper – that means that you get 4 of these envelopes from a sheet of 12 x 12! Handy! The board then instructs you to punch and score at 2 5/8″ to create the envelope.
To purchase any of the items featured in my projects please use the links above. To join my team of Stampin’ Friends select ‘Join My Team’ or send me a message!
Please support StampinByHannah, and join my Code Club, by using the Hostess code featured in the top right hand of my blog. For orders of over £150 please do not use this code, as you are entitled to your own Hostess benefits!
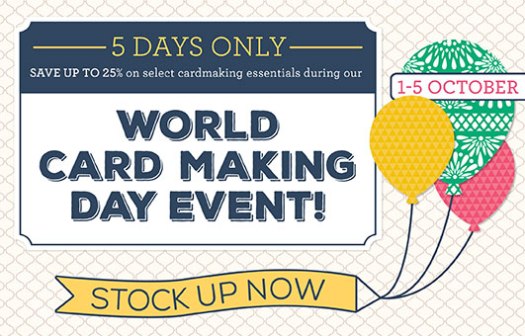
October is such a special month for a Stampin’ Up! demonstrator, not only is it the start of our Stampin’ Up! ‘year’ and therefore a month of reflection and goal setting, but also October is a month of great deals too!
The first offer only lasts for 5 days! but is a great opportunity to stock up on some great card making staples! I will definitely be stocking up on Fast Fuse! Oh, and the Designer Tin of Card Project Kit is just a MUST HAVE too!
But the other offer this month is even better….
There are so many great packs of Designer Series Paper in our current catalogues, and this offer is just a great excuse to test them all!
Right, that’s all for my super quick update! but one last thing before I go. Just a thought really, Have you thought of joining Stampin’ Up! and becoming a part of my fabulous team of Stampin’ Friends? If you join today, as the first day of a new calendar quarter you get a day shy of 6 months to sell / spend your first quarter minimum of £270! That means that you will be a demonstrator all the way through until the end of March next year, meaning that you’ll get your 20% discount all the way from now through Sale-a-bration (the biggest sale of the YEAR!). How awesome would that be?! for more information check out my Join My Team page, or message me today!
To purchase any of the items featured in my projects please use the links above. To join my team of Stampin’ Friends select ‘Join My Team’ or send me a message!
Please support StampinByHannah, and join my Code Club, by using the Hostess code featured in the top right hand of my blog. For orders of over £150 please do not use this code, as you are entitled to your own Hostess benefits!
Ok, so ‘The Season’ hasn’t quite arrived yet, but the time to start on your Christmas cards has! I know that Christmas prep has well and truly started in our house; lists of presents, thoughts of making Christmas Cake (chose not to bother, just defrosted 1 tier of our wedding cake instead!), plans for Christmas day, questions about which days we are working and which days are ours! as well as the endless debate over the colour theme for this year! So, maybe Tis the Season still fits….
So because we are now in the lead up to ‘The Season’ I’ve been put on a No Spend! Does this happen to anyone else? Where you are not allowed to buy anything before Christmas? I mean, we are really trying to save for our house deposit at the moment too, but anyway I am on an enforce ‘No Spend!’ and so I have only actually bought 3 stamp sets from the Autumn / Winter catalogue (and choosing which ones I was going to have was REALLY hard!) Anyway, the Christmas Pines bundle was my MUST HAVE set in this catalogue, and I have already made a heap of cards with this set. I have another coming this week if you are subscribed to my Weekly Emails.
So, this card uses the Christmas Pines bundle, along with the Presents and Pinecones Designer Series Paper (Yum! by the way!) and the Emerald Envy Ombre Stamp pad, oh and a trio of In Colour Enamel Shapes.
To purchase any of the items featured in my projects please use the links above. To join my team of Stampin’ Friends select ‘Join My Team’ or send me a message!
Please support StampinByHannah, and join my Code Club, by using the Hostess code featured in the top right hand of my blog. For orders of over £150 please do not use this code, as you are entitled to your own Hostess benefits!
Hello! Wow, where did last week go?! Oh, well, it’s Monday again – time for Make It Monday!
I spent the weekend with a group of awesome women; crafting, eating and having heaps of fun! I have rambled for hours about how much I LOVE Stampin’ Up! and this weekend was a prime example of why I love it. This weekend wasn’t a Stampin’ Up! organised event, but a team event, organised by one of my lovely Stampin’ friends. Someone I would NEVER have met without this company, and I spend the whole weekend crafting (how often to we get to do that!), it was great to reset, take time for me, and I am so ready for what the next few weeks will bring!
How cute are these! One of the things that we do when we get together is share and swap projects – we call them swaps, and its a massive part of any Stampin’ Up! event. Now, when I go to Stampin’ Up! organised events I make maybe 50 swaps, but because this was a smaller team event I made a swap for each person – so this time I made 22 of these. Actually I made 24, but that meant that I could leave a couple to say Thank You to the housekeepers / receptionist etc at the Hotel we stayed at.
Aren’t they super cute! Each pocket contains a bar of children’s chocolate (the same brand as those eggs with the toy in the middle!) – because chocolate / sweeties are another BIG theme at these events. James laughs at me, he always knows when I’m prepping for a crafty weekend away (he never remembers, no matter how many times I tell him I’m going!) when he sees the bags and bags of sweets sat in the office!
These pockets use the Pop of Pink Speciality Designer Series Paper and coordinating Pop of Paradise Stamp set. I did also make some using the Fruit Stand Designer Series Paper too, seeing as I managed to cut enough paper for 18 pockets and then ran out of paper – Math isn’t my strong point!
Measurements:
Designer Series Paper – 4 x 4 1/2″ (10 x 12 cm)
Score on the long side at 2 and 4″ (5 and 10 cm)
The pockets are super simple to put together (as you can tell, a 5 minute Make It Monday video! even with my rambling is a miracle!). They are finished with the Tag Topper Punch at the top, and a staple at the bottom. Like I said I made 24 of these and it took me about an hour, from start to finish.
I would LOVE to welcome you to our next crafty weekend! Have you ever thought about joining Stampin’ Up! and becoming a part of my team of Stampin’ Friends? check out my Join My Team page, or drop me a message today, I am sure you won’t regret it!
Don’t forget to shop using the Code Club Code to receive some great FREE product!
E23UG3WK
I will be closing this order on the 30th August 2016
To purchase any of the items featured in my projects please use the links above. To join my team of Stampin’ Friends select ‘Join My Team’ or send me a message!
Please support StampinByHannah, and join my Code Club, by using the Hostess code featured in the top right hand of my blog. For orders of over £150 please do not use this code, as you are entitled to your own Hostess benefits!
I have a special Make It Monday for you this week, I am taking part in a challenge (nothing new there) set by the lovely Michelle Last for her team of Pinkies! The theme this month is heat embossing, and you can check out heaps of Heat Embossing ideas over on Michelle’s blog tomorrow – and vote for your favourite!
This technique looks really fancy, but is really really simple. Check out the video for all the details:
Top tips:
Detailed die cuts look best, I’m loving uses Rose Garden and Pretty Pines
Use Metal tone Embossing powder; Gold, Silver or Copper
Make sure your heat tool is good and hot before melting your embossing powder
I hope you have enjoyed this Make It Monday, don’t forget to pop over to Michelle Last’s blog tomorrow and vote for your favourite Heat Embossed card!
Don’t forget to shop using the Code Club Code to receive some great FREE product!
2V6P3MWH
I will be closing this order on the 30th September 2016
To purchase any of the items featured in my projects please use the links above. To join my team of Stampin’ Friends select ‘Join My Team’ or send me a message!
Please support StampinByHannah, and join my Code Club, by using the Hostess code featured in the top right hand of my blog. For orders of over £150 please do not use this code, as you are entitled to your own Hostess benefits!