Technique Tuesday | Using the Precision Base Plate

Stampin' Up! Butterfly thinlit Precision base plate how to

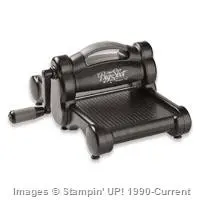
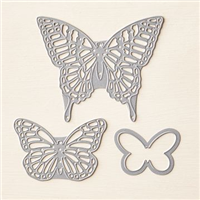
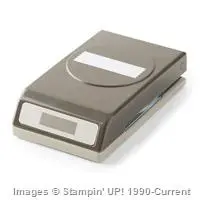
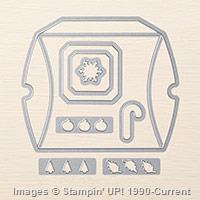
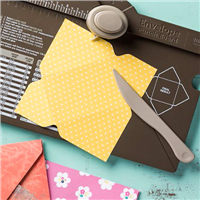
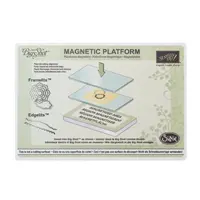
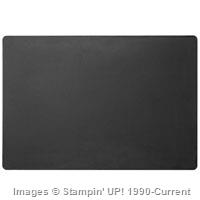
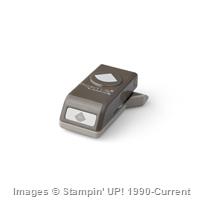
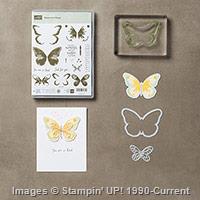
One of the things in the Autumn / Winter catalogue I was looking forward to more than anything else was the Precision Base Plate. I love cutting intricate dies with my Big Shot; the Butterfly thinlits or those stunning Delicate Ornaments, but getting all those little pieces out is a pain and needing to run things through the machine several time to ensure a good cut is annoying – but no more! Stampin' Up! UK Die cutting video tutorial

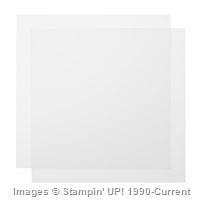
The Precision Base Plate is a steel plate deigned to replace one of your Clear Cutting Plates when using intricate dies. It works by providing a super hard surface for your dies to work against, giving a crisper, cleaner cut. I have to say though, I wouldn’t use this plate all the time – it just isn’t required for basic shapes, but the difference it makes on detailed dies makes this a must have accessory for my Big Shot Machine

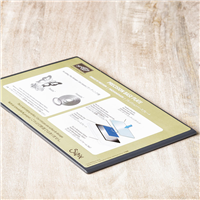
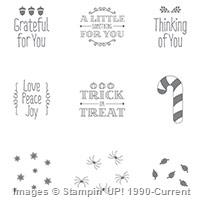
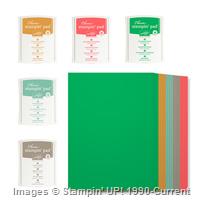
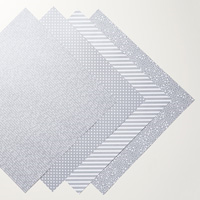
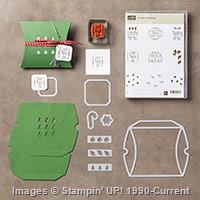
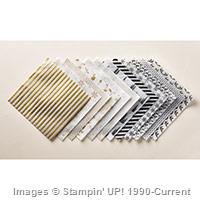
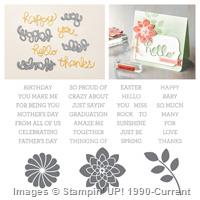
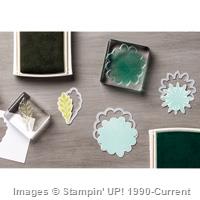
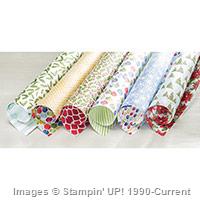
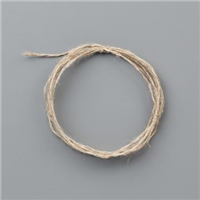
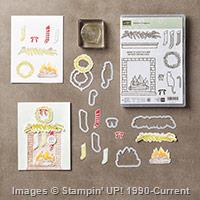
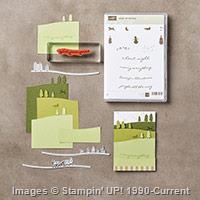
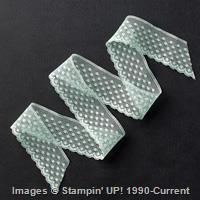
This card was super easy to make with the Big Shot and precision base plate, the video is only 8 minutes and that’s with all my waffle! The Designer Series Paper on both cards was the inspiration for the colour schemes here, the Bohemian Designer Series Paper pack features some pretty loud patterns but the reverse sides are lovely and delicate with some great tone on tone looks.

Stampin' Up! Butterfly thinlit Precision base plate how to

Precision Base Plate top tips:

  • Use the Precision plate with your Multi-purpose platform fully closed, just as you would for thinlits dies and Clear plates
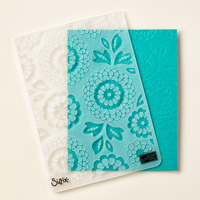
  • Make sure you are cutting on the correct side – the label should be face down (not showing) and you cut into the Black side of the plate
  • It may take a little more force to get this plate through your Big Shot, but DO NOT force it! check your sandwich and try again
  • This plate replaced a Clear Cutting Plate in your standard die sandwich – Multi-purpose Platform (on tab 2), Precision Base Plate (label side DOWN), card stock, die, Clear Cutting Plate

StampinByHannah Parties at home Teesside Stockton on Tees Craft Cardmaking Classes


Shop Now button-001Join my team button-001

To purchase any of the items featured in my projects please use the links above. To join my team of Stampin’ Friends select ‘Join My Team’ or send me a message!

Please support StampinByHannah, and join my Code Club, by using the Hostess code featured in the top right hand of my blog. For orders of over £150 please do not use this code, as you are entitled to your own Hostess benefits!

Sign up to my newsletter here – http://eepurl.com/2if59

Hannah Wilks

Stampin’ Up! UK Independent Demonstrator

Halloween With a Sleigh Ride!

Stampin' Up! UK Halloween Sleigh Ride

When I am shopping for products I want to buy things that I can get multiple uses from (don’t we all!) but this can be tricky when looking at Christmas themed goodies. I have been really enjoying making Christmas cards using the Sleigh Ride Edgelit dies, but I knew that they could be so versatile. I have great plans for these (so hoping that they will still be here in January, is it too early to be thinking of retiring products!) but I thought I would start with an event that is a little nearer – Halloween

Stampin' Up! UK Halloween Sleigh Ride

With both scenes cut from a single piece of Basic Black card stock, I played around with placement until I was happy with the line of the trees, and considered sticking everything down and calling this one done. But I wanted the little housed to be ‘lit up’ but the orange card stock behind, and with an orange sky the effect wasn’t quite right. Cut a piece of Very Vanilla with the houses edgelit, and added the negative space to the top of the card so that the only orange is coming through the windows of the cute houses. Much better

Although there are loads of really lovely spooky Halloween items in this years Autumn / Winter catalogue, its not something that really jumps out at me so the only sentiment I have is from the A Little Something Stamp Set – I think this may be the most used set in my collection at the moment – with Trick or Treat stamped in Basic Black on Very Vanilla punched with the 1 3/8″ circle punch and a little extra Orange added with a Tangerine Tango Stampin’ Write Marker

I think you could totally re-create this for Christmas, or even a winter birthday, What do you think?


StampinByHannah Parties at home Teesside Stockton on Tees Craft Cardmaking Classes


Shop Now button-001Join my team button-001

To purchase any of the items featured in my projects please use the links above. To join my team of Stampin’ Friends select ‘Join My Team’ or send me a message!

Please support StampinByHannah, and join my Code Club, by using the Hostess code featured in the top right hand of my blog. For orders of over £150 please do not use this code, as you are entitled to your own Hostess benefits!

Sign up to my newsletter here – http://eepurl.com/2if59

Hannah Wilks

Stampin’ Up! UK Independent Demonstrator


Pinkies Blog Hop | Pillow Box Note Card Collection

Stampin' Up! UK Watercolour Wings Note Card Collection

Blog hop logo

Welcome to another Pinkies Blog Hop! As it’s World Card Making Day today, we hope everyone will get some time to craft, and we’ve created some lovely projects to help inspire you to create your own beautiful card. Simply use the buttons at the end of each post to keep hopping!

Stampin' Up! UK Watercolour Wings Note Card Collection

I hope you’re enjoying our hop today. This is my first Pinkies Blog Hop (and hopefully not my last!) and I wanted to create something that would describe my style of crafting for this event. There are so many great stamp sets in this years Annual catalogue that picking one favourite is incredibly difficult, but I think Watercolour Wings is probably one of my most used. Its such a easy set to use, although the effect looks complicated. The butterflies are stamped from 5 different stamps – 4 layering butterfly wings, and a body – and each one is stamped in one colour!

Stampin' Up! UK Pinkies Blog Hop World Card Making Day

So the first, most solid stamp is inked and stamped off onto scrap paper 3 times before being stamped onto the card stock, the next stamp is stamped off twice, the 3rd stamp is stamped off once, and the final image is stamped straight onto the butterfly to create a lovely layered image. These butterflies also coordinate with the Butterflies Thinlits Die set – which is awesome because fussy cutting isn’t my friend!

The note cards themselves are 3 x 3″ cards in four of the most recent In-Colours; Mint Macaron, Watermelon Wonder, Cucumber Crush and Delightful Dijon. Complete with a layer of the same card stock measuring 2 3/4″ square, matching butterfly and sentiment piece.

The Thank you sentiment is taken from Something to Say, stamped in Tip Top Taupe and punched out with the Washi Label punch. I found the punch a little long for the sentiment so inserted the punched piece back into the punch for a bit of a trim, before mounting on a full sized punch of the Washi Label.

Stampin' Up! UK World Card Making Day 2015

I couldn’t finish this project without making a pocket for the cards to go in, and without using my favourite item from the Autumn/Winter catalogue this year – The Pillow Box Die of course! I have used the die so much in the past few weeks, I’m sure regular readers of my blog are sick of the sight of it! Here I have created a Pillow Pocket by only putting the die off the edge of my card stock before cutting, so only one end has the pillow box closure. Finished with a belly band of Gold Designer Series Paper from the Neutrals Designer Series Paper Stack and another one of those butterflies in Tip Top Taupe.

Oh, and of course no set of note cards would be complete without some envelopes, so I used the same Designer Series Paper to create 4 envelopes with the Envelope Punch Board.

Thanks so much for stopping by today, and I hope you enjoy the rest of the hop!

Blog hop nextBlog hop previous


Shop Now button-001Join my team button-001

To purchase any of the items featured in my projects please use the links above. To join my team of Stampin’ Friends select ‘Join My Team’ or send me a message!

Please support StampinByHannah, and join my Code Club, by using the Hostess code featured in the top right hand of my blog. For orders of over £150 please do not use this code, as you are entitled to your own Hostess benefits!

Sign up to my newsletter here – http://eepurl.com/2if59

Hannah Wilks

Stampin’ Up! UK Independent Demonstrator

Halloween Shaker Card and Pillow Box

Stampin' Up! Halloween Pillow Box

I will admit now, I’m not really one of Halloween. I’m not a fan of dressing up at the best of times, and the idea of then going out in the cold – no thanks! And seeing as I live in a 3rd floor flat, I don’t really get trick or treaters either (all the more sweeties for me!) but I couldn’t resist making this card and pillow box combo.

Stampin' Up! Halloween Pillow Box

The Square Pillow Box die is definitely one of my favs from the latest catalogue, made with card stock it’s just so clean and crisp. This one is a little different, with those cute pumpkins die cut from the front and some Tangelo Twist card stock added behind. Oh, and can you see the sneaky spiders, they are stamped in Versamark for a tone on tone look.

Stampin' Up! Halloween Shaker Card

The card also uses the same dies, the window is cut from the larger of the two squares in the collection, and the shaker pieces are those same pumpkins cut from Tangelo Twist and Basic Black card stock. I am loving the shaker card craze at the moment (have you seen our Shaker Card Kit?! It is AWESOME!) and they are so easy using the edge pieces from Dimensionals.

Trick of Treat is taken from A Little Something – the stamp set that you can buy with the Square Pillow Box die for 15% off! – and is stamped in Whisper White Craft Ink, punched with the 1 3/8″ circle punch


Shop Now button-001Join my team button-001

To purchase any of the items featured in my projects please use the links above. To join my team of Stampin’ Friends select ‘Join My Team’ or send me a message!

Please support StampinByHannah, and join my Code Club, by using the Hostess code featured in the top right hand of my blog. For orders of over £150 please do not use this code, as you are entitled to your own Hostess benefits!

Sign up to my newsletter here – http://eepurl.com/2if59

Hannah Wilks

Stampin’ Up! UK Independent Demonstrator

Vellum Pillow Box

I am still loving the Square Pillow Box die! I could make these all day, they are so simple and quick to put together. I was sat in my craft room the other day thinking of other variations of this great die, and realised that I hadn’t made an all vellum version! Shocking!

Stampin' Up! UK Square Pillow box top tips

This vellum is stunning (my photo does not do it justice!). I have been playing around with my photo skills again, and am trying natural light and some props at the moment, still needs work I think!

Ok, so Square Pillow Box top tips!

  • The die will cut two pieces of Designer Series Paper or Vellum, but only one piece of card stock at a time.
  • Fold and burnish the pieces well with your fingers, and a bone folder on the straight edges
  • Use Tear & Tape to ensure the whole length of the tabs are covered with adhesive
  • Lie the two pieces of the Pillow Box face down on your desk next to each other, and line up one edge at a time
  • Use Glue dots to stick the flaps together if needed
  • Make them super pretty by using the extra dies and coordinating stamp set!


Shop Now button-001Join my team button-001

To purchase any of the items featured in my projects please use the links above. To join my team of Stampin’ Friends select ‘Join My Team’ or send me a message!

Please support StampinByHannah, and join my Code Club, by using the Hostess code featured in the top right hand of my blog. For orders of over £150 please do not use this code, as you are entitled to your own Hostess benefits!

Sign up to my newsletter here – http://eepurl.com/2if59

Hannah Wilks

Stampin’ Up! UK Independent Demonstrator

Technique Tuesday | Faux In-lay Die Cutting

I have recently fallen head of heals in love with my Big Shot machine again. My Big Shot was one of those big ticket items I bought when I started crafting 5 years ago, and I have to admit it didn’t get the love and attention it deserved. However, since becoming a Stampin’ Up! demonstrator last year, the amount of use my Big Shot gets keeps increasing, and I am the first to admit that its starting to get tired through over use! I am in desperate need of new cutting plates since my current set are now sporting the ‘stained glass’ effect, and I am forever tightening the handle. I might have to buy it some Christmas presents this year!

Stampin' Up! UK Faux InLay Die Cutting Technique Tuesday

I really enjoy the In-lay die cutting technique, but trying to get all those pieces back into the paper can be a bit of a pain. I have recently tried a few different types of Faux In-Lay Die Cutting, using both the big shot AND punches!

There is a Big Shot add on that is a must for this one, the Premium Crease Pad. Designed to help form the creases when using Bigz Dies, the crease pad stops the die from cutting all the way through your card stock, leaving an embossed effect. This works on both detailed dies, like the Hello You Thinlits, and Butterflies Thinlit dies (love those!) as well as framelit dies, like the Flower Fayre dies that coordinated with the Flower Patch stamps

Stampin' Up! UK Faux In Lay Die cutting video tutorial

In-layed punching is super simple, and is really effective with stamped images, or Designer Series Paper. Keep your eyes on a blog for some more of this technique for sure!


Don’t forget to shop using the Code Club Code to receive some great FREE product!

JNUHVBUJ

I will be closing this order on the 30th September 2015


Supply List

Built for Free Using:  My Stampin Blog


Shop Now button-001Join my team button-001To purchase any of the items featured in my projects please use the links above. To join my team of Stampin’ Friends select ‘Join My Team’ or send me a message!

Please support StampinByHannah, and join my Code Club, by using the Hostess code featured in the top right hand of my blog. For orders of over £150 please do not use this code, as you are entitled to your own Hostess benefits!

Sign up to my newsletter here – http://eepurl.com/2if59

Hannah Wilks

Stampin’ Up! UK Independent Demonstrator

Pootlers Blog Hop | Decorating your Christmas Table

Stampin' Up! UK pillow box Christmas favour


bog hop-001

Hello! Welcome to the 3rd Pootler’s Team Blog Hop! I am so pleased you could join us! Everyone has worked so hard to create wonderful projects for you, please follow the hop around and leave comments on the fabulous blogs to come to.

Thanks


I have to admit that although I have been organising this hop for a couple of months, I only managed to actually create my project on Monday! but, never mind, I’m here now

Stampin' Up! UK pillow box designer series paper

If you are one of my regular readers you will know that my box of pre-order goodies sat lonely in my office for 3 weeks while I went off and got married. Coming back from honeymoon and getting back into crafting has taken a few weeks, and several days of playing with the new products, but this pillow box was one of the first things I made. I love cute packaging, but making my own boxes isn’t something that comes naturally to me, so this pillow box die is awesome! Anyway, when it came time to make my Blog Hop project (a littler later than planned) I looked around my craft room for inspiration and came across this little box, and I fell in love all over again!

Stampin' Up! UK pillow box Christmas favour

I made a second pillow box from Cherry Cobbler card stock this time, using the Seasons of Cheer Designer Series Paper as an accent. I will admit that the trees were a bit of an after thought, but they tie the pillow box favour into the rest of the project

Stampin' Up! UK Christmas Table Pootles Blog Hop

If I ever get a Christmas day at home, this is totally what my table is going to look like!

Stampin' Up! UK pillow box cutlery holder

The pillow box die is really versatile. Here I cut the tabs off one end, to create a cutlery holder. I adore this Designer Series Paper, I believe it was hand painted by one of the fabulously talented ladies at the Stampin’ Up! Home Office in Utah, and it is stunning! This tree paper has some wonderful Poinsettias on the reverse that are going to have to find their way onto the centre stage of a project or two! This pillow box is finished with a belly band of Vellum and Silver Glimmer Paper, with a tag and three vellum flowers punched from the Itty Bitty Accents Punch Pack

Stampin' Up! UK Christmas tag

Christmas just wouldn’t be with a tag. Last year I created 12 Tag of Christmas, and I have been thinking about doing something similar again this year, but I’m not sure yet. (Whatever I do will have to start soon though!). This tag features the same Designer Series Paper, Vellum and Glimmer paper combination, with those cute Itty Bitty flowers and the Love Peace Joy Stamp from A Little Something (the stamp set that comes bundled with the pillow box die).

Actually I can’t believe I have got to the end of my blog post without mentioning the Stamps! Shocking!

Hope you enjoy the rest of the hop, hop forward and check out what the wonderful Caroline has created this time.

See you again soon!

bog hop_2-001 bog hop_2_2-001


Shop Now button-001

Join my team button-001

To purchase any of the items featured in my projects please use the links above. To join my team of Stampin’ Friends select ‘Join My Team’ or send me a message!

Please support StampinByHannah, and join my Code Club, by using the Hostess code featured in the top right hand of my blog. For orders of over £150 please do not use this code, as you are entitled to your own Hostess benefits!

Sign up to my newsletter here – http://eepurl.com/2if59

Hannah Wilks

Stampin’ Up! UK Independent Demonstrator


Festive Fireplace Week – Tealight Holder

Stampin' Up! UK Festive Fireplace Tealights

Stampin Up! Festive Fireplace Week

Welcome to the final post in my Festive Fireplace week blog series, I do hope you have enjoyed it and found some inspiration. You can find all the other projects in this weeks worth of posts by searching for ‘Festive Fireplace’ in my search bar

Stampin' Up! UK Festive Fireplace Candles cat Christmas

This project comes with a bit of a disclaimer – DO NOT put real tealights inside! Please use electric tealights for this, I will not be held responsible for any accidents caused by this project!

Right, with that out of the way, fancy making one?

They are really simple to make, and I am loving the cat with the bow collar too. The Chocolate Chip version uses Very Vanilla, Cherry Cobbler and Tip Top Taupe, while the Soft Sky version uses Whisper White, Pear Pizzazz and Sahara Sand

Stampin' Up! UK Festive Fireplace Tealights

Measurements:

Card stock – 11 3/4 x 3″ (29 x 7.5 cm)

Score on the long side at 5″ (12.5 cm) rotate by 180 degrees and score 5″ again

Stamp your fireplace on both sides, lining the bottom edge up with the score lines you have just made, and cut out the centre of the fireplaces with a craft knife and metal ruler

Use Tear’n’Tape to attach vellum behind the fireplaces, and add mantle pieces, cats and any other decor items.

Form into a tent shape, rounding the corner with the Project Life by Stampin’ Up! corner punch, and joining the tops together with a staple.

Cover the staple with a bow, and insert your electric tealight


Stampin' Up! Uk at home class Wonderland vellum cardmaking workshop


Shop Now button-001Join my team button-001

To purchase any of the items featured in my projects please use the links above. To join my team of Stampin’ Friends select ‘Join My Team’ or send me a message!

Please support StampinByHannah, and join my Code Club, by using the Hostess code featured in the top right hand of my blog. For orders of over £150 please do not use this code, as you are entitled to your own Hostess benefits!

Sign up to my newsletter here – http://eepurl.com/2if59

Hannah Wilks

Stampin’ Up! UK Independent Demonstrator

Christmas Countdown | Sleigh Ride

Stampin' Up! Sleigh Ride edgelits jingle all the way

I am loving the bundles in the latest Stampin’ Up!® Autumn / Winter catalogue, did you know there are 17 bundles this time around?! That’s 17 chances to save 15%! Awesome!

One of my favourites is the Sleigh Ride Bundle, featuring the Jingle all the Way Stamp set, and Sleigh Ride Edgelits – designed to work together to make building Christmas scenes easy!

Stampin' Up! Sleigh Ride edgelits jingle all the way

I have really enjoyed doing these videos as part of Christmas Countdown. I changed things up a little making this series, and recorded voice-overs, what have you thought of them? There are a couple left before I transition into my 12 Weeks of Christmas series this year. I am so excited for this, I have some awesome projects planned, can’t wait!

I have no idea what has happened to my camera since I have been away, but suddenly everything is rather yellow – so I have edited this and the next few video’s on my YouTube channel (have you subscribed yet?) but hopefully its not too distracting

So, this card; I have focused here on tone-on-tone stamping and simple die cutting. This bundle is great, with a stamp set that is designed to add details to the die cuts created by the edgelits. The card base here is in Soft Sky, with the trees in Pear Pizzazz, and houses in Marina Mist.

What’s your favourite bundle from the new catalogue?


Stampin' Up! Uk at home class Wonderland vellum cardmaking workshop


Shop Now button-001Join my team button-001

To purchase any of the items featured in my projects please use the links above. To join my team of Stampin’ Friends select ‘Join My Team’ or send me a message!

Please support StampinByHannah, and join my Code Club, by using the Hostess code featured in the top right hand of my blog. For orders of over £150 please do not use this code, as you are entitled to your own Hostess benefits!

Sign up to my newsletter here – http://eepurl.com/2if59

Hannah Wilks

Stampin’ Up! UK Independent Demonstrator

Decorated Frames….. and some stamping too!

Stampin' Up! Decorated Frames Home decor stamping butterflies

Hi! Welcome to StampinByHannah! I hope you enjoy my blog, feel free to have a poke around, leave some likes, and follow along with some tutorials! Check out my latest Classes in the menu bar at the top of the page, and I can’t wait to hear from you!

Todays project was planned as one thing, but changed along the way to be something a little bit different! Stampin' Up! UK watercolour wings stamping tutorial

My big plan was a video tutorial decorating this photo frame. However, I started making my sample, added the two butterflies and a bow of Dotted Lace trim, and decided it as so gorgeous it didn’t really need any more – or really warrant a video tutorial either! However, the butterflies IN the frame (also beautiful!) could do with some explanation! The frame came from Asda for about £1.50

I am loving the Watercolour Wings bundle. This great stamp set, comes complete with two dies, one to cut the whole stamped butterfly and another smaller to coordinate with the Butterfly Thinlits dies.

Stampin' Up! Decorated Frames Home decor stamping butterflies

There are so many ink colours here. The framed version uses; Mint Macaron, Bermuda Bay, Delightful Dijon, Wisteria Wonder and Soft Sky. While the un-framed one uses; Lost Lagoon, Mint Macaron, Pink Pirouette, Melon Mambo and Crushed Curry.

The Watercolour Wings stamp set includes three stamps to make this butterfly (plus four to layer a smaller butterfly, some accent pieces and sentiments). The most solid stamp should be stamped first, with the detailed pieces layering over the top. This is a photopolymer stamp set, so layering up those stamped images is super easy too!

Stampin' Up! UK watercolour WIngs

I couldn’t leave without a close up of that lovely die-cut on the frame. The larger butterfly is from the Butterflies Thinlits dies set, and is die cut from Wisteria Wonder Card stock, with the smaller Mint Macaron butterfly from the Bold Butterflies thinlits layered onto with some Tombow glue. The 1″ Dotted Lace Trim ties into a beautiful bow too. I used Tombow to adhere the embellishment to the frame, and left it to dry overnight.

Beautiful!


Stampin' Up! UK classes mail order watercolour wings


Shop Now button-001Join my team button-001

To purchase any of the items featured in my projects please use the links above. To join my team of Stampin’ Friends select ‘Join My Team’ or send me a message!

Please support StampinByHannah, and join my Code Club, by using the Hostess code featured in the top right hand of my blog. For orders of over £150 please do not use this code, as you are entitled to your own Hostess benefits!

Sign up to my newsletter here – http://eepurl.com/2if59

Hannah Wilks

Stampin’ Up! UK Independent Demonstrator