Simply Sketched Saturday Challenge – Week 1!

Stampin' Up! UK Sketch Challenge Lovely Lace Die cutting Card

Stampin' Up! Sketch Challenge

Thank you for joining us on the first Simply Sketched Saturday Challenge! We’re a small group of Stampin’ Up!® Demonstrators who fancied a new challenge to share with you all.  The products used are all available in the current Annual, or seasonal, Stampin’ Up!® Catalogues*.  Simply use the buttons at the bottom of the post to keep hopping!


My regular blog readers will know how much I love a sketch challenge, and I am so excited to be taking part in this one!

Stampin' Up! UK Simply Sketched Challenge Week 1

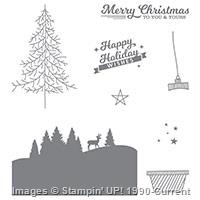
The lovely Sam Johnson has designed this lovely sketch this week, and it scared the pants off me! However, after about a week of staring at it, and find some further inspiration in Instagram, I finally managed to actually make something!

Stampin' Up! UK Sketch Challenge Lovely Lace Die cutting Card

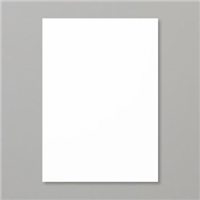
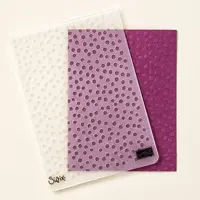
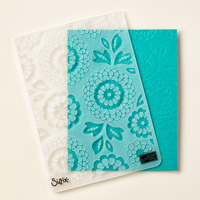
Definitely outside of my usual clean and simple style, but I’m super pleased with this card. I used my favourite embossing folder, Lovely Lace, to emboss a piece of Very Vanilla card stock. I love this folder so much that I actually need to replace it – its currently held together with parcel tape! Shocking I know, but that is how much use it has had!

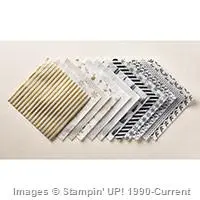
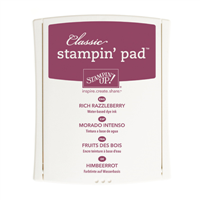
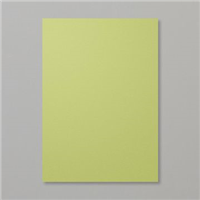
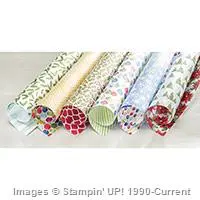
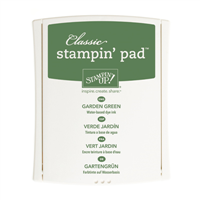
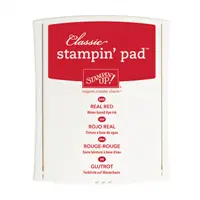
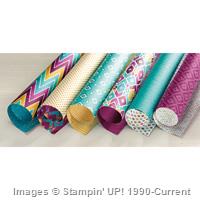
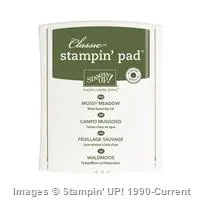
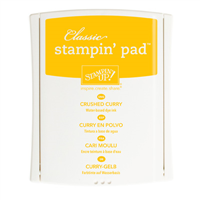
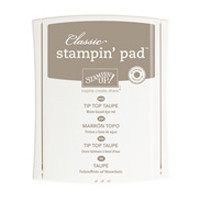
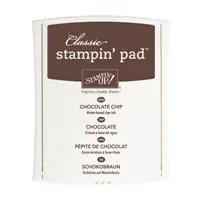
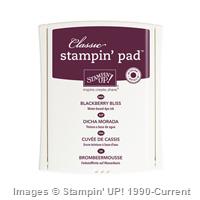
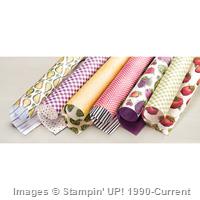
Once I had the piece embossed I added ink around the edges of the card stock with my Stampin’ sponges, inked in Tip Top Taupe, Chocolate Chip and Blackberry Bliss. I have been taking colour inspiration from the packs of Designer Series Paper recently, and have done the same here – using the Farmers Market Paper Pack.

Stampin' Up! UK Simply Sketched Challenge Hello You

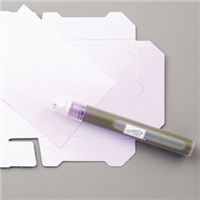
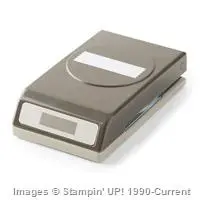
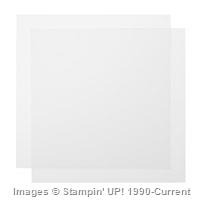
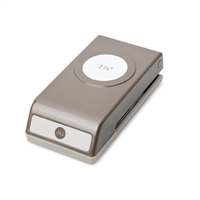
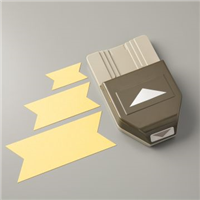
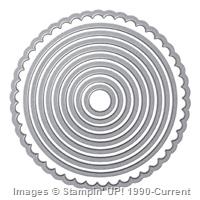
I added two strips of the Designer Series Paper to the bottom of the card after using my Triple Banner Punch to fishtail the ends, and completed the sketch with a Vellum circle added with two Glue Dots.

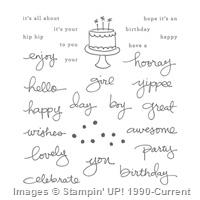
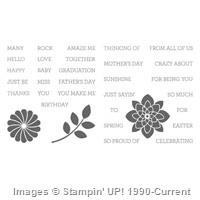
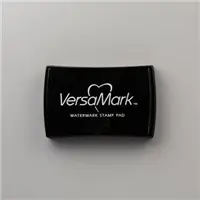
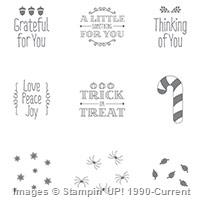
The sentiment is taken from the Crazy About You stamp and die bundle, and I used my Blackberry Bliss ink to emboss the word Hello – mainly because the ink takes so long to dry on Vellum, adding some clear embossing powder and heat setting it meant that I could get this card finished! The die cut ‘You’ is in Tip Top Taupe and is attached using Tombow Multi-purpose glue.

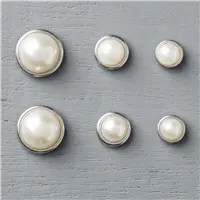
I finished the card with four of the Metal Rimmed Pearls

Simply Sketched Next

Simply Sketched Previous


Supply List

Built for Free Using: My Stampin Blog


Shop Now button-001Join my team button-001To purchase any of the items featured in my projects please use the links above. To join my team of Stampin’ Friends select ‘Join My Team’ or send me a message!

Please support StampinByHannah, and join my Code Club, by using the Hostess code featured in the top right hand of my blog. For orders of over £150 please do not use this code, as you are entitled to your own Hostess benefits!

Sign up to my newsletter here – http://eepurl.com/2if59

Hannah McCurley

Stampin’ Up! UK Independent Demonstrator

Birthday Buttons

Stampin' Up! Endless Birthday Wishes Buttons and Vellum

This card was totally inspired by a tiny stripe of vellum that was left over on my desk after a different project! I had trimmed 1 cm off a piece of the Winter Wonderland Designer Vellum for another card this week, and found it when I was playing around with some buttons – and this card was born

Stampin' Up! Endless Birthday Wishes Buttons and Vellum

This simple birthday card really occurred because I wanted to feature the Brights Buttons. I love these cute buttons, one because they are cute, and two because they coordinate with our inks and card stocks perfectly. I love Stampin’ Up! coordination, the ability to get the buttons to match the ink, to match the card stock, to match the patterned paper, embellishments and accessories.

The Happy Birthday is taken from Endless Birthday Wishes, stamped in Rich Razzleberry

Simply Gorgeous


Don’t forget to shop using the Code Club Code to receive some great FREE product!
TDNKQPDY
I will be closing this order on the 30th October 2015


Shop Now button-001Join my team button-001

To purchase any of the items featured in my projects please use the links above. To join my team of Stampin’ Friends select ‘Join My Team’ or send me a message!

Please support StampinByHannah, and join my Code Club, by using the Hostess code featured in the top right hand of my blog. For orders of over £150 please do not use this code, as you are entitled to your own Hostess benefits!

Sign up to my newsletter here – http://eepurl.com/2if59

Hannah McCurley

Stampin’ Up! UK Independent Demonstrator

Acrylic Block Stamping…. revisited!

Stampin' Up! Wonderland Vellum Sympathy card

A couple of weeks ago I made a Technique Tuesday video on this technique, and because I love it SO much, I’ve used it on another card!

Stampin' Up! Wonderland Vellum Sympathy card

This card uses a smaller sized Acrylic Block than the previous cards, because I have a smaller layer. I just couldn’t not use that gorgeous vellum on Pear Pizzazz card stock – it is beautiful in real life!

After using my Acrylic Block to stamp in Pear Pizzazz, I added the tops of the trees from the Wonderland Stamp set. Apparently this set is designed for Christmas cards, but this card doesn’t feel very festive. I’ve left it sentiment-less, but I think this would make a beautiful sympathy card.


Don’t forget to shop using the Code Club Code to receive some great FREE product! 

TDNKQPDY

I will be closing this order on the 30th October 2015


Shop Now button-001Join my team button-001

To purchase any of the items featured in my projects please use the links above. To join my team of Stampin’ Friends select ‘Join My Team’ or send me a message!

Please support StampinByHannah, and join my Code Club, by using the Hostess code featured in the top right hand of my blog. For orders of over £150 please do not use this code, as you are entitled to your own Hostess benefits!

Sign up to my newsletter here – http://eepurl.com/2if59

Hannah Wilks

Stampin’ Up! UK Independent Demonstrator

October Sketch Challenge – Card 3

Stampin' Up! Sketch Challenge Festival of Trees

I am loving this challenge! I don’t think I have even made more than one card with a sketch before, let alone using my own sketches!

Last week I came across a lovely lady called Linda’s blog, when she played along with my sketch challenge – check out here AWESOME card here! I am yet to purchase the stamp set Linda used on her card, but it totally inspired me to use the Festival of Trees stamp set, and to rotate my sketch too! funny how my brain works!

StampinByHannah October Sketch Challenge

The sketch is really simple, and I think I had been thinking small – so lets jump out of the box!

Stampin' Up! Sketch Challenge Festival of Trees

Ok, so that sketch has now been turned on its head. The three trees are stamped from Festival of Trees in Garden Green and Soft Sky, and the Designer Series Paper is Season of Cheer.

I’m really enjoying playing with this sketch, check back next Wednesday for yet another card using the same inspiration. I would LOVE to see what you have made with this sketch too, post me a link to your blog here or post a photo to my Facebook page.


Stampin' Up! Starter Kit offer


Shop Now button-001Join my team button-001

To purchase any of the items featured in my projects please use the links above. To join my team of Stampin’ Friends select ‘Join My Team’ or send me a message!

Please support StampinByHannah, and join my Code Club, by using the Hostess code featured in the top right hand of my blog. For orders of over £150 please do not use this code, as you are entitled to your own Hostess benefits!

Sign up to my newsletter here – http://eepurl.com/2if59

Hannah Wilks

Stampin’ Up! UK Independent Demonstrator

Technique Tuesday | Using the Precision Base Plate

Stampin' Up! Butterfly thinlit Precision base plate how to

One of the things in the Autumn / Winter catalogue I was looking forward to more than anything else was the Precision Base Plate. I love cutting intricate dies with my Big Shot; the Butterfly thinlits or those stunning Delicate Ornaments, but getting all those little pieces out is a pain and needing to run things through the machine several time to ensure a good cut is annoying – but no more! Stampin' Up! UK Die cutting video tutorial

The Precision Base Plate is a steel plate deigned to replace one of your Clear Cutting Plates when using intricate dies. It works by providing a super hard surface for your dies to work against, giving a crisper, cleaner cut. I have to say though, I wouldn’t use this plate all the time – it just isn’t required for basic shapes, but the difference it makes on detailed dies makes this a must have accessory for my Big Shot Machine

This card was super easy to make with the Big Shot and precision base plate, the video is only 8 minutes and that’s with all my waffle! The Designer Series Paper on both cards was the inspiration for the colour schemes here, the Bohemian Designer Series Paper pack features some pretty loud patterns but the reverse sides are lovely and delicate with some great tone on tone looks.

Stampin' Up! Butterfly thinlit Precision base plate how to

Precision Base Plate top tips:

  • Use the Precision plate with your Multi-purpose platform fully closed, just as you would for thinlits dies and Clear plates
  • Make sure you are cutting on the correct side – the label should be face down (not showing) and you cut into the Black side of the plate
  • It may take a little more force to get this plate through your Big Shot, but DO NOT force it! check your sandwich and try again
  • This plate replaced a Clear Cutting Plate in your standard die sandwich – Multi-purpose Platform (on tab 2), Precision Base Plate (label side DOWN), card stock, die, Clear Cutting Plate

StampinByHannah Parties at home Teesside Stockton on Tees Craft Cardmaking Classes


Shop Now button-001Join my team button-001

To purchase any of the items featured in my projects please use the links above. To join my team of Stampin’ Friends select ‘Join My Team’ or send me a message!

Please support StampinByHannah, and join my Code Club, by using the Hostess code featured in the top right hand of my blog. For orders of over £150 please do not use this code, as you are entitled to your own Hostess benefits!

Sign up to my newsletter here – http://eepurl.com/2if59

Hannah Wilks

Stampin’ Up! UK Independent Demonstrator

Delightful Guy Birthdays ….

Stampin' Up! UK Guy Greetings mens birthday card

One of those card that all card makers struggle with are Birthday card for men! Everyone I speak to always requests more men’s cards – they can be tricky, and personally I don’t like making theme-y cards either (just because dad likes Golf, doesn’t mean I should make a birthday card featuring golf balls, does it?!)

But we have a solution! Guy Greetings!

Stampin' Up! UK Guy Greetings mens birthday card

I adore this stamp set! I’m sure regular blog readers have read my waffle about this stamp set before, but for men’s birthday cards you just cannot beat it; a great selection of manly images complete with a series of handy sentiments in a lovely font.

This card actually uses a piece of Christmas Designer Series Paper, from the Season of Cheer Designer Series Paper Pack – and I totally took colour inspiration from this one piece of paper – Delightful Dijon all the way! (with a hint of Basic Black!). The spanners were stamped off once before stamping – with the ‘Happy Birthday’ stamped in full strength. I use this ‘Happy Birthday’ stamp a lot, but this is the first time I have combined it with the Washi Label punch, basically because I thought the stamp was too big! Wrong! Stampin’ Up! coordination at its best!


Don’t forget to shop using the Code Club Code to receive some great FREE product! 

TDNKQPDY

I will be closing this order on the 30th October 2015


Shop Now button-001Join my team button-001

To purchase any of the items featured in my projects please use the links above. To join my team of Stampin’ Friends select ‘Join My Team’ or send me a message!

Please support StampinByHannah, and join my Code Club, by using the Hostess code featured in the top right hand of my blog. For orders of over £150 please do not use this code, as you are entitled to your own Hostess benefits!

Sign up to my newsletter here – http://eepurl.com/2if59

Hannah Wilks

Stampin’ Up! UK Independent Demonstrator

Shaker Card using the To You and Yours Card Kit

Stampin' Up! UK Shaker Card To You and Yours

Yesterday we looked at the To You and Yours Shaker Card Kit (which I LOVE!) but I had HEAPS of bits and pieces left over after making the 18 cards.

So I have made a few bits and pieces with the left overs. I’m only sharing one of the card with you today, but sign up for my newsletter for more inspiration with this kit coming really soon

Stampin' Up! UK Shaker Card To You and Yours

Using the stamp set that goes with the kit as the shaker background I created my own shaker window using the Stampin’ Trimmer (although you could use dies). Those star sequins are left over from the kit, and I STILL have more!

The sentiment is also from the same stamp set, heat embossed in Gold (yum!)


Stampin' Up! Starter Kit offer


Shop Now button-001Join my team button-001

To purchase any of the items featured in my projects please use the links above. To join my team of Stampin’ Friends select ‘Join My Team’ or send me a message!

Please support StampinByHannah, and join my Code Club, by using the Hostess code featured in the top right hand of my blog. For orders of over £150 please do not use this code, as you are entitled to your own Hostess benefits!

Sign up to my newsletter here – http://eepurl.com/2if59

Hannah Wilks

Stampin’ Up! UK Independent Demonstrator

To You and Yours Shaker Card Kit

Stampin' Up! To you and your shaker card kit top tips

I am loving the Project Kits in this years catalogues! They are all so simple to put together – so simple in fact that most of them can be put together in a couple of hours, surrounded by your friends – if you want to book a Party with me between the 4th and 10th of November you can select 2 FREE stamp sets from my basket of Stamping Goodies AND I can give you a hand to put your chosen kit together too! So, book your party today!

The To You and Yours Shaker Card Kit really stood out to me in the Autumn / Winter catalogue as a kit I needed to get home and put together before I could offer it to you as a class – Is it really as easy as Stampin’ Up!® make it look?

YES!

Stampin' Up! To you and your shaker card kit top tips

This kit gets you 18 cards (with envelopes) 6 of each of 3 designs. Stampin’ Up!® have even made a really handy video of how to put the kit together – along with both written and photographic instructions provided in the kit.

Stampin' Up! UK shaker card kit

The kit features gorgeous foiled card bases, and a lovely selection of different shaker shapes and elements to make your 18 cards. You could totally mix it up a bit and put the Glass Glitter in the Joy Bauble, or put the Joy sticker on the Star shape.

Stampin' Up! UK classes and parties Teesside

For me the highlight of this kit is the Dimensional Strips, they make creating your shaker shape so easy – just remember to butt the ends up close together on the cards where your using that Glass Glitter or you might find you have an empty shaker card and an envelope full of sparkles by the time they reach the recipient!

I found that adding some Crystal Effects liquid glue at the joints of the Dimensionals also helped (even if it was only peace of mind) to keep that Glass Glitter contained!

I thought I would make a quick video showing you just how easy it is to make these cards, but of course my camera had other ideas! hope you enjoy the Voiceover, and horrendous bow tying at the end! (there is a reason why the others don’t have their bit of bakers twine!)Stampin' Up! UK Shaker card video tutorial

Shaker Card Top Tips:

  • Start by applying your outline stickers, these are easier to apply than they look, and make the cards look super professional too!
  • Complete all the stamping before you start gluing your window sheets to your shaker frames
  • Use Tombow or Crystal Effects to add your Window Sheet – DO NOT be tempted to use your Fine-Tip Glue Pen, this glue is FAR too running and makes a major mess, check the video if you don’t believe me!
  • Assemble the Christmas Tree cards first, as suggested by Stampin’ Up!®, as you need to add 6 sequins to each tree, and to get that messy Glass Glitter out of the way!
  • Ensure your Dimensional Strips are butted tight up against each other, and add a liquid glue between to create a full seal (and allow to dry) before pouring your Glass Glitter onto the stamped tree – then line your shaker frame up over the top – otherwise your stamped tree might not match your shaker window!
  • Add the sentiment stickers last!
  • Have FUN!

StampinByHannah Parties at home Teesside Stockton on Tees Craft Cardmaking Classes


Shop Now button-001Join my team button-001

To purchase any of the items featured in my projects please use the links above. To join my team of Stampin’ Friends select ‘Join My Team’ or send me a message!

Please support StampinByHannah, and join my Code Club, by using the Hostess code featured in the top right hand of my blog. For orders of over £150 please do not use this code, as you are entitled to your own Hostess benefits!

Sign up to my newsletter here – http://eepurl.com/2if59

Hannah Wilks

Stampin’ Up! UK Independent Demonstrator


Halloween With a Sleigh Ride!

Stampin' Up! UK Halloween Sleigh Ride

When I am shopping for products I want to buy things that I can get multiple uses from (don’t we all!) but this can be tricky when looking at Christmas themed goodies. I have been really enjoying making Christmas cards using the Sleigh Ride Edgelit dies, but I knew that they could be so versatile. I have great plans for these (so hoping that they will still be here in January, is it too early to be thinking of retiring products!) but I thought I would start with an event that is a little nearer – Halloween

Stampin' Up! UK Halloween Sleigh Ride

With both scenes cut from a single piece of Basic Black card stock, I played around with placement until I was happy with the line of the trees, and considered sticking everything down and calling this one done. But I wanted the little housed to be ‘lit up’ but the orange card stock behind, and with an orange sky the effect wasn’t quite right. Cut a piece of Very Vanilla with the houses edgelit, and added the negative space to the top of the card so that the only orange is coming through the windows of the cute houses. Much better

Although there are loads of really lovely spooky Halloween items in this years Autumn / Winter catalogue, its not something that really jumps out at me so the only sentiment I have is from the A Little Something Stamp Set – I think this may be the most used set in my collection at the moment – with Trick or Treat stamped in Basic Black on Very Vanilla punched with the 1 3/8″ circle punch and a little extra Orange added with a Tangerine Tango Stampin’ Write Marker

I think you could totally re-create this for Christmas, or even a winter birthday, What do you think?


StampinByHannah Parties at home Teesside Stockton on Tees Craft Cardmaking Classes


Shop Now button-001Join my team button-001

To purchase any of the items featured in my projects please use the links above. To join my team of Stampin’ Friends select ‘Join My Team’ or send me a message!

Please support StampinByHannah, and join my Code Club, by using the Hostess code featured in the top right hand of my blog. For orders of over £150 please do not use this code, as you are entitled to your own Hostess benefits!

Sign up to my newsletter here – http://eepurl.com/2if59

Hannah Wilks

Stampin’ Up! UK Independent Demonstrator


October Sketch Challenge – Hello December!

Stampin' Up! Sketch Challenge Hello December 2015

It’s time for another card made with my October sketch:

StampinByHannah October Sketch Challenge

Last week I used the Triple Banner punch and School House Designer Series Paper to create my card based on this sketch. This week I wanted to create using just stamps.

Looking through my stamp collection I wanted something that dangled, I wasn’t aiming to make a Christmas card, but the bauble stamp from Hello December 2015 leapt out, and then I noticed the cute banner in the set and had to add that too. I already had a Mint Macaron card base on my desk, along with a matt of Very Vanilla so they were natural choices.

Stampin' Up! Sketch Challenge Hello December 2015

Stamped in Mint Macaron and Lost Lagoon the card looked a little plain, so I grabbed my Versamark pad and some Iridescent Ice Embossing Powder and added 5 stars across the card. Unfortunately I photographed this on a very (very) dull day, and didn’t manage to capture the sparkle that this embossing powder brings – Clear embossing powder complete with glitter = Yum!


Don’t forget to shop using the Code Club Code to receive some great FREE product! 

TDNKQPDY

I will be closing this order on the 30th October 2015


Shop Now button-001Join my team button-001

To purchase any of the items featured in my projects please use the links above. To join my team of Stampin’ Friends select ‘Join My Team’ or send me a message!

Please support StampinByHannah, and join my Code Club, by using the Hostess code featured in the top right hand of my blog. For orders of over £150 please do not use this code, as you are entitled to your own Hostess benefits!

Sign up to my newsletter here – http://eepurl.com/2if59

Hannah Wilks

Stampin’ Up! UK Independent Demonstrator