Hexagonal Gift Bag

Stampin' Up! UK candle gift designer series paper stack

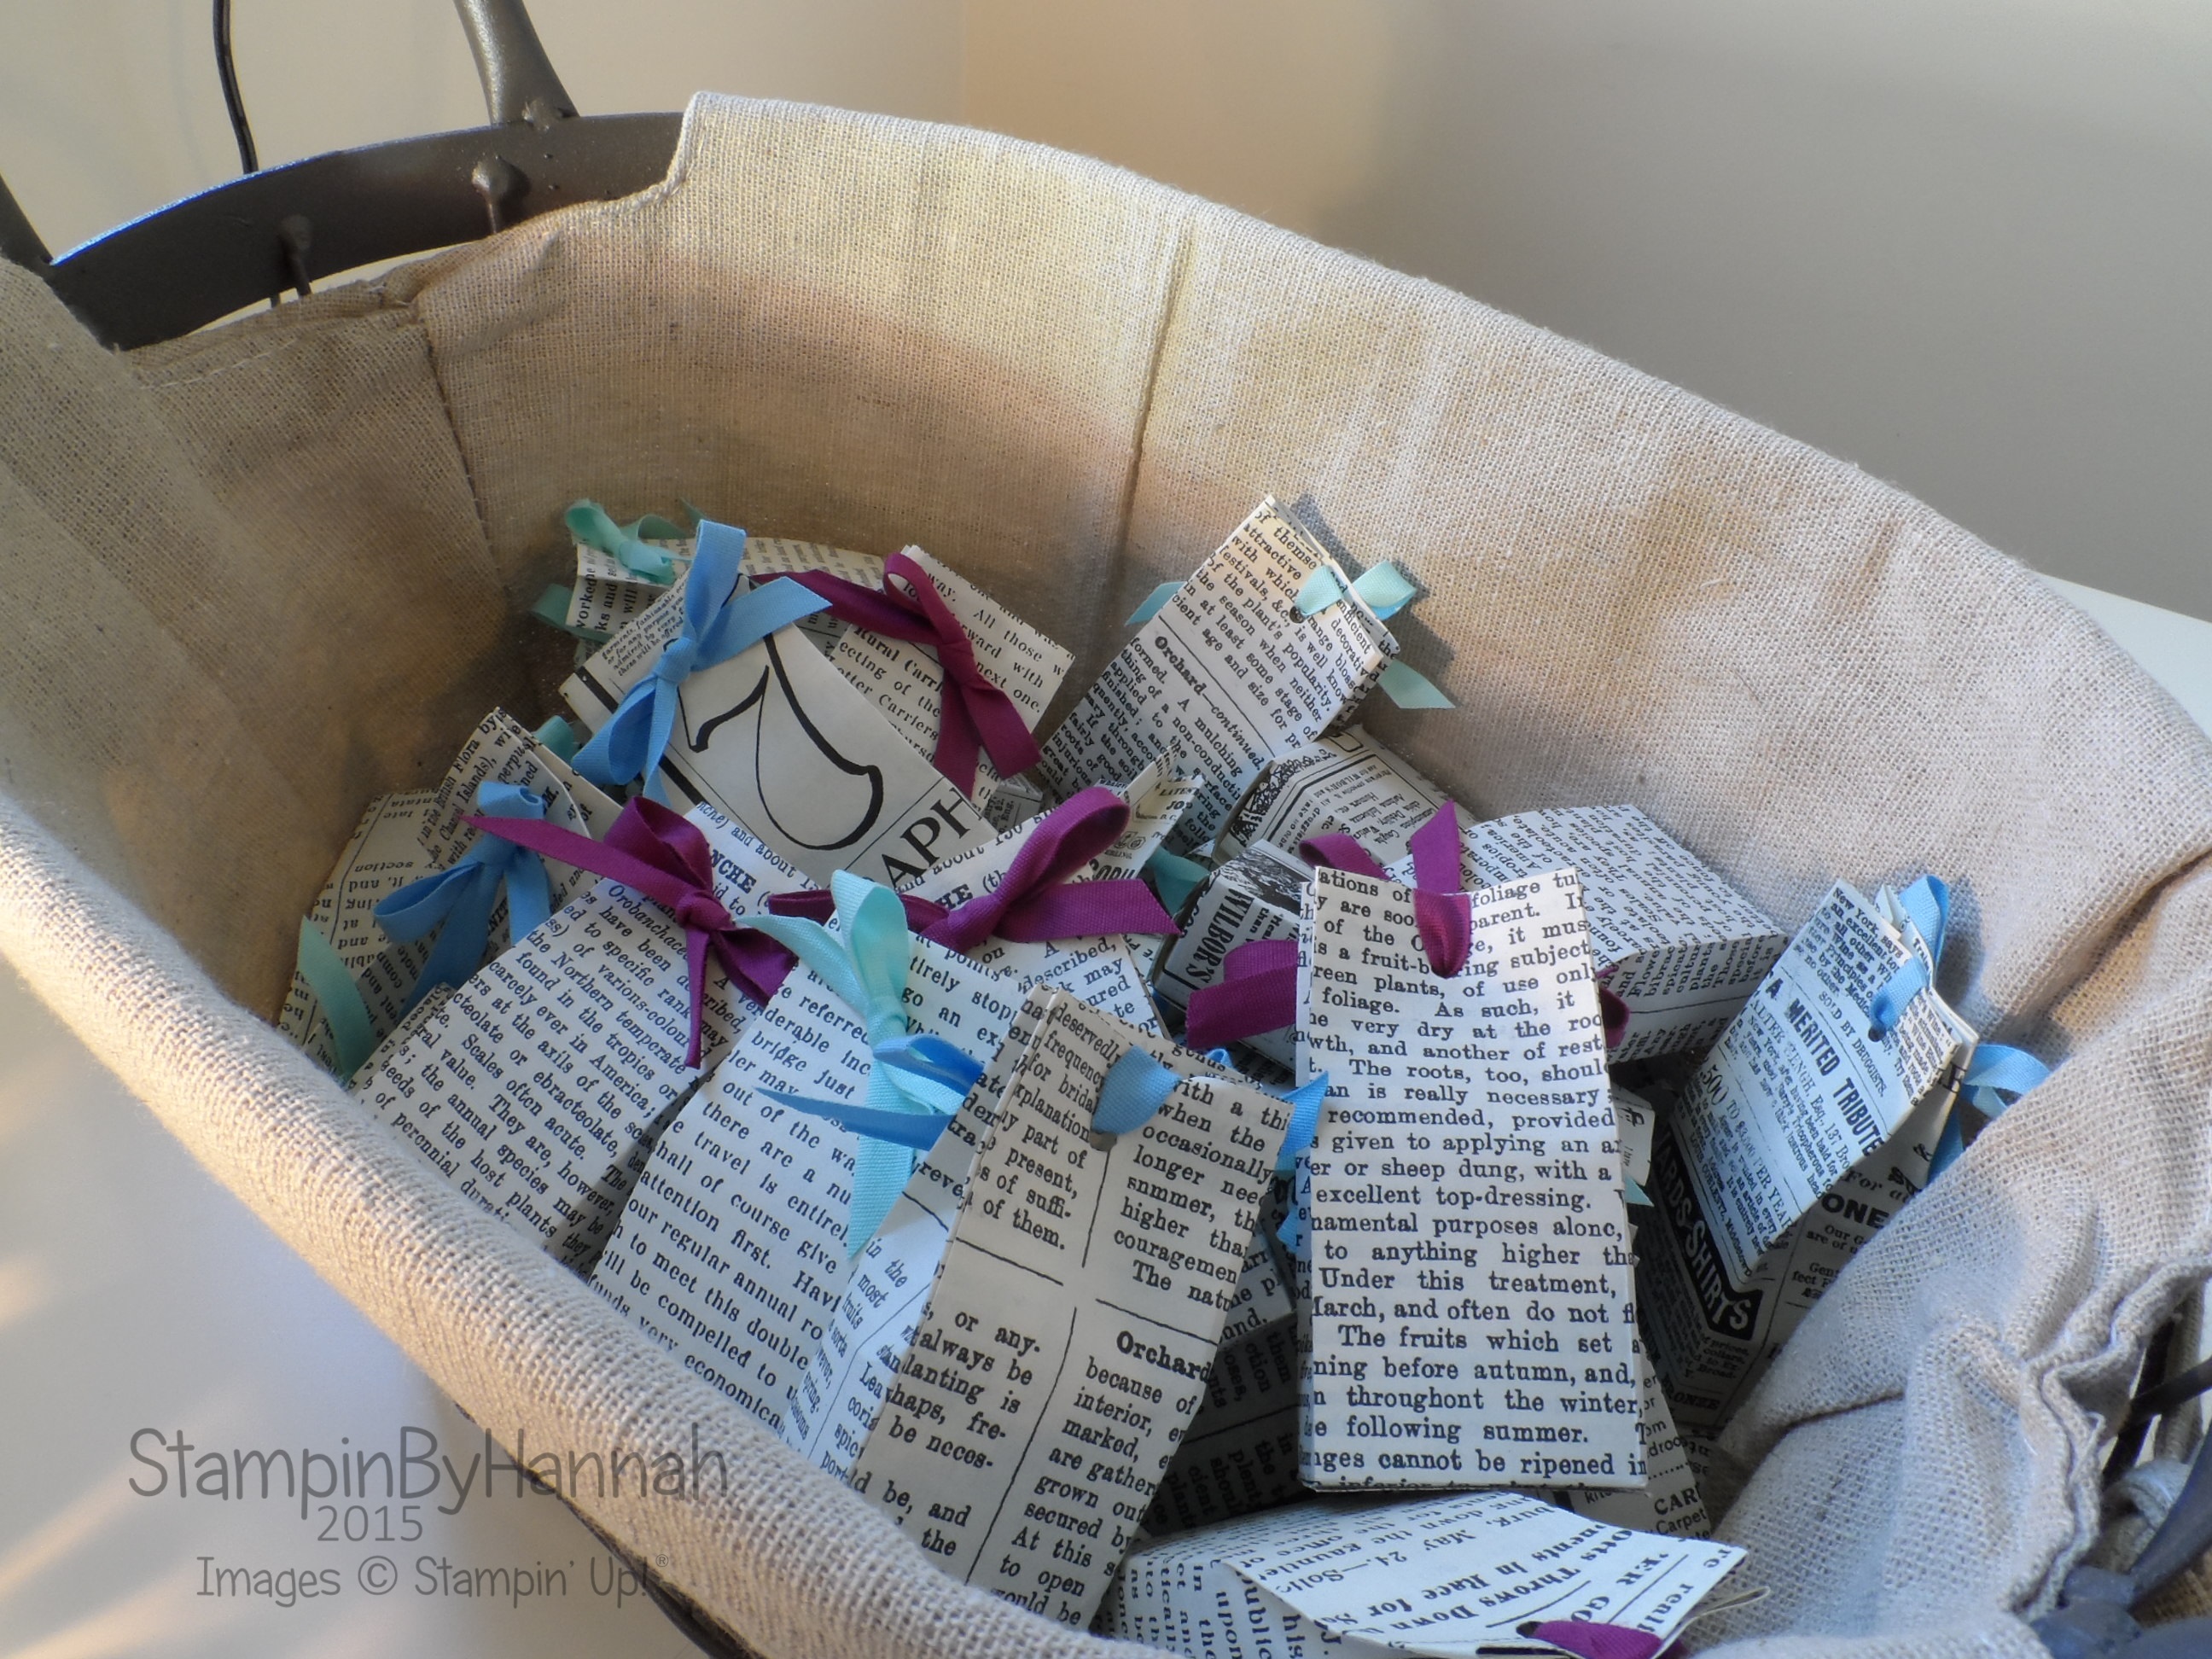
These candles fell into my bag a few months ago during a mad dash around Ikea. I love Ikea candles, and this scent in particular is one of my very favourites – Vanilla Ice Cream, Yum! I often give them as gifts, but trying to package them is always a little awkward. Or it was, how cute is this gift bag!

Hexagonal gift bag


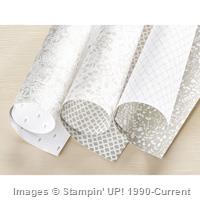
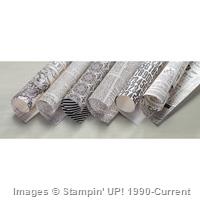
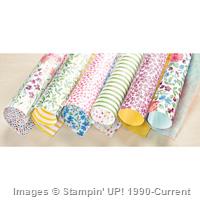
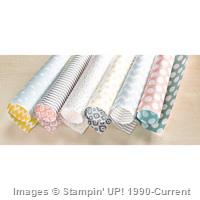
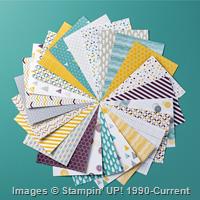
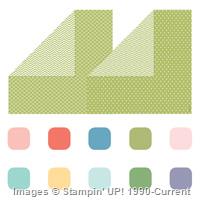
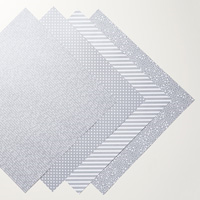
I adore the new Designer Series Paper Colour Collections, these use the Neutrals in Basic Grey and Sahara Sand. The collections have been re-configured this year, changing the patterns, so now each collection contains 40 sheets, 2 of each of 2 double sided designs in 10 colours (or 4 of each of 2 double-sided designs in 5 colours for the In-Colour collections). The designs are stunning; a diagonal stripe, a little floral print, a bold polka dot, and my favourite a wonderful script. They are fab!

Stampin' Up! UK candle gift designer series paper stackThese bags are quick and easy to make, as well as holding a good amount of whatever you choose. They are strong too, these both contain candles, without any danger of the bottom giving way! The base of the bag has 6 layers of DSP, making them super strong.
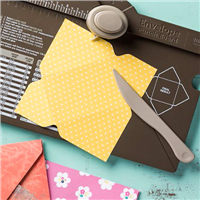
Measurements:

Designer Series Paper, or card stock; 11 x 8″ (28 x 20.5 cm)

Score on the long side at: 1 3/4, 3 1/2, 5 1/4, 7, 8 3/4 and 10 1/2″ (4.5, 9, 13.5, 18, 22.5 and 27 cm)

Score on the side side at: 3 and 6″ (7.5 and 15 cm)

Fold and burnish all the score lines

Holding the DSP in the landscape direction, with the fatter bit at the bottom, cut off the skinny end section, and cut up each one of the score lines to the first horizontal score.

Apply Fast Fuse to the skinny end section and fold to create a tube. This seam with be the back of the bag. Then apply Fast Fuse to 3 of the bottom sections and fold each section in to form the base.

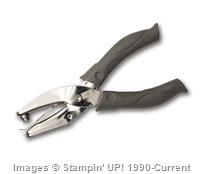
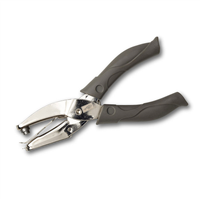
Turn the bag so it is the right way up, pinch in the top, and make holes with the 1/8″ handheld punch.

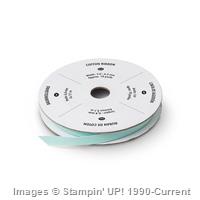
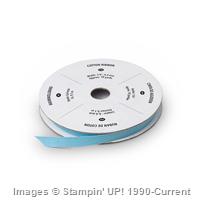
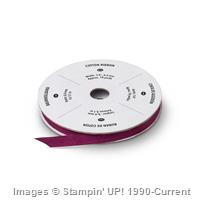
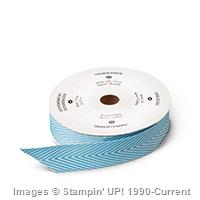
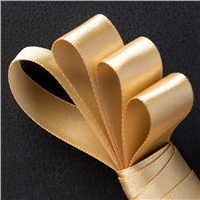
Feed your ribbon through the holes, starting from the front of the bag and working your way around

Finish with a bow


Shop Now button-001Join my team button-001

To purchase any of the items featured in my projects please use the links above. To join my team of Stampin’ Friends select ‘Join My Team’ or send me a message!

Please support StampinByHannah by using the Hostess code featured in the top right hand of my blog. For orders of over £150 please do not use this code, as you are entitled to your own Hostess benefits!

Sign up to my newsletter here – http://eepurl.com/2if59

Hannah Wilks

Stampin’ Up! UK Independent Demonstrator

Swatch Book

Stampin' Up! UK swatch book

If you have been following me for a while you may remember last year, when I shared my Customised Colour Coach. Well, can you imagine my sadness, when the colour coach was retired this week! I know, I don’t really know how I am going to cope! well, better now I have made this;

My Swatch Book!

Stampin' Up! UK swatch book

I just love a good swatch! I use them often when I’m choosing colours for projects (an even more often when I’m creating items for customer orders!) And when I spotted the Layered Letters Alphabet in the latest catalogue, I just knew I had the perfect swatch stamp too!

So, I have created 3 PDF’s for you to download and make your own Stampin’ Up! swatch book. The first file contains swatch cards for all 4 colour families, that’s 36 ink pad colours, while the 2nd is for the current In-Colours (2014-2016 and 2015-2017), and the 3rd download contains the swatch spots for the previous two sets of In-Colours!

Colour Swatches – Colour Families

Colour Swatches – In Colours

Colour Swatches – In Colours – previous

To create my swatch book:

First print the PDF files onto Whisper White card stock

Using the Layered Letters Alphabet stamp set, and the rectangular stamp, swatch each ink colour in the coordinating swatch spot.

Cut the swatches into 2″ squares by cutting along the lines of the template.

Make a hole in the top left hand corner of each swatch using the 1/4″ handheld punch and keep the swatches together with an O ring (I used these ones from Amazon)#


As mentioned in the video, Stampin’ Up! are currently running a great joining offer. Sign up between now and the 30th June 2015, and Stampin’ Up! will add an additional two stamp sets of your choosing into your Starter Kit for FREE! Awesome! For each person who joins my team during this promotion I will not only be sending you my usual new demo goodies, but I will also add a completed swatch book!


Shop Now button-001Join my team button-001

To purchase any of the items featured in my projects please use the links above. To join my team of Stampin’ Friends select ‘Join My Team’ or send me a message!

Please support StampinByHannah by using the Hostess code featured in the top right hand of my blog. For orders of over £150 please do not use this code, as you are entitled to your own Hostess benefits!

Sign up to my newsletter here – http://eepurl.com/2if59

Hannah Wilks

Stampin’ Up! UK Independent Demonstrator

Wedding Week – Wedding Favours

Stampin' Up! UK lided box video tutorial

I have recently put together my wedding favours, and I wish I could say that these are they, but they’re not. They are super cute little milk cartons, and I absolutely love them, but they are not these.

These would be perfect as Wedding Favours, and would hold a good amount of sugared almonds or other confectionery. I have once again pulled out the Something Borrowed Designer Series Paper – this paper retires on the 2nd June (that’s next Tuesday!) so grab it now while you still have the chance.

Stampin' Up! UK wedding favours something borrowed designer series paper

I love a monotone look for weddings, simple colours to make sure people are looking in the right place i.e.: at the bride and groom! and this paper is just perfect for that, detailed enough to be stunning, but not too complex that it shouts too loud.

Measurements:

Base – Card stock = 6 x 6 ” (15 x 15 cm)

score on all 4 sides at 2 ” (5 cm)

Lid – Designer Series Paper = 5 1/16 x 5 1/16″ (12.8 x 12.8 cm)

score on all 4 side at 1 1/2″ (3.8 cm)

Stampin' Up! UK lided box video tutorial


Shop Now button-001Join my team button-001

To purchase any of the items featured in my projects please use the links above. To join my team of Stampin’ Friends select ‘Join My Team’ or send me a message!

Please support StampinByHannah by using the Hostess code featured in the top right hand of my blog. For orders of over £150 please do not use this code, as you are entitled to your own Hostess benefits!

Sign up to my newsletter here – http://eepurl.com/2if59

Hannah Wilks

Stampin’ Up! UK Independent Demonstrator

Wedding Week – Create your own Envelopes

Stampin' Up! UK Envelope Punch Board Something Borrowed

I think the Envelope Punch Board is awesome! I really do, it’s such a great tool and I use it all the time; not only for envelopes but boxes and bows too! I was putting together the blog posts for this week, and realised how perfect it would be to have all your wedding stationary completely coordinating – even down to the envelopes. And then I thought, we have the most perfect tool for that! So, here we are; How to Make an Envelope using the Envelope Punch Board!

Stampin' Up! UK Envelope Punch Board Something Borrowed

What great Designer Series Paper to work with too, I have been loving this Sahara Sand / Whisper White combination recently, and I think it makes great neutral wedding stationary. In fact I have some of this paper hoarded away ready for the Wedding Album! (Its getting rather close now!)

Measurements:

To create an envelope perfectly sized for a A6 card, you will need a piece of Designer Series Paper that measures 8 1/4 x 8 1/4″.

Now, I know, normally I try to give you both metric and imperial measurements, however, when your using the Envelope Punch Board, the imperial measurements are much easier to see and use, so this time, I’m sticking with inches!

Insert you Designer Series Paper into your punch board punch, and line the left hand side of the paper up with the 3 5/8″ mark.

Punch and score using the scoring tool provided.

Turn your Designer Series Paper a quarter turn and line the previously made score line up with the guide on the punch, and punch and score again. Repeat this on all 4 sides.

Turn your Envelope Punch Board around and use the reverse side of the punch to round the corners of your envelope.

Fold and burnish your score lines using the side of the scoring tool.

Use your adhesive of choice to stick your envelope together, using a glue dot to secure the top flap (once your handmade card is inside, of course!)


Shop Now button-001Join my team button-001

To purchase any of the items featured in my projects please use the links above. To join my team of Stampin’ Friends select ‘Join My Team’ or send me a message!

Please support StampinByHannah by using the Hostess code featured in the top right hand of my blog. For orders of over £150 please do not use this code, as you are entitled to your own Hostess benefits!

Sign up to my newsletter here – http://eepurl.com/2if59

Hannah Wilks

Stampin’ Up! UK Independent Demonstrator


Stampin’ Up! UK Regional Training Swaps

One of the many many great things about being a demonstrator for Stampin’ Up! is the opportunity to attend Stampin’ Up! organised events. This past weekend I drove the 180+ miles to Telford for this years demonstrator training event. I will share the full details with your soon (well, as much as I can!) but for now, I thought I would share what I made for my Swaps!

Stampin' Up! UK Telford swaps 2015

Swapping is another great part of being a demonstrator. Each time we get together we make things to share; they are a great way of getting inspiration when you’ve lost your crafty mojo, and are a wonderful way of meeting new people. I found some cute little chocolates during a recent dash to Home Bargains (there’s one at the end of my road, perfect for those chocolate emergencies! they sell other stuff to, but chocolate is my main reason for a visit!) and knew they would have to be part of my swap!

Stampin' Up! UK Telford swap mini chocolate gift bag

Aren’t they just adorable! I loved making them, although the Typeset Designer Series Paper is interesting to work with! Its a lovely thin weight, and acts a little bit like vellum when you score it. You have to keep a tight hold otherwise it has a habit of moving and shifting – resulting in wonky bags!

Measurements:

Designer Series Paper – 4 3/4 x 3 1/2″ (12 x 9 cm)

Score on the long side first with the print facing the right way at 1 3/8, 2 1/8, 3 1/2 and 4 1/4″ (1, 4.5, 6.5 ad 10 cm)

Score on the short side at 3/4″ (2 cm)

Cut the little rectangle from the bottom corner, and cut up the other score lines just to the horizontal score

Use Fast Fuse to stick your bags together, applying the glue along the long thin edge. Then work out which side is the back (the one with the seam), fold in the bottom – sides first, then the back, then the front – applying Fast Fuse to the inside of the front flap.

Insert your chocolates

Use the 1/8″ Handheld punch to create a hole in the middle near the top.

Thread your ribbon from the inside through to the front, and then over the top and in through the back and through to the front. You should end up with both ends of the ribbon at the front.

Tie a bow! (I know, that makes it sound a whole lot easier than it is!)

Stampin' Up! Telford swaps basket

I couldn’t leave you without showing you my swaps basket (it doubles as my Bargain Basket!), don’t they look cute!


Shop Now button-001Join my team button-001

To purchase any of the items featured in my projects please use the links above. To join my team of Stampin’ Friends select ‘Join My Team’ or send me a message!

Please support StampinByHannah by using the Hostess code featured in the top right hand of my blog. For orders of over £150 please do not use this code, as you are entitled to your own Hostess benefits!

Sign up to my newsletter here – http://eepurl.com/2if59

Hannah Wilks

Stampin’ Up! UK Independent Demonstrator

Large Gift Bag Video Tutorial!

Hello! It’s finally Friday! I’m all set for a weekend of crafts and fun at Stampin’ Up! regional training tomorrow! I am so excited!

I love attending Stampin’ Up! events, they are always so much fun! And we always come away with heaps of inspirational ideas (as well as some free swag! Yay!)

Anyway, on with this weeks Friday Tutorial…..

I made this bag (and filmed it) back in February! I needed a bag quickly to gift a friend a bottle of her favourite tipple (a spirit that comes in a rectangular bottle) and came up with this.

Stampin' Up! UK large gift bag video tutorial

I apologise for the state of that photo, but they were just too tall to fit into my light box!

Measurements:

Designer Series Paper – 12 x 12″ (30.5 x 30.5 cm)

Score on the first side at 2 1/4″ (5.5 cm)

Score on the second side at 2 1/4, 5 1/4, 7 1/2 and 11″ (5.5, 13.5, 19 and 27 cm)


Shop Now button-001Join my team button-001

To purchase any of the items featured in my projects please use the links above. To join my team of Stampin’ Friends select ‘Join My Team’ or send me a message!

Please support StampinByHannah by using the Hostess code featured in the top right hand of my blog. For orders of over £150 please do not use this code, as you are entitled to your own Hostess benefits!

Sign up to my newsletter here – http://eepurl.com/2if59

Hannah Wilks

Stampin’ Up! UK Independent Demonstrator12

Bottle Labels!

Before we get into the blog post today I want to remind you about the retiring list – I know that the Designer Series Paper I have used below is on this list – it may no longer be available, and I’m sorry if it’s not – but go and check out the bargains before its too late!


I regularly give bottles of wine away as gifts – particularly at the moment where I have some wonderful people running around doing fantastic things in preparation for the wedding (really not long to go now!) But a bottle of wine on its own is boring, so I had to put my own stamp (get it!) on it!

Stampin' Up! UK wine gift tag

They are so simply to make (check out the video below!) and use a tiny piece of card stock, and an even smaller piece of Designer Series Paper, but they make such a difference to a boring bottle.

These ones use the 2014-2016 In Colours Blackberry Bliss and Hello Honey, and the now sadly retiring Moonlight Designer Series Paper stack. I really am sad to see this paper go, BUT I have seen the next Stampin’ Up! annual catalogue, and I have to say, the papers that are replacing Moonlight are AWESOME! Actually the whole catalogue is fantastic! Want to see it now? Join my team, and get to add some sneak peaks to your Starter Kit!

The stamps featured here are from You Plus Me, which really is Valentines day themed, however, I think the sentiments work well here (after all, that bottle of wine, that one, that one was mine!)

Measurements:

Card stock – 20 x 7 cm, score at 6.5 cm on the long side, and use a 1 3/8″ circle punch to make a whole in the smaller side.

Designer Series Paper – 13 x 6.5 cm


Shop Now button-001Join my team button-001

To purchase any of the items featured in my projects please use the links above. To join my team of Stampin’ Friends select ‘Join My Team’ or send me a message!

Please support StampinByHannah by using the Hostess code featured in the top right hand of my blog. For orders of over £150 please do not use this code, as you are entitled to your own Hostess benefits!

Sign up to my newsletter here – http://eepurl.com/2if59

Hannah Wilks

Stampin’ Up! UK Independent Demonstrator


Giant Tealights – a bag two ways

Last week I took a personal day, took myself off shopping – mainly for wedding things, shoes, honeymoon clothes, thank you presents, that sort of thing. But while I was out I stopped in at Ikea (I think I have a problem, I cannot just drive past, I have to go it, its like visiting an old friend!) and picked up a few items for my craft room. While I was there I had to stop in the Candle department, I love Ikea candles, its such a shame they’ve stopped doing the really big ones in glass pots though, instead I grabbed a pack of Giant Tealights, in Apple – or Wild Wasabi!

Stampin' Up! UK Ikea Giant Tealight Bag Video Tutorial

So, both bags are the same. But the Marina Mist version has been folded over near the top of the tealight inside, and the flap held closed by some now sadly retiring Chevron Ribbon. You can find out more about retiring products in my previous post. Whereas the Wild Wasabi version is held closed by one of the fabulous Clothespins (or pegs if your here in the UK!)

Measurements:

Designer Series Paper – 7 x 6″ (18 x 15 cm)

Score on the long side first at – 1, 3 3/8, 4 3/8 and 6 3/4″ (2.5, 8.5, 11 and 17 cm)

Score on the short side at – 1″ (2.5 cm)


Shop Now button-001Join my team button-001

To purchase any of the items featured in my projects please use the links above. To join my team of Stampin’ Friends select ‘Join My Team’ or send me a message!

Please support StampinByHannah by using the Hostess code featured in the top right hand of my blog. For orders of over £150 please do not use this code, as you are entitled to your own Hostess benefits!

Sign up to my newsletter here – http://eepurl.com/2if59

Hannah Wilks

Stampin’ Up! UK Independent Demonstrator

Marshmallow Box – Video Tutorial

Isn’t it always the way, when your doing a big ol’ deep clean that you come across something you had totally forgotten all about! well, that’s what happened to me last week. Deep cleaning my kitchen cupboards and this little box fell out on my head! First of all I thought it was a higher power being nice to me, rewarding my hard-work with Marshmallows, but alas the box was empty! However, it did inspire me to create this fab gift box – great for Marshmallows, or chocolates, a small candle, or just something little and cute!

Stampin' Up! UK Box video tutorial perpetual birthday calender

I love this box! The dots are from Perpetual Birthday Calender, while the sentiment is a retiring Hello There!

Measurements:

Card stock = 11 1/2 x 9 3/4″ (29 x 25 cm)

Score on the long side at – 2 3/4, 5 1/2, 8 1/4 and 11″ (7, 14, 21, and 28 cm)

Score on the short side at – 3/4, 3 1/2, 6 1/4, and 9″ (2, 9, 16, and 23 cm)


Shop Now button-001Join my team button-001

To purchase any of the items featured in my projects please use the links above. To join my team of Stampin’ Friends select ‘Join My Team’ or send me a message!

Please support StampinByHannah by using the Hostess code featured in the top right hand of my blog. For orders of over £150 please do not use this code, as you are entitled to your own Hostess benefits!

Sign up to my newsletter here – http://eepurl.com/2if59

Hannah Wilks

Stampin’ Up! UK Independent Demonstrator

Easter Egg Basket – Video Tutorial

I love the simplicity of these baskets. The eggs are yet another Lidl find – and don’t they match well with Strawberry Slush!

Stampin' Up! UK Easter Egg Basket Video


These baskets are finished with one of my most used stamp and punch combinations – Petite Petals. Stamped onto Strawberry Slush in Sahara Sand ink, for an almost tone on tone look.

Measurements:

Cardstock or Designer Series Paper – 6 x 6″ (15 x 15 cm)

Score on the 1st side at 2 and 4″ (5 and 10 cm)

Score on the 2nd side at 2 and 4″ (5 and 10 cm)


Hannah Wilks

Stampin’ Up! UK Independent Demonstrator

If you like the project, or any of the products used, would like a catalogue, or to join my team, please contact me, or click on the ‘Shop NOW’ button at the top of the page. You can also find me on Twitter, Facebook, YouTube, Google+, About.me, and Tumblr (Links in the sidebar)

Sign up to our newsletter here – http://eepurl.com/2if59

Thank you for stopping by www.www.stampinbyhannah.co.uk today

x