Gift Bag Punch Board | Coin Wallet

Stampin' Up! UK Gift Bag Punch Board Coin wallet

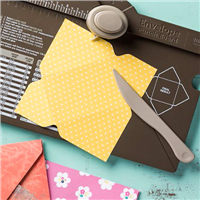
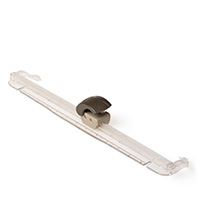
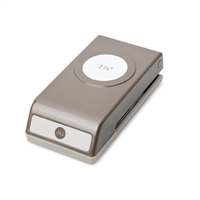
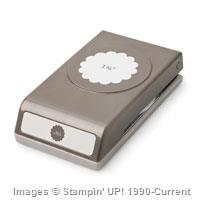
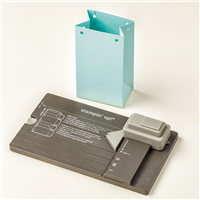
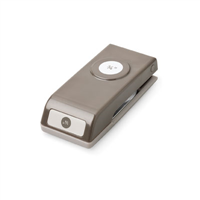
Oh yes, I’ve been playing with my Gift Bag Punch Board again! Last time I posted a Gift Bag Punch Board project I had a comment on my YouTube about it being nice to see a left-handed crafter attempt to use a punch board, well, I’m at it again!

Stampin' Up! UK Gift Bag Punch Board Coin wallet

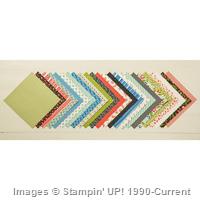
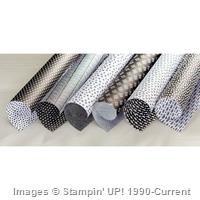
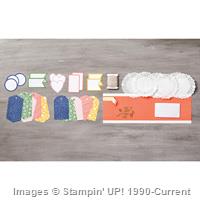
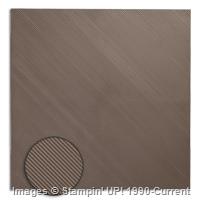
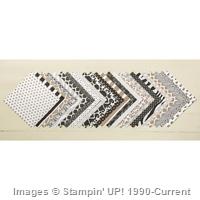
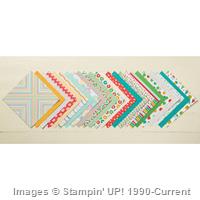
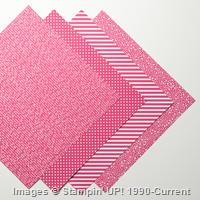
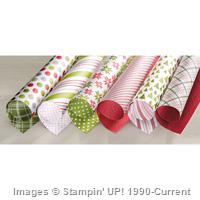
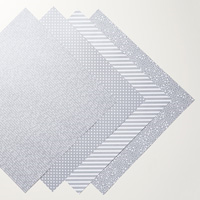
Aren’t these coin wallets super cute! I LOVE using the Neutrals Colour Collection of Designer Series Paper, did you know you get some pieces of Gold and Silver paper in there too?! I know, it’s awesome! I think these wallets are a great way to gift money or gift cards, why just give them in a card, make something really cute!

Measurements:

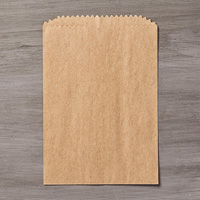
Designer Series Paper – 7 x 7″ (18 x 18 cm)

1. Line the edge of the Designer Series Paper with the start line on the Gift Bag Punch Board

2. Punch

3. Score at line M and the Horizontal Line

4. Line the Score line up to the start line

5. Score at line M and the Horizontal Line

6. Punch

7. Rotate the DSP by 180 degrees, and repeat the previous 6 steps ensuring the score lines match

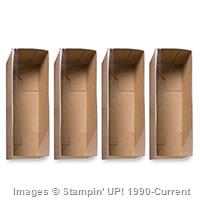
8. Fold and burnish on the score lines

9. Choose which side is your front and back, and cut off the front flap  on one side

10. Apply adhesive to the skinny strip down the side, and one of your bottom flaps

11. Close up your Coin Wallet

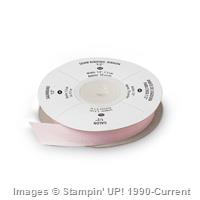
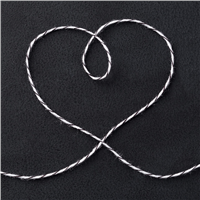
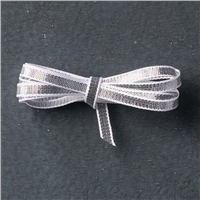
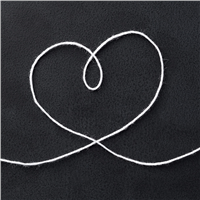
12. Create you closure, punch two 3/4″ circles from card stock, use brads to attach them to the wallet and wrap bakers twine around them in a figure of 8


Stampin' Up! UK classes mail order watercolour wings


Shop Now button-001Join my team button-001

To purchase any of the items featured in my projects please use the links above. To join my team of Stampin’ Friends select ‘Join My Team’ or send me a message!

Please support StampinByHannah, and join my Code Club, by using the Hostess code featured in the top right hand of my blog. For orders of over £150 please do not use this code, as you are entitled to your own Hostess benefits!

Sign up to my newsletter here – http://eepurl.com/2if59

Hannah Wilks

Stampin’ Up! UK Independent Demonstrator

Decorated Frames….. and some stamping too!

Stampin' Up! Decorated Frames Home decor stamping butterflies

Hi! Welcome to StampinByHannah! I hope you enjoy my blog, feel free to have a poke around, leave some likes, and follow along with some tutorials! Check out my latest Classes in the menu bar at the top of the page, and I can’t wait to hear from you!

Todays project was planned as one thing, but changed along the way to be something a little bit different! Stampin' Up! UK watercolour wings stamping tutorial

My big plan was a video tutorial decorating this photo frame. However, I started making my sample, added the two butterflies and a bow of Dotted Lace trim, and decided it as so gorgeous it didn’t really need any more – or really warrant a video tutorial either! However, the butterflies IN the frame (also beautiful!) could do with some explanation! The frame came from Asda for about £1.50

I am loving the Watercolour Wings bundle. This great stamp set, comes complete with two dies, one to cut the whole stamped butterfly and another smaller to coordinate with the Butterfly Thinlits dies.

Stampin' Up! Decorated Frames Home decor stamping butterflies

There are so many ink colours here. The framed version uses; Mint Macaron, Bermuda Bay, Delightful Dijon, Wisteria Wonder and Soft Sky. While the un-framed one uses; Lost Lagoon, Mint Macaron, Pink Pirouette, Melon Mambo and Crushed Curry.

The Watercolour Wings stamp set includes three stamps to make this butterfly (plus four to layer a smaller butterfly, some accent pieces and sentiments). The most solid stamp should be stamped first, with the detailed pieces layering over the top. This is a photopolymer stamp set, so layering up those stamped images is super easy too!

Stampin' Up! UK watercolour WIngs

I couldn’t leave without a close up of that lovely die-cut on the frame. The larger butterfly is from the Butterflies Thinlits dies set, and is die cut from Wisteria Wonder Card stock, with the smaller Mint Macaron butterfly from the Bold Butterflies thinlits layered onto with some Tombow glue. The 1″ Dotted Lace Trim ties into a beautiful bow too. I used Tombow to adhere the embellishment to the frame, and left it to dry overnight.

Beautiful!


Stampin' Up! UK classes mail order watercolour wings


Shop Now button-001Join my team button-001

To purchase any of the items featured in my projects please use the links above. To join my team of Stampin’ Friends select ‘Join My Team’ or send me a message!

Please support StampinByHannah, and join my Code Club, by using the Hostess code featured in the top right hand of my blog. For orders of over £150 please do not use this code, as you are entitled to your own Hostess benefits!

Sign up to my newsletter here – http://eepurl.com/2if59

Hannah Wilks

Stampin’ Up! UK Independent Demonstrator

Tall Tealight box using Pretty Petals

Stampin' Up! UK tealight box

I have had these tea-lights sat on my desk for months! I found these beautiful Pink Pirouette coloured tea-lights in Primark, for £1! and had to bring them home to make a box! I love it when I find items that perfectly match Stampin’ Up! colours, it makes gift giving so damn easy!

Stampin' Up! UK box tutorial pretty petals

These boxes hold 6 supermarket sized tea-lights, and are super quick and easy to make. Check out the video tutorial below if you don’t believe me!

Measurements:
(I’m sorry I haven’t got the metric measurements for this one, yet!)

Base –

Card stock – 7 x 4 1/2″

Score on the long side first at 1 5/8, 3 1/4, 4 7/8 and 6 1/2″

Score on the short side at 1 5/8″

Lid –

Card stock – 5 11/16 x 5 11/16″ (this measurement is really important to make sure your lid slips over your base!)

Score on all four sides at 2″

Designer Series Paper –

1 piece that measures 1 1/2 x 1 1/2″

4 pieces that measure 1 1/2 x 1 3/4″

Stampin' Up! UK tealight box

I can’t believe I have got this far into the blog post without mentioning that adorable Designer Series Paper! I did not think that this DSP was for me – it has a weird colour combination; Basic Black (which is what put me off!) Calypso Coral, Mint Macaron, Old Olive, Pacific Point and Very Vanilla. I am very much a Whisper White girl; I use Very Vanilla occasionally but I go through miles more Whisper White. So between the Basic Black and the Very Vanilla – I had decided that the Pretty Petals DSP stack was not for me! that was until I received a sample in a product share – I am converted! These papers are gorgeous! You have got to grab a pack (its only £7.25) and find out for yourself!


Shop Now button-001Join my team button-001

To purchase any of the items featured in my projects please use the links above. To join my team of Stampin’ Friends select ‘Join My Team’ or send me a message!

Please support StampinByHannah, and join my Code Club, by using the Hostess code featured in the top right hand of my blog. For orders of over £150 please do not use this code, as you are entitled to your own Hostess benefits!

Sign up to my newsletter here – http://eepurl.com/2if59

Hannah Wilks

Stampin’ Up! UK Independent Demonstrator

Gift Bag Punch Board Bag with Flap

Gift bag punch board project

I’m sorry, I know the title of this post is a bit of a mouthful. However, I’m at a bit of a loss of what else to call it!

I’m loving the new Gift Bag Punch Board! I think it’s proving to be almost as versatile as the Envelop Gift Board (that I truly adore!) and I have several projects and videos coming in the next few weeks!

Stampin' Up! UK Gift bag punch board

I am also sorry for my terrible bows! That satin ribbon is still my nemesis! however, the 1″ dotted lace trim (in the new In-Colours) tied like a dream! I think I need to watch some more bow tying tutorials to master that satin ribbon though!

Measurements:

Card stock (although, this would work just as well with Designer Series Paper) – 10″ x 8 1/4″ (25.5 x 21 cm) or a piece of A4 cut on the long side to 10″ (25.5 cm)

Follow the instructions on the Gift Bag punch board to make a Small bag

Once you have the basic gift bag punched and scored, turn your card stock around and repeat the steps in reverse order, so that you end up with symmetrical flaps on both sides

Fold the flaps down on one side and use the other side of the punch board to punch holes as described on the board

Stampin' Up! UK gift bag with flap

These bags are super simple to make, although I’m sure I have made it look trickier than it is in the video (lots of ‘bloopers’ recently!), why not grab your board and have a go, I would love to see what you create!

Pop over and post your creations on my Facebook page


Dont forget to shop using the Code Club Code to receive some great FREE product!

XEQGUA4P

I will be closing this order on the 30th July 2015


Shop Now button-001Join my team button-001

To purchase any of the items featured in my projects please use the links above. To join my team of Stampin’ Friends select ‘Join My Team’ or send me a message!

Please support StampinByHannah, and join my Code Club, by using the Hostess code featured in the top right hand of my blog. For orders of over £150 please do not use this code, as you are entitled to your own Hostess benefits!

Sign up to my newsletter here – http://eepurl.com/2if59

Hannah Wilks

Stampin’ Up! UK Independent Demonstrator

Triangular Box

Stampin' Up! easy box quick cute

I will be the first to admit 3D papercraft is not really my forte. I am a cardmaker and a stamper, however, I do dabble in box making, and I am particularly proud of this one!

Stampin' Up! easy box quick cute

I have two versions of this super cute box! The first is a card stock version – with Everyday Chic Designer Series Paper panels, and the other a DSP version using the Neutrals Designer Series Paper Stacks. Both hold up well, and are super easy to make too!

Measurements:

Cardstock or Designer Series Paper – 5 x 7 3/4″ (12.6 x 19.5 cm)

Score on the short side at 1 1/2, 3 and 4 1/2″ (3.8, 7.6 and 11.5 cm)

Score on the long side at 1 3/8″ (3.4 cm)

One the short side mark the centre of the middle square – with the skinny score line on the left  – mark at 2 3/4″ and with the skinny score line on the right at 2 1/4″ (7.3 and 5.8)

Use these marks to create the triangles that will become the opening flap lid and base of your box.

Designer Series Paper Panels Measure – 1 1/4 x 4 1/2″ (3 x 11.5 cm)


Dont forget to shop using the Code Club Code to receive some great FREE product!

XEQGUA4P

I will be closing this order on the 30th July 2015


Shop Now button-001Join my team button-001

To purchase any of the items featured in my projects please use the links above. To join my team of Stampin’ Friends select ‘Join My Team’ or send me a message!

Please support StampinByHannah, and join my Code Club, by using the Hostess code featured in the top right hand of my blog. For orders of over £150 please do not use this code, as you are entitled to your own Hostess benefits!

Sign up to my newsletter here – http://eepurl.com/2if59

Hannah Wilks

Stampin’ Up! UK Independent Demonstrator

Tag a Bag

I haven’t featured these kits for a while on the blog, although I use them all the time! I was so excited to see a brand new Tag a Bag Accessory kit in the new Annual Catalogue.  This time featuring Blushing Bride, Calypso Coral, Crushed Curry, Garden Green and Night of Navy. The kits are designed to help you add the finishing touch to gifts and treats but I use them all over!

The kit includes 10 large tag bases, and 10 tag building layers, over 18m of linen thread! doilies, Dimensionals, 10 gorgeous gold paperclips and 5 adhesive strips in Calypso Coral.

I have to say I use these adhesive strips all over! they make great labels, and my embossing powder containers are marked up with a piece with the colour of embossing power on the strip!

I will be using this kit on some projects really soon, but I wanted to give you a look at what you get for just £7.25! first!

What’s you go to item in the new catalogue?


Shop Now button-001Join my team button-001

To purchase any of the items featured in my projects please use the links above. To join my team of Stampin’ Friends select ‘Join My Team’ or send me a message!

Please support StampinByHannah by using the Hostess code featured in the top right hand of my blog. For orders of over £150 please do not use this code, as you are entitled to your own Hostess benefits!

Sign up to my newsletter here – http://eepurl.com/2if59

Hannah Wilks

Stampin’ Up! UK Independent Demonstrator

Week in Review – Weekly deals and a bonus project!

Stampin' Up! UK chocolate gift bag

This weeks Week in Review is a little different this week. As usual I have my top picks of this weeks Weekly deals, but I have a bonus project for you! (which is why this post is a little late!)

My wonderful upline is featuring 6×6 projects this week, and I thought I would jump on the bandwagon! So, lets get the Weekly deals over with first, and then I’ll show you a super cute bag!

Weekly Deals

Stampin' Up! UK Weekly Deals Bonus Deals

There are heaps of deals again this week, but there is a catch – they are only available in limited quantities, so if you see something you like – grab it now!

Sale: £2.06

Price: £2.75

Sale: £13.50

Price: £18.00

Sale: £3.38

Price: £4.50

Sale: £25.20

Price: £36.00

Sale: £3.38

Price: £4.50

Sale: £16.50

Price: £22.00

Sale: £3.85

Price: £5.50

Supply List

Built for Free Using:My Stampin Blog

 What a great selection! I adore my magnetic platform, it is the greatest addition to the Big Shot and makes lining dies and stamping up so easy! I have featured Gold Glimmer paper on a project this week and I LOVE it!
My other top pick is the Stampin’ Trimmer Rotary Addition which is definitely coming home with me!

What have I been up to?

Heaps! This week I am free from the day job, so I’m taking advantage and getting lots of blog work done! I spent all of yesterday filming and I plan to do something very similar today. I also managed to grab a couple of days off with James last week, and took advantage of the great weather for a picnic in the park!

StampinbyHannah Weekly deals bonus project

I also have plans for getting this Wedding prep sorted by the end of the week! I managed to grab 10 minutes yesterday to cut and score my Orders of Service, so I just have to print and assemble. As well as create the bouquets, finish the seating plan, and fill the favours! One month to go today! eeeeek!

Bonus Project!

So, I don’t normally include a crafty project on a Wednesday! But, this week my gorgeous upline is running 6×6 week – and I’m jumping on her bandwagon!

Stampin' Up! UK 6x6 week

How cute are these! The left hand bag uses the lovely Go Wild Designer Series Paper, while the other uses Bohemian (two sets of DSP I totally wasnt sure about, but have completely fallen in love with! )

Measurements:

Designer Series Paper – 6 x 6″ (15 x 15 cm)

Score on the first side at – 2 1/8, 2 7/8, 5, 5 3/4″ (5.3, 7.3, 12.6 and 14.6 cm)

Score on the second side at 3/4″ (2 cm)

I am sorry for the tiny strip down the side, but as you can see on the video our Tear and Tape fits in the gap well.

What do you think?

Code Club

XEQGUA4P

Don’t forget about my Code Club. Shop in my online store using this code, and I will be sending you some special gifts at the start of next month!


Shop Now button-001Join my team button-001

To purchase any of the items featured in my projects please use the links above. To join my team of Stampin’ Friends select ‘Join My Team’ or send me a message!

Please support StampinByHannah, and join my Code Club, by using the Hostess code featured in the top right hand of my blog. For orders of over £150 please do not use this code, as you are entitled to your own Hostess benefits!

Sign up to my newsletter here – http://eepurl.com/2if59

Hannah Wilks

Stampin’ Up! UK Independent Demonstrator

Card Storage Box

Stampin' Up! UK card storage box cherry on top DSP

There are a stack of these floating around on Pinterest, but I just had to put my own spin on it. The Classic Card Box. I wanted a box specifically to hold cards and envelopes while they wait to go to customers. Did you know that I always send a ‘Thank You’ card when you place an order in my store? If you have ordered and haven’t received a card it may be that you have selected ‘No Contact’ drop me an email if you think I’ve missed you.

Stampin' Up! UK card storage box video tutorial

The first box uses Lost Lagoon card stock, and a piece of that lovely Neutrals Designer Series Paper Stack. Whereas the video version is in Bermuda Bay with a piece of Cherry on Top Designer Series Paper. I grabbed the Cherry on Top DSP during demonstrator Pre-Order, purely because it was available to me! Demonstrators get the chance to order from a sample of product before the big launch! and I have to say, looking at the pictures in the Catalogue, I’m not sure that I would have ordered if it hadn’t been in that pre-order selection. And I would have missed out! Because it is fabulous! Featuring Bermuda Bay, Cucumber Crush, Crushed Curry, Pool Party, Tip Top Taupe and Watermelon Wonder, and a collection of birthday themed papers with some great patterns; it would look fab as part of a Project Life album! I might even have to order a second pad!

Measurements:

Card stock – 12 x 8″ (30.5 x 20.5 cm)

Score on the long side at – 4 1/2, 5 3/4, 10 1/4, and 11 1/2″ (11.5, 14.5, 26, and 29 cm)

Score on the short side at – 1 1/4″ (3 cm) turn the card stock around and score in the wide section nearest the skinny flap at 1 1/2″ (4 cm)

Designer Series Paper – 4 1/4 x 5″ (11 X 12.5 cm)


Shop Now button-001Join my team button-001

To purchase any of the items featured in my projects please use the links above. To join my team of Stampin’ Friends select ‘Join My Team’ or send me a message!

Please support StampinByHannah by using the Hostess code featured in the top right hand of my blog. For orders of over £150 please do not use this code, as you are entitled to your own Hostess benefits!

Sign up to my newsletter here – http://eepurl.com/2if59

Hannah Wilks

Stampin’ Up! UK Independent Demonstrator


Cookie Box

Stampin' Up! UK tag a bag cookie box

I call these Cookie Boxes, although they are really called Tag a Bag Gift Boxes, but they are food safe, and coordinate with the Tag a Bag accessory kits. I use them for all sorts of things, table bins at classes, boxes for gifts, storage for pens and gift tags and loads of other things too!

Stampin' Up! UK tag a bag cookie box

I made these for a class a few months ago, and thought they are super cute, and would look awesome in our new in colours!

Measurements:

Card stock – 10 x 2 1/2″ (25.5 x 6.5 cm)

Score on the long side at 2 1/2, 4 3/4, 7 1/4, and 9 1/2″ (6.5, 12, 18.5, ans 24 cm)

The stamps here are Flower Patch, which are a great photopolymer set that coordinate with the Flower Fair framelits. These look really complicate to line up, but if you look carefully you will find that each flower has a petal that not the same as the others and allow you to line up the stamped images with the framelits


Shop Now button-001Join my team button-001

To purchase any of the items featured in my projects please use the links above. To join my team of Stampin’ Friends select ‘Join My Team’ or send me a message!

Please support StampinByHannah by using the Hostess code featured in the top right hand of my blog. For orders of over £150 please do not use this code, as you are entitled to your own Hostess benefits!

Sign up to my newsletter here – http://eepurl.com/2if59

Hannah Wilks

Stampin’ Up! UK Independent Demonstrator

How to use the Stampin’ Up! Gift Bag Punch Board

Stampin' Up! UK Gift bag punch board tutorial

I love a simple gift bag, and with the Gift Bag Punch Board Stampin’ Up!® has made making super cute bags super easy! I know I will be using this punch board lots in the coming months (and even more around Christmas!) but I wanted to give you a quick guide to using the board before we drive into more complex projects with it!

How To:

The gift box punch board has the instructions printed onto it so you can refer back at each use, but I thought I would share some tips.

The punch board includes a great scoring tool / bone folder – always store it back into the board so you don’t loose it! It is so easy to loose a great tool like this in your crafty mess

The width of the paper or card stock is important: a small gift back uses 10″ (25.4 cm) wide DSP, and the S line on the board. A medium sized bag uses 11″ (27.9 cm) wide DSP and the M line on the board. A Large bag uses 12″ (30.5 cm) wide DSP and the L line on the board. The length of the DSP (or card stock) is not important, and just varies the height of the final bag, the board suggests using lengths between 4″ (10 cm) and 12″ (30.5 cm) In the video the card stock that I used was 10 x 6″ (25.4 x 15 cm)

The punch may be a little stiff, use the board on a table and stand to punch.

Have fun!


Shop Now button-001Join my team button-001

To purchase any of the items featured in my projects please use the links above. To join my team of Stampin’ Friends select ‘Join My Team’ or send me a message!

Please support StampinByHannah by using the Hostess code featured in the top right hand of my blog. For orders of over £150 please do not use this code, as you are entitled to your own Hostess benefits!

Sign up to my newsletter here – http://eepurl.com/2if59

Hannah Wilks

Stampin’ Up! UK Independent Demonstrator