Project Life by Stampin’ Up! July 2014

Another month come and gone, and a heap of photos to get into albums, isnt it great that we have Project Life by Stampin’ Up! to make that process easier.

Project Life by Stampin Up July 2014

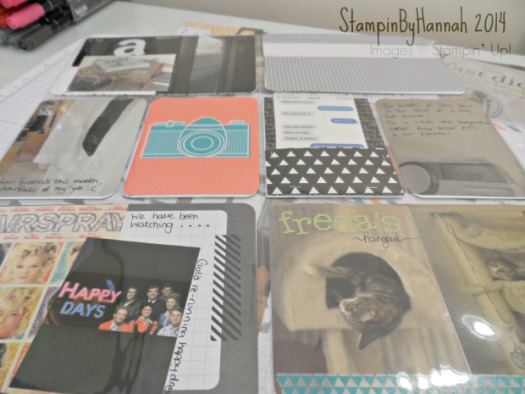
I really do love how simple you can make Project Life, and how complex it can become by adding items from the accessory packs, stamping, extra cardstock or DSP, and other memorabilia alongside your photos and journalling.

This month I created 3 pages (or spreads), the first focuses on the first week in the month. Usually I’m not too fussy about which order my photos from the month go in on the page, however, I knew I wanted this week to be seperate and a little different as it is about a very important week in our wedding planning process (12 months to go now! eeeek!), and included the taking of our engagement photos, buying our rings and me finding THE dress! Of course I havent included the photo of the dress (dont want the Mr. seeing it do we!) but I have mentioned it in my journalling.

Project Life by Stampin Up July 2014


The other two pages this month include the other photos and events from the month of July. I have discovered that I seem to take more photos of food than anything else! We’re supposed to be dieting (wedding prep again!) but this month has been horrendous with work, we’ve both had a heap of night shifts and horrible periods of not seeing each other at all, and so we’ve had a bit of a treat with a date night to Pizza Express, payday takeaway, and I might have been very naughty one of the nights James was on nightshift and I couldnt be bothered to find real food! Ooops! oh well, back to the dieting grindstone in August!

Project Life by Stampin Up July 2014

This month, as well as using the Everyday Adventure Project Life Card Collection, and Accessory Pack, I’ve mixed it up a little with the addition of some of the Moonlight Designer Series Paper Stack. I’m planning on working on these pages a little longer (put a nice order recently to add to my ever growing stash!), will do a full video share once they are completely finished, but I didnt want you to think I hadnt been working on it at all, so….

Until next time


Hannah Wilks

Stampin’ Up! UK Independent Demonstrator

If you like the project, or any of the products used, would like a catalogue, or to join my team, please contact me, or click on the ‘Shop NOW’ button at the top of the page. You can also find me on Twitter, Facebook, YouTube, Google+, About.me, and Tumblr (Links in the sidebar)

Thank you for stopping by www.www.stampinbyhannah.co.uk today

x

Wish Big!

I have a card project for you today, a very simple card project, but with a bit more meaning!

I joined Stampin’ Up! UK as a demonstrator on the 1st June 2014 (thats two months ago!), with the aim of meeting new people, finding some crafty friends and making some nice things with some quality product! I think I’m on my way to accomplishing that!

Believe it or not, I’m quite a shy person, I don’t like being the centre of attention, I hate new situations and crowds of people, and I fight with my anxiety every single day! Crafting / art / creating etc. has always been my escape, my time for me, something I do to get away from everything else, and shut-off for a while. And I love it!

When I found Stampin’ Up! (a number of years ago now) I couldn’t imagine having a blog and posting video’s on the internet! So, I didn’t sign up 🙁 and man, have I missed out over those years! This card represents for me more than just a card, made with Stampin’ Up! product, with a nice sentiment. Its now my mindset, and my goal – Wish Big!

Stampin' Up! UK Card Wish Big

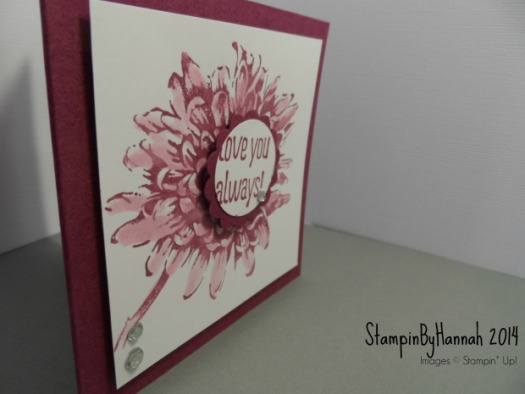
The card is a simple top fold card, cut from A4 (or 8 1/2 x 11″ if your in the states) and folded in half. The Whisper White piece is then cut slightly smaller (1/4″ on the top and side), and onto that I stamped the swirl from Everything Eleanor in Smoking Slate, and the large flower in Rich Razzleberry! The sentiment is from A Dozen Thoughts, ‘Wish Big’, stamped in Rich Razzleberry ink and Punched out using the Modern Label Punch. I inked the edges of the punched label and added 3 rhinestones before putting on the card with Dimentionals.

The card is incredibly simple, but means so much.

Hannah Wilks

Stampin’ Up! UK Independent Demonstrator

If you like the project, or any of the products used, would like a catalogue, or to join my team, please contact me, or click on the ‘Shop NOW’ button at the top of the page. You can also find me on Twitter, Facebook, YouTube, Google+, About.me, and Tumblr (Links in the sidebar)

Thank you for stopping by www.www.stampinbyhannah.co.uk today

x


Stampin’ Write Markers Watercolour Technique!

I recently purchased the Many Marvelous Markers pack from Stampin’ Up! mainly because I wanted access to all the Stampin’ Up! colours.

The Stampin’ Write markers are great, I love the duel tips and the handy storage system (more on that next week!), but I’m always looking to get more out of any product I purchase.

 Watercolour with Stampin Write markers

So, I was playing around with my inks last week, and used them for  similar technique, and suddenly thought ‘will this work with my markers!’

The card , Rich Razzleberry (yum!) is cut to 7″ by 3 1/2″ (17.5 x 9cm) and scored at 3 1/2″ (9cm)

The Whisper White square measures 3 x 3″ (7.5cm)

I use my glass table top but you could just as easily use a plate or paint palate

Hope you like this technique – show me your creations on my facebook page www.facebook.com/stampinbyhannah


Hannah Wilks

Stampin’ Up! UK Independent Demonstrator

If you like the project, or any of the products used, would like a catalogue, or to join my team, please contact me, or click on the ‘Shop NOW’ button at the top of the page. You can also find me on Twitter, Facebook, YouTube, Google+, About.me, and Tumblr (Links in the sidebar)

Thank you for stopping by www.www.stampinbyhannah.co.uk today

x

August Stampin’ Techniques Class – Blooming With Kindness

Stampin' Techniques class August 2014Hello!

I know I usually reserve mondays for tips / techniques / hauls etc. but I thought I would take this monday as an opportunity to tell you about the August Stampin’ Techniques Class here at StampinByHannah!

This class is available either online (check it out here!) for a small fee, or FREE! if you live within 25 miles of me (Stockton-on-Tees), as a party or workshop for you and your friends!

The class comes complete with instructional videos and a handout, as well as all the pieces to make the cards. The stamp set is sold seperately (available below)

Class starts August 1st!

I cant wait for you to join me!


Hannah Wilks

Stampin’ Up! UK Independent Demonstrator

If you like the project, or any of the products used, would like a catalogue, or to join my team, please contact me, or click on the ‘Shop NOW’ button at the top of the page. You can also find me on Twitter, Facebook, YouTube, Google+, About.me, and Tumblr (Links in the sidebar)

Thank you for stopping by www.www.stampinbyhannah.co.uk today

x

You are a Fabulous Work of Art!

Simple simple simple card this week.

As I am sure you know by now, I love a clean, simple card! Most of my creations are single layer, and sometimes I might add a punched shape or two, but not often. Well, the card this week is exactly like that, but I have jazzed it up a bit with some 2 layer stamping AND 2nd generation stamping! get me!

Stampin Up UK Fabulous Work of Art<a href="//www.pinterest.com/pin/create/button/?

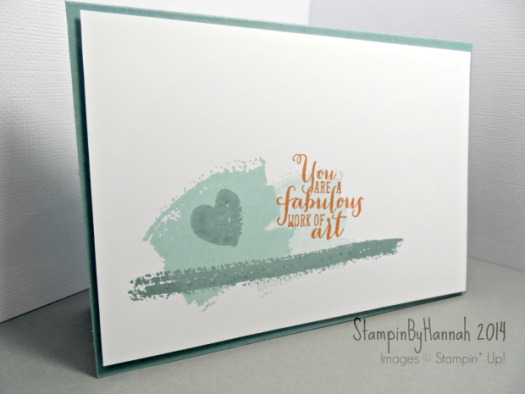
The card base (lost lagoon btw) is a piece of standard size cardstock (A4 or 8 1/2×11) cut cross ways and folded in half! Then I added a piece of Whisper White cut slightly smaller as my main (actually, only) layer.

Work of Art is a great stamp set (Love it, can you tell?!) and I selected several stamps from the set. The swoosh stamp is stamped once in Pool Party and then stamped again next to it as a place for the sentiment (which is stamped in Tangelo Twist – isnt it gorgeous!) and then I used the beautiful Lost Lagoon colour to stamp over the Pool Party for the long stamp and that lovely heart. Then the whole layer is attached to the card base on Dimensionals!

Simple!


Hannah Wilks

Stampin’ Up! UK Independent Demonstrator

If you like the project, or any of the products used, would like a catalogue, or to join my team, please contact me, or click on the ‘Shop NOW’ button at the top of the page. You can also find me on Twitter, Facebook, YouTube, Google+, About.me, and Tumblr (Links in the sidebar)

Thank you for stopping by www.www.stampinbyhannah.co.uk today

x


Project Tray

You know, sometimes, when your working on a longer project (mass producing wedding invitations, Project Life by Stampin Up!, making items for craft fairs or fundraising events) you need somewhere to put all your items together, to stop them taking over!

Well, here is your solution! The Project Tray!

Stampin' Up! UK Project Tray

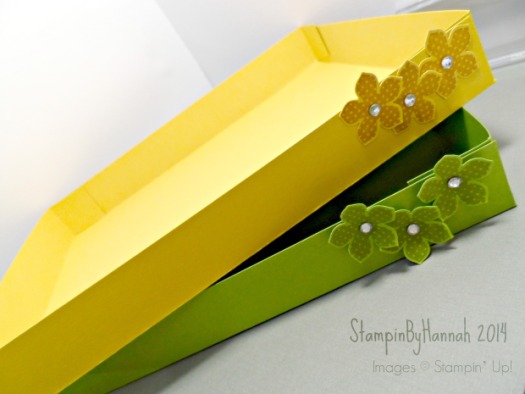
I use these all the time to hold various items and projects in the works, they hold items ready for making / photographing / selling / sending etc. I love them! and I thought I’d share the design with you.

It is super simple (as always, I cant do complicated!)

Here are the measurements:

IMPERIAL

Cardstock = 10″ x 8″

and score at 1″ on all sides

METRIC

Cardstock = 25.5cm x 20.5cm

Score at 2.5cm on all sides

See, told you it was simple!


Hannah Wilks

Stampin’ Up! UK Independent Demonstrator

If you like the project, or any of the products used, would like a catalogue, or to join my team, please contact me, or click on the ‘Shop NOW’ button at the top of the page. You can also find me on Twitter, Facebook, YouTube, Google+, About.me, and Tumblr (Links in the sidebar)

Thank you for stopping by www.www.stampinbyhannah.co.uk today

x

Just for You!

Hello there!

I thought I try something a little different this week. Just like when I’m scrapbooking (something I havent shared much of with you yet – watch this space) I like to push myself and try something new. So, I had a look at a couple of challenges for this week and settled on the Around the World Stamping’ Up! challenge!

This time they have selected three colours to be used: Hello Honey, Blackberry Bliss and Calypso Coral.

Now, this is where I panicked! I don’t have Calypso Coral (yet!  still building my collection over here!). But then I realised something, I have all the Stampin’ Write Markers! So, actually I do have Calypso Coral – just not in a Stampin’ Pad! Silly! Have I mentioned the Stampin’ Write Markers to you guys yet? No? How have you escaped! I Love Them! The great thing about the markers is not only can you colour an image with them, write with them, draw with them, but you can Stamp with them to! Awesome!

Right, back to the Challenge. I looked at the colours, and I looked at my stamps, and I thoughts for about 3 days! and then suddenly, inspiration!

AW20 - challenge entry - Just For You

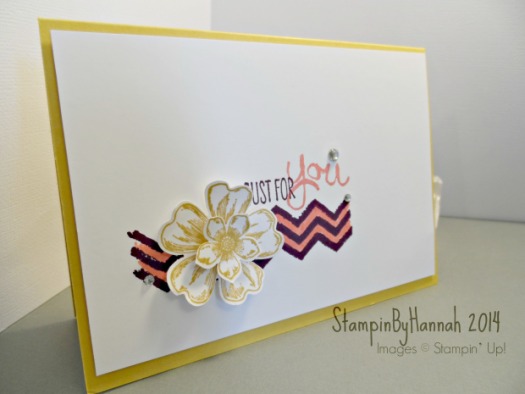
The Work of Art Stamp set has amazing background type images I love to use to ground other stamps on the card. I stamped the zig-zag / chevron image in Blackberry Bliss, before colouring between the lines with my Calypso Coral marker. I used Hello Honey to stamp the flowers, which I punched, and scrunched to give dimension, and then added the Just for You (this time colouring the stamp with that Calypso Coral marker). To finish I added a bit of bling with three jewels <3


Hannah Wilks

Stampin’ Up! UK Independent Demonstrator

If you like the project, or any of the products used, would like a catalogue, or to join my team, please contact me, or click on the ‘Shop NOW’ button at the top of the page. You can also find me on Twitter, Facebook, YouTube, Google+, About.me, and Tumblr (Links in the sidebar)

Thank you for stopping by www.www.stampinbyhannah.co.uk today

x


Why you absolutely NEED the new Stampin’ Up! UK Catalogue!

Sorry this post is up a little later than usual (you can blame my UPS man!) but I was waiting on my order of shiny new things from the new Stampin’ Up! 2014-2015 catalogue

Stampin Up! - New things from the 2014-2015 catalogue

As usual all the new items in the Stampin’ Up! catalogue are gorgeous (and I want them all!) but I had to make a selection and so these are my picks for the next couple of months! Stampin Up! Itty Bitty Accents punch pack

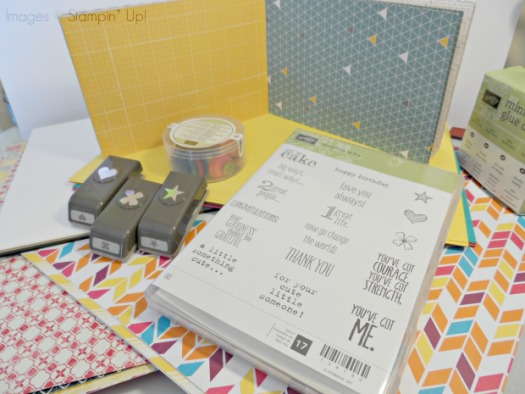
Stampin’ Up! make the most awesome punches, and the small punch packs are always popular, this new offering is no exception! The Itty Bitty Accents Punch Pack coordinates with the Something to Say Stamp Set. The stamped images (a heart, a star, and the flower) fit well in the punches and help you create your own custom embellishments, quickly! I love them!

But I think the most exciting thing for me are the new Designer Series Papers! I ordered two this time: Flashback and Sweet Taffy. As usual the papers use Stampin’ Up! colour collections and In Colours, coordinating with all the cardstock, inks and embellishments already in your stash!

Stampin Up Flashback DSP
Flashback!

Basic Black, Crushed Curry, Pool Party, Real Red, Smokey Slate, Very Vanilla

Stampin Up! Sweet Taffy DSP
Sweet Taffy!


Daffodil Delight, Melon Mambo, Old Olive, Pumpkin Pie, Rich Razzleberry, Tempting Turquoise, Whisper White
Of course I have a video with all this gorgeousness in as well!

and then you can purchase all these items from my shop – by clicking the pretty boxes below!

Hannah Wilks

Stampin’ Up! UK Independent Demonstrator

If you like the project, or any of the products used, would like a catalogue, or to join my team, please contact me, or click on the ‘Shop NOW’ button at the top of the page. You can also find me on Twitter, Facebook, YouTube, Google+, About.me, and Tumblr (Links in the sidebar)

Thank you for stopping by www.www.stampinbyhannah.co.uk today

x

Stampin’ Up! Weekly Deals: 2.7.14

Its Wednesday! and that can only mean one thing – WEEKLY DEALS!

This weeks deals are amazing!

Stampin up weekly deals


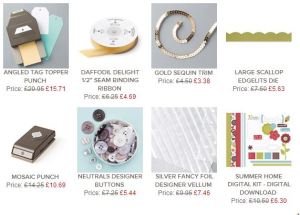
Not only does it include the Angled Tag Topper Punch, but also the Mosaic Punch (coordinating stamps are available!), buttons, ribbon and trim, and some gorgeous vellum too! All for amazing prices!

Don’t miss out! Grab yourself a bargain, visit my shop NOW!


Hannah Wilks

Stampin’ Up! UK Independent Demonstrator

If you like the project, or any of the products used, would like a catalogue, or to join my team, please contact me, or click on the ‘Shop NOW’ button at the top of the page. You can also find me on Twitter, Facebook, YouTube, Google+, About.me, and Tumblr (Links in the sidebar)

Thank you for stopping by www.www.stampinbyhannah.co.uk today

x


Custom Stampin’ Up! Color Coach!

Stampin Up Custom Color Coach

I recently wrote a post about the Stampin’ Up! Color Coach (See it HERE!) I love it, I think its an awesome tool (and Yes! you definitely need one!), but there was something missing! I’ve customised mine to meet my needs, and I thought I’d give you a peak!

I like the screw fastener the Color Coach comes with, but I like a bit more flexibility (I move the swatches around a lot and I like to be able to have one on its own, which I found a little awkward with the screw), So, I swapped it out for a O ring (most likely found at my local craft-type store, maybe in a mini-album kit, but believe me its been floating around my craft room for a good while!).

I also like to be able to see at a glance which inks I currently own (no, I don’t have them all yet! one day soon hopefully!), and what a tone on tone looks like. So, I stamped the same colour of ink on the card (Eg: Melon Mambo Swatch, stamped on with Melon Mambo ink) using the Everything Eleanor Swirlly stamp.

Now I can move the swatches around much more easily and see which colours I have (and which ones I need to get next!)


Hannah Wilks

Stampin’ Up! UK Independent Demonstrator

If you like the project, or any of the products used, would like a catalogue, or to join my team, please contact me, or click on the ‘Shop NOW’ button at the top of the page. You can also find me on Twitter, Facebook, YouTube, Google+, About.me, and Tumblr (Links in the sidebar) 

Thank you for stopping by www.www.stampinbyhannah.co.uk today

x