Christmas Wishes Pocket Project

I do love a cute Christmas make – and this would be great to make for you children and grandchildren to remember why they love Christmas, why Christmas is so special, or to teach them a little bit about the Christmas story.

Before you watch the video, I recorded this a couple of weeks ago (and I forgot all about it!) and so I’m sorry for a waffle at the beginning about the Good Greetings offer which has sadly now ended.


I found a similar looking item in my local Craft Superstore, however, I thought I could totally make something similar at home.

Stampin' Up! UK Christmas Wishes Pocket

The measurements:

Cardstock = 8 x 4 1/2″ (20.4 x 11.5 cm)

A piece of cardstock that measures 3 1/4″ x 3 1/4″ (9.5 x 9.5 cm)

and 10 stripes that measure 3/4″ x 5″ (2 x 12.7 cm)

Score the short side at – 1/2″ and 4″ ( 0.6 and 10.2cm)

Score the short side at – 4 1/2″ (11.5cm)

Now, I think this would be a really cute idea to add to your Project Life or December Daily! but the pocket is too big!

So, to make a pocket which fits your project life: You need a piece of cardstock that measure = 6 1/2 x 4″ (16.5 x 10.2 cm), score the short side at 1/2″ and 3 1/2″ (1.2cm and 9cm), and the long side at 4″ (10.2 cm)


Hannah Wilks

Stampin’ Up! UK Independent Demonstrator

If you like the project, or any of the products used, would like a catalogue, or to join my team, please contact me, or click on the ‘Shop NOW’ button at the top of the page. You can also find me on Twitter, Facebook, YouTube, Google+, About.me, and Tumblr (Links in the sidebar)

Sign up to our newsletter here – http://eepurl.com/2if59

Thank you for stopping by www.www.stampinbyhannah.co.uk today

x

A Polar Pool Party…..

I love making Christmas cards, I take a heap of time over them every year. Most years I have made 50+ of the same card, this year, my first Christmas as a Stampin’ Up! UK demonstrator, I have made so many Christmas cards as samples, I don’t have to stand at my desk for hours over a weekend making all my cards! This is super exciting! I know it’s a small thing, but it just reminds me of the many reasons why being a Stampin’ Up! UK demonstrator is just the most awesome thing I have ever done!

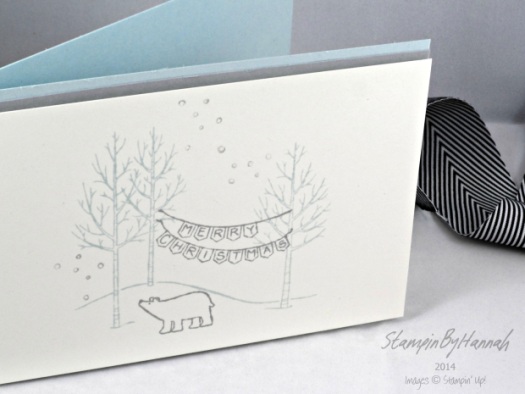
Stampin' Up! UK White Christmas Pool PartySo, this is another one of my many Christmas cards!

I cut a piece of Pool Party cardstock in half, and folded it in half to create this side folding, but wide card. I stamped the trees from White Christmas in Pool party ink, on Very Vanilla cardstock, before adding the ‘Merry Christmas’ banner and polar bear in Smokey Slate. I added the Very Vanilla stamped piece onto the card base, but there was something missing.

I cut a lot of my cardstock down a little when making card bases (I just find it easier when doing ‘layer maths’) and so have a stack of strips of cardstock left over, which of course I keep! I added one of these cardstock strips in Smokey Slate to the top of the card, and added some of the ‘snow’ stamps from White Christmas.

Thats another Christmas card made, all ready for my family, friends or customers!


Hannah Wilks

Stampin’ Up! UK Independent Demonstrator

If you like the project, or any of the products used, would like a catalogue, or to join my team, please contact me, or click on the ‘Shop NOW’ button at the top of the page. You can also find me on Twitter, Facebook, YouTube, Google+, About.me, and Tumblr (Links in the sidebar)

Sign up to our newsletter here – http://eepurl.com/2if59

Thank you for stopping by www.www.stampinbyhannah.co.uk today

x

12 Tags of Christmas – Merry….

Its Monday! And in the lead up to Christmas, that only means one thing…… its time for another 12 tags of Christmas!

Stampin' Up! UK 12 tags of Christmas Seasonally Scattered

This tag is super duper simple!

The tag base is a 2″ x 6″ piece of Whisper White cardstock, punched with the Scalloped Tag topper punch.

I just adore the Seasonally Scattered stamp set, I will be so sad when it leaves us in January, but for now I’m planning on using it for as long as possible! So I used the Merry Stamp, in Real Red Ink, its just so beautiful!

I added some sparkle (I’m sorry, the picture does NOT do this one justice at all!) by dotting my 2-way glue pen around the image, and added some lovely glitter. I don’t use glitter all that often, I love sparkle but I generally opt for jewels and rhinestones over glitter, but every time I bust out the glitter I remember how much I love it, and wonder why it doesn’t get used more!

The string on this tag is the white bakers twine from the Tag a Bag accessory kit from the annual catalogue.


Hannah Wilks

Stampin’ Up! UK Independent Demonstrator

If you like the project, or any of the products used, would like a catalogue, or to join my team, please contact me, or click on the ‘Shop NOW’ button at the top of the page. You can also find me on Twitter, Facebook, YouTube, Google+, About.me, and Tumblr (Links in the sidebar)

Sign up to our newsletter here – http://eepurl.com/2if59

Thank you for stopping by www.www.stampinbyhannah.co.uk today

x

All Around the World Stampin’ Challenge – AW 28 entry

I’m really trying to push myself at the moment, no only in my creativity, but also my business, my fitness (and so weight loss) and my job! I have a LOT going on! and I LOVE it!

But, sometimes a get stuck in a rut with cardmaking. This is when I turn to Pinterest, or YouTube, or a Challenge for inspiration.

This week, I took another look at the All Around the World Stampin’ Challenge Blog, a group of Stampin’ Up! demos from around the world, who complete 2 challenges a month, and have some amazing ideas. I am going to try and complete some of these challenges (not promising I’m going to take part every fortnight, but I will try!)

Stampin' Up! UK AW28 Festival of Trees Baked Brown Sugar Cherry Cobbler Mossy Meadow

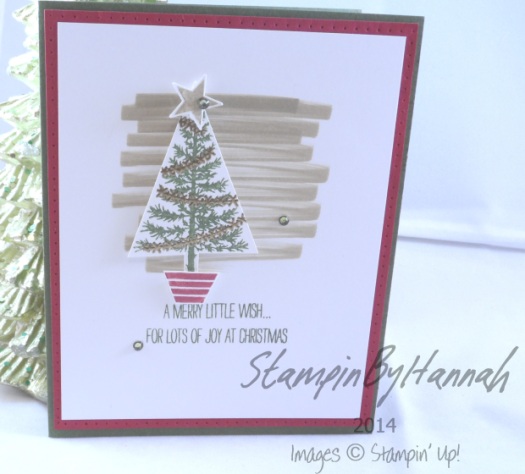
The challenge this time was to use Baked Brown Sugar, Cherry Cobbler, and Mossy Meadow. This is why these challenges push me so much; I don’t own all the Stampin’ Up! Ink pads, I don’t have cardstock in every colour, and I definitely don’t have all the stamps! But, I do own the Many Marvellous Markers (and luckily for this challenge, the In-Colour 2013-2015 Stampin’ Write Markers).

So, I grabbed my Mossy Meadow and Cherry Cobbler cardstock, along with a piece of Whisper White, my favourite stamp set from the seasonal catalogue, and my pens, and got to creating.

I used Mossy Meadow as my cardbase, with a layer of Cherry Cobbler (complete with pierced boarder!) and a layer of Whisper White. I stamped the Tree from Festival of Trees in Mossy Meadow (stamped off first) and added the tinsel in Versamark and Gold embossing powder.The tree pot I stamped in Cherry Cobbler (using my pens) and the star is Baked Brown Sugar and punched out using one of the Itty Bitty Accents punches.

I added the scribble backdrop of Baked Brown Sugar before popping the tree up with some dimensionals. The sentiment is stamped in Mossy Meadow, and the Basic Jewel Rhinestones coloured with Old Olive Blendabilities (have I told you how much I love those?! check out my latest Club for more!)

And that is my Challenge entry!

Thats for reading, don’t forget to subscribe to my newsletter (link in the babble below) to keep up to date with news around here!


Hannah Wilks

Stampin’ Up! UK Independent Demonstrator

If you like the project, or any of the products used, would like a catalogue, or to join my team, please contact me, or click on the ‘Shop NOW’ button at the top of the page. You can also find me on Twitter, Facebook, YouTube, Google+, About.me, and Tumblr (Links in the sidebar)

Sign up to our newsletter here – http://eepurl.com/2if59

Thank you for stopping by www.www.stampinbyhannah.co.uk today

x

Fancy Fold Friday – Twist Turn Card

Its that time again! Fancy Fold Friday Time – and now we’re getting complex!

This week its the super cute Twist Turn Card!

I love this card, it make such a great birthday card, and is the perfect size to hold a gift card. Actually, while we’re on that – I love giving gift cards as gifts – who doesn’t love the gift of shopping?! lol, ok, but sometimes gift cards are really handy gifts (thinking here of any gamers in your life, I don’t know about you but I think £40 is an expensive gift, but I don’t mind contributing!) So, we give James’ younger brother gift cards, but trying to find a way to package them in a way that’s not really boring is a bit of a challenge. When I gave him a Twist Turn card for his birthday this year, I got a ‘ooooh, cool!’ a great compliment from a 13 year old I do believe! So, I haven’t included a way of attaching your gift card into the card, but that’s really because I use the Stampin’ Up! 2-way glue pen – if you use this adhesive when its wet (and blue) its permanent, but leave it to dry (and turn clear) it becomes re-positionable – and great for holding a gift card!

Stampin' Up! UK Twist Turn Card Gift card holder

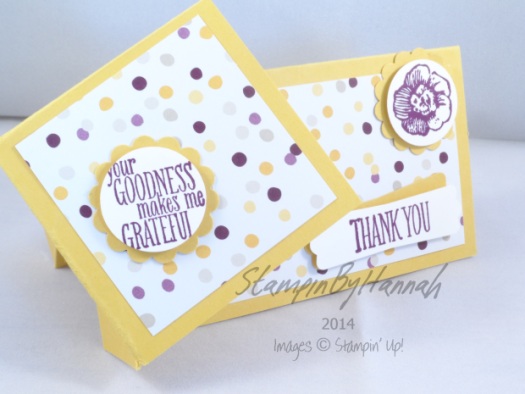
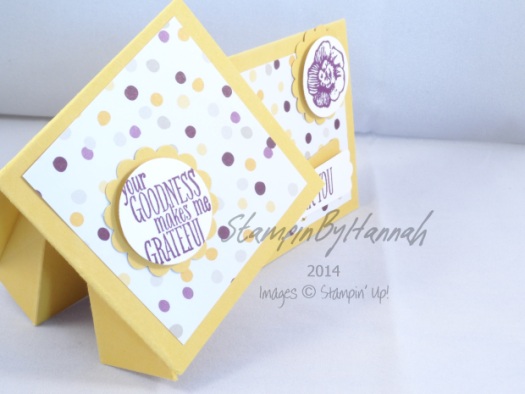
Ok, so, to the card! The card base (Hello Honey, if you were wondering!), is cut to 8 1/4″ by 5 1/4″, score it on the long side at 2 5/8″ and 3 1/2″, and on the short side at 2 5/8″. Then, you need to make two diagonal score lines. Orientate the cardstock with the short side at the top, with the two score lines going horizontally near the bottom, draw a score line from the bottom score line at the edge of the cardstock, to the middle of the next score line, repeat on both sides – giving you an arrow pointing away from you. Fold on all the score lines. Stampin' Up! UK Twist Turn Card Gift card holder


The folds should be burnished well, of the card wont stand up well. The DSP used here is from the Moonlight DSP stack (LOVE!), and the stamps are from Everything Eleanor, and Something to Say, punched out uisng the 1″ circle punch, scallop circle punch, and Modern Label punch.

Let me know if you want a video tutorial for this (or anything other card)

See you again next week

x


Hannah Wilks

Stampin’ Up! UK Independent Demonstrator

If you like the project, or any of the products used, would like a catalogue, or to join my team, please contact me, or click on the ‘Shop NOW’ button at the top of the page. You can also find me on Twitter, Facebook, YouTube, Google+, About.me, and Tumblr (Links in the sidebar)

Thank you for stopping by www.www.stampinbyhannah.co.uk today

x


Pizza Box Style Chocolate Box!

I do love Chocolate! and papercraft – and how better to combine them, a super cute chocolate box!

Stampin' Up! UK Chocolate box pizza box style


Cardstock Measurements – 4 1/2″ 8

Score on the long edge at – 1″, 3 1/2, 4 1/2″, 7″

Score on the short edge at – 1″ and 3 1/2″

The cardstock for the top of the box measures – 2 1/4″ by 2 1/4″


Hannah Wilks

Stampin’ Up! UK Independent Demonstrator

If you like the project, or any of the products used, would like a catalogue, or to join my team, please contact me, or click on the ‘Shop NOW’ button at the top of the page. You can also find me on Twitter, Facebook, YouTube, Google+, About.me, and Tumblr (Links in the sidebar)

Thank you for stopping by www.www.stampinbyhannah.co.uk today

x

Weekly deals – 5.11.14

Time for some more awesome weekly deals!

Stampin' Up! UK Weekly deals November 2014This weeks offerings include a lovely 8×8″ scrap-booking kit, and the Grateful Heart Thanksgiving Ensemble (MDS digital download) which makes lovely autumn themed party invitations. But also the Lovely Romance stamp set in wood mount, which coordinates with the Chalk Talk framelits. AND some great This and That goodies, Coaster Board, and the Triangle punch which could be a great addition to your crafty stash!


But wait, thats not all!


Stampin' Up! UK Blendabilities club


Also, I have an offer for you this week! Check out my new Blendabilities club!

Get all the Stampin’ Up! Blendabilities, along with momento ink (and refill), stamps, colour lifter pen, and Whisper White cardstock, for just £42.50 per month for 6 months. Each month you will receive at least 2 sets of Blendabilities, as well as a project and instructional video from me! How exciting, and a great way to get started with our Blendabilities – colour your projects happy!


Hannah Wilks

Stampin’ Up! UK Independent Demonstrator

If you like the project, or any of the products used, would like a catalogue, or to join my team, please contact me, or click on the ‘Shop NOW’ button at the top of the page. You can also find me on Twitter, Facebook, YouTube, Google+, About.me, and Tumblr (Links in the sidebar)

Sign up to our newsletter here – http://eepurl.com/2if59

Thank you for stopping by www.www.stampinbyhannah.co.uk today

x

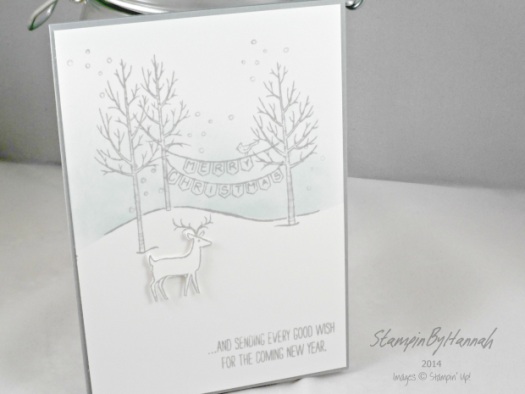
White Reindeer …..

I just love the White Christmas stamp set, and although the trees are lovely, my favourite part of the stamp set is the ‘little detail’ stamps; the snow, the car, the snowman, and this great reindeer!

Stampin' Up! UK White Christmas dear

This card uses a Smokey Slate card base, with a Whisper White stamped panel.

I stamped the trees, banner, and sentiment in Smokey Slate, as well as a reindeer. I then created a mask and covered the hills, in order to protect the snow scene while I used a Finger Dauber to ink the sky using Soft Sky ink. I then stamped the reindeer again on a piece of scrap Whisper White cardstock, and fussy cut it (but not the antlers! I’m not that crazy!), before layering the reindeer over the original stamped reindeer with a dimensional!

Isn’t it cute!

Hannah Wilks

Stampin’ Up! UK Independent Demonstrator

If you like the project, or any of the products used, would like a catalogue, or to join my team, please contact me, or click on the ‘Shop NOW’ button at the top of the page. You can also find me on Twitter, Facebook, YouTube, Google+, About.me, and Tumblr (Links in the sidebar)

Thank you for stopping by www.www.stampinbyhannah.co.uk today

x


12 Tags of Christmas – Under the Tree

Welcome to another 12 Tags of Christmas!

This week I used the Under the Tree Specialty Designer Series Paper – a wonderful heavy cardstock weight paper that is amazing for boxes and packaging, but has a hidden feature!
Stampin' Up! UK 12 Tags of Christmas Under the TreeOk, so, this tag is 6″ x 2″, and punched with the Scallop Tag Topper Punch.

The Under the Tree paper is coloured on one side, and kraft with a white pattern on the other. For this tag I used the Kraft side, and inked the tag with Old Olive Ink and a sponge. The white printed pattern acts as a resist, meaning that the Kraft cardstock takes the colour of the ink, but the pattern doesn’t! (this sort of thing always reminds me of some Tim Holtz products, and just screams to ink and spritz and alter). I then stamped the snowflake stamp from Trendy Trims in Early Espresso ink.

The tag was then finished with the Natural and Old Olive Two-Tone Trim (extra chunky bakers twine! LOVE!)


So, check back next time for another installment of our 12 Tags of Christmas!

and sign up for the StampinByHannah newsletter by hitting the Subscribe to Newsletter button —->

Hannah Wilks

Stampin’ Up! UK Independent Demonstrator

If you like the project, or any of the products used, would like a catalogue, or to join my team, please contact me, or click on the ‘Shop NOW’ button at the top of the page. You can also find me on Twitter, Facebook, YouTube, Google+, About.me, and Tumblr (Links in the sidebar)

Thank you for stopping by www.www.stampinbyhannah.co.uk today

x


StampinByHannah Product of the Month – November 2014

Its that time again! Product of the month reveal time!

This month I am so excited for this! At the time I write this I haven’t made anything with this product yet, however, I really hope to sort that out this afternoon!


It’s the Seasonal Snapshop Project Life by Stampin’ Up! Card Collection AND the coordinating Accessory Pack!

The Project Life by Stampin’ Up! kits are just such good value for money! The card collections contain 100 double sided cards in 3 sizes (6 x 4″, 4 x 4″ and 3 x 4″, which are 10.2 x 15.2 cm, 10.2 x 10.2 cm, ad 7.6 x 10.2 cm) for just £13.50, and then the Accessory packs contain various items for just £8.95! This Accessory pack includes: 3 3×4 printed acetate cards, 7 sheets of stickers (including 4 alphabets!), 60 sequins, 4 epoxy badges, epoxy stickers and a roll of super cute Washi tape!

Stampin' Up! UK Project Life by Stampin' Up! Seasonal Snapshot

As usual the Project Life by Stampin’ Up! kits coordinate with other Stampin’ Up! products; the 12 x 12 album, pocket pages, journalling pens, framelits and dies, and of course stamps!

The kit also colour coordinates with other Stampin’ Up! products – the Seasonal Snapshot collection uses: Basic Black, Hello Honey, Old Olive, Real Red, Sahara Sand, and Tangerine Tango!

Although I will make some Project Life spreads with this collection, I am planning on showing some you other uses for our Project Life kits!

Hope you enjoy this November Product of the Month – grab your now to follow along!


Hannah Wilks

Stampin’ Up! UK Independent Demonstrator

If you like the project, or any of the products used, would like a catalogue, or to join my team, please contact me, or click on the ‘Shop NOW’ button at the top of the page. You can also find me on Twitter, Facebook, YouTube, Google+, About.me, and Tumblr (Links in the sidebar)

Sign up to our newsletter here – http://eepurl.com/2if59

Thank you for stopping by www.www.stampinbyhannah.co.uk today

x