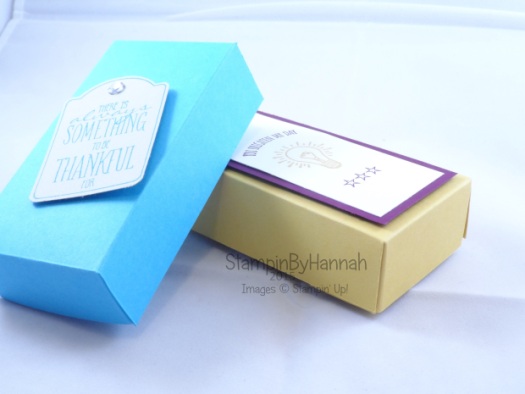
Stampin’ Up! Soap Box!

I think I made this box originally about 6 months ago, and since then it has been sat looking very sad in my prototypes box! That is until now!

This past couple of weeks have been pretty tough going actually, I’ve had an awful cold and have felt utterly rubbish, and so when it came time to prep for this weeks worth of blog projects I had nothing! So, out came my trusty prototypes box and this project leapt out at me! Thank god for being really productive a couple of months ago! (I actually think I might have designed this one whilst waiting for my Stampin’ Up! Starter kit, so actually its more like 8 months ago!)

Stampin' Up! UK How to make your own soap box

Isn’t it cute! and I’ve finally managed to make something in both Imperial and Metric Measurements! Yay!

So, that stamp set – its a Sale-a-bration Freebie! for more information about how to get Sale-a-bration items, just click HERE!

The Imperial Box uses Hello Honey as the box, with a piece of Blackberry Bliss, and some Whisper White. While I used Tempting Turquoise for my video version!

Measurement:

Cardstock – 12 x 4″ (30 x 10 cm)

Score on the long side at 1, 2, 6, 7, and 11″ (2.5, 5, 15, 17.5 and 27.5 cm)

Score on the short side at 1 and 3″ (2.5 7.5 cm)


Hannah Wilks

Stampin’ Up! UK Independent Demonstrator

If you like the project, or any of the products used, would like a catalogue, or to join my team, please contact me, or click on the ‘Shop NOW’ button at the top of the page. You can also find me on Twitter, Facebook, YouTube, Google+, About.me, and Tumblr (Links in the sidebar)

Sign up to our newsletter here – http://eepurl.com/2if59

Thank you for stopping by www.www.stampinbyhannah.co.uk today

x
Thanks….. I’m Crazy About you!

Welcome to another week here at StampinByHannah! There are some great projects coming this week.

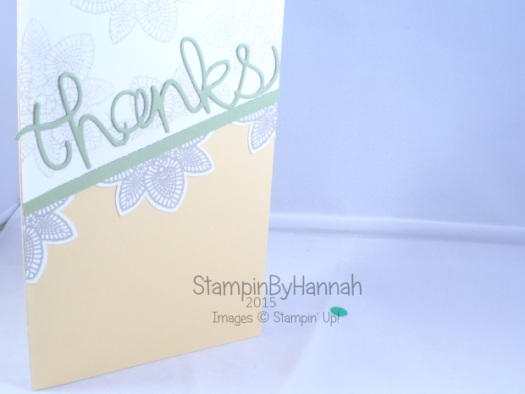
To set the week off I decided to say Thanks! using the Hello You Thinlits Dies (that come bundled with the Crazy About You stamp set)

Stampin' Up! UK Petal Potpourri Hello You

This card is a CASE (copy and share everything) from the Stampin’ Up! Spring/Summer catalogue page 23. Using the Petal Potpourri stamp set, and that lovely doily print flower (LOVE it!).

The card base is So Saffron, with a piece of Whisper White added at an angle.

I stamped the flower twice on a piece of Whisper White, using Crumb Cake ink, and punched them out with the Flower Medallion Punch before cutting them in half.

The ‘Thanks’ is die cut using those lovely framelits in Pear Pizzazz cardstock, using the Big Shot. Stampin’ Up! Transfer Adhesive Sheets are definitely the best things to stick these die cut words on with.

The Big Shot! I don’t think I’ve talked about the Big Shot before have I? I might have mentioned it briefly I suppose. The Big Shot is one of the greatest tools as a card-maker, I use mine all the time! The Big Shot is a manual Die Cutting machine, meaning that it uses Dies to cut shapes from cardstock (or fabric, fun foam, paper, felt, and a host of other materials). Stampin’ Up! sell the Big Shot and a whole heap of accessories, including the Magnetic Platform (which hold onto your metal dies, allowing you to line up stamped images and your dies without using bits of tape!), spare cutting mats, Dies and Embossing Folders. The Spring/Summer catalogue features a lot of new dies and embossing folders for use with your Big Shot, and makes a Big Shot a worthwhile investment.

At this point I felt that the card was a little too plain, and so added some more of the Petal Potpourri Doilies in Crumb Cake stamped off once to finish.


Hannah Wilks

Stampin’ Up! UK Independent Demonstrator

If you like the project, or any of the products used, would like a catalogue, or to join my team, please contact me, or click on the ‘Shop NOW’ button at the top of the page. You can also find me on Twitter, Facebook, YouTube, Google+, About.me, and Tumblr (Links in the sidebar)

Sign up to our newsletter here – http://eepurl.com/2if59

Thank you for stopping by www.www.stampinbyhannah.co.uk today

x


Sale-a-Bration on Sunday

Hope everyone is having a great weekend! I wish I was crafting, but I am at work instead, oh well!

Time for Sale-a-bration on Sunday, my weekly look at the Sale-a-bration goodies available for FREE with any £45 spend with me and Stampin’ Up!

Stampin' Up! UK Sale-a-bration You Brighten my day

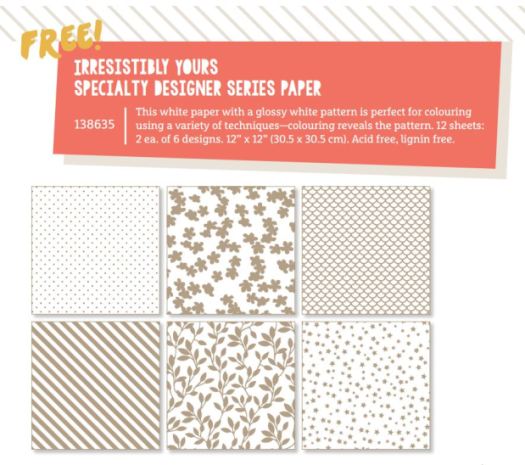
I have already mentioned the delights that are contained within the pages of this years Sale-a-bration brochure. I think though that the most surprising is a pack of Designer Series Paper – Irresistibly Yours. A pack of paper which when it arrives in your hands appears like 12 sheets of white cardstock. But then you feel it, and feel its glossy patterns. Then you ink it and it comes alive! 12 sheets of white paper with 6 white glossy designs on, all waiting for ink!

Stampin' Up! UK Irresistibly Yours Sale-a-bration

The stamp I have selected for this card also comes from the Sale-a-bration offerings. You Brighten My Day coordinates with several different punches including; the Note Tag Punch, the Itty Bitty Accents Punch Pack, the Banner Punch, and the What’s Up! Punch. Check out this weeks Weekly Deals for some great punch offers!

The Card was simple enough to put together too! Half a sheet of A4 Lost Lagoon Cardstock cut in half, and then folded in half to create an A6 card. A piece of Irresistibly Yours cut to 5 3/4″ x 4″ and inked using a sponge with Lost Lagoon ink.

I grabbed my Lost Lagoon ink again to stamp the tag stamp, punched it out with the Note Tag Punch, as well as punching out a piece of Lost Lagoon cardstock. Before finishing the card with a bow tied with Whisper White Bakers Twine! Lovely!


Fancy Fold Friday – Box Card

Welcome to another Fancy Fold Friday.

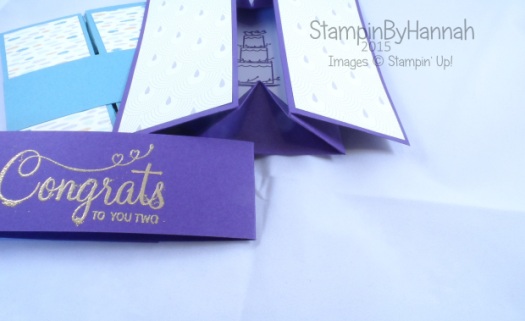
This card is the result of a conversation I had a few weeks before Christmas with one of my Stampin’ Up! Pootles team mates. She had spotted this card, and could find what it was called or a tutorial for it. What followed was a quick mess around with some copy paper (a disaster by the way) and a quick hunt on Pinterest. We found this tutorial, and I just knew I had to do my own version; I have altered the measurements in order to fit the card into a C6 envelope.

Stampin' Up! UK Box Card Video Tutorial


The card above uses Elegant Eggplant cardstock, with the Something Borrowed Designer Series Paper and stamps from Your Perfect Day.

I’m sorry, but I haven’t currently got the metric measurements of this card. I have tried but I wasn’t very successful. So its imperial only for the time being.

Measurements:

Cardstock = 8 1/4 x 10!

Score on the Long Side at – 2, 3 1/2, 6 1/2, and 8″, marking the cardstock at 5″

Score on the Short Side at – 1 1/2 and 6 3/4″

Score triangles from the 5″ marks to the points where the score lines meet.


Hannah Wilks

Stampin’ Up! UK Independent Demonstrator

If you like the project, or any of the products used, would like a catalogue, or to join my team, please contact me, or click on the ‘Shop NOW’ button at the top of the page. You can also find me on Twitter, Facebook, YouTube, Google+, About.me, and Tumblr (Links in the sidebar)

Sign up to our newsletter here – http://eepurl.com/2if59

Thank you for stopping by www.www.stampinbyhannah.co.uk today

x

The Perfect Bow….

I think this was the most anticipated item in the new Stampin’ Up! catalogue

The Bow Builder Punch

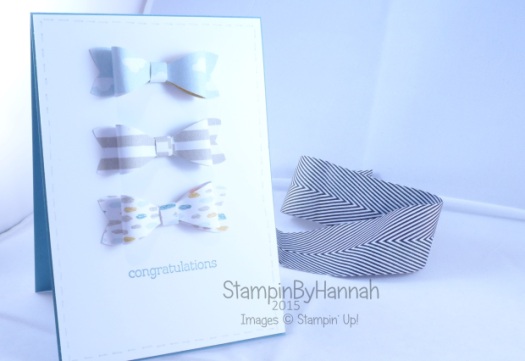
Perfect baby size bows every single time! Actually, ‘baby sized’ is what Stampin’ Up! describe them as, I would rather think of them as cute. They measure 5.7 x 2.2 cm (2 1/4 x 3/4″) when assembled. They are the perfect size for a A6 card (thats half an A4 folded in half), and are just so sweet.

Stampin' Up! UK Bow Builder Punch

This card is actually a CASE (copy and share everything) from the Stampin’ Up! Spring/Summer catalogue. I have used different papers and changed the sentiment.

The papers I have selected are from the Sweet Dreams Designer Series Paper pack, designed for baby projects. This paper uses a selection of beautiful soft colours; Basic Grey, Crisp Cantaloupe, Hello Honey, Lost Lagoon, Sahara Sand and Whisper White; in both a girly print and something better for boys! I have used the blue ‘boy’ sides for this card, to match the Lost Lagoon card base.

This DSP also matches a selection of Washi taps, cute buttons, and the Little Sunshine stamp set.

But for today, I’ve just used the papers to create these 3 lovely bows.

The punch punches out half a bow, so for each bow you need to punch twice. They are super simple to assemble. My suggestion is to curl the bow sections with your bone folder, and stick them together with Glue Dots.

I grabbed my Zoo Babies stamp set for the sentiment, and completed the card with some hand-drawn faux stitching in Sahara Sand Stampin’ Write Marker.


Hannah Wilks

Stampin’ Up! UK Independent Demonstrator

If you like the project, or any of the products used, would like a catalogue, or to join my team, please contact me, or click on the ‘Shop NOW’ button at the top of the page. You can also find me on Twitter, Facebook, YouTube, Google+, About.me, and Tumblr (Links in the sidebar)

Sign up to our newsletter here – http://eepurl.com/2if59

Thank you for stopping by www.www.stampinbyhannah.co.uk today

x
Salted Caramel Bag – Video Tutorial

I got this bag as part of a Christmas gift; it originally contained Salted Caramel (hence the title!), and I loved the shape so much I just had to recreate it.

I have to say now, that this bag is a little awkward, mainly due to some strange score lines, but I hope that the video will explain all.

Stampin' Up! UK large gift bag StampinByHannah

I used the lovely Sweet Taffy Designer Series Paper from the annual catalogue for this gift bag, with stamping using the Petal Potpourri and Something Wonderful (Sale-a-bration item!).

Measurements –

Cardstock = 12 x 11 1/2″ (30.5 x 29 cm)

Score on the long side at – 2 and 9″ (5 and 22.5 cm)

Score on the short side at – 2, 5 1/2, 7 1/2, 11″ (5, 14, 19, 28 cm)

Then turn the cardstock back so that the long side is at the top, with the 2″  (5 cm) score line on the left and score at 5″(12.5 cm) – but only between the narrow score lines.

The back on the short side score at 1″ and at 6 1/2″ (2.5 and 16.5 cm) but stop about 1″ about the 5″ score line (down 15 cm). At the end of these score lines, score triangles.

Stamped cardstock – 6 1/4 x 3″ (16.5 x 7.5 cm)

Layer – 6 1/2 x 3 1/4 (17 x 8 cm)

PS: Sorry I’m so snuffly in the video – I thought this cold had packed its bags and was leaving, but then it turned around and came back! *off to lie on the sofa!*


Petal Potpourri!

Have you seen the latest Stampin’ Up! catalogue yet? NO! well, its HERE! take a look!

There are some amazing stamp sets, Designer Series Papers, Dies, and even some new Inks!

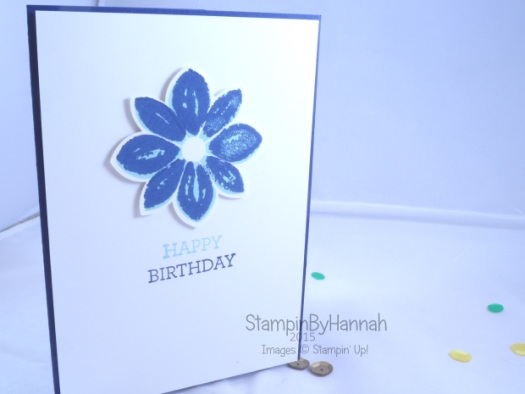
This card uses just one of the New Stamp sets – Petal Potpourri – four wonderful floral images that coordinate with a new punch (I’ll get to that in a moment), along with 2 flower centres! Clean and simple, but oh so handy.

Stampin' Up! UK Petal Potpourri happy birthday

This card uses a Night of Navy card base, with a Whisper White matt.

I stamped the flower twice, first a solid image in Pool Party, and then this lovely hand-painted looking flower in Night of Navy. Now, I have to say this would have been easier if I had used the Stamp-a-ma-jig Stamp positioning tool, but I didn’t! and So the images are a little off, but I don’t mind that.

The flower was then punched out using the new Flower Medallion Punch. This punch coordinates with two stamp sets in the new catalogue! I love a good versatile punch! And even comes bundled with this stamp set to save you 15%.

The Happy Birthday sentiment is taken from another new set – Crazy About You! Quite possibly the most versatile set of sentiment stamps I have seen in ages! and although it is designed to coordinate with some lovely word thinlit dies – the sentiments can totally be used on their own!


Hannah Wilks

Stampin’ Up! UK Independent Demonstrator

If you like the project, or any of the products used, would like a catalogue, or to join my team, please contact me, or click on the ‘Shop NOW’ button at the top of the page. You can also find me on Twitter, Facebook, YouTube, Google+, About.me, and Tumblr (Links in the sidebar)

Sign up to our newsletter here – http://eepurl.com/2if59

Thank you for stopping by www.www.stampinbyhannah.co.uk today

x
 

Sale-a-bration on Sunday – lotus Blossom

Welcome to my first Sale-a-bration on Sunday for 2015! Each Sunday between now and the end of March I will be sharing with you some great projects using the Sale-a-bration stamps and papers from this years brochure!

Stampin' Up! UK Sale-a-bration SAB lotus blossom

I love this card! actually, I love this stamp! Back in November I attended a Stampin’ Up! event about this years Sale-a-bration, and this was the stamp they allowed us to play with. I love the 2-step stamping technique, and this stamp makes it so easy to get a really pretty effect.

This card uses a Lost Lagoon card base with a Whisper White mat. I stamped the flower with Lost Lagoon and Soft Sky. The flower image comes in three pieces, each piece adding more detail, from a larger backing piece to the detailed petals. So I stamped the first stamp in Soft Sky, before layering the other two stamps over with Lost Lagoon. The best way of using these two-step stamping is to stamp off some layers; where you ink up your stamp and stamp it once on a piece of scrap paper, before stamping finally onto your project.

This stamp set is part of Stampin’ Up! Sale-a-bration period, lasting from 6th January to 31st March 2015. For each £45 you spend with me and Stampin’ Up! you can choose a FREE product from the Sale-a-bration brochure, which could be this stamp set, or some of the great Blendabilities markers!


Hannah Wilks

Stampin’ Up! UK Independent Demonstrator

If you like the project, or any of the products used, would like a catalogue, or to join my team, please contact me, or click on the ‘Shop NOW’ button at the top of the page. You can also find me on Twitter, Facebook, YouTube, Google+, About.me, and Tumblr (Links in the sidebar)

Sign up to our newsletter here – http://eepurl.com/2if59

Thank you for stopping by www.www.stampinbyhannah.co.uk today

x
Its’s Challenge time again! – AW32

I do love a good challenge! And this challenge over at Around the World Stampin Challenges is particularly good!

AW32

I love using sketches when I’m scrapbooking, but using a sketch when I’m card-making isnt something I do much of! So, this really was a challenge for me.

Stampin' Up! UK AW32 Sketch Challenge entry

I decided to use new products from the Spring/Summer catalogue (and a little something from Sale-a-bration!) for this card. I just love using my new stuff! Don’t you?

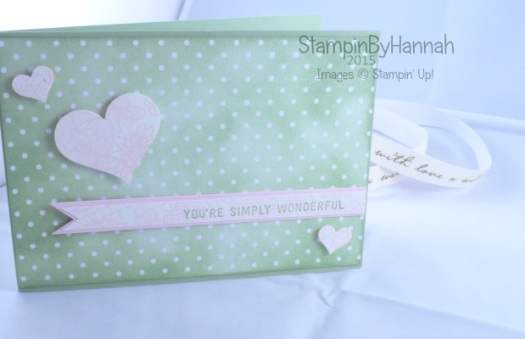
The card base is Pear Pizzazz, with a matt of that fabulous Irresistibly Yours Designer Series Paper from the Sale-a-bration brochure. This paper is fabulous! When it arrives it just looks like 12 sheets of white 12×12 cardstock, but when you ink or mist it, it comes alive! The white paper has a glossy white pattern hidden on it, 6 different designs – dots, flowers, stripes, vines, stars and a sort of scaly pattern! So I grabbed for the dots here and sponged it in Pear Pizzazz Ink – I love that inky / blotchy look. It says “this card was handmade! with love and effort!”

The hearts punched using the Sweetheart punch, and the heart from Itty Bitty Accents. I stamped the new background stamp, Something Lacy, in Pink Pirouette, onto Very Vanilla cardstock before punching out the hearts and creating the sentiment banner. That sentiment by the way is another Sale-a-bration item!

I love the Sale-a-bration offerings this year. There is a great selection of stamps, papers, embellishments, Project Life cards, AND some blendabilities! all for FREE when you spend £45 with me and Stampin’ Up! between now and the 31st of March! Awesome!

Anyway, thanks for reading all my waffle today, and I hope you enjoyed the card!


Hannah Wilks

Stampin’ Up! UK Independent Demonstrator

If you like the project, or any of the products used, would like a catalogue, or to join my team, please contact me, or click on the ‘Shop NOW’ button at the top of the page. You can also find me on Twitter, Facebook, YouTube, Google+, About.me, and Tumblr (Links in the sidebar)

Sign up to our newsletter here – http://eepurl.com/2if59

Thank you for stopping by www.www.stampinbyhannah.co.uk today

x

Fancy Fold Friday – Twist Turn Card Video Tutorial!

Welcome to another Fancy Fold Friday! This week I am re-visiting a previous project as a reader had asked for a video tutorial, and so here it is. This is originally a CASE from My Chic and Scratch, but I have altered the measurements to fit A4 cardstock.

Stampin' Up! UK Twist Turn card Butterfly BasicsThis card uses the new Butterfly Basics stamp set, from the Spring/Summer catalogue from Stampin’ Up! This stamp set comes bundled with a set of thinlits, Butterflies Thinlit Dies. This set of dies is a little different that our usual Stampin’ Up! thinlits as not all the dies match a stamp, instead the sets compliment each other. Saying that the butterfly featured on this card is the only stamp/die combination in the set!

Measurements:

Cardstock – 8 1/4 x 5 1/4″ (20.9 x 13.3 cm)

Score on the long side at 2 5/8 and 3 1/2″ (6.6 and 8.9 cm)

Score on the short side at 2 5/8″ (6.6 cm)

Between the two score lines draw two further score lines on a diagonal. Lay your card with the long side at the top and the square created by the previous score lines on the left. Draw a score line from the top of the left hand score line to the point with the right hand score and horizontal score line meet. Then draw a further score line from the point with the right hand score line and the horizontal score line meet to the bottom of the left hand score line.

With the card still laid in the same orientation fold along the horizontal score line, before folding all the score lines both forwards and backwards. Fold the left hand score line backwards, and fold the card along the horizontal score. Holding the card under the square that you have just formed, take hold of the top two corners of that square and tilt. Make sure you burnish all the score lines well at this point.

Then attach your decorative cardstock or DSP.

Measurements:

2 1/4 x 2 1/4″ ( 5.7 x 5.7 cm)
2 1/4 x 4 1/4″ (5.7 x 10.8 cm)


Hannah Wilks

Stampin’ Up! UK Independent Demonstrator

If you like the project, or any of the products used, would like a catalogue, or to join my team, please contact me, or click on the ‘Shop NOW’ button at the top of the page. You can also find me on Twitter, Facebook, YouTube, Google+, About.me, and Tumblr (Links in the sidebar)

Sign up to our newsletter here – http://eepurl.com/2if59

Thank you for stopping by www.www.stampinbyhannah.co.uk today

x