Delightful Guy Birthdays ….

Stampin' Up! UK Guy Greetings mens birthday card

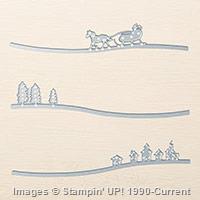
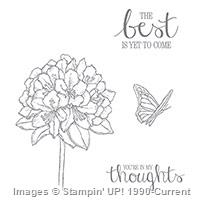
One of those card that all card makers struggle with are Birthday card for men! Everyone I speak to always requests more men’s cards – they can be tricky, and personally I don’t like making theme-y cards either (just because dad likes Golf, doesn’t mean I should make a birthday card featuring golf balls, does it?!)

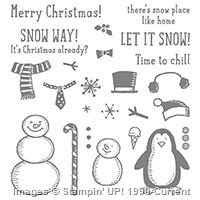
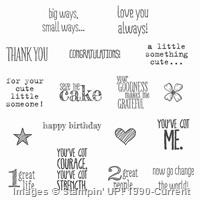
But we have a solution! Guy Greetings!

Stampin' Up! UK Guy Greetings mens birthday card

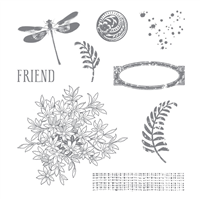
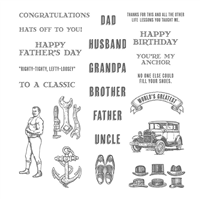
I adore this stamp set! I’m sure regular blog readers have read my waffle about this stamp set before, but for men’s birthday cards you just cannot beat it; a great selection of manly images complete with a series of handy sentiments in a lovely font.

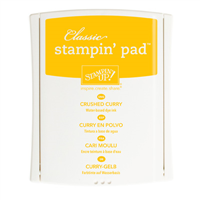
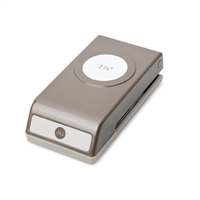
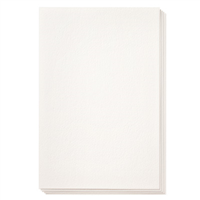
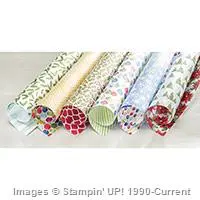
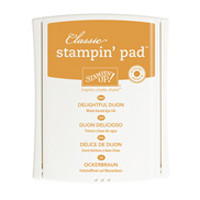
This card actually uses a piece of Christmas Designer Series Paper, from the Season of Cheer Designer Series Paper Pack – and I totally took colour inspiration from this one piece of paper – Delightful Dijon all the way! (with a hint of Basic Black!). The spanners were stamped off once before stamping – with the ‘Happy Birthday’ stamped in full strength. I use this ‘Happy Birthday’ stamp a lot, but this is the first time I have combined it with the Washi Label punch, basically because I thought the stamp was too big! Wrong! Stampin’ Up! coordination at its best!


Don’t forget to shop using the Code Club Code to receive some great FREE product! 

TDNKQPDY

I will be closing this order on the 30th October 2015


Shop Now button-001Join my team button-001

To purchase any of the items featured in my projects please use the links above. To join my team of Stampin’ Friends select ‘Join My Team’ or send me a message!

Please support StampinByHannah, and join my Code Club, by using the Hostess code featured in the top right hand of my blog. For orders of over £150 please do not use this code, as you are entitled to your own Hostess benefits!

Sign up to my newsletter here – http://eepurl.com/2if59

Hannah Wilks

Stampin’ Up! UK Independent Demonstrator

Shaker Card using the To You and Yours Card Kit

Stampin' Up! UK Shaker Card To You and Yours

Yesterday we looked at the To You and Yours Shaker Card Kit (which I LOVE!) but I had HEAPS of bits and pieces left over after making the 18 cards.

So I have made a few bits and pieces with the left overs. I’m only sharing one of the card with you today, but sign up for my newsletter for more inspiration with this kit coming really soon

Stampin' Up! UK Shaker Card To You and Yours

Using the stamp set that goes with the kit as the shaker background I created my own shaker window using the Stampin’ Trimmer (although you could use dies). Those star sequins are left over from the kit, and I STILL have more!

The sentiment is also from the same stamp set, heat embossed in Gold (yum!)


Stampin' Up! Starter Kit offer


Shop Now button-001Join my team button-001

To purchase any of the items featured in my projects please use the links above. To join my team of Stampin’ Friends select ‘Join My Team’ or send me a message!

Please support StampinByHannah, and join my Code Club, by using the Hostess code featured in the top right hand of my blog. For orders of over £150 please do not use this code, as you are entitled to your own Hostess benefits!

Sign up to my newsletter here – http://eepurl.com/2if59

Hannah Wilks

Stampin’ Up! UK Independent Demonstrator

To You and Yours Shaker Card Kit

Stampin' Up! To you and your shaker card kit top tips

I am loving the Project Kits in this years catalogues! They are all so simple to put together – so simple in fact that most of them can be put together in a couple of hours, surrounded by your friends – if you want to book a Party with me between the 4th and 10th of November you can select 2 FREE stamp sets from my basket of Stamping Goodies AND I can give you a hand to put your chosen kit together too! So, book your party today!

The To You and Yours Shaker Card Kit really stood out to me in the Autumn / Winter catalogue as a kit I needed to get home and put together before I could offer it to you as a class – Is it really as easy as Stampin’ Up!® make it look?

YES!

Stampin' Up! To you and your shaker card kit top tips

This kit gets you 18 cards (with envelopes) 6 of each of 3 designs. Stampin’ Up!® have even made a really handy video of how to put the kit together – along with both written and photographic instructions provided in the kit.

Stampin' Up! UK shaker card kit

The kit features gorgeous foiled card bases, and a lovely selection of different shaker shapes and elements to make your 18 cards. You could totally mix it up a bit and put the Glass Glitter in the Joy Bauble, or put the Joy sticker on the Star shape.

Stampin' Up! UK classes and parties Teesside

For me the highlight of this kit is the Dimensional Strips, they make creating your shaker shape so easy – just remember to butt the ends up close together on the cards where your using that Glass Glitter or you might find you have an empty shaker card and an envelope full of sparkles by the time they reach the recipient!

I found that adding some Crystal Effects liquid glue at the joints of the Dimensionals also helped (even if it was only peace of mind) to keep that Glass Glitter contained!

I thought I would make a quick video showing you just how easy it is to make these cards, but of course my camera had other ideas! hope you enjoy the Voiceover, and horrendous bow tying at the end! (there is a reason why the others don’t have their bit of bakers twine!)Stampin' Up! UK Shaker card video tutorial

Shaker Card Top Tips:

  • Start by applying your outline stickers, these are easier to apply than they look, and make the cards look super professional too!
  • Complete all the stamping before you start gluing your window sheets to your shaker frames
  • Use Tombow or Crystal Effects to add your Window Sheet – DO NOT be tempted to use your Fine-Tip Glue Pen, this glue is FAR too running and makes a major mess, check the video if you don’t believe me!
  • Assemble the Christmas Tree cards first, as suggested by Stampin’ Up!®, as you need to add 6 sequins to each tree, and to get that messy Glass Glitter out of the way!
  • Ensure your Dimensional Strips are butted tight up against each other, and add a liquid glue between to create a full seal (and allow to dry) before pouring your Glass Glitter onto the stamped tree – then line your shaker frame up over the top – otherwise your stamped tree might not match your shaker window!
  • Add the sentiment stickers last!
  • Have FUN!

StampinByHannah Parties at home Teesside Stockton on Tees Craft Cardmaking Classes


Shop Now button-001Join my team button-001

To purchase any of the items featured in my projects please use the links above. To join my team of Stampin’ Friends select ‘Join My Team’ or send me a message!

Please support StampinByHannah, and join my Code Club, by using the Hostess code featured in the top right hand of my blog. For orders of over £150 please do not use this code, as you are entitled to your own Hostess benefits!

Sign up to my newsletter here – http://eepurl.com/2if59

Hannah Wilks

Stampin’ Up! UK Independent Demonstrator


Halloween With a Sleigh Ride!

Stampin' Up! UK Halloween Sleigh Ride

When I am shopping for products I want to buy things that I can get multiple uses from (don’t we all!) but this can be tricky when looking at Christmas themed goodies. I have been really enjoying making Christmas cards using the Sleigh Ride Edgelit dies, but I knew that they could be so versatile. I have great plans for these (so hoping that they will still be here in January, is it too early to be thinking of retiring products!) but I thought I would start with an event that is a little nearer – Halloween

Stampin' Up! UK Halloween Sleigh Ride

With both scenes cut from a single piece of Basic Black card stock, I played around with placement until I was happy with the line of the trees, and considered sticking everything down and calling this one done. But I wanted the little housed to be ‘lit up’ but the orange card stock behind, and with an orange sky the effect wasn’t quite right. Cut a piece of Very Vanilla with the houses edgelit, and added the negative space to the top of the card so that the only orange is coming through the windows of the cute houses. Much better

Although there are loads of really lovely spooky Halloween items in this years Autumn / Winter catalogue, its not something that really jumps out at me so the only sentiment I have is from the A Little Something Stamp Set – I think this may be the most used set in my collection at the moment – with Trick or Treat stamped in Basic Black on Very Vanilla punched with the 1 3/8″ circle punch and a little extra Orange added with a Tangerine Tango Stampin’ Write Marker

I think you could totally re-create this for Christmas, or even a winter birthday, What do you think?


StampinByHannah Parties at home Teesside Stockton on Tees Craft Cardmaking Classes


Shop Now button-001Join my team button-001

To purchase any of the items featured in my projects please use the links above. To join my team of Stampin’ Friends select ‘Join My Team’ or send me a message!

Please support StampinByHannah, and join my Code Club, by using the Hostess code featured in the top right hand of my blog. For orders of over £150 please do not use this code, as you are entitled to your own Hostess benefits!

Sign up to my newsletter here – http://eepurl.com/2if59

Hannah Wilks

Stampin’ Up! UK Independent Demonstrator


October Sketch Challenge – Hello December!

Stampin' Up! Sketch Challenge Hello December 2015

It’s time for another card made with my October sketch:

StampinByHannah October Sketch Challenge

Last week I used the Triple Banner punch and School House Designer Series Paper to create my card based on this sketch. This week I wanted to create using just stamps.

Looking through my stamp collection I wanted something that dangled, I wasn’t aiming to make a Christmas card, but the bauble stamp from Hello December 2015 leapt out, and then I noticed the cute banner in the set and had to add that too. I already had a Mint Macaron card base on my desk, along with a matt of Very Vanilla so they were natural choices.

Stampin' Up! Sketch Challenge Hello December 2015

Stamped in Mint Macaron and Lost Lagoon the card looked a little plain, so I grabbed my Versamark pad and some Iridescent Ice Embossing Powder and added 5 stars across the card. Unfortunately I photographed this on a very (very) dull day, and didn’t manage to capture the sparkle that this embossing powder brings – Clear embossing powder complete with glitter = Yum!


Don’t forget to shop using the Code Club Code to receive some great FREE product! 

TDNKQPDY

I will be closing this order on the 30th October 2015


Shop Now button-001Join my team button-001

To purchase any of the items featured in my projects please use the links above. To join my team of Stampin’ Friends select ‘Join My Team’ or send me a message!

Please support StampinByHannah, and join my Code Club, by using the Hostess code featured in the top right hand of my blog. For orders of over £150 please do not use this code, as you are entitled to your own Hostess benefits!

Sign up to my newsletter here – http://eepurl.com/2if59

Hannah Wilks

Stampin’ Up! UK Independent Demonstrator


Technique Tuesday | Watercolour Background

Stampin' Up! UK Watercolour background video tutorial

One of my favourite things to do is play with colour. I love pulling inks out of my Colour Caddy and seeing how they work together, look next to each other and compliment each other to make some fabulous projects! Adding water to out Stampin’ Up!® inks is also pretty high up there on my list of favourite techniques at the moment, either using the inks as watercolour or making a colourful mess – I just love it!

Stampin' Up! UK Watercolour background video tutorial

I created this card completely on video – I am trying to remember to turn on the camera when I am playing with inks and paper, you just never know if the card is going to turn into a masterpiece or a complete mess!

Colour is so important in card making, but Stampin’ Up!® make it so simple; with colour families of matching colours and coordinating products that all work together to help you create wonderful cards, and other items too.

So, before I waffle on forever about how much I LOVE Stampin’ Up!’s® colour palate, shall we watch the video tutorial?

See, creating this brightly coloured background is super simple; just four colour of ink and a heap of water. The colours used here are Daffodil Delight, Delightful Dijon, Pumpkin Pie, and Watermelon Wonder. I did need to add some extra Watermelon Wonder as it began is dry pink, but with some extra ink added we succeeded in creating a lovely orange/coral tone for this card.

The stamping here is from Best Thoughts, one of the lovely Hostess Exclusives for this year – place an order of £150 or more to purchase this set, or host a party. Speaking of which have you heard about my latest Party offering? Book a party between 4th and 10th November 2015 and choose 2 FREE stamp set from my basket of Stamping Goodies! check the ad below for more details!


StampinByHannah Parties at home Teesside Stockton on Tees Craft Cardmaking Classes


Shop Now button-001Join my team button-001

To purchase any of the items featured in my projects please use the links above. To join my team of Stampin’ Friends select ‘Join My Team’ or send me a message!

Please support StampinByHannah, and join my Code Club, by using the Hostess code featured in the top right hand of my blog. For orders of over £150 please do not use this code, as you are entitled to your own Hostess benefits!

Sign up to my newsletter here – http://eepurl.com/2if59

Hannah Wilks

Stampin’ Up! UK Independent Demonstrator

Awesome friends – Inspired by Pootles

Stampin' Up! UK Pootles Awesomely Artistic Friend

Hello! Welcome to Monday, yes I know, I wish it was still Sunday too, oh well, shall I cheer you up with a card?

Recently my wonderful upline Sam (Pootles) challenged her team to make a card without using their favourite products! This is a tough challenge because I love so much of our products, and to be honest I don’t buy anything I don’t like, but I do have things I don’t use very often

Stampin' Up! UK Pootles Awesomely Artistic Friend

I decided to CASe (copy and share) a card Sam made a few weeks ago, using colours I don’t use very often. So this is a Cajun Craze card base with an Always Artichoke matt. The Stamping is in Chocolate Chip, using the Awesomely Artistic stamp set, which is a favourite, as is the Washi Label punch.

The card is finished using the Elegant Butterfly punch and a trio of Pearls


Stampin' Up! Starter Kit offer


Shop Now button-001Join my team button-001

To purchase any of the items featured in my projects please use the links above. To join my team of Stampin’ Friends select ‘Join My Team’ or send me a message!

Please support StampinByHannah, and join my Code Club, by using the Hostess code featured in the top right hand of my blog. For orders of over £150 please do not use this code, as you are entitled to your own Hostess benefits!

Sign up to my newsletter here – http://eepurl.com/2if59

Hannah Wilks

Stampin’ Up! UK Independent Demonstrator

12 Weeks of Christmas | Mass Produced Christmas Card

Stampin' Up! UK Santa's gifts mass produced christmas card video tutorial

Stampin' Up! 12 weeks of Christmas

Welcome to the second Week of 12 Weeks of Christmas! I make all the Christmas cards that I send each year, which means making about 150 cards leading up to the Festive Season. Anyway of making that task easier is fine by me! Last year I made around 50 Christmas cards for my blog which were all received by family and friends, this year I am planning to sell more of these at Christmas fairs and events, and so need a few more cards!

I often use mass production techniques when I’m making multiples of a particular card, for customer Thank you’s or Wedding Stationary, and will do the same this year with my Christmas cards.

Stampin' Up! 12 Weeks of Christmas Santas gifts

This features a super cute Rudolph (that’s a reindeer!) from the Santa’s Gift stamp set. Before you go grabbing for your Autumn / Winter catalogue thinking you’ve missed something, this stamp set is taken from the Christmas section in the Annual Catalogue. I have added some colour to Rudolph using a Blender pen and Stampin’ Write Markers in Real Red and Cherry Cobbler.

Check out the video for the full mass production experience!

These cards are really easy to produce, and would make a great family project for a rainy Saturday afternoon. I’m a big believer in getting children crafting, get them winding the handle on the big shot, or colouring Rudolph’s scarf! They’re have great fun!

The cards are finished by added a dot of Fine Tip Glue to Rudolph’s nose, they would look so cute with some glitter added too!

Stampin' Up! UK Santa's gifts mass produced christmas card video tutorial

Mass Production Top Tips:

  • Cut all your card stock first, this card uses 4 pieces of card stock – a Cherry Cobbler card base (half a piece of A4, scored at 10.5 cm), a Very Vanilla layer (14.2 x 10 cm), a Basic Grey matt (10.5 x 8.5 cm), and a Very Vanilla topper (10 x 8 cm)
  • Do each stage of the process in its entirety – Run all the Very Vanilla layers through the big shot, before stamping all the Rudolphs, colour all the scarfs etc.
  • Find your rhythm – fold and score, fold and score….
  • Do anything that requires drying time last! (like adding Fine Tip Glue to Rudolphs nose!)
  • Have Fun!

Don’t forget to shop using the Code Club Code to receive some great FREE product! 

TDNKQPDY

I will be closing this order on the 30th October 2015


Supply List

Built for Free Using:  My Stampin Blog


Shop Now button-001Join my team button-001

To purchase any of the items featured in my projects please use the links above. To join my team of Stampin’ Friends select ‘Join My Team’ or send me a message!

Please support StampinByHannah, and join my Code Club, by using the Hostess code featured in the top right hand of my blog. For orders of over £150 please do not use this code, as you are entitled to your own Hostess benefits!

Sign up to my newsletter here – http://eepurl.com/2if59

Hannah Wilks

Stampin’ Up! UK Independent Demonstrator

Pinkies Blog Hop | Pillow Box Note Card Collection

Stampin' Up! UK Watercolour Wings Note Card Collection

Blog hop logo

Welcome to another Pinkies Blog Hop! As it’s World Card Making Day today, we hope everyone will get some time to craft, and we’ve created some lovely projects to help inspire you to create your own beautiful card. Simply use the buttons at the end of each post to keep hopping!

Stampin' Up! UK Watercolour Wings Note Card Collection

I hope you’re enjoying our hop today. This is my first Pinkies Blog Hop (and hopefully not my last!) and I wanted to create something that would describe my style of crafting for this event. There are so many great stamp sets in this years Annual catalogue that picking one favourite is incredibly difficult, but I think Watercolour Wings is probably one of my most used. Its such a easy set to use, although the effect looks complicated. The butterflies are stamped from 5 different stamps – 4 layering butterfly wings, and a body – and each one is stamped in one colour!

Stampin' Up! UK Pinkies Blog Hop World Card Making Day

So the first, most solid stamp is inked and stamped off onto scrap paper 3 times before being stamped onto the card stock, the next stamp is stamped off twice, the 3rd stamp is stamped off once, and the final image is stamped straight onto the butterfly to create a lovely layered image. These butterflies also coordinate with the Butterflies Thinlits Die set – which is awesome because fussy cutting isn’t my friend!

The note cards themselves are 3 x 3″ cards in four of the most recent In-Colours; Mint Macaron, Watermelon Wonder, Cucumber Crush and Delightful Dijon. Complete with a layer of the same card stock measuring 2 3/4″ square, matching butterfly and sentiment piece.

The Thank you sentiment is taken from Something to Say, stamped in Tip Top Taupe and punched out with the Washi Label punch. I found the punch a little long for the sentiment so inserted the punched piece back into the punch for a bit of a trim, before mounting on a full sized punch of the Washi Label.

Stampin' Up! UK World Card Making Day 2015

I couldn’t finish this project without making a pocket for the cards to go in, and without using my favourite item from the Autumn/Winter catalogue this year – The Pillow Box Die of course! I have used the die so much in the past few weeks, I’m sure regular readers of my blog are sick of the sight of it! Here I have created a Pillow Pocket by only putting the die off the edge of my card stock before cutting, so only one end has the pillow box closure. Finished with a belly band of Gold Designer Series Paper from the Neutrals Designer Series Paper Stack and another one of those butterflies in Tip Top Taupe.

Oh, and of course no set of note cards would be complete without some envelopes, so I used the same Designer Series Paper to create 4 envelopes with the Envelope Punch Board.

Thanks so much for stopping by today, and I hope you enjoy the rest of the hop!

Blog hop nextBlog hop previous


Shop Now button-001Join my team button-001

To purchase any of the items featured in my projects please use the links above. To join my team of Stampin’ Friends select ‘Join My Team’ or send me a message!

Please support StampinByHannah, and join my Code Club, by using the Hostess code featured in the top right hand of my blog. For orders of over £150 please do not use this code, as you are entitled to your own Hostess benefits!

Sign up to my newsletter here – http://eepurl.com/2if59

Hannah Wilks

Stampin’ Up! UK Independent Demonstrator

Kindness Project – Sweetie Boxes

Stampin' Up! UK Sweeties Box Video Tutoria

I love sharing my papercrafting with other people, I always make sweetie parcels and little gifts for my work colleagues at Christmas and special events, but until recently that’s where my sharing stopped! Shock I know, that was until I came across The Kindness Projects – and from now on people I come across will be getting little token gifts from me – a cashier in the supermarket, the doctor’s receptionist, the lovely chap that delivers my Stampin’ Up! goodies!

So, what are my token gifts – well, I thought I would go with some sweeties start with, and I have a pile left over from the sweetie bar at the Wedding, so I’ll be working my way through these first.

The first sweeties that I pulled out of the stack were my favourites  – Parma Violets! (just remind me of my childhood! LOVE them!) and so this box was created!

Stampin' Up! UK Sweeties Box Video Tutoria

Aren’t they Cute! I adore this Designer Series Paper, Sweet Li’l Thing, it’s designed with Children in mind, but I just cannot resist those Strawberries! I made a card with this same paper last week. The prints are adorable, and I love the colour combination too – Hello Honey, Pool Party, Tangelo Twist, Tip Top Taupe, Very Vanilla and Watermelon Wonder – I don’t think I would have come up with that colour combination on my own, but I have to say it will be one that is staying in my Colour Combo Bank from now on!

And they are so quick and easy to make with only a teeny tiny bit of Designer Series Paper too! Awesome!

These boxes have been finished with a ‘Thank You’ from Something to Say, punched with my favourite punch (this week!) the Washi Label Punch, and some flowers from the Itty Bitty Accents Punch pack (and a few Candy Dots!)

Stampin' Up! UK Kindness Projects Parma Violets Box Video Tutorial

Measurements:

Designer Series Paper : 4 1/2 x 5 1/2″ (11.5 x 14 cm)

Score on the long side at 1 and 4 1/2″ (2.5 and 11.5 cm)

Score on the short side at 1, 2, 3 and 4″ (2.5, 5, .5 and 10 cm)

Don’t forget to round the corners on the lid to ensure a good close


Shop Now button-001Join my team button-001

To purchase any of the items featured in my projects please use the links above. To join my team of Stampin’ Friends select ‘Join My Team’ or send me a message!

Please support StampinByHannah, and join my Code Club, by using the Hostess code featured in the top right hand of my blog. For orders of over £150 please do not use this code, as you are entitled to your own Hostess benefits!

Sign up to my newsletter here – http://eepurl.com/2if59

Hannah Wilks

Stampin’ Up! UK Independent Demonstrator