Fancy Fold Friday – Double Diamond

So, a few weeks ago I asked for any requests for fancy fold cards (any further suggestions most welcome, by the way!) and one of my lovely downline suggested a Double Diamond Fold – So Kathryn this is for you!

Stampin' Up! UK Double Diamond Fold Card I Like You


When I initially looked at this card, I did think ‘oh dear, that looks awfully complicated’ but really its quite simple, just folding the cardstock – no cutting involved!

I have used the I Like You Hostess Stamp set for this card, coloured with 4 of the lightest Blendabilities – Coastal Cabana, Old Olive, Rich Razzleberry, and Pumpkin Pie. I love this way of using my Blendies – really its just line colouring, and you could just as easily use the Stampin’ Write Markers. Using the stamped image as a guide, use your markers to add lines of colour, it just gives that hint of a shade rather than going for a full blended coloured look.

Measurements:

Cardstock = 10 x 4″

Score on the long side at 2 and 8″ making marks at 4 and 6″ on both sides

Score on the short side at 2″ before turning back to the long side, and marking the card stock on that 2″ horizontal score line at 3 and 7″

Then using a ruler and stylus (or ball tool) join the marks to form a diamond shape in the centre of the cardstock – the marks at 4″ should join with the 3″ mark, and the marks at 6″ should join the 7″ mark

Fold the cardstock from the left hand side; mountain fold, valley fold, valley, mountain.

Holding the edges of the cardstock push the edges together and the card should form!

Magic

In addition to the originally piece of cardstock you will need 2 pieces of coloured card measuring 1 /34 x 1 3/4″ and a piece measuring 2 3/4 x 2 3/4″

For stamping you will need 3 pieces of Whisper White; 1 measuring 2 1/2 x 2 1/2″ and 2 measuring 1 1/2 x 1 1/2″


Hannah Wilks

Stampin’ Up! UK Independent Demonstrator

If you like the project, or any of the products used, would like a catalogue, or to join my team, please contact me, or click on the ‘Shop NOW’ button at the top of the page. You can also find me on Twitter, Facebook, YouTube, Google+, About.me, and Tumblr (Links in the sidebar)

Sign up to our newsletter here – http://eepurl.com/2if59

Thank you for stopping by www.www.stampinbyhannah.co.uk today

x

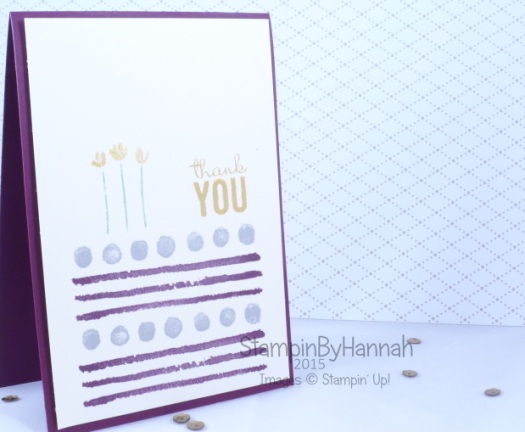
A Painted Thank You.

I recently took delivery of all the stamps for the rest of my Classes and Workshops from now until June, and this stamp set was amongst my haul!

Having trawled through Pinterest a few weeks ago I knew I loved the images of this set, but when it actually came time to use it, I was stumped. The floral images are so pretty, but I wanted to use the less obvious stamps within the set, the dots and lines, rather than the bold flowers.

Stampin' Up! UK Painted Petals Thank you

Over the weekend I had a Crafty Crop, attended by my lovely downline, Kathryn. And I grabbed Painted Petals out for another card (coming soon!), but while it was on the desk I took the opportunity to have a little play with the stamps. I regularly do this when I have little or no inspiration, I just grab the stamps and some inks and just stamp – no plan, no card in mind, just stamping.

So the colours I picked up this time where Blackberry Bliss, Hello Honey, and Smoky Slate. What a lovely selection I don’t think I’ve used before. Stamping onto Very Vanilla for a softer look, I came up with this simple Thank You card. Isn’t it lovely


Hannah Wilks

Stampin’ Up! UK Independent Demonstrator

If you like the project, or any of the products used, would like a catalogue, or to join my team, please contact me, or click on the ‘Shop NOW’ button at the top of the page. You can also find me on Twitter, Facebook, YouTube, Google+, About.me, and Tumblr (Links in the sidebar)

Sign up to our newsletter here – http://eepurl.com/2if59

Thank you for stopping by www.www.stampinbyhannah.co.uk today

x
Stampin’ Up! Chocolate Box!

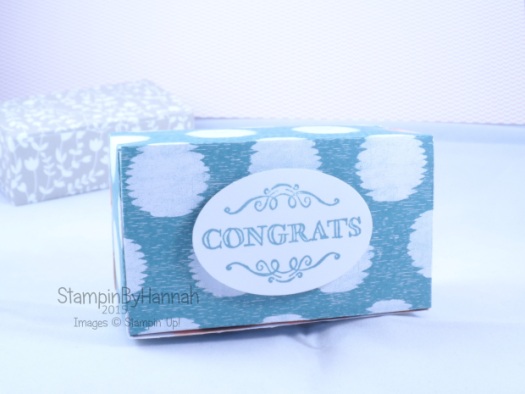
Hope everyone is having a great week! Inspiration struck me last week whilst be very naughty and stuffing my face full of chocolate (supposed to be on a diet …. its not going well!). I just loved the dimensions of the box the chocolates came in, however, it was far to big to make from a sheet of 12 x 12, so I set about making a smaller version, and here it is!

Stampin' Up! UK Chocolate box Simply Wonderful Sale-a-bration

Its a lovely box, and although I designed it for chocolates I didn’t have any on hand when filming the tutorial, so I filled it with sweeties instead!

The original version used the Something Borrowed Designer Series Paper but its currently on back order 🙁 which is a shame as it is so beautiful, So I swapped it for a piece of the Sweet Dreams designer series paper instead. I think this DSP is great! It forms part of the Baby Suite (see page 39 of the Spring Summer catalogue) and it does have some baby themed accessories, however, the papers themselves are a lovely selection of generic patterns. One side uses boy colours – Lost Lagoon, Basic Gray – while the other side features more girly hues – Crisp Cantaloupe and Hello Honey.

The stamp is from Simply Wonderful, one of the sets available as part of Sale-a-bration! I love the coordination of Sale-a-bration products this year, not only do we have stamps, papers and accessories that coordinate with each other, but we also have stamp sets that are great used with some of the punches in the annual catalogue! This set in particular works great with the Extra-Large Oval punch, and the Decorative Label punch too!

Measurements:

Cardstock (or Designer Series Paper) – 12 x 5 3/4″ (30.5 x 14.5 cm)

Score on the long side at – 1, 4 1/2, 6 1/2 and 10″ (2.5, 11.5, 16.5 and 25.5 cm)

Score on the short side at – 2, 3 1/4 and 5 1/4″ (5, 8.5 and 13 cm)


Hannah Wilks

Stampin’ Up! UK Independent Demonstrator

If you like the project, or any of the products used, would like a catalogue, or to join my team, please contact me, or click on the ‘Shop NOW’ button at the top of the page. You can also find me on Twitter, Facebook, YouTube, Google+, About.me, and Tumblr (Links in the sidebar)

Sign up to our newsletter here – http://eepurl.com/2if59

Thank you for stopping by www.www.stampinbyhannah.co.uk today

x
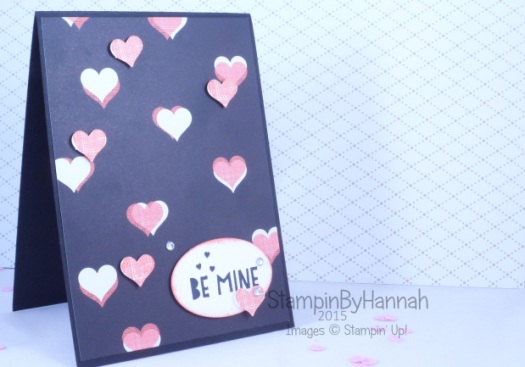
Be Mine…..

Before we get into the rest of the post I just want to remind you that today is the last day to book onto my February Technique Class if you plan on attending in person (you have until Friday if you are choosing the virtual option). You can see what we are making HERE


Right, Be mine!

I just love this stamp set – You Plus Me – so much in fact that it is my featured stamp set for February! Valentines here I come!

Stampin' Up! UK You Plus Me valentines Be mine

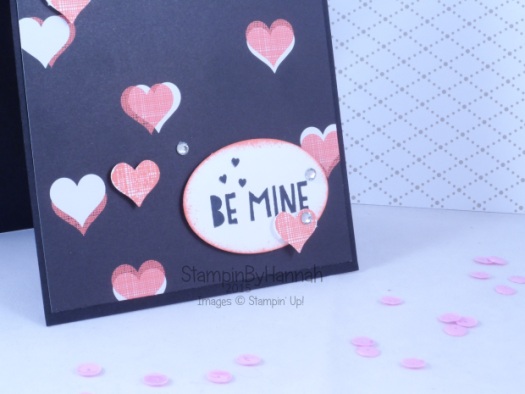
This card uses a piece of the Stacked with Love Designer Series Paper stack too! By happy coincidence the stamp set and the paper feature a very similar heart shape. So I stamped the heart 5 times on a piece of Whisper White in Calypso Coral ink, and punched them out with the heart punch from the Itty Bitty Accents Punch Pack. Now this heart doesn’t fit perfectly but, its close enough, it just leaves some of the inky bits behind!

The hearts are popped up on dimensionals, as is the sentiment – from the same stamp set, punched out with the Extra Large Oval. Seeing as this is a very dark card, black cardstock and black designer series paper, I stamped the sentiment in Stazon ink, the blackest black ink I own!

The card was missing something at this point, and I have to admit putting it to one side. But I very quickly pulled it back out and added a trio of jewels. Pefect!

Stampin' Up! UK Valentines cardsHave you made any Valentines cards yet this year?


Hannah Wilks

Stampin’ Up! UK Independent Demonstrator

If you like the project, or any of the products used, would like a catalogue, or to join my team, please contact me, or click on the ‘Shop NOW’ button at the top of the page. You can also find me on Twitter, Facebook, YouTube, Google+, About.me, and Tumblr (Links in the sidebar)

Sign up to our newsletter here – http://eepurl.com/2if59

Thank you for stopping by www.www.stampinbyhannah.co.uk today

x
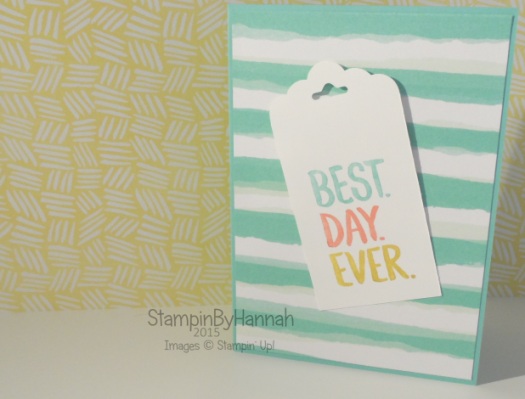
Sale-a-bration on Sunday – Best. Day. Ever.

I’m loving Sale-a-bration this year! As always Stampin’ Up! have brought us some truely awesome items! but this year, the coordination is fantastic!

I was playing around with some of the stamp sets yesterday, and I realised I hadn’t really done much with the Designer Series Paper – Best Year Ever!

So I had to rectify that!

Stampin' Up! UK Sale-a-bration on sunday Best day ever

Its this card just fab! I grabbed the Best Year Ever Designer series paper, and looked at the colours – Coastal Cabana, Calypso Coral, Crushed Curry – I stopped there (there are more) what a lovely colour combination! and something I would never have come up with myself! I do this quite often, I’ll grab some DSP and check what colours are in it, reach for my Stampin’ Write markers and see where I end up!

The stamp, Best Day Ever, is coloured with the Stampin’ Write Markers in Coastal Cabana, Calypso Coral and Crushed Curry – stamped onto a piece of Whisper White measuring 4″ x 2″, and punched with the Scalloped Tag Topper Punch.

What a simple and effective card for our Sale-a-bration on Sunday!


Sale-a-bration is the biggest Stampin’ Up! sale of the year – not only can you choose a FREE item (from a selection) for every £45 spend, but you can earn more Hostess Credits by holding a party, AND get some great free items by choosing to become a demonstrator!


Hannah Wilks

Stampin’ Up! UK Independent Demonstrator

If you like the project, or any of the products used, would like a catalogue, or to join my team, please contact me, or click on the ‘Shop NOW’ button at the top of the page. You can also find me on Twitter, Facebook, YouTube, Google+, About.me, and Tumblr (Links in the sidebar)

Sign up to our newsletter here – http://eepurl.com/2if59

Thank you for stopping by www.www.stampinbyhannah.co.uk today

x
February Technique Class!

Hey Folks!

I just wanted to pop up today to let you know about my February Technique Class.

Stampin' Up! UK February Technique Class Slider Card Valentines

I hold monthly classes from my home at the beginning of every month, and this month (seeing as its almost Valentines day!) I thought we would make some love themed cards.

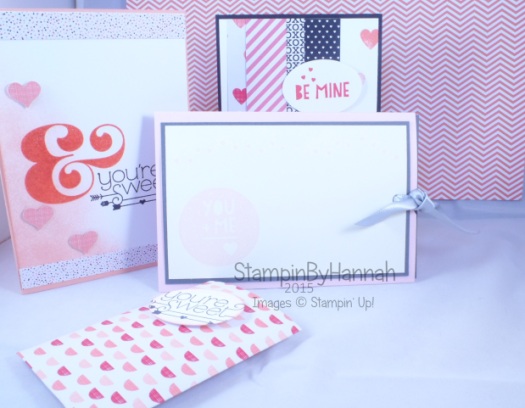
This class uses the You Plus Me Stamp and Designer Series Paper Stack Bundle (found on page 5 of the Stampin’ Up! Spring Summer Catalogue). I love this stamp set, it features a number of cute little images as well as larger sentiments, and the DSP stack is super cute!

As part of the class we will be making 3 cards, including one special fancy fold card! as well as a sweet little gift bag perfect for gift cards or small chocolates, using lots of techniques including heat embossing!

The cost of the class is £10, or £28 if you want the stamps and DSP, and is available either in person or virtually. Everyone will get access to both written and video instructions of all the cards and projects for the month too!

Booking for this class closes on the 26th of January 2015 at midnight for those attending in person, and on the 31st of January for those attending virtually, so grab your place today!

Class Only – Attend in Person – £10DSP paper shares


Class With Stamp Set – Attend in Person – £28DSP paper shares


Class Only – Virtual option – £10DSP paper shares


Class With Stamp Set – Virtual Option – £28DSP paper shares


For more information about my classes check out my Classes and Workshops page!

Fancy Fold Friday – Twisted Easel Card

Have you got that Friday feeling?! I do! and if its Friday, it can only mean one thing around here! Time for another Fancy Fold!

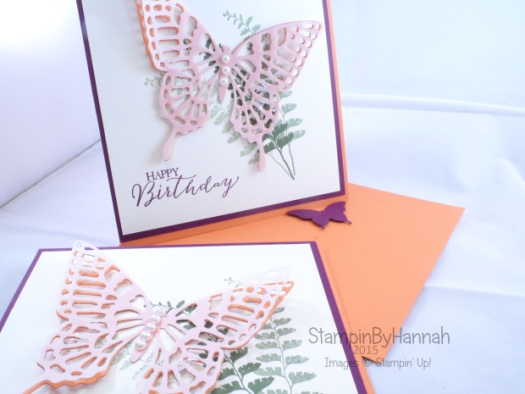
This week I have kept it simple and made a Twisted Easel card, using that lovely Butterfly Basics stamp set and the coordinating Butterflies Framelits dies.

Stampin' Up! UK Twisted Easel Card Butterfly Basics In Collours

I absolutely LOVE the latest selection of In Colours; Blackberry Bliss, Lost Lagoon, Hello Honey, Mossy Meadow, and Tangelo Twist, and so have selected 3 of them to use on my Fancy Fold card this week.

No one wants to watch my pick all the pieces out of these butterflies so I pre-cut them for filming purposes, but I wanted to share with you how pretty they are and how well they cut using the Big Shot! There are loads of YouTube tutorials out there already showing you how to get the best from these dies, so for now I’ll stick to having them pre-cut and ready to show you.

Measurements:

Cardstock – 12 x 6″ (30 x 15 cm)

Score on the long side at 6″ (15 cm)

Score a diagonal line from the top corner of one side of your cardstock to the bottom of the central score line. Fold and Burnish all the score lines well (this is the trick to this card)

Mat = 5 3/4 x 5 3/4″ (14.5 x 14.5 cm)

Layer – 5 1/2 x 5 1/2″ (14 x 14 cm)


Hannah Wilks

Stampin’ Up! UK Independent Demonstrator

If you like the project, or any of the products used, would like a catalogue, or to join my team, please contact me, or click on the ‘Shop NOW’ button at the top of the page. You can also find me on Twitter, Facebook, YouTube, Google+, About.me, and Tumblr (Links in the sidebar)

Sign up to our newsletter here – http://eepurl.com/2if59

Thank you for stopping by www.www.stampinbyhannah.co.uk today

x
 

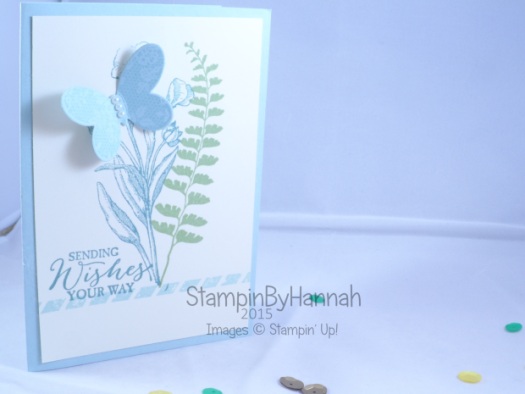
Sending Wishes Your Way….

I know that most of the time we make cards for happy occasions, but there are always times we need a ‘Thinking of you’ type card.

Stampin' Up! UK Butterfly Basics Thinking of you sympathy card

Stampin’ Up! stamp sets are always versatile, and although I didn’t originally set out to make such a card, I think this set is perfect for such an occasion.

Using the Butterfly Basics Stamp Set from the Spring/Summer catalogue, and a Soft Sky Card base. The Fern has been stamped in Pear Pizzazz onto a piece of Very Vanilla. I love all the Blue colours from Stampin’ Up! and my current favourite has to be Lost Lagoon, so I’ve used that to stamp the flower and sentiment, before stamping the boarding in Soft Sky.

The butterfly is stamped in Soft Sky ink onto to the same colour of cardstock, I do love tone on tone stamping. Before being die cut using the Butterflies thinlits die


Hannah Wilks

Stampin’ Up! UK Independent Demonstrator

If you like the project, or any of the products used, would like a catalogue, or to join my team, please contact me, or click on the ‘Shop NOW’ button at the top of the page. You can also find me on Twitter, Facebook, YouTube, Google+, About.me, and Tumblr (Links in the sidebar)

Sign up to our newsletter here – http://eepurl.com/2if59

Thank you for stopping by www.www.stampinbyhannah.co.uk today

x
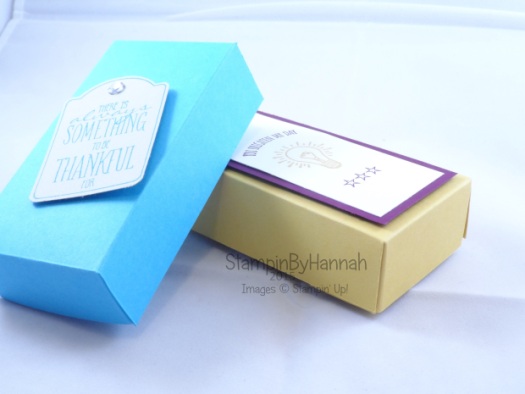
Stampin’ Up! Soap Box!

I think I made this box originally about 6 months ago, and since then it has been sat looking very sad in my prototypes box! That is until now!

This past couple of weeks have been pretty tough going actually, I’ve had an awful cold and have felt utterly rubbish, and so when it came time to prep for this weeks worth of blog projects I had nothing! So, out came my trusty prototypes box and this project leapt out at me! Thank god for being really productive a couple of months ago! (I actually think I might have designed this one whilst waiting for my Stampin’ Up! Starter kit, so actually its more like 8 months ago!)

Stampin' Up! UK How to make your own soap box

Isn’t it cute! and I’ve finally managed to make something in both Imperial and Metric Measurements! Yay!

So, that stamp set – its a Sale-a-bration Freebie! for more information about how to get Sale-a-bration items, just click HERE!

The Imperial Box uses Hello Honey as the box, with a piece of Blackberry Bliss, and some Whisper White. While I used Tempting Turquoise for my video version!

Measurement:

Cardstock – 12 x 4″ (30 x 10 cm)

Score on the long side at 1, 2, 6, 7, and 11″ (2.5, 5, 15, 17.5 and 27.5 cm)

Score on the short side at 1 and 3″ (2.5 7.5 cm)


Hannah Wilks

Stampin’ Up! UK Independent Demonstrator

If you like the project, or any of the products used, would like a catalogue, or to join my team, please contact me, or click on the ‘Shop NOW’ button at the top of the page. You can also find me on Twitter, Facebook, YouTube, Google+, About.me, and Tumblr (Links in the sidebar)

Sign up to our newsletter here – http://eepurl.com/2if59

Thank you for stopping by www.www.stampinbyhannah.co.uk today

x
Thanks….. I’m Crazy About you!

Welcome to another week here at StampinByHannah! There are some great projects coming this week.

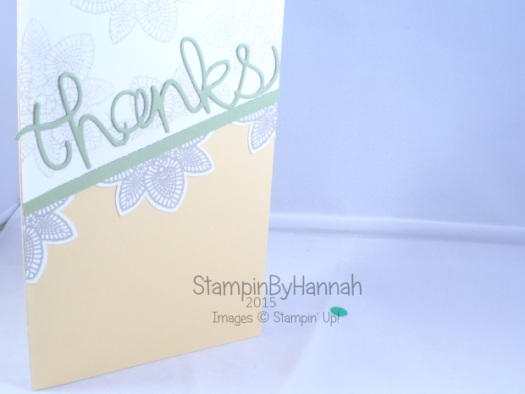
To set the week off I decided to say Thanks! using the Hello You Thinlits Dies (that come bundled with the Crazy About You stamp set)

Stampin' Up! UK Petal Potpourri Hello You

This card is a CASE (copy and share everything) from the Stampin’ Up! Spring/Summer catalogue page 23. Using the Petal Potpourri stamp set, and that lovely doily print flower (LOVE it!).

The card base is So Saffron, with a piece of Whisper White added at an angle.

I stamped the flower twice on a piece of Whisper White, using Crumb Cake ink, and punched them out with the Flower Medallion Punch before cutting them in half.

The ‘Thanks’ is die cut using those lovely framelits in Pear Pizzazz cardstock, using the Big Shot. Stampin’ Up! Transfer Adhesive Sheets are definitely the best things to stick these die cut words on with.

The Big Shot! I don’t think I’ve talked about the Big Shot before have I? I might have mentioned it briefly I suppose. The Big Shot is one of the greatest tools as a card-maker, I use mine all the time! The Big Shot is a manual Die Cutting machine, meaning that it uses Dies to cut shapes from cardstock (or fabric, fun foam, paper, felt, and a host of other materials). Stampin’ Up! sell the Big Shot and a whole heap of accessories, including the Magnetic Platform (which hold onto your metal dies, allowing you to line up stamped images and your dies without using bits of tape!), spare cutting mats, Dies and Embossing Folders. The Spring/Summer catalogue features a lot of new dies and embossing folders for use with your Big Shot, and makes a Big Shot a worthwhile investment.

At this point I felt that the card was a little too plain, and so added some more of the Petal Potpourri Doilies in Crumb Cake stamped off once to finish.


Hannah Wilks

Stampin’ Up! UK Independent Demonstrator

If you like the project, or any of the products used, would like a catalogue, or to join my team, please contact me, or click on the ‘Shop NOW’ button at the top of the page. You can also find me on Twitter, Facebook, YouTube, Google+, About.me, and Tumblr (Links in the sidebar)

Sign up to our newsletter here – http://eepurl.com/2if59

Thank you for stopping by www.www.stampinbyhannah.co.uk today

x