Fancy Fold Friday – Waterfall card

Welcome to another Fancy Fold Friday here at StampinByHannah!

I love doing these fancy fold posts for you all, but I have to say, I need some inspiration, so, would you please be so kind as to leave a comment below with a fancy fold that you would like to see me tackle!

This card is a request from my lovely friend Kathryn.

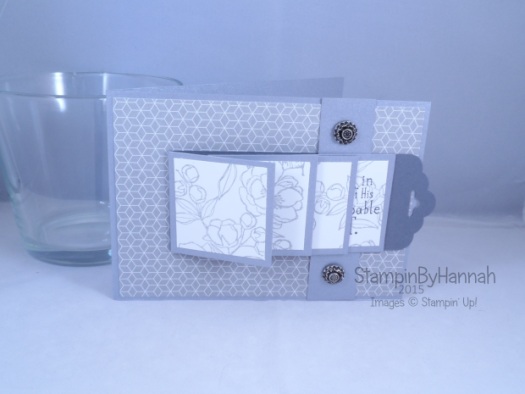
Stampin' Up! UK Waterfall card Indescribable Gift

Usually a Waterfall card is vertical, but I had to change it up a bit, and so decided to make it sideways, I think it works.

This card uses the Brushed Silver cardstock and Moonlight Designer Series Paper Stack, I love neutral colours at the moment – probably something to do with still being in winter mode – its been so very cold here!

The stamp set I have used it Indescribable Gift, one of the Easter themed sets from the Spring/Summer catalogue. I know that it has been designed with the Blendabilities in mind, but I just think it is the most beautiful line image I can’t bring myself to colour it in! Here I have stamped it in Smokey Slate onto Whisper White, and the sentiment from the same set is stamped in Momento Black (my Favourite black ink!)

Measurements:

Cardbase – cut a piece of A4 length ways – put the cardstock into your trimmer with the short side at the top and cut at 10.5 cm (4 1/8″)

Designer Series Paper – 10 x 14.2 cm (3 7/8″ x 5 1/2″)

Then there are a series of smaller pieces of cardstock –

1 piece – 2.5 x 10.5cm (1 x 4 1/8″)

4 pieces – 5 x 5 cm (2 x 2″)

Cut a piece of Whisper White to 4.5 x 18 cm (1 3/4 x 7″) and stamp along the length, then cut this piece into 4 measuring 4.5 x 4.5 cm (1 3/4 x 1 3/4″)

Cut a piece of Basic Grey cardstock to 5 x 24 cm (2 x 9 1/2″) and score at 5, 7, 9, and 11 cm (2, 2 3/4, 3 1/2, and 4 1/4″) punch the end with the Scalloped Tag Topper Punch

Check the video for full Instructions.


Hannah Wilks

Stampin’ Up! UK Independent Demonstrator

If you like the project, or any of the products used, would like a catalogue, or to join my team, please contact me, or click on the ‘Shop NOW’ button at the top of the page. You can also find me on Twitter, Facebook, YouTube, Google+, About.me, and Tumblr (Links in the sidebar)

Sign up to our newsletter here – http://eepurl.com/2if59

Thank you for stopping by www.www.stampinbyhannah.co.uk today

x
Dotty for Petal Potpourri!

I just love the solid flower image from the Petal Potpourri Stamp set, I’ve stamped it here in Wisteria Wonder AND Old Olive (yes, those leave are just cut from the same flower, stamped in Old Olive!)
Stampin' Up! UK Petal Potpourri large polka dot embossing I am a simple card maker – as in I make simple cards – I may well be a simple person to! (I’ll let you decide on that one!), so I don’t use Embossing folders very often, but this card was just too plain. This is the Large Polka Dot embossing folder, on Basic Gray. Simple, but rich looking!


Hannah Wilks

Stampin’ Up! UK Independent Demonstrator

If you like the project, or any of the products used, would like a catalogue, or to join my team, please contact me, or click on the ‘Shop NOW’ button at the top of the page. You can also find me on Twitter, Facebook, YouTube, Google+, About.me, and Tumblr (Links in the sidebar)

Sign up to our newsletter here – http://eepurl.com/2if59

Thank you for stopping by www.www.stampinbyhannah.co.uk today

x


How to get 6 (metric) cards from one sheet of 12 x 12 Designer Series Paper!

I love 12 x 12 paper! I admit, I am a little addicted, and I don’t actually use it as often as I should!

When I received the Painted Blooms Designer Series Paper I knew I was going to struggle to cut into it, its a gorgeous collection of floral themed papers all hand painted – it is stunning! But I knew I had to use this one particular piece in as large pieces as I could, and making 6 cards from one sheet of DSP was the way to do this.

I know a few US demo’s have made similar videos, but they use slightly different measurements to fit 8 1.2 x 11″ cardstock, rather than our A4

Stampin' Up! UK painted blooms petals giveaway

I just love the look of these cards, all different but definitely a set together!

And I couldn’t bear to split them up so, I’m going to give them away to you – to win these 6 cards all you have to do is place an order with me before midnight on the 28th of February 2015 – and I will select one random winner! awesome!

Stampin' Up! UK Painted Bloom Petals 6 cards from one DSP

But, how do you make them! well, I have a video for that!

Measurements:

For these cards you will need 3 sheets for A4 cardstock cut in half and folded to make 6 cards, and a sheet of 12 x 12 Designer Series Paper

Cut 1.8 cm (3/4″) from the bottom of the 12 x 12 DSP

Cut your DSP in half at 14.3 cm (5 13/16″)

Then cut each piece into 10 cm (3 7/8″) pieces, you will have two little slivers of DSP left over


Hannah Wilks

Stampin’ Up! UK Independent Demonstrator

If you like the project, or any of the products used, would like a catalogue, or to join my team, please contact me, or click on the ‘Shop NOW’ button at the top of the page. You can also find me on Twitter, Facebook, YouTube, Google+, About.me, and Tumblr (Links in the sidebar)

Sign up to our newsletter here – http://eepurl.com/2if59

Thank you for stopping by www.www.stampinbyhannah.co.uk today

x

Sale-a-bration on Sunday – Watercolouring with Irresistibly Yours

Hey! Welcome to another Sale-a-bration on Sunday!

I am loving Sale-a-bration this year, there are so many lovely products for you to choose from when you spend £45 in either the Annual or Spring/Summer catalogues. Although I love all the stamp sets that are available, I think the Irresistibly Yours Designer Series Paper is my absolute favourite item!

Stampin' Up! UK sale-a-bration SAB irresistibly yours designer series paperThis paper is patterned, but with glossy white patterns, making it perfect for emboss resist techniques – just like this one!

I have made a video tutorial for this, however it is super simple – I smoosh (technical term!) my ink pad face down onto my glass worktop, a large acrylic block would work just as well, and add some water to make a Stampin’ Up! coloured watercolour! and use a large flat brush to apply this ink/water combo into the paper. The glossy areas resist the ink and so stay white, rub over the piece with a cloth or piece of paper towel to clean the ink off though. The piece needs to be left to dry (or dried with a heat tool) for about 10 minutes before attaching to the card.

Stampin' Up! UK Sale-a-bration SAB irresistibly yours watercolour video tutorial

The card I make in the video uses Rose Red ink, and a Mossy Meadow Card base, while the other just uses Night of Navy. I would suggest that a deeper colour works best for this technique so that the white areas really pop.

The stamp is also a Sale-a-bration item – the Simply Wonderful stamp set, which coordinates with the Extra-Large oval punch!

Thanks for joining me for Sale-a-bration on Sunday, see you again next week for some more great techniques and crafty projects.


Hannah Wilks

Stampin’ Up! UK Independent Demonstrator

If you like the project, or any of the products used, would like a catalogue, or to join my team, please contact me, or click on the ‘Shop NOW’ button at the top of the page. You can also find me on Twitter, Facebook, YouTube, Google+, About.me, and Tumblr (Links in the sidebar)

Sign up to our newsletter here – http://eepurl.com/2if59

Thank you for stopping by www.www.stampinbyhannah.co.uk today

x
 

Fancy Fold Friday – Joy Fold Card

Hello and welcome to another Fancy Fold Friday!

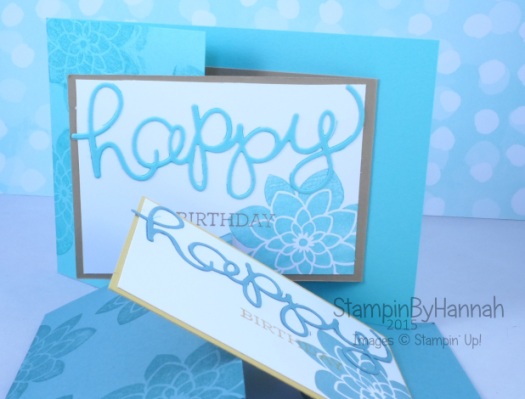
Today I have Joy fold card for you, using In-colours from both 2013-2015 AND 2014-2016

Stampin' Up! UK Joy Fold Fancy Fold


I will be so sad when Coastal Cabana leaves us in June, its so pretty, and I couldn’t pass up the opportunity to use it in this card. The other version uses the New In-Colours – Lost Lagoon and Hello Honey.

The card also features the Crazy About You stamp set and Hello You Thinlits, I love using thinlits like these, but getting all those bits and pieces out of the dies can be a bit of a pain. I know there are loads of tips on how to make this easier on YouTube (particularly after the release of those beautiful Butterfly Thinlits!) but I use the old fashioned method of poking through the holes of the die with my poky tool and allowing the bits of cardstock fall into a sandwich bag (rather than letting them loose all over my desk!)

Measurements:

Outer Card – 4 1/8 x 8 3/4″ (10.5 x 22.3 cm) Scored at 3″ (or 14.8 cm)

Inner Card – 3 x 8 1/4 (7.5 x 21 cm) Scored at 4 1/8 (10.5 cm)

Two pieces of Whisper White cardstock measuring 2 3/4 x 3 7/8″ (7 x 10 cm)


Hannah Wilks

Stampin’ Up! UK Independent Demonstrator

If you like the project, or any of the products used, would like a catalogue, or to join my team, please contact me, or click on the ‘Shop NOW’ button at the top of the page. You can also find me on Twitter, Facebook, YouTube, Google+, About.me, and Tumblr (Links in the sidebar)

Sign up to our newsletter here – http://eepurl.com/2if59

Thank you for stopping by www.www.stampinbyhannah.co.uk today

x

March Technique Class!

Right, so there are only a few days left before booking for my March Technique Class closes!

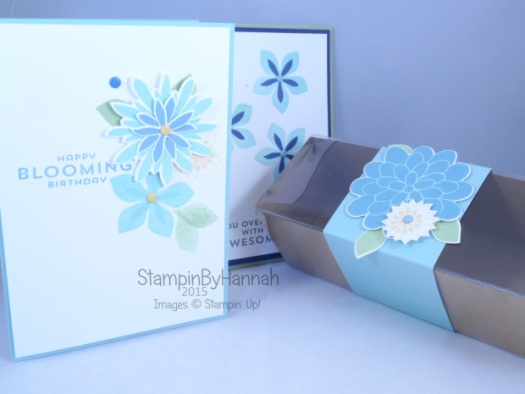
This month we are using the Flower Patch stamp set and die bundle, to make 2 lovely cards and a gift box!

Stampin' Up! UK Flower Patch

As always all materials are provided, including adhesives. All classes take place within my home (unless you choose the virtual option!) and private classes are also available.
Stampin' Up! UK Flower Patch Cardmaking classes

Each month we make a series of cards, and I always include a 3D project; either a fancy fold card, or a box of some form. This month the boxes we are using are from Stampin’ Up! but we are going to make them look fabulous!

Check out my Facebook events for all my classes, or my Stampin’ Up! page for full details of all StampinByHannah events!
Stampin' Up! UK Flower Patch Craft Classes on TeessideMy classes are available either in person or virtually, and are available with or without the Stamp set.

Class only – £10

Class with Stamp set – £28

Class with Stamp and die bundle – £45

Message me for payment information


Hannah Wilks

Stampin’ Up! UK Independent Demonstrator

If you like the project, or any of the products used, would like a catalogue, or to join my team, please contact me, or click on the ‘Shop NOW’ button at the top of the page. You can also find me on Twitter, Facebook, YouTube, Google+, About.me, and Tumblr (Links in the sidebar)

Sign up to our newsletter here – http://eepurl.com/2if59

Thank you for stopping by www.www.stampinbyhannah.co.uk today

x

Ambassador’s Chocolate box! using Stampin’ Up! UK products – video Tutorial

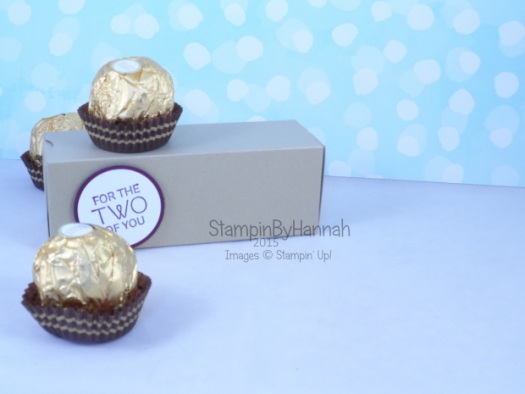
I love taking packaging as inspiration for handmade projects, a few weeks ago I was shopping with a friend and spotted a long thin box of chocolates, and just knew I had to buy it and re-create it. Now, that box wasn’t all that exciting, but using an existing box makes it much easier to re-engineer a box to fit the same items! So, the original box held 5 chocolates, my version holds 3, but I think 3 of these indulgent chocolates is enough!

Stampin' Up! UK Ferrero Rocher box chocolate video tutorial

I have made this box a few times now, with punched out sections, and designer series paper, but may favourite has to be this Brushed Gold version. The photo doesn’t do the colour of this cardstock justice, but I think I managed to capture the shine in the video.

I also grabbed one of the new wedding themed stamp sets from the Spring/Summer catalogue for the stamped sentiment – Your Perfect Day, punched out perfectly (pun intended) with the 1 1/4″ circle punch. I just love the look of these two punched layered on top of each other, the bottom layer is a 1 3/8″ circle punched from Blackberry Bliss cardstock (love that colour!)

Measurements:

Cardstock = 8 1/4 x 6 1/2″ (21 x 17 cm)

Score on the long side first at – 1/2, 2, 6 1/4 and 7 3/4″ (1 , 5, 16, and 20 cm)

Score on the short side at 1/2, 2, 3 1/2 and 5″ (1, 5, 9, 13 cm)

Measurements for Designer Series Paper:

4 pieces cut to 1 1/4 x 4″ (3 x 10 cm)

2 pieces cut to 1 1/4 x 1 1/4″ (3 x 3 cm)


Hannah Wilks

Stampin’ Up! UK Independent Demonstrator

If you like the project, or any of the products used, would like a catalogue, or to join my team, please contact me, or click on the ‘Shop NOW’ button at the top of the page. You can also find me on Twitter, Facebook, YouTube, Google+, About.me, and Tumblr (Links in the sidebar)

Sign up to our newsletter here – http://eepurl.com/2if59

Thank you for stopping by www.www.stampinbyhannah.co.uk today

x
Butterfly Basics

Hello and Welcome to a new week at StampinbyHannah!

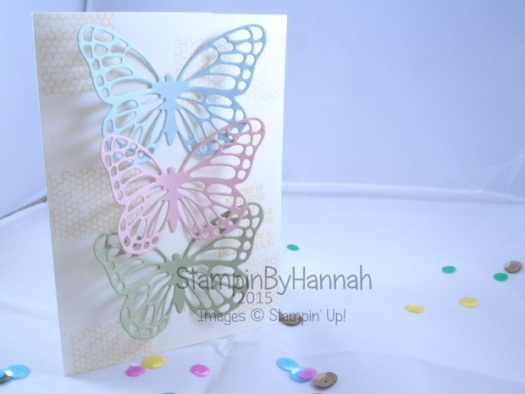
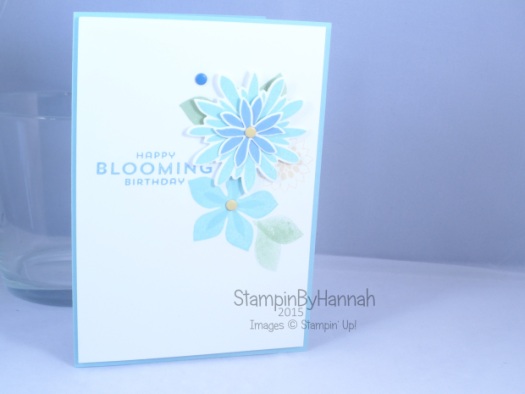
This card uses the Butterfly Thinlits dies, from the Spring/Summer Stampin’ Up! catalogue. Isn’t it pretty.
Stampin' Up! UK Butterfly Thinlits dies Butterfly BasicsWhen I first received these dies I had a good old play with them, trying to find the best way to get them to cut, which colours did I prefer, that kind of thing, and this is the card that resulted.

I adore the subtles collection cardstocks for spring, the colours are all just so pretty. Here I have used Soft Sky, Blushing Bride and Pear Pizzazz.

There are now loads of videos on YouTube showing you some of the best ways to get these dies to cut. I am absolutely no expert on this one! I run them through my slightly tired Big Shot several times, rotating them and moving them across the cutting plates. Once they are cut I stand and poke all the pieces through with my pokey tool (or Stampin’ Up! Paper Piercing Tool), into a Sandwich bag to catch all the little bits. But these Butterflies are worth the effort, they are stunning on a card!


Hannah Wilks

Stampin’ Up! UK Independent Demonstrator

If you like the project, or any of the products used, would like a catalogue, or to join my team, please contact me, or click on the ‘Shop NOW’ button at the top of the page. You can also find me on Twitter, Facebook, YouTube, Google+, About.me, and Tumblr (Links in the sidebar)

Sign up to our newsletter here – http://eepurl.com/2if59

Thank you for stopping by www.www.stampinbyhannah.co.uk today

x


Sale-a-bration on Sunday – An opportunity too good to miss?!

So, we are now about halfway through Sale-a-bration – the biggest sale in the Stampin’ Up! calender, and I have to say, I’m loving it! There are a great selection of FREE products available this year, just for spending £45! (or €60) with me.

Have I also mentioned that as well as choosing stamps or designer series paper, this year you can also choose one of the packs of Blendabilities from the annual catalogue – that means that there are 22 different items that you can get for FREE right up until the 31st of March! And there are great offers for hosting parties or becoming a demonstrator too.


So, I wanted to mention the great joining offer available during Sale-a-bration. For just £99 you can choose £130 worth of Stampin’ Up! products, from either the Annual or Spring/Summer catalogues, AND you can choose either a FREE project kit from the Spring/Summer catalogue OR two items from Sale-a-bration! AWESOME!

Stampin' Up! UK join NOWStampin' Up! UK Sale-a-bration join

but, there is more! There are many amazing things about being a Stampin’ Up! demonstrator, not least the great Stampin’ Friends you meet, the chance to attend some awesome Stampin’ Up! events (this year’s events are going to be amazing, trust me!), and some great demonstrator incentives and offers. PLUS, the normal 20% discount on all purchases, pre-order periods and free products just for being a demo!

Then there are the great things I can offer too! I have a growing number of demonstrators in my team, with our own downline blog, private facebook group, Pinterest board, and events, one to one sessions, and help with parties and events that you hold too! Oh, and there’s the small matter of joining a team that includes the world famous Pootles! (She’s my upline if you really want to know!)

Now, I know the idea of being a demonstrator is scary, and I’m not totally sure demonstrator is the right word for what we do either, but…. there are many different reasons to join Stampin’ Up!, maybe you just love the products and that 20% discount is really handy, or you love to get your hands on all that lovely new product before you friends, or maybe you need a bit of extra income for a family holiday, birthdays or Christmas, Stampin’ Up! could be for you!

For further information about Stampin’ Up! drop me a message.

Stampin' Up! UK Sale-a-bration best day ever

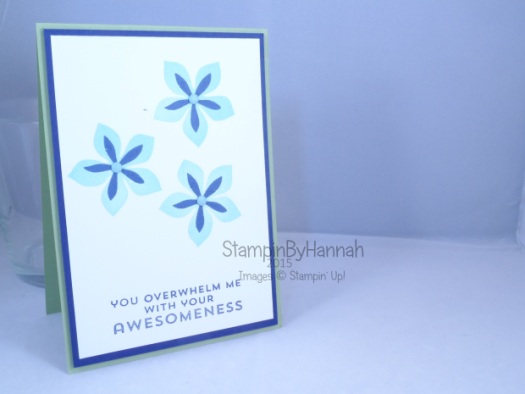
I couldn’t leave you without a card on Sale-a-bration Sunday could I! This uses a Coastal Cabana Card blank, stamped using the Best Day Ever stamp set, complete with a piece of the Best Year Ever designer series paper, and some fussy cut flowers from the same stamp set!


Hannah Wilks

Stampin’ Up! UK Independent Demonstrator

If you like the project, or any of the products used, would like a catalogue, or to join my team, please contact me, or click on the ‘Shop NOW’ button at the top of the page. You can also find me on Twitter, Facebook, YouTube, Google+, About.me, and Tumblr (Links in the sidebar)

Sign up to our newsletter here – http://eepurl.com/2if59

Thank you for stopping by www.www.stampinbyhannah.co.uk today

x
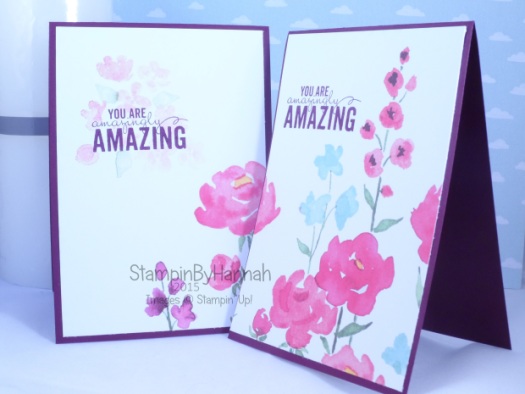
Fancy Fold Friday – Extended Thinlit Circle Card

I have previously used this Thinlit Circle Card die for a Fancy Fold Friday, but this time I’ve made a small alteration – creating an extended flap on one end.

Stampin' Up! UK Thinlit Circle Card extended Painted Petals

I love the Painted Petals Stamp set and Painted Blooms Designer Series Paper. I just think its great that you can look like a watercolour expert, just using a couple of stamps!

The Painted Blooms DSP features some lovely colours, but the colour that stood out on this piece was Blackberry Bliss and so I selected Blackberry Bliss cardstock as my card base.

The secret to making this card successfully is cutting your cardstock, the die creates a card that is 5 1/2″ tall, so your cardstock should be cut a hair shorter to ensure that it passes through the die allowing you to cut part of the die, leaving the trailing edge to create the extended portion.

Measurements:

Cardstock = 8 1/4 x 5 3/8

Insert your cardstock through the die, leaving one edge of the cardstock above the die when laid on your acrylic plate. Fold the extended side into the card, lining the edge up with the circle cut out in the centre.

Cut a 6×6″ piece of DSP with the die. Trim around all  4 edges, and cut along the score lines left by the die. Trim the larger piece to 2″ wide.

Whisper White piece for the insert measures 2 x 5″, cut a scallop circle from Whisper White using the Scallop Circle die from the die set.


Hannah Wilks

Stampin’ Up! UK Independent Demonstrator

If you like the project, or any of the products used, would like a catalogue, or to join my team, please contact me, or click on the ‘Shop NOW’ button at the top of the page. You can also find me on Twitter, Facebook, YouTube, Google+, About.me, and Tumblr (Links in the sidebar)

Sign up to our newsletter here – http://eepurl.com/2if59

Thank you for stopping by www.www.stampinbyhannah.co.uk today

x