Tuesday Tips! – Colour your pearls

I’m trying really hard to get into a regular posting schedule, and I want to give you more than just cards! So, I thought I would try and give you some tips, tricks, and techniques on tuesdays. Some of these tips will have videos, some will just be blog posts, I might miss a  week here or there (I work full time as a nurse, so some weeks are a little crazy busy round here!), but my aim is to post a few times per week, and I’m hoping this structured posting schedule will help!

So, for the first in a series of Tuesday Tip posts, I thought I would show you my current favourite technique – colouring my jewels and pearls!


If you have any techniques / products / ideas that you want more information on, or a video tutorial, leave me a comment below or use the Contact Me form


Hannah Wilks

Stampin’ Up! UK Independent Demonstrator

If you like the project, or any of the products used, would like a catalogue, or to join my team, please contact me, or click on the ‘Shop NOW’ button at the top of the page. You can also find me on Twitter, Facebook, YouTube, Google+, About.me, and Tumblr (Links in the sidebar)

Thank you for stopping by www.www.stampinbyhannah.co.uk today

x
Super Simple Sunday – A work of art just for men!

Arent mens card hard! well, no….. not when you have Pinterest to help!

So today I was searching around on Pinterest, and came across this great idea for using Work of Art… When I bought the set I could see awesome backgrounds, and I could see flower, but I never saw a boat! until today

Stampin up work of art boat

So this card is super simple! I stamped the components of the boat in Pumpkin Pie, Pear Pizzazz, and Crumb Cake. The Sentiment is stamped in Pear Pizzazz on a background of triple stamped Crumb Cake dots (I love that stamp, so much!). I added 3 coloured pearls and matted the piece on a piece of Pumpkin Pie, and a Crumb Cake card base!

Easy peasy!


Hannah Wilks

Stampin’ Up! UK Independent Demonstrator

If you like the project, or any of the products used, would like a catalogue, or to join my team, please contact me, or click on the ‘Shop NOW’ button at the top of the page. You can also find me on Twitter, Facebook, YouTube, Google+, About.me, and Tumblr (Links in the sidebar)

Thank you for stopping by www.www.stampinbyhannah.co.uk today

x

Weekly deals from Stampin’ Up!

Yes folks! its that time again! and to brighten up the mid-week / hump day / etc. I bring you ……. New Stampin’ Up!©Weekly Deals!!!!! YAY!

So what delights are on offer this week?

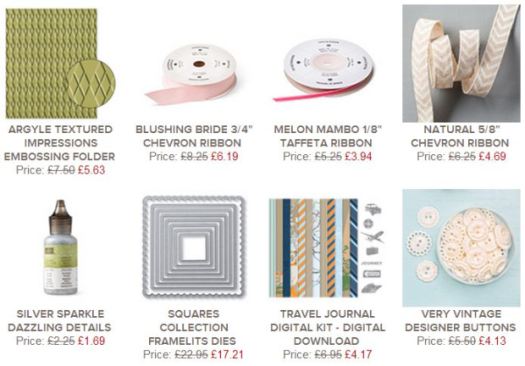
Stampin Up! Weekly deals

Three different types of ribbon! Dazzling Details! Square Framelits! and Embossing folder! and Very Vintage Designer Buttons! Awesome!


Dont forget that the Big Shot promotion I waffled on about last week is still ongoing – SEE HERE!

Next week sees the launch of the Seasonal Autumn/Winter Catalogue, along with an awesome Joining deal (get £150 worth of Stampin’ Up! product for £99 in your Demonstrator Starter Kit), oh and I’ll have more exciting things for hosts and hostesses from next month, so book your Stampin’ Up! party with me NOW!


Book your Stampin Up Party with Stampinbyhannah


Hannah Wilks

Stampin’ Up! UK Independent Demonstrator

If you like the project, or any of the products used, would like a catalogue, or to join my team, please contact me, or click on the ‘Shop NOW’ button at the top of the page. You can also find me on Twitter, Facebook, YouTube, Google+, About.me, and Tumblr (Links in the sidebar)

Thank you for stopping by www.www.stampinbyhannah.co.uk today

x


Tuesday Tips! – Stamp ‘n’ Punch

So this weeks Tuesday Tip is something I think people struggle with – using your stamps and punches!

Stampin’ Up! © are producing more and more stamp sets that coordinate with punches (and framelets, but thats a different day!) and I know sometimes its hard to line up your images to get good punched images, so here are my tips:

  • line up your stamp the same way your punch is orientated
  • Stamp close to the edge of your paper
  • get your stamped images plenty of room for your punch
  • dont forget its only ink and paper (or cardstock) you can always try again!

Until next time…..

Hannah Wilks

Stampin’ Up! UK Independent Demonstrator

If you like the project, or any of the products used, would like a catalogue, or to join my team, please contact me, or click on the ‘Shop NOW’ button at the top of the page. You can also find me on Twitter, Facebook, YouTube, Google+, About.me, and Tumblr (Links in the sidebar)

Thank you for stopping by www.www.stampinbyhannah.co.uk today

x


A Cute little Something

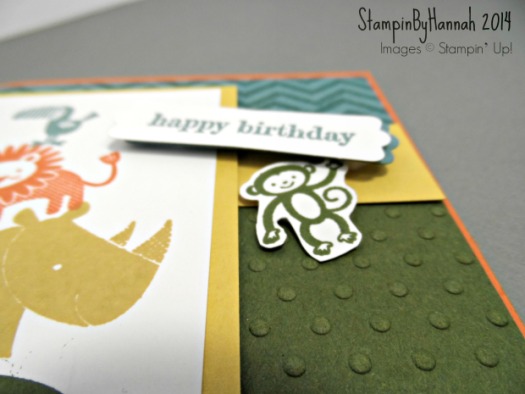
My card for today uses one of my favourite stamp sets for childrens cards – Zoo Babies. I just think this set is so versitile! Stamp in subtle colours for awesome new baby cards, or (like I’ve done here) use your Brights to create a wonderful card for any occasion.

Stampin Up Something To say Zoo Babies

To create this fun card for my Cousin’s daughters Thanksgiving last weekend, I stamped each of the animals from the Zoo Babies stamp set onto a piece of Whisper White cardstock, one in each of a selection of Brights Inks; Old Olive, Melon Mambo, Burmuda Bay, Daffodil Delight, Pumpkin Pie, Real Red, Tempting Turquiose, and Rich Razzleberry! These were then punched out using my 1″ circle punch, and layered onto a color coordinated 1 1/4″ scallop circle.

A cute little something close up

The sentiment “a little something cute…. for your cute little someone” is taken from the Something to Say stamp set (it continues inside!), and is stamped in Real Red, to coordinate with the Card Base

I love this card, its super cute! for a super cute little girl 🙂


Hannah Wilks

Stampin’ Up! UK Independent Demonstrator

If you like the project, or any of the products used, would like a catalogue, or to join my team, please contact me, or click on the ‘Shop NOW’ button at the top of the page. You can also find me on Twitter, Facebook, YouTube, Google+, About.me, and Tumblr (Links in the sidebar)

Thank you for stopping by www.www.stampinbyhannah.co.uk today

x

Inspired by….

Ok, so I have a confession to make, I watch A LOT of YouTube! A LOT! my excuse for this is that its my main source of inspiration. I love watching other people craft and create, I love watching craft room tours, and more than anything I love the mass of different ideas all in one place. I know a lot of people use pinterest for this, but for me its YouTube.

I subscribe to a countless number of crafters, creatives, organisers and others, giving me a diverse selection of ideas and projects, and this project is a ‘mash-up’ of YouTube and Stampin’ Up!

One of the people I watch a lot is Jennifer McGuire (her blog is AWESOME, go check it out!). Jennifer uses a number of different products, and I’ve made it a big of a mission to re-create some of her ideas (or CASE – Copy And Share Everything) using Stampin’ Up! product, so this is what this is……

Stampin' Up! festival of trees

This card uses the new Festival of Trees Stamp Set, available on the 28th of August. I love this stamp set, its so versitile, I can see ice-cream cones in its future! but for now I’ll stick with Christmas! It has a matching punch, making it super easy to ‘cut out’ the tree shapes, and it’s photopolymer so you can get these amazing two-step / layered stamping looks.

I love a couple of the techniques on this card, using Stampin’ Write Markers to colour the stamp (yes, it works on photopolyer stamps to!), using Old Olive and Early Expresso to colour the tree. I then used my Real Red Ink Pad to stamp the red dots (baubles / orniments / etc.). I stamped the stars in Crushed Curry on a scrap piece of Whisper White – I love that this stamp set also coordinates with the Star punch from the Itty Bitty Accents Punch Pack!

stampin up festival of trees

But my favourite technique on this card is the embossed edge! I stamped the chevron stamp from Work of Art down the side of the card blank in Versamark Ink, and heat embossed it with Clear Stampin’ Emboss Powder. I then assembled the card, attaching the Whisper White piece with the trees stamped on, to the Early Expresso Card Blank. This looked a little bare to me, so, like Jennifer, I added a strip of colour, in this case a 1/4″ strip of Old Olive card stock.

The sentiment is also from the Festival of Trees Stamp set, stamped in Early Expresso. I added the stars using Glue Dots, and called this card finished!

The Seasonal Catalogue launches on the 28th August, drop me and email for a copy!

Hannah Wilks

Stampin’ Up! UK Independent Demonstrator

If you like the project, or any of the products used, would like a catalogue, or to join my team, please contact me, or click on the ‘Shop NOW’ button at the top of the page. You can also find me on Twitter, Facebook, YouTube, Google+, About.me, and Tumblr (Links in the sidebar)

Thank you for stopping by www.www.stampinbyhannah.co.uk today

x

Work of Art Card Process

Trying something different (yet again!) and thought I’d turn the camera on while I was crafting last week, and this is the outcome!

Work of Art Card Process

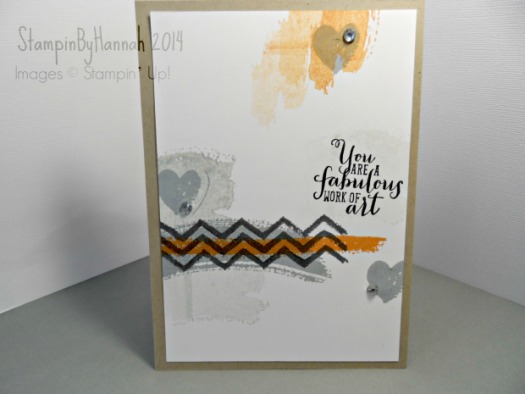
I really do LOVE the Work of Art Stamp set. I know some people find the big black images on the cover a little intimidating but once you look past that, and think thats not black – its possibility! its creativity! its wonderful!

I have a bit of a thing at the moment for layered stamping, I will blame Stampin’ Up! for that, 2 layer stamping in all over the new catalogue (still need to get my hands on that flower patch stamp set! Yum!)

So, this card didnt work out exactly as planned, and it definately has that ‘handmade’ look about it (something to do with the stamping halos I think) but I do quite like it!

Let me know if you’d like to see more ‘direct from my craftroom’ style videos (or anything else really!)


Hannah Wilks

Stampin’ Up! UK Independent Demonstrator

If you like the project, or any of the products used, would like a catalogue, or to join my team, please contact me, or click on the ‘Shop NOW’ button at the top of the page. You can also find me on Twitter, Facebook, YouTube, Google+, About.me, and Tumblr (Links in the sidebar)

Thank you for stopping by www.www.stampinbyhannah.co.uk today

x

Deals and delights ….. this week at Stampin’ Up!©

Stampin' Up! Big Shot Bundle

Hi folks!

Just thought I’d drop in with a look at the offers and deals currently available from Stampin’ Up!

As usual (it is wednesday after all) there are Weekly Deals. This weeks offering includes chevron ribbon in Marina Mist and Wisteria Wonder, two of the Bigz dies (for your Big Shot…. I’ll get to that in a minute!), an embossing folder, and the Artisan Label punch. The label punch coordinates with the lovely Label Love stamp set, and gives you great gift labels and card toppers.

Stampin' Up! weekly deals

The other great offer from Stampin’ Up! (that lasts until the 31st August) is the Big Shot Bundle offer!

This great offer allows you to get the Big Shot (in my opinion the greatest die cutting machine) along with a Stamp set and Die Bundle for£87.95, and then get 15% off the other Stamp and Die Bundles available! Awesome!

Stampin' Up! Big Shot Bundle

Now, what does this mean? This means that you can create fantastic coordinated cards and gift labels, without fussy cutting, giving you a more professional finish to your projects. Owning the Big Shot opens a new world of creating potentionals – embossing, die cutting, creating gift boxes (hint… that new seasonal catalogue is coming soon…..), cut paper, card, felt, fabric…. give your projects the WOW factor! Get your Big Shot today!

Already own the Big Shot, not a problem, you get 15% off the bundles mentioned too! Fantastic!

Wait… theres more?!

Yes!

Take a close look at those bundles! That Bright and Beautiful Stars Bundle…. thats right, a NEW stamp set! Due for release in the Seasonal catalogue, could be your now! and for 15% off….. now that really is too good to turn down!

To purchase head over to my shop now!


Hannah Wilks

Stampin’ Up! UK Independent Demonstrator

If you like the project, or any of the products used, would like a catalogue, or to join my team, please contact me, or click on the ‘Shop NOW’ button at the top of the page. You can also find me on Twitter, Facebook, YouTube, Google+, About.me, and Tumblr (Links in the sidebar)

Thank you for stopping by www.www.stampinbyhannah.co.uk today

x

Warmest Wishes …..

As you may have noticed, most of my cards are clean and simple. But, every now and then, I like to push my boundries and try something different. This card is just that, its busy, and bright!

I love the layered effect on this card (its one I’ve made a few times for older relatives and a like),  but I dont usually make it in orange!

The In Colours 2014-2016 include Tangelo Twist –  a knock your eyes out, bright, Orange! It is gorgeous!

Here I’ve paired it with Daffodil Delight (another lovely colour), and the Blooming with Kindness Stamps, creating a bright and cheery, Warmest Wishes on your Birthday, card.

Warmest Wishes Tangelo Twist

The trick with this card is in the measurements!

The card base is half an A4 piece of Tangelo Twist Card stock, and then there are 5 cardstock layers on top, alternating between Whisper White and Tangelo Twist.

Layer 1 – Whisper White – 5 1/2 x 3 3/4″ (14 x 9.5cm)

Layer 2 – Tangelo Twist – 5 x 3 1/8″ (8 x 12.5cm)

Layer 3 – Whisper White – 4 5/8 x 2 3/4″ (11.5 x 7cm)

Layer 4 – Tangelo Twist – 4 / 2 1/4″ (10 x 6cm)

Layer 5 – Whisper White – 3 5/8 x 2″ (9 x 5cm)


Once all your layers are cut, stack the Whisper White pieces on top of each other (each one in the centre of the one underneath), and stamp across all three layers. You could use some temporary adhesive to stop the layers from moving, although I just hold them steady with one hand and stamp with the other. This stamping will leave a white boarder around each layer, but thats OK, thats where the Tangelo Twist layers come into their own! Once the ink is dry, stack the Whisper White pieces with the Tangelo Twist pieces, starting with the largest piece at the bottom and ending with the smallest piece on top.

I have stuck my layers together with SNail adhesive, but for a more dimensional look you could pop your layers up with dimensionals for a truely eye-popping card!


Hannah Wilks

Stampin’ Up! UK Independent Demonstrator

If you like the project, or any of the products used, would like a catalogue, or to join my team, please contact me, or click on the ‘Shop NOW’ button at the top of the page. You can also find me on Twitter, Facebook, YouTube, Google+, About.me, and Tumblr (Links in the sidebar)

Thank you for stopping by www.www.stampinbyhannah.co.uk today

x
Are you up for the Challenge?!

Its an exciting day here at StampinByHannah, as we celebrate the launch of our sister site – www.stampinbychallenge.blogspot.co.uk – a monthly (for now) challenge blog for all cardmakers and papercrafters

Head over to the blog now to find out what this months challenge is, and enter now!

Thought I’d give you a little pick at what I made though (but you’ll have to visit StampinByChallenge to get what the challenge is!)

Stampin By Challenge


This super simple card uses a Whisper White card blank and some punched circles. I used the 1 1/4″ scallop circle punch to cut 3 circles from the new In Colours card stock (in Blackberry Bliss, Lost Lagoon, and Hello Honey), and then layered the 1″ circles of Moonlight DSP on top (with some dimentionals of course!). The sentiment is from the Blooming with Kindness stamp set.

Feeling inspired?

Join the fun now!


Hannah Wilks

Stampin’ Up! UK Independent Demonstrator

If you like the project, or any of the products used, would like a catalogue, or to join my team, please contact me, or click on the ‘Shop NOW’ button at the top of the page. You can also find me on Twitter, Facebook, YouTube, Google+, About.me, and Tumblr (Links in the sidebar)

Thank you for stopping by www.www.stampinbyhannah.co.uk today

x