DIY Wreath Card

Wreaths appear to be a BIG trend this year when it comes to Christmas (or actually any holiday / event!), and Stampin’ Up! have an amazing Wreath stamp set (and matching framelits) which is just gorgeous, but I decided that I would make my own!Stampin' Up! UK DIY Wreath Christmas


This card uses a Real Red Card base, with Old Olive and Whisper White Card matts. I used the Itty Bitty Accents Punch Pack Flower punch to make the flowers for the wreath in Old Olive and Real Red, before arranging them in a sort of circle and attaching them using Glue Dots – Super Simple to make but really pretty

Stampin' Up! UK DIY Wreath christmas punch

The sentiment is one from the Holiday Home stamp set (sorry, this stamp set is used a LOT in the coming weeks!)

LOVE!

Hannah Wilks

Stampin’ Up! UK Independent Demonstrator

If you like the project, or any of the products used, would like a catalogue, or to join my team, please contact me, or click on the ‘Shop NOW’ button at the top of the page. You can also find me on Twitter, Facebook, YouTube, Google+, About.me, and Tumblr (Links in the sidebar)

Sign up to our newsletter here – http://eepurl.com/2if59

Thank you for stopping by www.www.stampinbyhannah.co.uk today

x

Blendabilities Club

Before I get into the post today, I just want to remind you about the current joining offer – It Is Awesome – Check it out HERE!


Ok, so I don’t really have a project for you today, but I do have a video so:


Check out my Club page for more information

Hannah Wilks

Stampin’ Up! UK Independent Demonstrator

If you like the project, or any of the products used, would like a catalogue, or to join my team, please contact me, or click on the ‘Shop NOW’ button at the top of the page. You can also find me on Twitter, Facebook, YouTube, Google+, About.me, and Tumblr (Links in the sidebar)

Sign up to our newsletter here – http://eepurl.com/2if59

Thank you for stopping by www.www.stampinbyhannah.co.uk today

x

12 Tags of Christmas – Under the Tree

Time once again for another tag!

I will openly admit to cheating this week, but I think these tags are awesome!

Stampin' Up! UK Under the Tree 12 tags of christmas

This tag uses the Under the Tree Tag a Bag Accessory Kit, and nothing else! (well, except the matching stamps!)

I have mentioned my love of the Tag a Bag kits offered by Stampin’ Up! and this tag demonstrates perfectly why they are so great! The kit comes with 10 of these, for just £7.25! each present I send this year will have one of these – adding a nice tag means you can use really cheap wrapping paper and no one notices because they see the effort that has gone into the tag – except here it hasn’t taken any effort! perfect!

This tag uses one large tag base, a builder tag stamped in Early Espresso using the Trendy Trims stamps, an Early Espresso clothespin, and some Crumb Cake bakers twine!

Simple!


Hannah Wilks

Stampin’ Up! UK Independent Demonstrator

If you like the project, or any of the products used, would like a catalogue, or to join my team, please contact me, or click on the ‘Shop NOW’ button at the top of the page. You can also find me on Twitter, Facebook, YouTube, Google+, About.me, and Tumblr (Links in the sidebar)

Sign up to our newsletter here – http://eepurl.com/2if59

Thank you for stopping by www.www.stampinbyhannah.co.uk today

x


Build your Bonus! with this Fab offer!

Right, this one is a goodie!

Next week, starting Tuesday 25th November, for ONE week, Stampin’ Up! is offering the Starter kit at 25% off!

That means £130 worth of product for just £74.25!

AND you get a further 5% bonus on all orders placed and taken in December, that’s on top of the usual 30% discount on your first demonstrator order! which is just awesome!

For more information about joining Me and Stampin’ Up! see my Join Me page, order your starter kit HERE and select me as your demonstrator, or message me for more information.

oh, and don’t forget to sign up for my newsletter for more amazing offers, hints and tips 🙂

look forward to speaking to you soon

x


Hannah Wilks

Stampin’ Up! UK Independent Demonstrator

If you like the project, or any of the products used, would like a catalogue, or to join my team, please contact me, or click on the ‘Shop NOW’ button at the top of the page. You can also find me on Twitter, Facebook, YouTube, Google+, About.me, and Tumblr (Links in the sidebar)

Sign up to our newsletter here – http://eepurl.com/2if59

Thank you for stopping by www.www.stampinbyhannah.co.uk today

x


StampinByHannah’s Advent Calender Project 2014

I LOVE Christmas! to be honest with you I love the build up to Christmas more than the day itself!

I particularly love Advent! Now, I don’t know if that is just because of the piles of Chocolate, or that it is part of the whole event that is Christmas!

So, this year, my first year of blogging, I thought I would make an Advent Calender! Next year, who know you may get some advent gifts, but this year, its a lovely project!

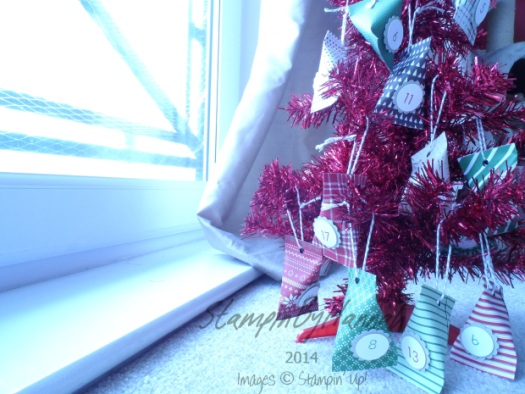
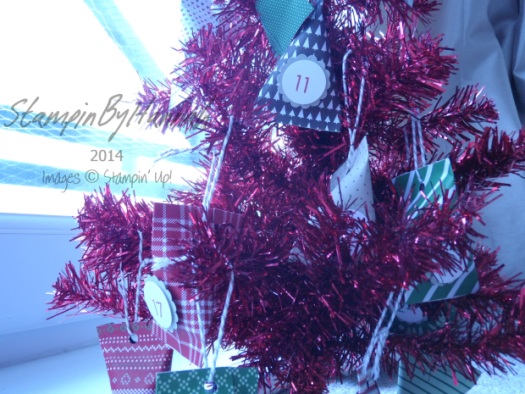
Stampin' Up! UK advent calender trim the tree

I loved making the Halloween Gift Treat bags in October, and thought they would make perfect little tree ornament (or advent chocolate hanging devices if you will!). And so made 24 miniature treat bags with the Stampin’ Up! Trim the Tree DSP stack (LOVE!!!), some bakers twine (from the Tag a Bag Accessory kit!) and the Back to Basics Alphabet!

Measurements =

DSP – 3 1/2 x 4 1/2″ (9 x 12 cm) which is one of the pieces of the DSP from the Trim the Tree DSP stack cut in half!

Apply sticky strip to one end and both long sides, remove the backing from the sticky strip at the end and roll the DSP into a tube.

Then remove the backing from the sticky strip on one side and pinch together.

Insert your chocolate!

Remove the backing of the sticky strip on the other side and pinch together, at right angles to the other side.

Using a hole punch make a hole in one end and feed through your bakers twine, tying it in a knot to create a loop (so you can hang your treat pouch on the tree!).

Add numbers to each pouch by stamping the numbers 1 – 24 on cardstock (I used the Back to Basics Alphabet for this) and punching out with a 1″ circle punch.

Punch 24 1 1/4″ scallop circles and add one to the back of each number with a dimensionals.

Attach each number to a treat pouch with dimensionals.

Stampin' Up! UK Chocolate advent calender homemade

James is super excited about opening each pouch to find the chocolate inside! (Yes, he’s 24! and my husband to be, and Yes, he is just a big kid! We love Christmas!)


Hannah Wilks

Stampin’ Up! UK Independent Demonstrator

If you like the project, or any of the products used, would like a catalogue, or to join my team, please contact me, or click on the ‘Shop NOW’ button at the top of the page. You can also find me on Twitter, Facebook, YouTube, Google+, About.me, and Tumblr (Links in the sidebar)

Sign up to our newsletter here – http://eepurl.com/2if59

Thank you for stopping by www.www.stampinbyhannah.co.uk today

x


AW29 – Holiday Home

I recently grabbed the Holiday Home stamp set and Framelits – thanks to Pinterest and everyones wonderful projects! and I just love the cute houses!

So when the latest Around the World Stampin’ Challenge was released I just knew I wanted to use these stamps.

The challenge this time is to make a project using Real Red, Hello Honey, and Crumb Cake, I’m super pleased with what I came up with.

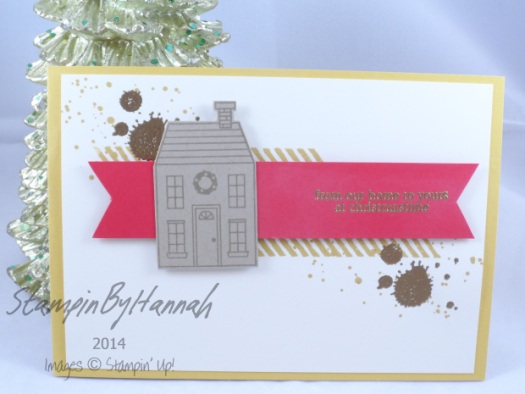
Stampin' Up! UK AW29 Holiday Home Christmas

For this card I used a Hello Honey card base, with a Very Vanilla card matt. I stamped the house image on Crumb Cake cardstock with Crumb cake ink, and cut it out (although I have ordered the framelits, they havent arrived yet!). I gold embossed the sentiment on a piece of Real Red cardstock.

I put the card together and it just looked plan. I’m generally a simple card maker, but it was too simple even for me! So I grabbed for my current ‘go to’ stamp set – Gorgeous Grunge, and stamped in Hello Honey, but it still just didn’t look complete. Bring on more Gold! I really love the look of Gold embossing, and I just think that bit of Gold splatter just proved to be the finishing touch!

Check out the other challenge entries HERE!


Hannah Wilks

Stampin’ Up! UK Independent Demonstrator

If you like the project, or any of the products used, would like a catalogue, or to join my team, please contact me, or click on the ‘Shop NOW’ button at the top of the page. You can also find me on Twitter, Facebook, YouTube, Google+, About.me, and Tumblr (Links in the sidebar)

Sign up to our newsletter here – http://eepurl.com/2if59

Thank you for stopping by www.www.stampinbyhannah.co.uk today

x


Fancy Fold Friday – Scallop Tag Topper Card

Hello!

This is a joint post with my other website – www.thehandmadeweddings.co.uk.

I love making wedding stationary, but a standard card can be a little bit dull, and I love making these!

It uses my favourite Scallop Tag Topper punch, yes I really do use it all the time!

Stampin' Up! UK Scallop tag topper punch wedding card


Measurements:

Cardstock = 8 1/4 x 5 3/4″ (21 x 14.5 cm)

Mark your halfway point on the short sides of your cardstock – approximately 2 7/8″ (7.3 cm) and use these as guide marks when using your scallop tag topper punch

Score one of the tags where it joins the card, and fold.

Score the main card at 4 1/4″ (10.8 cm)


Insert measures – 3 7/8 x 5 1/2 ” (10 x 14 cm)

Card matt measures – 2 1/4 x 5 1/2″ (5.5 x 14 cm)


For more information and to see the complete Wedding invitation collection visit – www.thehandmadeweddings.co.uk


Hannah Wilks

Stampin’ Up! UK Independent Demonstrator

If you like the project, or any of the products used, would like a catalogue, or to join my team, please contact me, or click on the ‘Shop NOW’ button at the top of the page. You can also find me on Twitter, Facebook, YouTube, Google+, About.me, and Tumblr (Links in the sidebar)

Sign up to our newsletter here – http://eepurl.com/2if59

Thank you for stopping by www.www.stampinbyhannah.co.uk today

x

An Itty Bitty Bit Shimmery

Have you take a look at the Paper Basics Page of the Annual Catalogue? No?! well, then you have missed out! I LOVE this page! you can find it on page 192, and its where you can find all the cool papers and cardstocks; vellum, Kraft cardstock, watercolour paper, glimmer page and what I am using today – Shimmery White cardstock!

Stampin' Up! UK shimmery white card

This photo does not do this cardstock justice! it is gorgeous!

This is a top folding card, half a piece of A4 folded in half, with a card matt cut slightly smaller and embossed using my Simply Scored! to get long embossed lines like a frame. The off cuts of the Shimmery White cardstock were cut to 1 1/2″ squares, and I used my Itty Bitty Accents punch pack to punch the shapes, before layering them with some scraps of Melon Mambo!

cool huh!


Hannah Wilks

Stampin’ Up! UK Independent Demonstrator

If you like the project, or any of the products used, would like a catalogue, or to join my team, please contact me, or click on the ‘Shop NOW’ button at the top of the page. You can also find me on Twitter, Facebook, YouTube, Google+, About.me, and Tumblr (Links in the sidebar)

Sign up to our newsletter here – http://eepurl.com/2if59

Thank you for stopping by www.www.stampinbyhannah.co.uk today

x

Save the Date

Ok, so we’re getting to that point in the year when all those Brides start looking for Wedding Stationary (If you are one of those Brides BTW check out this page!), and so as crafters we are often called upon to make invitations, save the dates, thank you cards etc. etc.

Stampin' Up! UK Save the Date Cheers to Love Butterflies

This lovely Save the Date card uses a sentiment from Cheers to Love (lovely for wedding cards!), and some of the butterflies from Papillon Potpourri.

The card base here is the Brushed Gold cardstock (Yum!) with a Whisper White piece. I first stamped the solid butterflies in Blushing Bride, before overstamping the detailed butterflies in Gold! The Sentiment is also stamped using the Gold Metallic Encore Ink.

The larger butterfly I stamped on a scrap piece of Whisper White, in VersaMark, before embossing in Gold, and punching it out with the Elegant Butterfly Punch. Both the Whisper White stamped piece, and the large butterfly are added to the card base with dimensionals for that layered look.

For more information on Wedding Stationary, Contact me HERE


Hannah Wilks

Stampin’ Up! UK Independent Demonstrator

If you like the project, or any of the products used, would like a catalogue, or to join my team, please contact me, or click on the ‘Shop NOW’ button at the top of the page. You can also find me on Twitter, Facebook, YouTube, Google+, About.me, and Tumblr (Links in the sidebar)

Sign up to our newsletter here – http://eepurl.com/2if59

Thank you for stopping by www.www.stampinbyhannah.co.uk today

x

12 Tags of Christmas – Trim the Tree….

Oh yes, We are still working our way though the 12 tags of Christmas!

Stampin' Up! UK Christmas Tag Trim the Tree

Here I cut a 2 x6″ piece of DSP from the Trim the Tree Designer Series Paper Stack (there are so many cute patterns in there!), and punched the top with the Scalloped Tag Topper Punch.

The band around the tag is just a scrap of the same piece of DSP, wrapped around and attached with some Snail.

The ribbons on the top are the Real Red 3/8″ Satin Woven Ribbon tied around a piece of 5/8″ Organza Ribbon.

This tag is simple but really sweet.


Hannah Wilks

Stampin’ Up! UK Independent Demonstrator

If you like the project, or any of the products used, would like a catalogue, or to join my team, please contact me, or click on the ‘Shop NOW’ button at the top of the page. You can also find me on Twitter, Facebook, YouTube, Google+, About.me, and Tumblr (Links in the sidebar)

Sign up to our newsletter here – http://eepurl.com/2if59

Thank you for stopping by www.www.stampinbyhannah.co.uk today

x