Work of Art Notecard set

Note card set featuring Work of Art from Stampin' Up!

As the end of the current catalogue fast approaches I have been looking at those stamp sets that I have neglected in recent months. Today I thought I would show you guys a set of note cards using Work of Art. This is one of the stamp sets I picked in my Starter kit almost 2 years ago (It’s my second SU birthday next week! so excited!!!) but I haven’t used it as much recently, time to change that!

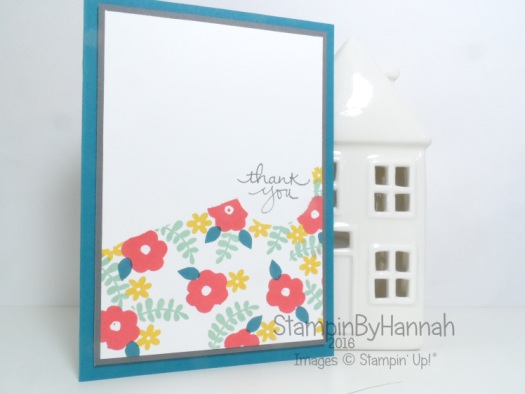
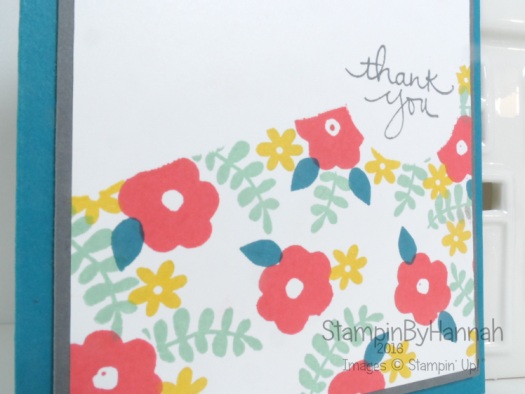
Note card set featuring Work of Art from Stampin' Up!These are so super simple to do. I used the paint strokes stamp from Work of Art and inked it up, and stamped it four times down a piece of Whisper White card stock without re-inking it. This creates a great gradient effect, and is a great demonstration of the number of times you can generation stamp with Stampin’ Up! inks. I selected four colours: Island Indigo, So Saffron, Old Olive and Watermelon Wonder. The So Saffron didn’t work quite as well as the others, but I still love the card

The sentiment is also from Work of Art, and is stamped in Chocolate Chip ink.

Note card set and box instructions using work of art from Stampin' Up!These cards would make a great gift, and so I also created this awesome box to hold them and their envelopes too!

Box Base  – Early Espresso Card stock – 25.5 x 16 cm

Score on the long side at 2, 18.5 and 20.5 cm

Score on the short side at 2 and 14 cm

The lid is created with a piece of Window Sheet – 20.7 x 16.2 cm

Scored on all for sides at 2 cm.

When working with Window Sheet you need to score repeatedly, to ensure a crease it formed, but it looks wonderful when its finished

The box is completed with a knot of Whisper White Organza Ribbon and a bow in Old Olive Bakers Twine


Stampinbyhannah Stampin' Up! Annual Catalogue Launch Event 2016


Product List


Shop Now button-001Join my team button-001

To purchase any of the items featured in my projects please use the links above. To join my team of Stampin’ Friends select ‘Join My Team’ or send me a message!

Please support StampinByHannah, and join my Code Club, by using the Hostess code featured in the top right hand of my blog. For orders of over £150 please do not use this code, as you are entitled to your own Hostess benefits!

Sign up to my newsletter here – http://eepurl.com/2if59

Hannah McCurley

Stampin’ Up! UK Independent Demonstrator

Make It Monday | Creating Backgrounds with small stamps

Make It Monday video tutorial creating backgrounds will small stamps featuring Endless Thanks from Stampin' Up!

Make It Monday with Stampin' Up!

This is technique that I use often to get the most out of the small stamps we often find in our stamp sets, using those small stamps to create fabulous backgrounds for our cards. I have a heap of this type of card in planning (mostly still in my head, but I’m sure they will find their way onto the blog at some point!)

Make It Monday video tutorial creating backgrounds will small stamps featuring Endless Thanks from Stampin' Up!

There are several techniques going on on this card. Firstly, I am still obsessed with Masking (class coming soon!) before I got to creating my own background. I first stamped the Thank You from Endless Thanks in Basic Grey, and then stamped it again onto a sticky note. This sticky note then became a Mask as I punched out the Thank You with a 1 3/8″ circle punch. The second mask was a strip of sticky note tape laid on the diagonal across the card.

Enjoy the video tutorial, and keep watching for me making a mistake as per usual! I think I recovered it pretty well though….

The key to making backgrounds with small stamps is the order in which you stamp. I find the easiest way to do this is stamp the largest image first, and the use smaller and smaller stamps to fill in the gaps. I do of course break this rule in my video tutorial, however there is a reason for my madness! I stamped the Watermelon Wonder flowers first, and then the Crushed Curry ones, before I went back to a larger stamp (the leaves) to fill in the gaps –  the reason being that I didn’t want all the leaves to be the same length. I used more masked to cover the flowers, and allow me to stamp shorter leaves.

Make it Monday Endless Thanks small stamps background using Stampin' Up! products

Measurements:

Card Base – Island Indigo – Half A4, folded in half

Basic Grey – 13.8 x 9.5 cm

Whisper White – 13.3 x 9 cm


Don’t forget to shop using the Code Club Code to receive some great FREE product!

BZNJV4Y4

I will be closing this order on the 30th May 2016


Product List


Shop Now button-001Join my team button-001

To purchase any of the items featured in my projects please use the links above. To join my team of Stampin’ Friends select ‘Join My Team’ or send me a message!

Please support StampinByHannah, and join my Code Club, by using the Hostess code featured in the top right hand of my blog. For orders of over £150 please do not use this code, as you are entitled to your own Hostess benefits!

Sign up to my newsletter here – http://eepurl.com/2if59

Hannah McCurley

Stampin’ Up! UK Independent Demonstrator

Simply Sketched Saturday Challenge | May 2016

Stampin' Up! UK Birthday Card English Garden

Stampin' Up! Sketch ChallengeIts that time again, I am so excited to see what everyone has made based on the sketch this month! I have chosen to use some Designer Series Paper that is on the retiring list and will sadly leave us on 31st May, but I am sure that some of the girls will show me some sneaky peaks of new products, and I cannot wait!

Simply Sketched Saturday Challenge May 2016

This months awesome Sketch is brought to us by Kathleen from lilypopcrafts.

Simply Sketched Saturday Challenge English Garden Birthday card using Stampin' Up! products

My challenge with this sketch was the diagonal element. I selected the Designer Series Paper – English Garden – based on the flowers on the sketch, but new I didn’t want to cut the corner off my paper. I had a little play around with the paper before coming up with this paper curl idea. I curled the Designer Series Paper around my paper piercer (you could use a pencil or a paint brush, anything round would work to be honest) and held the curl with a few Mini Glue Dots.

The Happy Birthday is from the Tin of Cards stamp set, and fits perfectly into the Decorative Label punch. I really wanted to create a boarder around the sentiment, and so cut apart a further 2 decorative label punch pieces (in Melon Mambo) to create a boarder.

Simply Sketched Saturday Challenge Blog Hop Birthday Envelope English GardenOnce I had created the card I realised that it wouldn’t fit in a standard envelope, and so grabbed another piece of the same Designer Series paper and my Envelope Punch Board to create custom envelope.

Instructions:

Designer Series Paper – 8 7/8 x 8 7/8″ (I’m sticking to Imperial Measurements today, because I find them easier on the Envelope Punch Board)

Punch and Score on the first side at 3 3/8, and on the same sideat 4 1/8″

Rotate the paper by 90 degrees, line up the previous score lines with the marker on the punch board, punch and score. Repeat on all four sides.

Fold and burnish on the score lines, to create your envelope

Stampin' Up! UK Birthday Card English GardenI completed the envelope with a belly band of Night of Navy card stock (26 x 5 cm, Scored on the long side at 11, 12.5, 23.5 and 25 cm). The sentiment is heat embossed in white, and the flowers and butterfly are taken from the Garden in Bloom Stamp set.

Thanks so much for visiting StampinByHannah today, don’t forget to subscribe to my blog and Weekly Inspiration Email! and hop on to the next blog in our challenge

Simply Sketched NextSimply Sketched Previous


Don’t forget to shop using the Code Club Code to receive some great FREE product!

BZNJV4Y4

I will be closing this order on the 30th May 2016


Product List


Shop Now button-001Join my team button-001

To purchase any of the items featured in my projects please use the links above. To join my team of Stampin’ Friends select ‘Join My Team’ or send me a message!

Please support StampinByHannah, and join my Code Club, by using the Hostess code featured in the top right hand of my blog. For orders of over £150 please do not use this code, as you are entitled to your own Hostess benefits!

Sign up to my newsletter here – http://eepurl.com/2if59

Hannah McCurley

Stampin’ Up! UK Independent Demonstrator

Fancy Fold Friday | Corner Fold Card

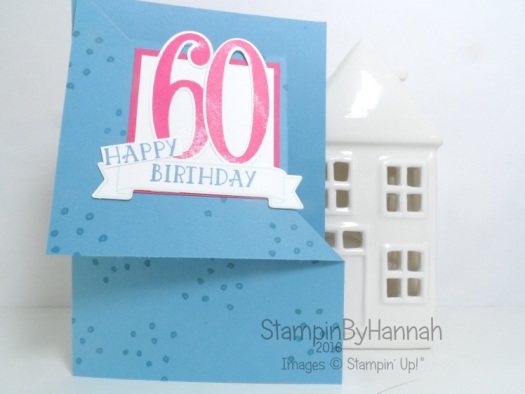
Fancy Fold Friday Video Tutorial Corner Fold Card featuring Number of Years from Stampin' Up! UK

Fancy Fold Friday

When I first made this card last year it took me ages to work out the cutting and scoring, I had found a tutorial from an awesome American fellow Stampin’ Up! demonstrator and just had to make this card, but the US don’t use A4 card stock, so I had to convert the measurements. It has taken me so long to revisit this style of card after the trauma of that day, but following my own instructions I had the card finished in a flash!

Fancy Fold Friday Video Tutorial Corner Fold Card featuring Number of Years from Stampin' Up! UK

I love the fact that this card has its own level of dimension, although you could really burnish the fold lines to get the card to be flatter. I have also seen this style of fancy fold embossed with an embossing folder after the fold has been created which looks awesome! but I opted for tone on tone stamping today

This card features the Number of Years stamps and dies – which is currently available as a 15% bundle, but the bundle retired on the 31st May, although the stamps and dies will still be available they will cost more – grab them today for a bargain!

Fancy Fold Friday Corner Fold Card featuring Number of years from Stampin' Up! Uk

Have you spotted my colour combination inspiration today? Yes, this card is made in my blog colours; Soft Sky, Marina Mist and Melon Mambo!

Measurements:

Card Base – Marina Mist – Half A4, folded in half (14.8 x 21, scored on the long side at 10.5 cm)

Insert you card base into your Stampin’ Trimmer with the long side at the top, line up the left hand edge at 13 cm –  using the measurements printed on the cutting arm of the Stampin’ Trimmer cut from 2 cm down to 8 cm.

Turn your card base so the short edge is at the top, line up the left hand edge of your card stock at 8 cm, and cut again from 2cm to 8 cm – you should have created a corner cut in the middle of your card front.

Then fold the top right hand edge of the card front down, ensure that you don’t fold the centre square that will appear, burnish this score line well to ensure you card front sits flat.


Don’t forget to shop using the Code Club Code to receive some great FREE product!

BZNJV4Y4

I will be closing this order on the 30th May 2016


Product List


Shop Now button-001Join my team button-001

To purchase any of the items featured in my projects please use the links above. To join my team of Stampin’ Friends select ‘Join My Team’ or send me a message!

Please support StampinByHannah, and join my Code Club, by using the Hostess code featured in the top right hand of my blog. For orders of over £150 please do not use this code, as you are entitled to your own Hostess benefits!

Sign up to my newsletter here – http://eepurl.com/2if59

Hannah McCurley

Stampin’ Up! UK Independent Demonstrator

Go Wild with Watercolour Wings!

Watercolour Wings Card using Stampin' up! Uk products

Hello! Happy Thursday! I thought I would share a card I sent to a friend a couple of weeks ago with you guys today. I know this card has arrived, and so is ‘safe to share!’

Watercolour Wings Card using Stampin' up! Uk products

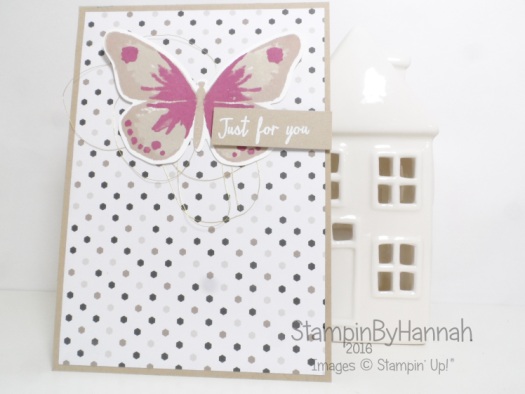
This card uses the 2-step stamping technique I shared on Monday. However, instead of using Picture Perfect I grabbed Watercolour Wings! I am so super happy this stamp set is stopping around a while longer.  I used the Designer Series Paper for the colour inspiration. I love that Stampin’ Up! Designer Series Paper coordinates exactly with our inks and card stocks – which means that we can take the colours from the papers and know that the colours work together. I did add a colour into the mix, seeing as Go Wild featured a totally neutral palate, I added a touch of Rich Razzleberry.

Watercolour wings 2 step stamping using stampin up uk products

The butterfly is stamped in 3 layers; the base layer is Sahara Sand, with layer two in Crumb Cake and the final detail in Rich Razzleberry. I find it easier to die cut this butterfly (using the coordinating framelit die) before I stamp in the butterfly body – I cannot tell you how many headless butterflies I had before I figured that out!

This card was finished with a series of loops of Gold Metallic Thread behind the butterfly and the sentiment heat embossed in White.


Stampinbyhannah Stampin' Up! Annual Catalogue Launch Event 2016


Product List


Shop Now button-001Join my team button-001

To purchase any of the items featured in my projects please use the links above. To join my team of Stampin’ Friends select ‘Join My Team’ or send me a message!

Please support StampinByHannah, and join my Code Club, by using the Hostess code featured in the top right hand of my blog. For orders of over £150 please do not use this code, as you are entitled to your own Hostess benefits!

Sign up to my newsletter here – http://eepurl.com/2if59

Hannah McCurley

Stampin’ Up! UK Independent Demonstrator

Global Design Project #036

Global Design Project Case the Designer Thank You featuring Hello You from Stampin' Up!

Hello! yes, I’m back again with another Challenge entry. This time for the Global Design Project Case the Designer Challenge!

Global Design Project #036

This card from Paula Dobson is awesome. The idea for this challenge is that you take an element of the card, and use it as inspiration. I just love the ‘You’ thinlit die from the Hello You Thinits, and could not pass the the opportunity to use them again!

Global Design Project Case the Designer Thank You featuring Hello You from Stampin' Up!The ‘You’ is actually die cut 4 times, the first time from the stamped piece of Whisper White, and then 3 times in Early Espresso. It is super easy to layer these together using Tombow glue (although the silicone mat helps lots!). Before I die cut the You though I stamped onto the piece of Whisper White, first with the flowers from Birthday Blossoms in Perfect Plum, and then in Blushing Bride and Crumb Cake with Gorgeous Grunge.

Thank you card featuring Stampin' Up! Uk products

The ‘Thank’ is from Crazy About You, although the stamp actually reads Thanks I masked off the S while I inked the stamp up in Versamark. I am tempted to cut off the S actually, I might get more use out of it that way, but then again, I’m not all that sure about Stamp Butchery!

To finish I added some gold splatter using a Gold Wink of Stella


Product List


Shop Now button-001Join my team button-001

To purchase any of the items featured in my projects please use the links above. To join my team of Stampin’ Friends select ‘Join My Team’ or send me a message!

Please support StampinByHannah, and join my Code Club, by using the Hostess code featured in the top right hand of my blog. For orders of over £150 please do not use this code, as you are entitled to your own Hostess benefits!

Sign up to my newsletter here – http://eepurl.com/2if59

Hannah McCurley

Stampin’ Up! UK Independent Demonstrator

Can You Case It #120 – Sketch Challenge

Watercolour Wishes Thanks Card using Stampin' Up! products

Hello! I have 2 challenge posts coming today and tomorrow. I know I don’t usually post on a Tuesday afternoon (or a Wedneday!) but I couldn’t miss this weeks Challenges.

The first is from Can You Case It!

Can You Case It 120 Sketch Challenge

Now, I love this type of sketch, really basic with plenty of room for imagination!

Watercolour Wishes Thanks Card using Stampin' Up! products

Recently I took the stamp set out of my Watercolour Wishes card kit. It is such a great stamp set that leaving it in the kit was just a waste! I have used it so much since it appeared on my shelves! I sponged the corner first in Basic Grey and then in Mint Macaron ink, and then stamped the little hearts in Mint Macaron. The ‘Thanks’ is heat embossed in White onto a 1″ strip of Vellum.

Keeping it simple today, but just wait until you see what I did for tomorrows challenge post!


Don’t forget to shop using the Code Club Code to receive some great FREE product!

BZNJV4Y4

I will be closing this order on the 30th May 2016


Product List


Shop Now button-001Join my team button-001

To purchase any of the items featured in my projects please use the links above. To join my team of Stampin’ Friends select ‘Join My Team’ or send me a message!

Please support StampinByHannah, and join my Code Club, by using the Hostess code featured in the top right hand of my blog. For orders of over £150 please do not use this code, as you are entitled to your own Hostess benefits!

Sign up to my newsletter here – http://eepurl.com/2if59

Hannah McCurley

Stampin’ Up! UK Independent Demonstrator

Picture Perfect Humming Bird

Humming Bird Card featuring Picture Perfect from Stampin' Up! UK

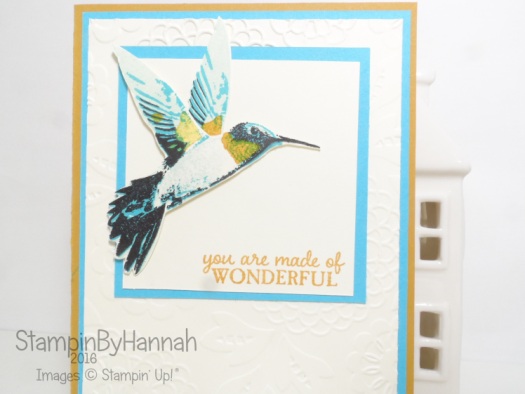
This card was totally inspired by the fabulous Brandy Cox, a few weeks ago she created a great card using this humming bird in a similar colour combination as well as creating a bird with two wings. I loved it and just had to have a go to!

Humming Bird Card featuring Picture Perfect from Stampin' Up! UK

This bird is stunning! I will admit that I bought the Picture Perfect stamp set purely for the Rose stamp (Which I used in my Make It Monday video yesterday!) but once it arrived this bird just made my heart sing! I have so many ideas for this one, and so little time to play with it! There are so many colour combinations that would make this bird look awesome, here I have used Soft Sky, Tempting Turquoise, Basic Black and Delightful Dijon. I never even thought of using Basic Black on this bird until I saw Brandy’s sample, but it really works!

The humming bird stamp actually only has one wing, but I really love the idea of adding a second to really make the bird appear as if in flight. I simply stamped an extra bird and just fussy cut the wing, then added the second wing behind the fussy cut bird with a dab of Tombow glue

Picture Perfect Humming bird from Stampin' Up! Uk

I had to use my favourite embossing folder on this card too! My Lovely Lace embossing folder looks worse for wear, I really need to buy a new one, but it still works – even if it is held together by parcel tape! (on an important note; this is why I don’t advise you run your embossing folders through the big shot sideways too often, or you will need parcel tape too!)

Measurements:

Card Base – Delightful Dijon – Half A4 folded in half

Tempting Turquoise – 14.3 x 10 cm

Very Vanilla – 13.8 x 9.5 cm

Tempting Turquoise – 7.5 x 7.5 cm

Very Vanilla – 7 x 7 cm


Don’t forget to shop using the Code Club Code to receive some great FREE product!

BZNJV4Y4

I will be closing this order on the 30th May 2016


Product List


Shop Now button-001Join my team button-001

To purchase any of the items featured in my projects please use the links above. To join my team of Stampin’ Friends select ‘Join My Team’ or send me a message!

Please support StampinByHannah, and join my Code Club, by using the Hostess code featured in the top right hand of my blog. For orders of over £150 please do not use this code, as you are entitled to your own Hostess benefits!

Sign up to my newsletter here – http://eepurl.com/2if59

Hannah McCurley

Stampin’ Up! UK Independent Demonstrator

Make It Monday | 2 Step Stamping

Make It Monday Video Tutorial 2 Step Stamping Picture Perfect from Stampin' Up! UK

Make It Monday with Stampin' Up!

Welcome to another week of Make It Monday!

I have been loving playing with the Picture Perfect stamp set recently, and have a few cards to share with you using this stamp set over the next week or so. I am so pleased that this stamp set is in our new Annual catalogue too. (I do have a few spare catalogues, let me know if you want one!)

Make It Monday Video Tutorial 2 Step Stamping Picture Perfect from Stampin' Up! UK

How pretty is this rose? Little known fact about me, one of my middle names is Rose – I rebelled against it for a LONG time, but these days I love it and really embrace the Rose in my name. James went through a period a few years ago of buying me heaps of Roses (flower not chocolates, although he has bought me plenty of those too!) but recently I haven’t had any flowers, maybe I should send him this blog post as I reminder!

Video Tutorial featuring Picture Perfect from Stampin' Up!

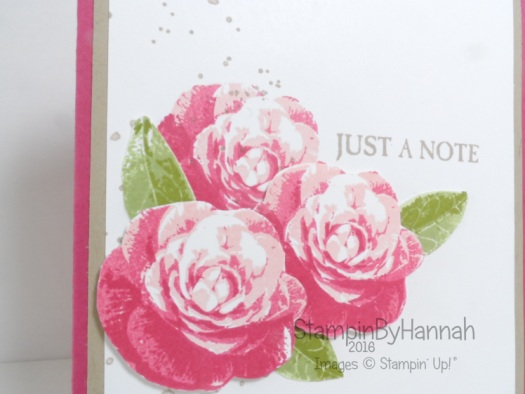
Back to the stamping …. These roses look really complex, but are super simple to stamp. They are a 3 layer stamped image, which means that there are 3 stamps stamped one on top of the other, in different colours to create the full flower. The leaves are the formed in the same way. You can see exactly how to stamp these in the video tutorial below

I adore this colour combination, Rose Red and Crumb Cake. The roses are stamped in Blushing Bride and Rose Red, while the leaves are a combination of Pear Pizzazz and Old Olive.

Make It Monday Featuring Stampin Up Picture Perfect Video Tutorial

I arranged the flowers before I stuck everything down, I do this a lot when I’ve fussy or die cut elements, just to check my composition works. I found that this card was missing something, Stampin’ Up! have some great stamp sets for this event, but Gorgeous Grunge is my favourite! So I added some Crumb Cake spatter using Gorgeous Grunge, and that was the card complete!

Measurements:

Card Base – Rose Red – 14.85 x 21 cm (half a sheet of A4) Scored at 10.5 cm

Crumb Cake Layer – 14.3 x 10 cm

Whisper White Layer – 13.8 x 9.5 cm


Stampinbyhannah Stampin' Up! Annual Catalogue Launch Event 2016


Product List


Shop Now button-001Join my team button-001

To purchase any of the items featured in my projects please use the links above. To join my team of Stampin’ Friends select ‘Join My Team’ or send me a message!

Please support StampinByHannah, and join my Code Club, by using the Hostess code featured in the top right hand of my blog. For orders of over £150 please do not use this code, as you are entitled to your own Hostess benefits!

Sign up to my newsletter here – http://eepurl.com/2if59

Hannah McCurley

Stampin’ Up! UK Independent Demonstrator

Fancy Fold Friday | Simple Easel Card

Fancy Fold Friday Easel Card Video Tutorial using Stampin' Up! UK products

Fancy Fold Friday

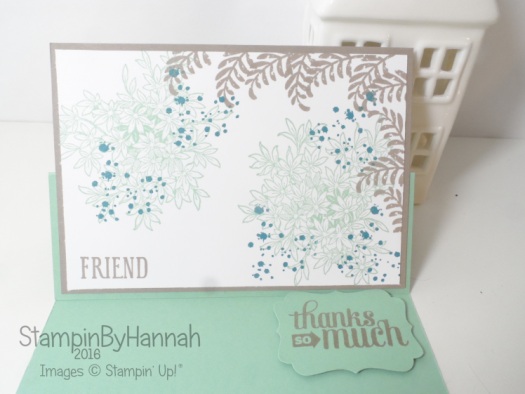
Welcome to Fancy Fold Friday! Today I thought I would share my most commonly made Fancy Fold Card! A Simply Easel – I love doing a twist on the Easel card but today I’m heading back to basics and keeping it simple!

Fancy Fold Friday Easel Card Video Tutorial using Stampin' Up! UK products

I am still totally in love with this stamp set too! Awesomely Artistic is a great layering stamp set, and you can see me layer these stamps in the video tutorial below!

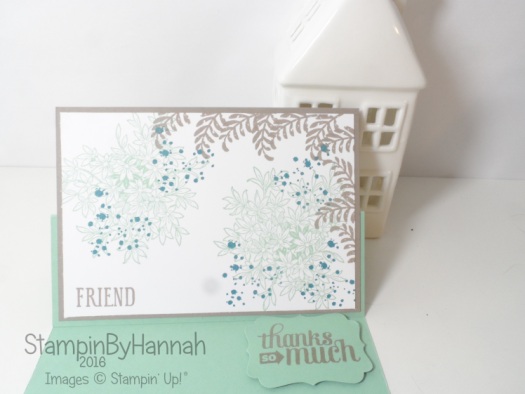
Easel cards are super simple, but require one very key component – the stopper! This is the part of the card that makes the card front stand up. Here I have used the Decorative Label punch to create my stopper, popping my punched out sentiment on a dimensional.

Easel card using Awesomely Artistic from Stampin' Up! Uk

Measurements:

Card Base: Mint Macaron – 21 x 14.8 cm, Scored on the long side at 10.5 cm and 5.2 cm

Card Layers: Tip Top Taupe – 10 x 14.2 cm and Whisper White – 9.5 x 13.8 cm

Don’t forget that you will also need a scrap of Mint Macaron card stock for the stopper.


Stampin' up! Uk retiring list 2016


Product List

Awesomely Artistic Clear-Mount Stamp Set

£18.00
2015-2017 In Color A4 Cardstock

£6.50
Mint Macaron Classic Stampin' Pad

£6.00
Tip Top Taupe Classic Stampin' Pad

£6.00
Island Indigo Classic Stampin' Pad

£6.00
Decorative Label Punch

£16.00
B.Y.O.P. Photopolymer Stamp Set

£23.00
Stampin' Dimensionals

£3.75


Shop Now button-001Join my team button-001

To purchase any of the items featured in my projects please use the links above. To join my team of Stampin’ Friends select ‘Join My Team’ or send me a message!
Please support StampinByHannah, and join my Code Club, by using the Hostess code featured in the top right hand of my blog. For orders of over £150 please do not use this code, as you are entitled to your own Hostess benefits!

Sign up to my newsletter here – http://eepurl.com/2if59

Hannah McCurley

Stampin’ Up! UK Independent Demonstrator