World Card Making Day 2014 – I Like Navy!

This is the 3rd post in my series of World Card Making Day posts!

Stampin' Up! UK I Like You Night of Navy Blender

I LOVE this card! It uses that lovely Hostess Stamp Set – I Like You. Stamped around the sentiment, in Daffodil Delight, Old Olive, and Night of Navy. Then, the Night of Navy flowers have added colour using ink pads and the Stampin’ Up! Blender Pens – a great way to add little touches of colour to a stamped image.

I hope you are enjoying World Card Making Day – check out the products I’ve used to make this card HERE!


Hannah Wilks

Stampin’ Up! UK Independent Demonstrator

If you like the project, or any of the products used, would like a catalogue, or to join my team, please contact me, or click on the ‘Shop NOW’ button at the top of the page. You can also find me on Twitter, Facebook, YouTube, Google+, About.me, and Tumblr (Links in the sidebar)

Thank you for stopping by www.www.stampinbyhannah.co.uk today

x


Fancy Fold Friday – Easel Card

HELLO!

Welcome to fancy fold friday!

Once again, trying something new here! I have a few of these posts lined up over the next few weeks, looking at card folds that make your cards stand out from the other cards on the mantel piece. I thought we’d start simple – a easel card

Stampin' Up UK Wisteria Wonder Bouquet Toss Thank You card

Easel cards are super simple to create. This card base (in Wisteria Wonder) is cut to 8 1/4 by 5 1/2 (about half an A4). The card is scored at 2 1/4 and 4 1/8th, creating a triangle of cardstock. Another piece of cardstock (this time in Very Vanilla) is attached to one of the short sides of the triangle to create a taller card. The stamp set used here is Bouquet Toss – a set that, although designed for weddings (and that ties into the Always and Forever wedding stationary templates in MDS), is a lovely feminine stamp set for Thank You cards, Birthdays, and Congratulations cards. The small flowers (although fussy cut here) work wonderfully with the 1/2″ circle punch, to create ‘pegs’ to hold the card up when displayed.

Stampin' Up UK Wisteria Wonder Bouquet Toss Thank You card


I’m really loving simple colour combinations at the moment, and have found myself making a lot of cards with only two or maybe three colours!

Can’t wait to see you again next week!


Hannah Wilks

Stampin’ Up! UK Independent Demonstrator

If you like the project, or any of the products used, would like a catalogue, or to join my team, please contact me, or click on the ‘Shop NOW’ button at the top of the page. You can also find me on Twitter, Facebook, YouTube, Google+, About.me, and Tumblr (Links in the sidebar)

Thank you for stopping by www.www.stampinbyhannah.co.uk today

x

Copy and Share Everything …..

I always find making birthday cards for children difficult, and I tend to gravitate back towards Stampin’ Up! Zoo Babies at every possible opportunity. I’ve had a few childrens (well toddlers) cards to make recently, including a first birthday ‘card-in-a-box’ that I forgot to photograph! Ooops! and had run out of ideas a little by the time another birthday came around, so where did I turn for inspiration ….. Pinterest!

Oh, Pinterest, how I love thee…… I use Pinterest all the time, to collate my ideas, record my projects, for inspiration for many things in my life as well as crafting. I love the organised way of creating ‘boards’, ensuring all my ideas about a particular topic are together – Stampin’ Up!, Wedding, Christmas etc. etc. Go and check out my Pinterest and follow along.

So, I was all out of inspiration, but thats OK, I have a Pinterest Board for that – CASE

CASE stands for : Copy And Share Everything, something actively encouraged by Stampin’ Up! So thats what I did

Stampin Up! Zoo Babies

Using the In Colours 2014-2016 – Tangelo Twist, Hello Honey, Mossy Meadow, and Lost Lagoon, the Zoo Babies Stamp Set, and some scraps of cardstock this was my make.

The recipient LOVED it!

Stampin Up Zoo Babies


Go and Like my Facebook page, and check out Pinterest 🙂


Hannah Wilks

Stampin’ Up! UK Independent Demonstrator

If you like the project, or any of the products used, would like a catalogue, or to join my team, please contact me, or click on the ‘Shop NOW’ button at the top of the page. You can also find me on Twitter, Facebook, YouTube, Google+, About.me, and Tumblr (Links in the sidebar)

Thank you for stopping by www.www.stampinbyhannah.co.uk today

x

Inspired by….

Ok, so I have a confession to make, I watch A LOT of YouTube! A LOT! my excuse for this is that its my main source of inspiration. I love watching other people craft and create, I love watching craft room tours, and more than anything I love the mass of different ideas all in one place. I know a lot of people use pinterest for this, but for me its YouTube.

I subscribe to a countless number of crafters, creatives, organisers and others, giving me a diverse selection of ideas and projects, and this project is a ‘mash-up’ of YouTube and Stampin’ Up!

One of the people I watch a lot is Jennifer McGuire (her blog is AWESOME, go check it out!). Jennifer uses a number of different products, and I’ve made it a big of a mission to re-create some of her ideas (or CASE – Copy And Share Everything) using Stampin’ Up! product, so this is what this is……

Stampin' Up! festival of trees

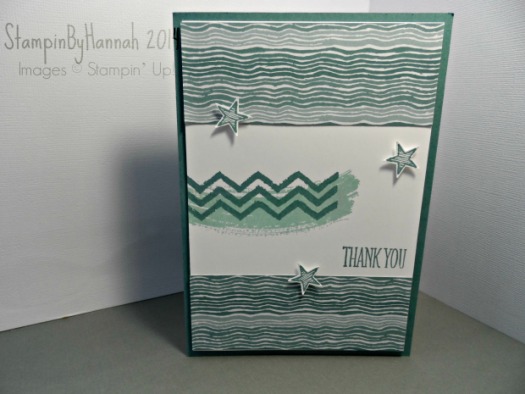
This card uses the new Festival of Trees Stamp Set, available on the 28th of August. I love this stamp set, its so versitile, I can see ice-cream cones in its future! but for now I’ll stick with Christmas! It has a matching punch, making it super easy to ‘cut out’ the tree shapes, and it’s photopolymer so you can get these amazing two-step / layered stamping looks.

I love a couple of the techniques on this card, using Stampin’ Write Markers to colour the stamp (yes, it works on photopolyer stamps to!), using Old Olive and Early Expresso to colour the tree. I then used my Real Red Ink Pad to stamp the red dots (baubles / orniments / etc.). I stamped the stars in Crushed Curry on a scrap piece of Whisper White – I love that this stamp set also coordinates with the Star punch from the Itty Bitty Accents Punch Pack!

stampin up festival of trees

But my favourite technique on this card is the embossed edge! I stamped the chevron stamp from Work of Art down the side of the card blank in Versamark Ink, and heat embossed it with Clear Stampin’ Emboss Powder. I then assembled the card, attaching the Whisper White piece with the trees stamped on, to the Early Expresso Card Blank. This looked a little bare to me, so, like Jennifer, I added a strip of colour, in this case a 1/4″ strip of Old Olive card stock.

The sentiment is also from the Festival of Trees Stamp set, stamped in Early Expresso. I added the stars using Glue Dots, and called this card finished!

The Seasonal Catalogue launches on the 28th August, drop me and email for a copy!

Hannah Wilks

Stampin’ Up! UK Independent Demonstrator

If you like the project, or any of the products used, would like a catalogue, or to join my team, please contact me, or click on the ‘Shop NOW’ button at the top of the page. You can also find me on Twitter, Facebook, YouTube, Google+, About.me, and Tumblr (Links in the sidebar)

Thank you for stopping by www.www.stampinbyhannah.co.uk today

x

Work of Art Card Process

Trying something different (yet again!) and thought I’d turn the camera on while I was crafting last week, and this is the outcome!

Work of Art Card Process

I really do LOVE the Work of Art Stamp set. I know some people find the big black images on the cover a little intimidating but once you look past that, and think thats not black – its possibility! its creativity! its wonderful!

I have a bit of a thing at the moment for layered stamping, I will blame Stampin’ Up! for that, 2 layer stamping in all over the new catalogue (still need to get my hands on that flower patch stamp set! Yum!)

So, this card didnt work out exactly as planned, and it definately has that ‘handmade’ look about it (something to do with the stamping halos I think) but I do quite like it!

Let me know if you’d like to see more ‘direct from my craftroom’ style videos (or anything else really!)


Hannah Wilks

Stampin’ Up! UK Independent Demonstrator

If you like the project, or any of the products used, would like a catalogue, or to join my team, please contact me, or click on the ‘Shop NOW’ button at the top of the page. You can also find me on Twitter, Facebook, YouTube, Google+, About.me, and Tumblr (Links in the sidebar)

Thank you for stopping by www.www.stampinbyhannah.co.uk today

x

Warmest Wishes …..

As you may have noticed, most of my cards are clean and simple. But, every now and then, I like to push my boundries and try something different. This card is just that, its busy, and bright!

I love the layered effect on this card (its one I’ve made a few times for older relatives and a like),  but I dont usually make it in orange!

The In Colours 2014-2016 include Tangelo Twist –  a knock your eyes out, bright, Orange! It is gorgeous!

Here I’ve paired it with Daffodil Delight (another lovely colour), and the Blooming with Kindness Stamps, creating a bright and cheery, Warmest Wishes on your Birthday, card.

Warmest Wishes Tangelo Twist

The trick with this card is in the measurements!

The card base is half an A4 piece of Tangelo Twist Card stock, and then there are 5 cardstock layers on top, alternating between Whisper White and Tangelo Twist.

Layer 1 – Whisper White – 5 1/2 x 3 3/4″ (14 x 9.5cm)

Layer 2 – Tangelo Twist – 5 x 3 1/8″ (8 x 12.5cm)

Layer 3 – Whisper White – 4 5/8 x 2 3/4″ (11.5 x 7cm)

Layer 4 – Tangelo Twist – 4 / 2 1/4″ (10 x 6cm)

Layer 5 – Whisper White – 3 5/8 x 2″ (9 x 5cm)


Once all your layers are cut, stack the Whisper White pieces on top of each other (each one in the centre of the one underneath), and stamp across all three layers. You could use some temporary adhesive to stop the layers from moving, although I just hold them steady with one hand and stamp with the other. This stamping will leave a white boarder around each layer, but thats OK, thats where the Tangelo Twist layers come into their own! Once the ink is dry, stack the Whisper White pieces with the Tangelo Twist pieces, starting with the largest piece at the bottom and ending with the smallest piece on top.

I have stuck my layers together with SNail adhesive, but for a more dimensional look you could pop your layers up with dimensionals for a truely eye-popping card!


Hannah Wilks

Stampin’ Up! UK Independent Demonstrator

If you like the project, or any of the products used, would like a catalogue, or to join my team, please contact me, or click on the ‘Shop NOW’ button at the top of the page. You can also find me on Twitter, Facebook, YouTube, Google+, About.me, and Tumblr (Links in the sidebar)

Thank you for stopping by www.www.stampinbyhannah.co.uk today

x

Are you up for the Challenge?!

Its an exciting day here at StampinByHannah, as we celebrate the launch of our sister site – www.stampinbychallenge.blogspot.co.uk – a monthly (for now) challenge blog for all cardmakers and papercrafters

Head over to the blog now to find out what this months challenge is, and enter now!

Thought I’d give you a little pick at what I made though (but you’ll have to visit StampinByChallenge to get what the challenge is!)

Stampin By Challenge


This super simple card uses a Whisper White card blank and some punched circles. I used the 1 1/4″ scallop circle punch to cut 3 circles from the new In Colours card stock (in Blackberry Bliss, Lost Lagoon, and Hello Honey), and then layered the 1″ circles of Moonlight DSP on top (with some dimentionals of course!). The sentiment is from the Blooming with Kindness stamp set.

Feeling inspired?

Join the fun now!


Hannah Wilks

Stampin’ Up! UK Independent Demonstrator

If you like the project, or any of the products used, would like a catalogue, or to join my team, please contact me, or click on the ‘Shop NOW’ button at the top of the page. You can also find me on Twitter, Facebook, YouTube, Google+, About.me, and Tumblr (Links in the sidebar)

Thank you for stopping by www.www.stampinbyhannah.co.uk today

x

A Moonlight Thank You

Have I mentioned how much I love the new In Colours for 2014-2016! Have I! oh well, your going to hear it again! I love our new In Colours!

This time I thought I’d have a play with the MoonLight Designer Series Paper Stack. These paper stacks are so handy for a quick card. Instead of the usual 12×12″ size, these stacks (and there are two of them in the annual catalogue and another on its way in the seasonal catalogue – I cant wait!), these stacks are 6 1/2″ by 4 1/2″ (thats 11.4×16.5cm), just a little bigger than your standard size card! Awesome! The Moonlight stack features the new In Colours in their full and beautiful glory, using Blackberry Bliss, Hello Honey and Lost Lagoon (the yummest colours!)Stampin Up! Moonlight thank you

I’ve been playing with Lost Lagoon a bit in the last few weeks, I had a couple of card orders that called for just such a colour, and this card uses my very last piece of Lost Lagoon Cardstock (must order more!), along with a piece of the Moonlight DSP, Work of Art stamp set, and the Something to Say stamp set and coordinating Itty Bitty Accents Punch pack! (LOVE!)

Stampin Up! Moonlight thank you

The Something to Say stamp set features14 sentiment stamps, many of which are designed to be used in pairs, along with 3 accent stamps: a heart, a flower, and a star. Here I’ve used the star, stamped in Lost Lagoon on Whisper White cardstock, and punched them out using the star punch from the Itty Bitty Accents Punch Pack. The Thank You is also from the same stamp set.

A quick and easy card front, attached to a Lost Lagoon Card base with a few dimensionals

Easy!


Hannah Wilks

Stampin’ Up! UK Independent Demonstrator

If you like the project, or any of the products used, would like a catalogue, or to join my team, please contact me, or click on the ‘Shop NOW’ button at the top of the page. You can also find me on Twitter, Facebook, YouTube, Google+, About.me, and Tumblr (Links in the sidebar)

Thank you for stopping by www.www.stampinbyhannah.co.uk today

x

Thank You …….

Mass production of cards can be difficult. I find that producing a small number of the same card makes it easier, doing say 8 of each colour for example.

3x3 Thank you note cards

Recently I have been making Wedding Invitations (150 of them actually) and although I have broken them down into batches, there are a number of other ways of making the ‘batch cardmaking’ process a little easier.

1. do all of each step all at once eg: cut ALL the pieces for ALL the cards, then do ALL the scoring, ALL the stamping etc.

2. do it in smaller batches. I found that once I’d made about 40 invitations I was ready to give up all together, so instead, I did 30-35, and stopped for a while (admittedily, this only works if you have plenty of time!)

3. Change it up. Generally I do 6-8 of the exact same card before I change something, either the colour, or placement of the stamped images, use a different punch, etc.

4. Grab your nearest and dearest to help! not something I have ever tried, but thats more because James is not crafty at all, and I’m not sure if Freda the Cat is much good with a paper trimmer!

So, here’s my offer to you: place an order of £20 or more (there are many ways to order, use the contact me page if you are stuck), and get one of these super cute thank you notes, plus a special little something! (I’m not telling you what – you’ll have to order and find out!)

What could you get for £20? take a little look below (click on the image to go to my shop from where you can purchase!)

Thank you

🙂


Hannah Wilks

Stampin’ Up! UK Independent Demonstrator

If you like the project, or any of the products used, would like a catalogue, or to join my team, please contact me, or click on the ‘Shop NOW’ button at the top of the page. You can also find me on Twitter, Facebook, YouTube, Google+, About.me, and Tumblr (Links in the sidebar)

Thank you for stopping by www.www.stampinbyhannah.co.uk today

x

Take a shot………

Or just take advantage of the latest Stampin’ Up! awesome deal and get your Stampin’ Up! Big Shot in August, and get a free stamp and framelit bundle, as well as getting 15% off other selected bundles!

This offer, only available for one month, lets you into a whole new world (sorry!) of crafting, giving you even more options for cards and projects. The Big Shot is a great die cutting machine, enabling you to emboss, cut and score, using framelits, bigz dies, embossing folders and other wonderful ways to give your cards more dimension and impact.

The Big Shot allows you to cut and emboss a number of different materials, including; card and paper, vellum, coaster board, window sheet, glimmer paper, foil, felt and many others. Use your Big Shot to create 3D projects using the Stampin’ Up! Bigz Die; Hamburger box, Spiral flowers, gift bows, and designer rosettes. Create embossed cards for your Project Life album. Use stamp and framelit bundles to stamp and cut intricate shapes and images, giving your projects that extra special something!

For the month of August get your Big Shot, with a Stamp and Die bundle, for £87.95, AND get 15% off other selected bundles!


Hannah Wilks

Stampin’ Up! UK Independent Demonstrator

If you like the project, or any of the products used, would like a catalogue, or to join my team, please contact me, or click on the ‘Shop NOW’ button at the top of the page. You can also find me on Twitter, Facebook, YouTube, Google+, About.me, and Tumblr (Links in the sidebar)

Thank you for stopping by www.www.stampinbyhannah.co.uk today

x