Stampin’ Up! UK Regional Training Swaps

One of the many many great things about being a demonstrator for Stampin’ Up! is the opportunity to attend Stampin’ Up! organised events. This past weekend I drove the 180+ miles to Telford for this years demonstrator training event. I will share the full details with your soon (well, as much as I can!) but for now, I thought I would share what I made for my Swaps!

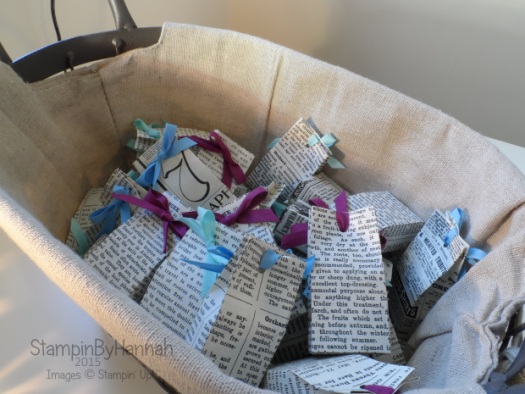
Stampin' Up! UK Telford swaps 2015

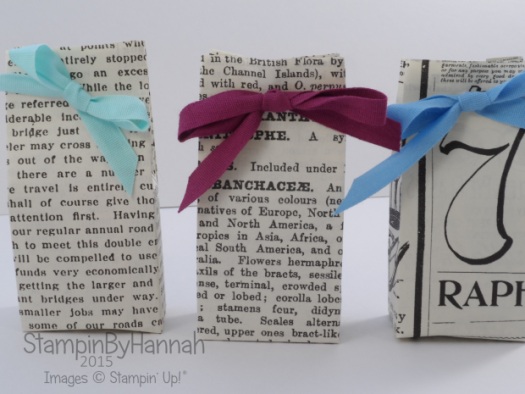
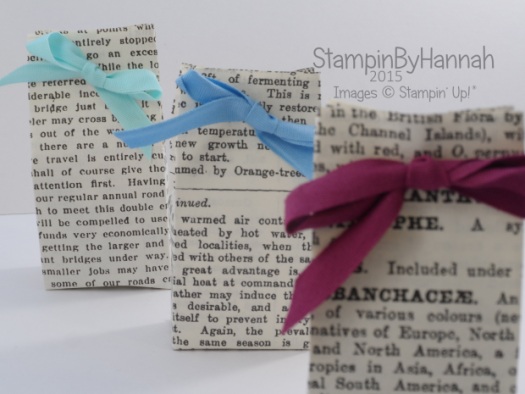
Swapping is another great part of being a demonstrator. Each time we get together we make things to share; they are a great way of getting inspiration when you’ve lost your crafty mojo, and are a wonderful way of meeting new people. I found some cute little chocolates during a recent dash to Home Bargains (there’s one at the end of my road, perfect for those chocolate emergencies! they sell other stuff to, but chocolate is my main reason for a visit!) and knew they would have to be part of my swap!

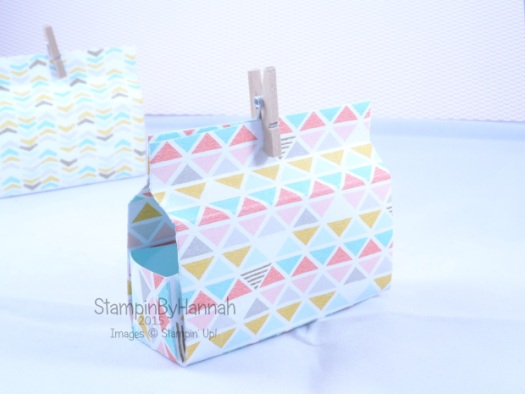
Stampin' Up! UK Telford swap mini chocolate gift bag

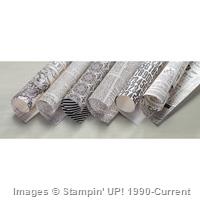
Aren’t they just adorable! I loved making them, although the Typeset Designer Series Paper is interesting to work with! Its a lovely thin weight, and acts a little bit like vellum when you score it. You have to keep a tight hold otherwise it has a habit of moving and shifting – resulting in wonky bags!

Measurements:

Designer Series Paper – 4 3/4 x 3 1/2″ (12 x 9 cm)

Score on the long side first with the print facing the right way at 1 3/8, 2 1/8, 3 1/2 and 4 1/4″ (1, 4.5, 6.5 ad 10 cm)

Score on the short side at 3/4″ (2 cm)

Cut the little rectangle from the bottom corner, and cut up the other score lines just to the horizontal score

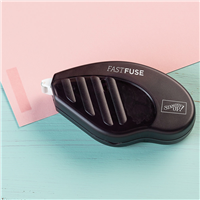
Use Fast Fuse to stick your bags together, applying the glue along the long thin edge. Then work out which side is the back (the one with the seam), fold in the bottom – sides first, then the back, then the front – applying Fast Fuse to the inside of the front flap.

Insert your chocolates

Use the 1/8″ Handheld punch to create a hole in the middle near the top.

Thread your ribbon from the inside through to the front, and then over the top and in through the back and through to the front. You should end up with both ends of the ribbon at the front.

Tie a bow! (I know, that makes it sound a whole lot easier than it is!)

Stampin' Up! Telford swaps basket

I couldn’t leave you without showing you my swaps basket (it doubles as my Bargain Basket!), don’t they look cute!


Shop Now button-001Join my team button-001

To purchase any of the items featured in my projects please use the links above. To join my team of Stampin’ Friends select ‘Join My Team’ or send me a message!

Please support StampinByHannah by using the Hostess code featured in the top right hand of my blog. For orders of over £150 please do not use this code, as you are entitled to your own Hostess benefits!

Sign up to my newsletter here – http://eepurl.com/2if59

Hannah Wilks

Stampin’ Up! UK Independent Demonstrator
Bottle Labels!

Before we get into the blog post today I want to remind you about the retiring list – I know that the Designer Series Paper I have used below is on this list – it may no longer be available, and I’m sorry if it’s not – but go and check out the bargains before its too late!


I regularly give bottles of wine away as gifts – particularly at the moment where I have some wonderful people running around doing fantastic things in preparation for the wedding (really not long to go now!) But a bottle of wine on its own is boring, so I had to put my own stamp (get it!) on it!

Stampin' Up! UK wine gift tag

They are so simply to make (check out the video below!) and use a tiny piece of card stock, and an even smaller piece of Designer Series Paper, but they make such a difference to a boring bottle.

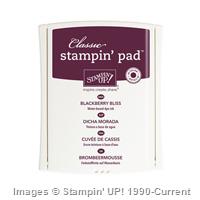
These ones use the 2014-2016 In Colours Blackberry Bliss and Hello Honey, and the now sadly retiring Moonlight Designer Series Paper stack. I really am sad to see this paper go, BUT I have seen the next Stampin’ Up! annual catalogue, and I have to say, the papers that are replacing Moonlight are AWESOME! Actually the whole catalogue is fantastic! Want to see it now? Join my team, and get to add some sneak peaks to your Starter Kit!

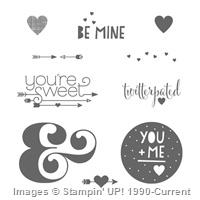
The stamps featured here are from You Plus Me, which really is Valentines day themed, however, I think the sentiments work well here (after all, that bottle of wine, that one, that one was mine!)

Measurements:

Card stock – 20 x 7 cm, score at 6.5 cm on the long side, and use a 1 3/8″ circle punch to make a whole in the smaller side.

Designer Series Paper – 13 x 6.5 cm


Shop Now button-001Join my team button-001

To purchase any of the items featured in my projects please use the links above. To join my team of Stampin’ Friends select ‘Join My Team’ or send me a message!

Please support StampinByHannah by using the Hostess code featured in the top right hand of my blog. For orders of over £150 please do not use this code, as you are entitled to your own Hostess benefits!

Sign up to my newsletter here – http://eepurl.com/2if59

Hannah Wilks

Stampin’ Up! UK Independent Demonstrator


Giant Tealights – a bag two ways

Last week I took a personal day, took myself off shopping – mainly for wedding things, shoes, honeymoon clothes, thank you presents, that sort of thing. But while I was out I stopped in at Ikea (I think I have a problem, I cannot just drive past, I have to go it, its like visiting an old friend!) and picked up a few items for my craft room. While I was there I had to stop in the Candle department, I love Ikea candles, its such a shame they’ve stopped doing the really big ones in glass pots though, instead I grabbed a pack of Giant Tealights, in Apple – or Wild Wasabi!

Stampin' Up! UK Ikea Giant Tealight Bag Video Tutorial

So, both bags are the same. But the Marina Mist version has been folded over near the top of the tealight inside, and the flap held closed by some now sadly retiring Chevron Ribbon. You can find out more about retiring products in my previous post. Whereas the Wild Wasabi version is held closed by one of the fabulous Clothespins (or pegs if your here in the UK!)

Measurements:

Designer Series Paper – 7 x 6″ (18 x 15 cm)

Score on the long side first at – 1, 3 3/8, 4 3/8 and 6 3/4″ (2.5, 8.5, 11 and 17 cm)

Score on the short side at – 1″ (2.5 cm)


Shop Now button-001Join my team button-001

To purchase any of the items featured in my projects please use the links above. To join my team of Stampin’ Friends select ‘Join My Team’ or send me a message!

Please support StampinByHannah by using the Hostess code featured in the top right hand of my blog. For orders of over £150 please do not use this code, as you are entitled to your own Hostess benefits!

Sign up to my newsletter here – http://eepurl.com/2if59

Hannah Wilks

Stampin’ Up! UK Independent Demonstrator
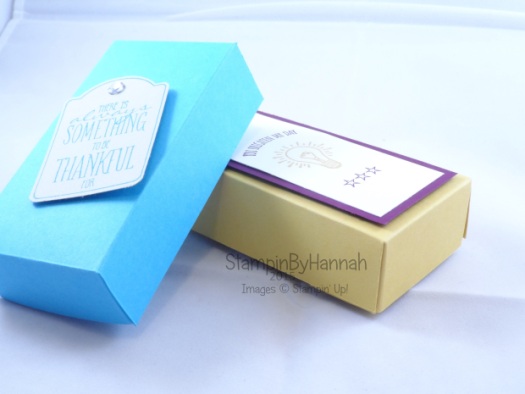
Ambassador’s Chocolate box! using Stampin’ Up! UK products – video Tutorial

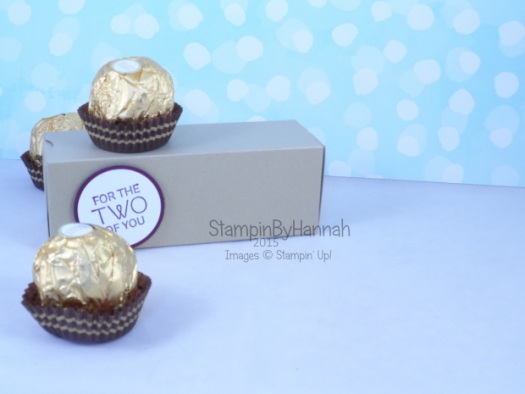
I love taking packaging as inspiration for handmade projects, a few weeks ago I was shopping with a friend and spotted a long thin box of chocolates, and just knew I had to buy it and re-create it. Now, that box wasn’t all that exciting, but using an existing box makes it much easier to re-engineer a box to fit the same items! So, the original box held 5 chocolates, my version holds 3, but I think 3 of these indulgent chocolates is enough!

Stampin' Up! UK Ferrero Rocher box chocolate video tutorial

I have made this box a few times now, with punched out sections, and designer series paper, but may favourite has to be this Brushed Gold version. The photo doesn’t do the colour of this cardstock justice, but I think I managed to capture the shine in the video.

I also grabbed one of the new wedding themed stamp sets from the Spring/Summer catalogue for the stamped sentiment – Your Perfect Day, punched out perfectly (pun intended) with the 1 1/4″ circle punch. I just love the look of these two punched layered on top of each other, the bottom layer is a 1 3/8″ circle punched from Blackberry Bliss cardstock (love that colour!)

Measurements:

Cardstock = 8 1/4 x 6 1/2″ (21 x 17 cm)

Score on the long side first at – 1/2, 2, 6 1/4 and 7 3/4″ (1 , 5, 16, and 20 cm)

Score on the short side at 1/2, 2, 3 1/2 and 5″ (1, 5, 9, 13 cm)

Measurements for Designer Series Paper:

4 pieces cut to 1 1/4 x 4″ (3 x 10 cm)

2 pieces cut to 1 1/4 x 1 1/4″ (3 x 3 cm)


Hannah Wilks

Stampin’ Up! UK Independent Demonstrator
If you like the project, or any of the products used, would like a catalogue, or to join my team, please contact me, or click on the ‘Shop NOW’ button at the top of the page. You can also find me on Twitter, Facebook, YouTube, Google+, About.me, and Tumblr (Links in the sidebar)

Sign up to our newsletter here – http://eepurl.com/2if59

Thank you for stopping by www.www.stampinbyhannah.co.uk today

x

Valentines Seam Bag

Valentines isn’t as big a holiday in the UK as it is in the USA – in fact it barely registers at all. I don’t think I have ever been out for a Valentines dinner, there are two reasons for that; first restaurants appear to increase their prices on this one night of the year, and that I have been at work for most of the Valentines since James and I have been together (I’m on nights this year, passion killer or what!)

So, instead of going all out, we tend to have a quite night in with a nice dinner during the week. This year I have a couple of little things to make this evening a little more special, including this little table gift.

Stampin' Up! UK stacked with love Valentines treat bags

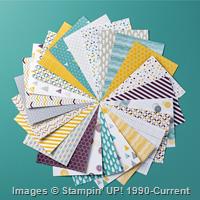
This bag uses the Stacked with Love Designer Series Paper Stack, a lovely selection of love themed papers in that lovely 6 1/2 x 4 1/2″ size, perfect for card fronts (and cute little bags!)

This DSP comes bundled with the You Plus Me stamp set, and I featured both as part of my February Techniques class.

Measurements:

DSP – 6 1/2 x 4 1/2″

Score the long side at 2 3/8″ and 4 1/8″

Score on the short side at 1 3/8 and 3 1/8″

I have also used the Sweetheart Punch, You Plus Me and Itty Bitty Accents Punch Pack.


Hannah Wilks

Stampin’ Up! UK Independent Demonstrator
If you like the project, or any of the products used, would like a catalogue, or to join my team, please contact me, or click on the ‘Shop NOW’ button at the top of the page. You can also find me on Twitter, Facebook, YouTube, Google+, About.me, and Tumblr (Links in the sidebar)

Sign up to our newsletter here – http://eepurl.com/2if59

Thank you for stopping by www.www.stampinbyhannah.co.uk today

x

Mini Egg Basket

Ok, so I have a confession to make. I am a chocoholic! and seeing as I am currently on the biggest Wedding diet of the Century my chocolate intake is very very limited! So, I’m making boxes and bags to put chocolate in instead! lol, have to get my fix somewhere!

So, this is my Mini-Egg basket

Stampin' Up! UK Mini Eggs Basket Easter Sale-a-bration

It’s it cute! I love it! Not only is it adorable in the Best Year Ever Designer Series Paper (part of Sale-a-bration) but its super quick to make, AND they fold flat for storage! awesome!

Measurements:

Designer Series Paper = 6 x 5″

Score on the long side at – 1/2, 1, 2 1/2, 3 1/2, 5 and 5 1/2″

Score on the short side at – 1 and 4″

To enable this basket to fold flat you need to create some extra score lines. Holding the paper with the long side at the top, fold the two horizontal scores in wards. The two score lines in the centre need to fold to meet the score lines you have just folded. The video shows this better than I can explain it.


The basket when assembled holds 6-9 Mini Eggs, yum!


Hannah Wilks

Stampin’ Up! UK Independent Demonstrator
If you like the project, or any of the products used, would like a catalogue, or to join my team, please contact me, or click on the ‘Shop NOW’ button at the top of the page. You can also find me on Twitter, Facebook, YouTube, Google+, About.me, and Tumblr (Links in the sidebar)

Sign up to our newsletter here – http://eepurl.com/2if59

Thank you for stopping by www.www.stampinbyhannah.co.uk today

x

Stampin’ Up! Chocolate Box!

Hope everyone is having a great week! Inspiration struck me last week whilst be very naughty and stuffing my face full of chocolate (supposed to be on a diet …. its not going well!). I just loved the dimensions of the box the chocolates came in, however, it was far to big to make from a sheet of 12 x 12, so I set about making a smaller version, and here it is!

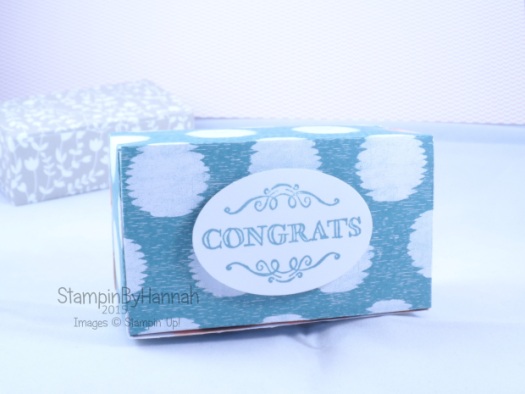
Stampin' Up! UK Chocolate box Simply Wonderful Sale-a-bration

Its a lovely box, and although I designed it for chocolates I didn’t have any on hand when filming the tutorial, so I filled it with sweeties instead!

The original version used the Something Borrowed Designer Series Paper but its currently on back order 🙁 which is a shame as it is so beautiful, So I swapped it for a piece of the Sweet Dreams designer series paper instead. I think this DSP is great! It forms part of the Baby Suite (see page 39 of the Spring Summer catalogue) and it does have some baby themed accessories, however, the papers themselves are a lovely selection of generic patterns. One side uses boy colours – Lost Lagoon, Basic Gray – while the other side features more girly hues – Crisp Cantaloupe and Hello Honey.

The stamp is from Simply Wonderful, one of the sets available as part of Sale-a-bration! I love the coordination of Sale-a-bration products this year, not only do we have stamps, papers and accessories that coordinate with each other, but we also have stamp sets that are great used with some of the punches in the annual catalogue! This set in particular works great with the Extra-Large Oval punch, and the Decorative Label punch too!

Measurements:

Cardstock (or Designer Series Paper) – 12 x 5 3/4″ (30.5 x 14.5 cm)

Score on the long side at – 1, 4 1/2, 6 1/2 and 10″ (2.5, 11.5, 16.5 and 25.5 cm)

Score on the short side at – 2, 3 1/4 and 5 1/4″ (5, 8.5 and 13 cm)


Hannah Wilks

Stampin’ Up! UK Independent Demonstrator
If you like the project, or any of the products used, would like a catalogue, or to join my team, please contact me, or click on the ‘Shop NOW’ button at the top of the page. You can also find me on Twitter, Facebook, YouTube, Google+, About.me, and Tumblr (Links in the sidebar)

Sign up to our newsletter here – http://eepurl.com/2if59

Thank you for stopping by www.www.stampinbyhannah.co.uk today

x

Stampin’ Up! Soap Box!

I think I made this box originally about 6 months ago, and since then it has been sat looking very sad in my prototypes box! That is until now!

This past couple of weeks have been pretty tough going actually, I’ve had an awful cold and have felt utterly rubbish, and so when it came time to prep for this weeks worth of blog projects I had nothing! So, out came my trusty prototypes box and this project leapt out at me! Thank god for being really productive a couple of months ago! (I actually think I might have designed this one whilst waiting for my Stampin’ Up! Starter kit, so actually its more like 8 months ago!)

Stampin' Up! UK How to make your own soap box

Isn’t it cute! and I’ve finally managed to make something in both Imperial and Metric Measurements! Yay!

So, that stamp set – its a Sale-a-bration Freebie! for more information about how to get Sale-a-bration items, just click HERE!

The Imperial Box uses Hello Honey as the box, with a piece of Blackberry Bliss, and some Whisper White. While I used Tempting Turquoise for my video version!

Measurement:

Cardstock – 12 x 4″ (30 x 10 cm)

Score on the long side at 1, 2, 6, 7, and 11″ (2.5, 5, 15, 17.5 and 27.5 cm)

Score on the short side at 1 and 3″ (2.5 7.5 cm)


Hannah Wilks

Stampin’ Up! UK Independent Demonstrator
If you like the project, or any of the products used, would like a catalogue, or to join my team, please contact me, or click on the ‘Shop NOW’ button at the top of the page. You can also find me on Twitter, Facebook, YouTube, Google+, About.me, and Tumblr (Links in the sidebar)

Sign up to our newsletter here – http://eepurl.com/2if59

Thank you for stopping by www.www.stampinbyhannah.co.uk today

x

Salted Caramel Bag – Video Tutorial

I got this bag as part of a Christmas gift; it originally contained Salted Caramel (hence the title!), and I loved the shape so much I just had to recreate it.

I have to say now, that this bag is a little awkward, mainly due to some strange score lines, but I hope that the video will explain all.

Stampin' Up! UK large gift bag StampinByHannah

I used the lovely Sweet Taffy Designer Series Paper from the annual catalogue for this gift bag, with stamping using the Petal Potpourri and Something Wonderful (Sale-a-bration item!).

Measurements –

Cardstock = 12 x 11 1/2″ (30.5 x 29 cm)

Score on the long side at – 2 and 9″ (5 and 22.5 cm)

Score on the short side at – 2, 5 1/2, 7 1/2, 11″ (5, 14, 19, 28 cm)

Then turn the cardstock back so that the long side is at the top, with the 2″  (5 cm) score line on the left and score at 5″(12.5 cm) – but only between the narrow score lines.

The back on the short side score at 1″ and at 6 1/2″ (2.5 and 16.5 cm) but stop about 1″ about the 5″ score line (down 15 cm). At the end of these score lines, score triangles.

Stamped cardstock – 6 1/4 x 3″ (16.5 x 7.5 cm)

Layer – 6 1/2 x 3 1/4 (17 x 8 cm)

PS: Sorry I’m so snuffly in the video – I thought this cold had packed its bags and was leaving, but then it turned around and came back! *off to lie on the sofa!*


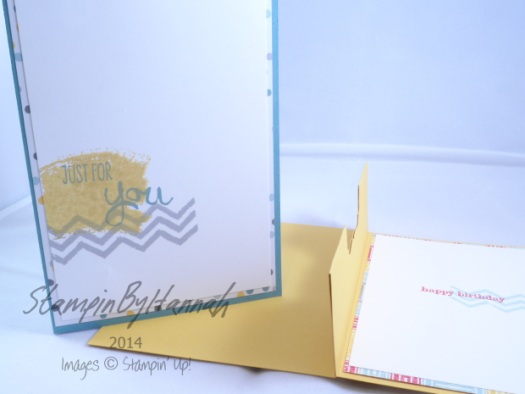
Fancy Fold Friday – Pop-up Gift Card Card Tutorial!

Ok, so before I start, I give Michelle Last full credit for this project, I just think its awesome and HAD to share! (HERE is her version)

Stampin' Up! UK Pop up gift card card

This gift card holder (or gift card card if you will) is super cool! I used this design to hold all the gift cards we gave as Christmas gifts.

Measurements:

Cardstock – 5 3/4″ x 11 3/4″ (14.8 x 29.7cm)

Fold the card in half, and score both ends at 4 1/8″ (10.5cm)

Designer Series Paper – 5 5/8 x 4″ (14.3 x 10 cm)

Whisper White – 5 3/8 x 3 3/4″ (13.8 x 9.5 cm)


I have finished my version with stamping from Work of Art and Something to Say Stamp sets, in the 2014-2016 In-Colours.


Hannah Wilks

Stampin’ Up! UK Independent Demonstrator
If you like the project, or any of the products used, would like a catalogue, or to join my team, please contact me, or click on the ‘Shop NOW’ button at the top of the page. You can also find me on Twitter, Facebook, YouTube, Google+, About.me, and Tumblr (Links in the sidebar)

Sign up to our newsletter here – http://eepurl.com/2if59

Thank you for stopping by www.www.stampinbyhannah.co.uk today

x