Watercolour Week | Faux Watercolouring With Watercolour Wings

Faux Watercolour technique featuring Watercolour Wings from Stampin' Up! UK

I hope you have enjoyed this week of Watercolour, I have LOVED making the samples this week!

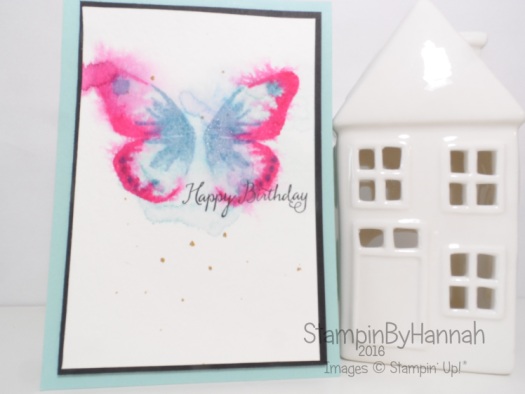
This final card is a bit of a cheat though – Faux Watercolouring. I know, it sounds silly, but just take a look…

Faux Watercolour technique featuring Watercolour Wings from Stampin' Up! UK

This is so super simple! It doesn’t even require a brush!

Watercolour Wings is awesome, and I am so pleased that it is with us for another year too. The idea of this stamp set is that you are able to layer different inks and create a watercolour effect butterfly (Faux watercolouring in itself!) however, there is a massive trend around at the moment of sort of running watercolour, where the paint has run. Which is what I have done here. The butterfly is stamped in 3 layers; Pool Party, Marina Mist and Melon Mambo. After each layer the Watercolour paper was spritzed with water and dried with a Heat Tool to create these runs of ink and hard edges. So pretty!

The sentiment is taken from Balloon Celebration and the card is finished with a splatter of Gold Wink of Stella and some Clear Wink of Stella on the centre of the butterfly.


Code Club Stampin Up!


Product List


Shop Now button-001Join my team button-001

To purchase any of the items featured in my projects please use the links above. To join my team of Stampin’ Friends select ‘Join My Team’ or send me a message!

Please support StampinByHannah, and join my Code Club, by using the Hostess code featured in the top right hand of my blog. For orders of over £150 please do not use this code, as you are entitled to your own Hostess benefits!

Sign up to my newsletter here – http://eepurl.com/2if59

Hannah McCurley

Stampin’ Up! UK Independent Demonstrator

Make It Monday | Watercolour Wash

Make It Monday Watercolour Wash video tutorial

Make It Monday with Stampin' Up!

I did it! I finally got round to making another video tutorial for a Make It Monday! Yay!

This week here at StampinByHannah I have a heap of projects using Watercolour to share with you. I love watercolour, I love playing with inks and getting a little messy, creating one off pieces and generally having fun with ink! Yesterday I attended a Team Training day (more on that coming this week, but I will admit that this blog post was written last week!) and held an inspiration station based around watercolouring, so I have a mountain of samples to share with you, featuring a range of watercolouring techniques. But I thought I would keep it simple for Monday, and demonstrate a watercolour wash

Make It Monday Watercolour Wash video tutorial

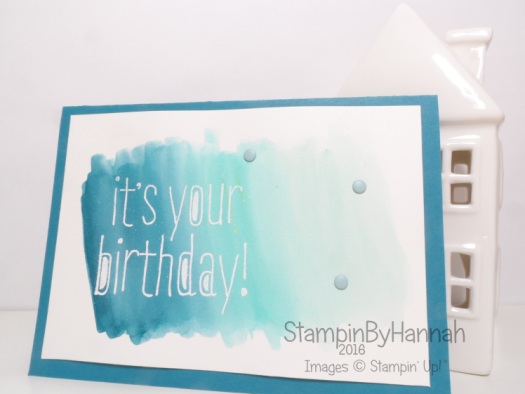
This was my original card, and the wash here is in Island Indigo, Bermuda Bay and Pool Party, super pretty. This card would be perfect for a masculine birthday and so the sentiment it taken from Big News and has been heat embossed in white.

The key to an effective watercolour wash for me is to use an Aqua-Painter. I tend to prefer a traditional paint brush when watercolouring images, but for a wash like this one, the Aqua-Painter really comes into it own. The great thing about an Aqua-Painter is that the handle of the brush is full of water, which comes out onto your paper via the bristles of the brush which means that as you ‘wash’ over your card stock with the brush more water feeds out, diluting your ink further and giving you a super easy ombre effect.

Stampin' Up! UK Watercolour Wash Video Tutorial Thank you card

Now for these cards as the colour starts to fade on your wash, I have added in a different colour to create a gradient and multi-colour wash. As usual there are no rules here, you could use just one colour or you could create a whole rainbow, who says you stick to just blues!


Don’t forget to shop using the Code Club Code to receive some great FREE product!

7AXEMZNA

I will be closing this order on the 30th April 2016


Product List


Shop Now button-001Join my team button-001

To purchase any of the items featured in my projects please use the links above. To join my team of Stampin’ Friends select ‘Join My Team’ or send me a message!

Please support StampinByHannah, and join my Code Club, by using the Hostess code featured in the top right hand of my blog. For orders of over £150 please do not use this code, as you are entitled to your own Hostess benefits!

Sign up to my newsletter here – http://eepurl.com/2if59

Hannah McCurley

Stampin’ Up! UK Independent Demonstrator

Butterfly Basics Week – Watercolour

Stampin' Up! UK Butterfly Basics Watercolour Birthday Card

Butterfly Basics is one of my favourite stamp sets from this years Annual catalogue (actually it was in last years Spring/Summer too!) It can be found on Page 124, and is in the Artistic Expression section. Although it was designed for Stamp Layering the flower image is great for a simple watercolour

Stampin' Up! UK Butterfly Basics Watercolour Birthday Card

The big key to watercolouring your stamped images is using the right ink to stamp with. I’ve used Archival Basic Black ink here as it is water-resistant, but you could also use Stazon. Memento is great for using with your alcohol markers but as it is water-based tends to run and bleed when used with watercolouring.

When watercolouring an image like this I smoosh my ink pad onto a large clear block and add some drops of water either from an Aquapainter or spritzer. I’m not great with an aquapainter (yet) so stick with my trusty paint brush. My current fav is a Soft grip number 5 round brush from Royal and Langnickels Crafter’s Choice range, which I only bought because they are purple! When watercolouring a small-ish image like this one I prefer to keep my brush quite dry with more ink that water which is why I prefer a brush rather than an Aquapainter because that way I have more control

Stampin' Up! UK Butterfly Basics Week Birthday cardSo, my colour choices here are Pear Pizzazz, Crushed Curry and Melon Mambo for the watercolour and ink splatter, with accent stamping and sentiment in Sahara Sand


Product List


Shop Now button-001Join my team button-001

To purchase any of the items featured in my projects please use the links above. To join my team of Stampin’ Friends select ‘Join My Team’ or send me a message!

Please support StampinByHannah, and join my Code Club, by using the Hostess code featured in the top right hand of my blog. For orders of over £150 please do not use this code, as you are entitled to your own Hostess benefits!

Sign up to my newsletter here – http://eepurl.com/2if59

Hannah McCurley

Stampin’ Up! UK Independent Demonstrator


Butterfly Basics Week – Make It Monday

Stampin' Up! UK Make It Monday Blender Pen colouring Butterfly Basics

Make It Monday with Stampin' Up!

Welcome to a whole week of posts focusing on Butterfly Basics. I LOVE this stamp set, its super pretty and great for a host of techniques including; watercolour, stamp layering, blender pens on vellum, and die cutting (seeing as it coordinates with TWO die sets!) and can be found on page 124 of the Annual catalogue in the Artistic Expression section. I love this part of the catalogue, its the run wild section for me, where you can find stamp sets specifically designed for techniques and where your imagination can run away with you.

Make It Monday Butterfly Basics Vellum Blender Pens

I know I did promise a video this week, but time ran away with me again – 3 shifts at work this week and then I’m off for 9 days! So, fingers crossed I get some filming done then!

Stampin' Up! UK Stamping on Vellum

So, today we are using our Blender Pens to colour on Vellum. I really enjoy this technique, and its a great way to introduce yourself to the joy of the blender pen! Blender pens contain a clear ‘ink’ that means that you can blend out the ink from your stamping, or use them to pick up coloured ink to colour an image. Blender pens work great on our Whisper White card stock, BUT you have to work fast, which is why I’ve used vellum today. Vellum is really slippy (non-porous) and ink takes much longer to dry on it, which makes it great for trying our your Blender Pens!

Stampin' Up! UK Blender Pens on Vellum

I’ve used my Stampin’ Write Markers today too. Scribble some marker onto a clear block and use the Blender Pen to pick up the ink – much less messy that doing the same with an ink pad!

Stampin' Up! UK Blender Pens Stampin' Write Makers Vellum Colouring

Ok, so after you have stamped your image onto the vellum (I’ve used our Archival Basic Black ink) allow the ink to dry and then turn the Vellum over. Then, using your blender pens, colour the reverse side of the image. I used four colours here; Wild Wasabi, Always Artichoke, Bermuda Bay and Crushed Curry.

Stampin' Up! UK Vellum tips and tricks

Because ink takes so long to dry on Vellum I used my Heat Tool to speed up the process. But you have to be super careful when heating Vellum that it doesn’t burn, use the first setting on the Heat Tool and keep taking the Vellum out of the heat every few seconds. The ink will dry much quicker this way.

Stampin' Up! UK Vellum Birthday Card

Time for some finishing touches. Attaching Vellum to card stock can be tricky. I’ve used Fast Fuse here, because its clear and I’m attaching the Vellum to Whisper White Card stock it is easily hidden under the stamping. Stampin' Up! UK Make It Monday Blender Pen colouring Butterfly Basics

The bow clip in the top corner helps to keep the free edge tidy, and I’ve added some Gold Wink of Stella to the flower to mirror the Gold in the Clip

Stampin' Up! UK Butterfly Basics Birthday Card

What do you think? I love the soft colours you get when you colour on the reverse of the Vellum. You could just as easily colour the front, you just get more vibrant colour

Thanks for stopping by for this weeks Make It Monday, check back tomorrow for another card made using the Butterfly Basics Stamp set!


Don’t forget to shop using the Code Club Code to receive some great FREE product!

7AXEMZNA

I will be closing this order on the 30th April 2016


Product List


Shop Now button-001Join my team button-001

To purchase any of the items featured in my projects please use the links above. To join my team of Stampin’ Friends select ‘Join My Team’ or send me a message!

Please support StampinByHannah, and join my Code Club, by using the Hostess code featured in the top right hand of my blog. For orders of over £150 please do not use this code, as you are entitled to your own Hostess benefits!

Sign up to my newsletter here – http://eepurl.com/2if59

Hannah McCurley

Stampin’ Up! UK Independent Demonstrator

Masked Ink Blending

Stampin' Up! UK Butterfly Basics Birthday Card

Hello there! Firstly, I have to apologise for the lateness of this post, I really don’t know what is happening to me at the moment but my energy is at an all time low. After hosting my monthly Card Class last night, I just could not get motivated to move this morning!

The card I’m sharing today has been working its way out of my brain since I checked the Global Design Project Blog on Monday, I’m just glad I got to make it before the challenge closed!Global Design Project Sketch Challenge 30I always enjoy a sketch challenge, but this card formed in my head (after I’d checked the Global Design Project Blog) but I didn’t put the 2 together until yesterday.

Stampin' Up! UK Global Design Project Butterfly Basics

Now, trying to photograph a mainly white card is tricky, I hope you can forgive my slightly shaky skills.

At class last night the ladies were working through the current Annual catalogue working out their orders and someone mentioned that they loved this stamp set. I have to admit that my copy has been gathering dust slightly over the past few months, but it is definitely one of my all time favourites, I’m not sure if its the font, or the fern, or those flowers, or the fact that it coordinates with two die sets, but I love it!

Stampin' Up! UK Butterfly Basics Birthday Card

Ok, So the sentiment is from Butterfly Basics, and is stamped in Blackberry Bliss (retiring soon!). After the ink was dry, I used a 1″ strip of sticky note tape as a mask and covered that sentiment, before ink blending over the sentiment with Sahara sand ink and my sponge. I love this technique at the moment, I get to get all inky but I still get to see sharp white on my card!

The butterfly is die cut from Pear Pizzazz card stock, and the card is finished with 3 dots of Gold Glimmer paper punched with the 1/4″ and 1/8″ handheld punches (the same as I did on this card earlier in the week!)

Thanks for checking out my blog today, and I will be back soon with another card featuring this awesome stamp set!


Don’t forget to shop using the Code Club Code to receive some great FREE product! 

7AXEMZNA

I will be closing this order on the 30th April 2016


Product List


Shop Now button-001Join my team button-001

To purchase any of the items featured in my projects please use the links above. To join my team of Stampin’ Friends select ‘Join My Team’ or send me a message!

Please support StampinByHannah, and join my Code Club, by using the Hostess code featured in the top right hand of my blog. For orders of over £150 please do not use this code, as you are entitled to your own Hostess benefits!

Sign up to my newsletter here – http://eepurl.com/2if59

Hannah McCurley

Stampin’ Up! UK Independent Demonstrator
Make It Monday | Layering Stamps

Stampin' Up! UK Stamp Layering Birthday Card

Make It Monday with Stampin' Up!

Hello! Welcome to another edition of Make It Monday! I was hoping to have another video for you this week but alas I completely ran out of time. Thinking of making a 3D project for next week though, so I will certainly film that.

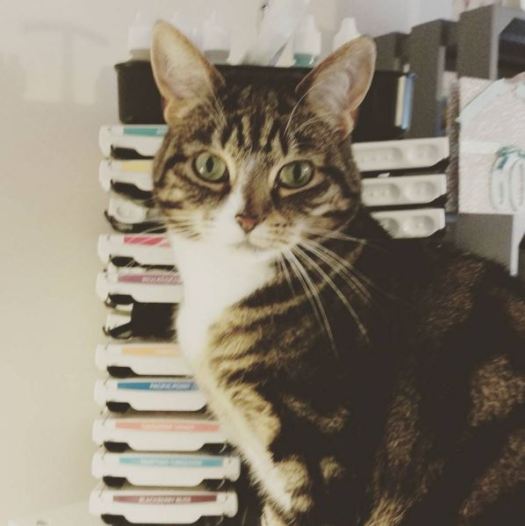
This past few weeks have been hella stressful (nothing new there then!) with my hectic new job, unwell relatives, James starting back at university, and the end of Sale-a-bration I haven’t had a whole heap of time to craft. So I was overjoyed when James said he was working on Saturday morning – time to get my backside back in that craft room! You will see what I made in my Saturday morning craft session later on in the week, I had heaps of ideas for cards that I have been sat on for weeks, but trying to come up with an idea for Make It Monday was a struggle. I did however have a glamorous assistant!

Freda

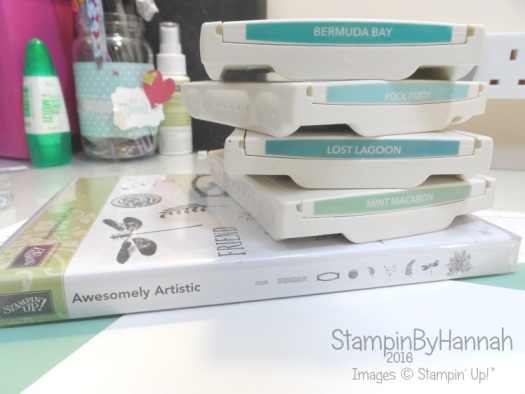
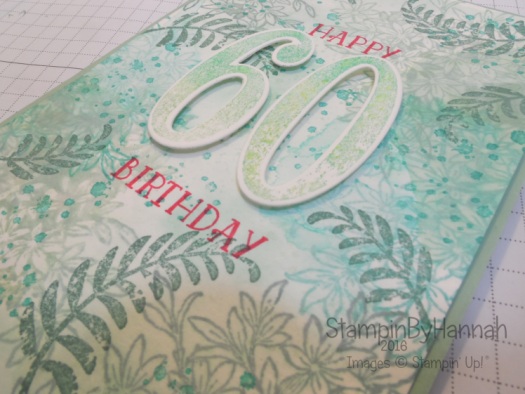
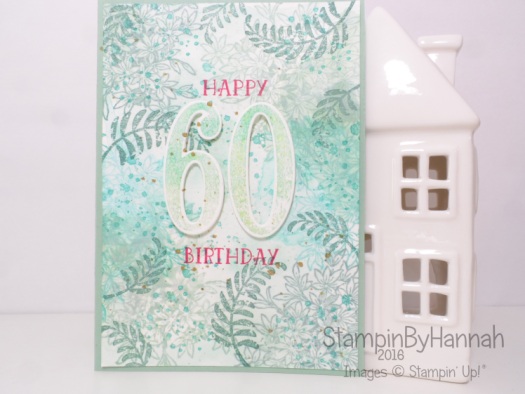
I did what I always do when I’m struggling for inspiration – I grabbed a random stamp set off the shelf and pull out a pile of inks. I knew I wanted to use Watercolour Paper, but that was about as fair as I got in planning! Stampin' Up! UK Awesomely Artistic Stamp Layering

So, this was my jumping off point. As I have discussed on the blog before I love getting really inky, and adding heaps of ink and water to this piece of Watercolour paper seemed like a good idea, at the end of the day most of my crafting is a bit of an experiment anyway!

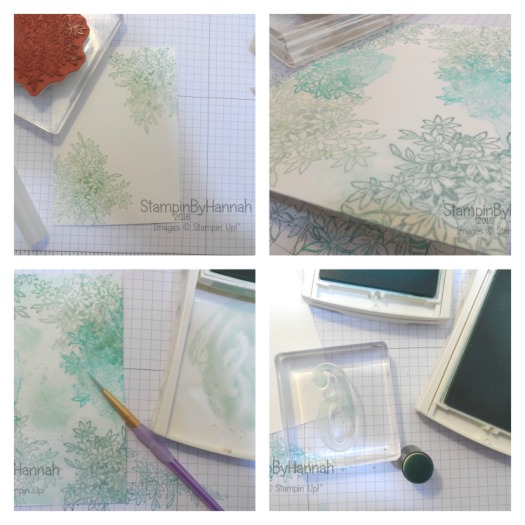
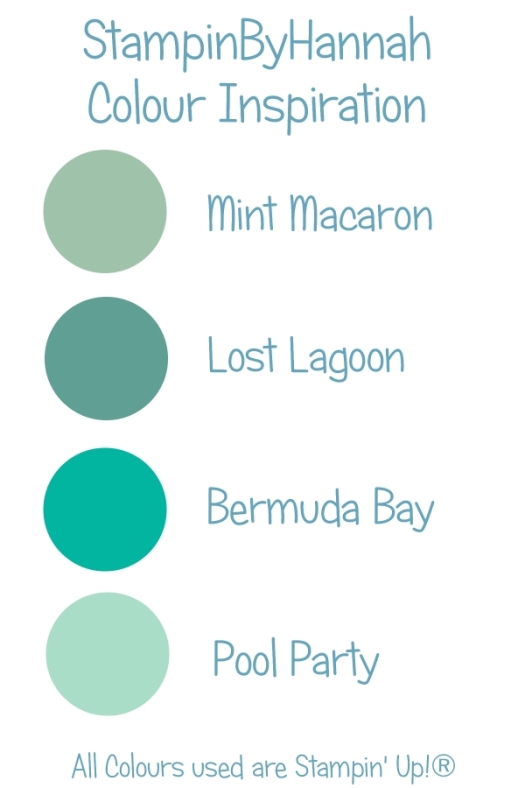
I set about creating a background on my piece of Watercolour paper, adding a boarder of that gorgeous foliage stamp from Awesomely Artistic in Mint Macaron, Bermuda Bay and Lost lagoon, adding several spritzs’ of water after each stamping and using my Heat Tool to dry everything off. Once the boarder was stamped I grabbed for my Aquapainter and hit the centre of the Watercolour Paper with more ink and water, and finally splattering ink all over the place!
Stampin' Up! UK Make it monday Stamp Layering

Stamp Layering is a super quick and easy technique, we have stamp sets designed just for this technique (ones with lots of smaller images are great, as are floral and foliage type stamps). So once I had my background dry I then added another layer of stamping in Lost Lagoon and Bermuda Bay using the fern stamps and that fabulous little splatter stamp!

At this point I have to admit, I had no idea what the hell this card was going to be used for! But Birthday seemed like a good idea, I am loving the Number of Years stamp set at the moment with those great number dies. These stamps are designed to look watercoloured, but if you add the ink to them with a Sponge Dauber (rather than the normal method of sticking the stamp in the inkpad) you can add multiple colours of ink and create a great blended effect. These numbers are inked in Mint Macaron and Bermuda Bay and spritzed with water before stamping.

Stampin' Up! UK Awesomely Artistic Number of Years Birthday Card

It still needed a little something, a little something sparkly – Wink Of Stella in Gold! Lovely

Stampin' Up! UK Stamp Layering Birthday Card

Ok, So, time for a challenge –  I would love to see what you create with either the technique or these colours! Leave a link in the comments below and I will select one winner to receive this card and a Gold Wink of Stella Brush!

Stampin' Up! UK Colour Inspiration Color Combination Stampinbyhannah

Entries will close at 06:30AM BST on 11th April 2016 (Thanks when the next Make It Monday will go live!) and I will select a winner and contact them in due course

Good Luck!


Product List


Shop Now button-001Join my team button-001

To purchase any of the items featured in my projects please use the links above. To join my team of Stampin’ Friends select ‘Join My Team’ or send me a message!

Please support StampinByHannah, and join my Code Club, by using the Hostess code featured in the top right hand of my blog. For orders of over £150 please do not use this code, as you are entitled to your own Hostess benefits!

Sign up to my newsletter here – http://eepurl.com/2if59

Hannah McCurley

Stampin’ Up! UK Independent Demonstrator

Happy Birthday Husband

Stampin' Up! UK Mans birthday card Guy Greetings

It was James’ birthday on Good Friday, but what with the end of Sale-a-bration rearing its head I didn’t get around to posting the card until now.

James is always very supportive of my card making, but I think he gets a little nervous when it comes time for me to make a card for him. James is a manly sort of bloky sort of fellow, he doesn’t do flowers or pink or ribbon or anything remotely feminine at all (I am solely responsible for anything remotely ‘homely’ in our house, he would have a sofa and a fridge and a TV and call it home!) so cards aren’t really something he would spend time or effort in choosing, let along making for anyone!

Stampin' Up! UK Mans birthday card Guy Greetings

I love creating super simple cards for James. He has started to make cards for me (just because he knows I like a handmade card) and always goes to town on ink blending and punches, he actually bought his own card blanks because he was too scared to touch my card stock (rightly so!). So, when it comes to make a card for James I like to keep things simple, in the hope that one day he might calm down on the ink and punches!

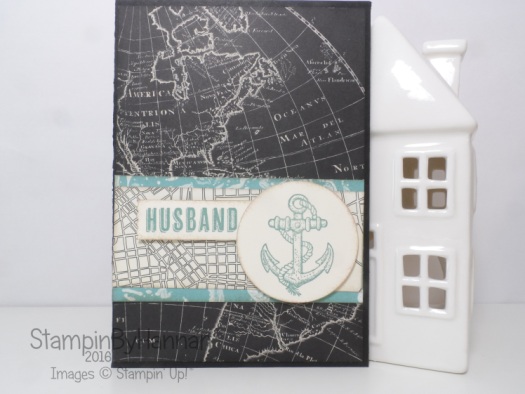
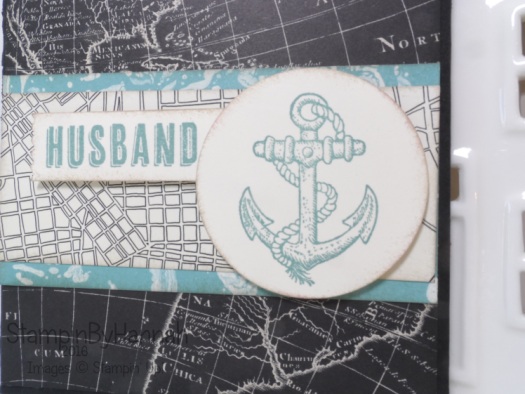
Anyway, this card features the stamp set Guy Greetings and Going Places Designer Series Paper. I love the travel theme of this paper, its a full stack of 6 x 6 papers printed with maps and street plans, along with some great marble type prints – all of which are great for guys.

Stampin' Up! UK Guy Greetings Going Places Designer Series paper

‘Husband’ fits perfectly into the Washi Label punch, while I grabbed my Circle collection framelits and my big shot for the anchor. Both stamps are from Guy Greetings and are stamped in Lost Lagoon. I remember a few years ago watching Shimelle Lane on YouTube create these great Scrapbook layouts using masses of Patterned Paper and she ALWAYS inked the edges to get the to ‘go together’ and I thought I would use the same technique here, so once I had all my pieces I grabbed out my Sahara Sand ink and a sponge and inked all the papers – I love the effect

Even James said it loved it!

Success at last


Product List


Shop Now button-001Join my team button-001

To purchase any of the items featured in my projects please use the links above. To join my team of Stampin’ Friends select ‘Join My Team’ or send me a message!

Please support StampinByHannah, and join my Code Club, by using the Hostess code featured in the top right hand of my blog. For orders of over £150 please do not use this code, as you are entitled to your own Hostess benefits!

Sign up to my newsletter here – http://eepurl.com/2if59

Hannah McCurley

Stampin’ Up! UK Independent Demonstrator
One Layer Birthday

Stampin' Up! UK One Layer Birthday Card

My crafty mojo is still missing, and so I’m still sharing the stack of cards that have been abandoned on my desk. Stampin' Up! UK One Layer Birthday Card

This card was made purely to test out a colour combination. I do this quite often, make a quick card or panel in a couple of colours to see how well it works. I love the simplicity of this card, one layer is something I just don’t do, but I might have do start doing more often.

The stamps are from Perpetual Birthday Calender and Rose Wonder, the colours are Mint Macaron, Watermelon Wonder and Blushing Bride

Stampin' Up! UK One layer Birthday card perpetual birthday

However, once I had ‘finished’ it was a  little too simple, and so I added a splatter or Wink of Stella in Gold, and a trio of Crystal Effects spots.


April Class Ad


Product List


Shop Now button-001Join my team button-001

To purchase any of the items featured in my projects please use the links above. To join my team of Stampin’ Friends select ‘Join My Team’ or send me a message!

Please support StampinByHannah, and join my Code Club, by using the Hostess code featured in the top right hand of my blog. For orders of over £150 please do not use this code, as you are entitled to your own Hostess benefits!

Sign up to my newsletter here – http://eepurl.com/2if59

Hannah McCurley

Stampin’ Up! UK Independent Demonstrator

Irresistible Birthday

Stampin' Up! UK Colour me irresistible boys birthday card

Over the next month I’m planning a series of cards purely for the guys in your life. We all struggle with cards for our husbands, sons, dads etc. for me the key is keeping things simple.

Stampin' Up! UK Colour me irresistible boys birthday card

I sent this card to my brother for his birthday last month, it was super quick and simple to make, mostly thanks to Stampin’ Up!®

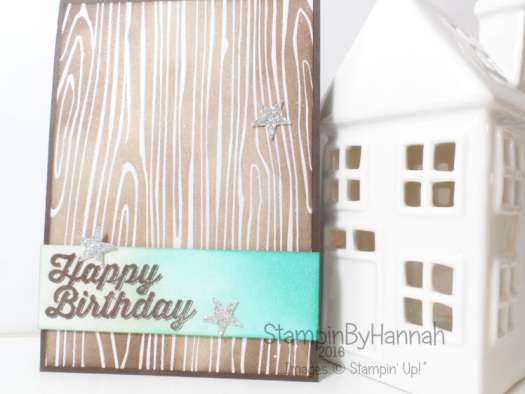
The main focus of this card is the Colour Me Irresistible Designer Series Paper (LOVE!) which comes in 12 x 12 sheets of white card stock with a resist pattern, as well as some sheets that are pre-coloured. This card uses a white sheet with a woodgrain resist, that I have inked with my Stampin’ Sponges in Chocolate Chip and Early Espresso to create a realistic wood effect.

Stampin' Up! UK boys birthday cardI grabbed for my sponges again for the sentiment strip blending Mint Macaron and Bermuda Bay, adding a Happy Birthday from the Perfect Pairings stamp set (free during Sale-a-bration!).


Don’t forget to shop using the Code Club Code to receive some great FREE product! 

43TCF4SH

I will be closing this order on the 29th March 2016


Product List


Shop Now button-001Join my team button-001

To purchase any of the items featured in my projects please use the links above. To join my team of Stampin’ Friends select ‘Join My Team’ or send me a message!

Please support StampinByHannah, and join my Code Club, by using the Hostess code featured in the top right hand of my blog. For orders of over £150 please do not use this code, as you are entitled to your own Hostess benefits!

Sign up to my newsletter here – http://eepurl.com/2if59

Hannah McCurley

Stampin’ Up! UK Independent Demonstrator

Happiest of Birthdays to you!

Stampin' Up! UK Birthday Blooms Card

I have loved showing my March class cards with you all! Have you booked your place at my April card class yet? check out my Card Class page for all the details

Stampin' Up! UK Birthday Blooms Card

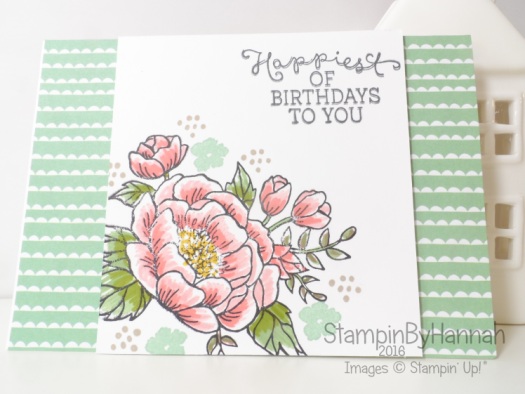
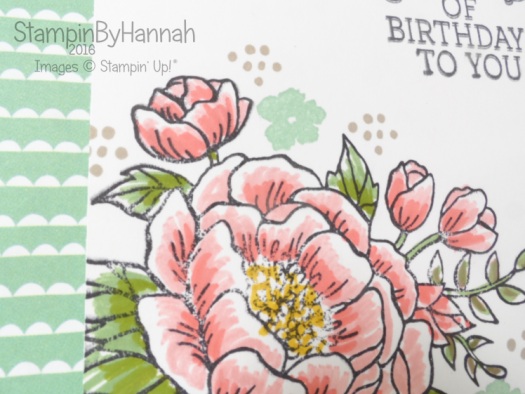
This was my favourite card to make, just because I got to colour the flower (again!) but using Stampin’ Write Markers. Now, I tend to use my markers to stamp with rather than colour, as they don’t blender well – however, I have embraced the lack of blending here love the effect.

Stampin' Up! UK Card Class Teesside

Sorry for such a short post, but I’ve been super busy preparing for the Simply Sketched Saturday Blog Hop and a super special project.

See you again soon!


April Class Ad


Product List


Shop Now button-001Join my team button-001

To purchase any of the items featured in my projects please use the links above. To join my team of Stampin’ Friends select ‘Join My Team’ or send me a message!

Please support StampinByHannah, and join my Code Club, by using the Hostess code featured in the top right hand of my blog. For orders of over £150 please do not use this code, as you are entitled to your own Hostess benefits!

Sign up to my newsletter here – http://eepurl.com/2if59

Hannah McCurley

Stampin’ Up! UK Independent Demonstrator