Pinkies Blog Hop | Shadow Box Card

Pinkies Team Blog Hop using Christmas Pines from Stampin' Up! UK

blog hop logo (1)Thank you for joining us on another Pinkies Blog Hop! We’re showcasing lots of gorgeous projects using products from the new Stampin’ Up!® Autumn/Winter Seasonal Catalogue. Simply use the buttons at the end of each post to keep hopping!

Wow, I’m loving this new Autumn / Winter catalogue, there are just so many great products and ideas. I thought I would make a special card for the Pinkies Blog Hop this time. I’m usually a pretty simple card maker, but this style of card has caught my eye recently (during my hours of scrolling through Pinterest!) and I just had to have a go at making my own!

Christmas Pines Shadow Box Card using Stampin' Up! UK Products

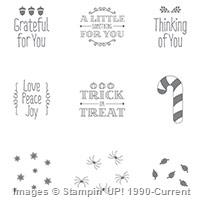
My favourite bundle in this years catalogue is Christmas Pines; I just love the collection of sentiments and the fabulous detailed die cuts. I will admit that you will be seeing a whole lot of this stamp set in the coming weeks, but that’s a story for another day!

Pinkies Team Blog Hop using Christmas Pines from Stampin' Up! UK

Measurements:

Card base: Basic Black card stock, 10.5 x 22 cm, scored on the long side at 10.5 and 11.5 cm. You will also need a piece of card stock that measures 6.5 x 6.5 cm

Using the scoring blade on you Stampin’ Trimmer, draw a square on the front of your card base; line up the card stock at 2 cm and score from 2 cm down to 8.5 cm – do this on all 4 sides of the card front.

Using a ruler, draw  diagonal lines from corner to corner of the square you have just created. The use these lines as a guide to score another square 1 cm smaller than the previous. You should now have one square inside the other. Then, using a ruler and a  craft knife, cut along the diagonal lines. Fold on the score lines, creating your shadow area in the middle of your card.

For this card, I stamped and heat embossed the sentiment on the 6.5 cm x 6.5 cm card stock using the new Emerald Envy Glitter Stampin’ Emboss powder before adhering it to the centre of the card.

Christmas Card Shadow Box using Christmas Pines from Stampin' Up!

The problem with this style of card is that it doesn’t fit or fold flat into a standard envelope. So I have also created a box for it to go in.

Measurements:

Box Base; 14 x 14 cm, scored on all four sides at 1.5 cm

Box Lid; 13.2 x 13.2 cm, scored on all four sides at 1 cm.

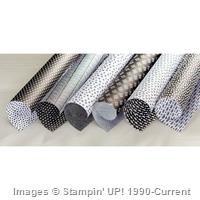
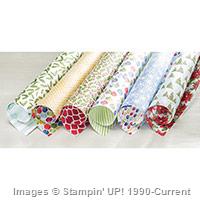
Both the card and the box are finished with the Presents and Pinecones Designer Series Paper and die cuts from the Christmas Pines bundle.

Thanks so much for stopping by, check out Anna’s blog and her fabulous projects by using the Next button.

nextprevious


September Stamp of the Month Club Online Card Class using Merriest Wishes from Stampin' Up! UK


Shop Now button-001Join my team button-001

To purchase any of the items featured in my projects please use the links above. To join my team of Stampin’ Friends select ‘Join My Team’ or send me a message!

Please support StampinByHannah, and join my Code Club, by using the Hostess code featured in the top right hand of my blog. For orders of over £150 please do not use this code, as you are entitled to your own Hostess benefits!

Sign up to my newsletter here – http://eepurl.com/2if59

Hannah McCurley

Stampin’ Up! UK Independent Demonstrator

Team Gifts

Hello Team Member Card using Pop of Paradise from Stampin' Up! UK

I love spoiling my new Team Members, and always send out a special Welcome to the Team pack to each person that chooses me to become their Team Leader. My ‘Welcome Pack’ always includes a card and usually a special little something from me, sometimes its a notebook, sometimes sweeties, but this month I’m sending products! I am LOVING the new In-Colours and so for those special people that join my team in June are all going to find some of the new Enamel Shapes in their goodie packs.

Hello Team Member Card using Pop of Paradise from Stampin' Up! UK

I have, of course, also made cards and gift bags to hold those Enamel shapes. The Flamingo comes from the Pop of Paradise stamp set, which coordinates with the Pop of Pink Designer Series Paper that features on the card and the Gift Bag too. This gift bag was so easy to put together with the Gift Bag Punch Board, this one uses a piece of Designer Series Paper that measures 7 x 12″.

Gift bag punch board project using Pop of Pink from Stampin' Up! UK

It is so simple to join my team of Stampin’ Friends; you just have to buy the Stampin’ Up! starter kit. £130 worth of great Stampin’ Up! products for just £99, AND if you join during June you get to choose 2 stamp sets from the new Annual Catalogue for FREE! That is up to £92 of stamps – Awesome!

But what do you get once you have joined? Not only do you get a great custom Starter Kit, and a great team of instant Friends, but while you are a demonstrator you get at least 20% off all purchases, PLUS the chance to pre-order new products, attend Stampin’ Up! events AND have heaps of Stampin’ fun!

Pop of Pink Gift Bag Gift Bag Punch Board Stampin' Up! UK

Want to know more about joining my team of Stampin’ Friends, check out my Join My Team page or drop me an email! or you can join HERE!


Stampin' Up! joining June 2016


Product List


Shop Now button-001Join my team button-001

To purchase any of the items featured in my projects please use the links above. To join my team of Stampin’ Friends select ‘Join My Team’ or send me a message!

Please support StampinByHannah, and join my Code Club, by using the Hostess code featured in the top right hand of my blog. For orders of over £150 please do not use this code, as you are entitled to your own Hostess benefits!

Sign up to my newsletter here – http://eepurl.com/2if59

Hannah McCurley

Stampin’ Up! UK Independent Demonstrator

Simply Sketched Saturday Challenge | May 2016

Stampin' Up! UK Birthday Card English Garden

Stampin' Up! Sketch ChallengeIts that time again, I am so excited to see what everyone has made based on the sketch this month! I have chosen to use some Designer Series Paper that is on the retiring list and will sadly leave us on 31st May, but I am sure that some of the girls will show me some sneaky peaks of new products, and I cannot wait!

Simply Sketched Saturday Challenge May 2016

This months awesome Sketch is brought to us by Kathleen from lilypopcrafts.

Simply Sketched Saturday Challenge English Garden Birthday card using Stampin' Up! products

My challenge with this sketch was the diagonal element. I selected the Designer Series Paper – English Garden – based on the flowers on the sketch, but new I didn’t want to cut the corner off my paper. I had a little play around with the paper before coming up with this paper curl idea. I curled the Designer Series Paper around my paper piercer (you could use a pencil or a paint brush, anything round would work to be honest) and held the curl with a few Mini Glue Dots.

The Happy Birthday is from the Tin of Cards stamp set, and fits perfectly into the Decorative Label punch. I really wanted to create a boarder around the sentiment, and so cut apart a further 2 decorative label punch pieces (in Melon Mambo) to create a boarder.

Simply Sketched Saturday Challenge Blog Hop Birthday Envelope English GardenOnce I had created the card I realised that it wouldn’t fit in a standard envelope, and so grabbed another piece of the same Designer Series paper and my Envelope Punch Board to create custom envelope.

Instructions:

Designer Series Paper – 8 7/8 x 8 7/8″ (I’m sticking to Imperial Measurements today, because I find them easier on the Envelope Punch Board)

Punch and Score on the first side at 3 3/8, and on the same sideat 4 1/8″

Rotate the paper by 90 degrees, line up the previous score lines with the marker on the punch board, punch and score. Repeat on all four sides.

Fold and burnish on the score lines, to create your envelope

Stampin' Up! UK Birthday Card English GardenI completed the envelope with a belly band of Night of Navy card stock (26 x 5 cm, Scored on the long side at 11, 12.5, 23.5 and 25 cm). The sentiment is heat embossed in white, and the flowers and butterfly are taken from the Garden in Bloom Stamp set.

Thanks so much for visiting StampinByHannah today, don’t forget to subscribe to my blog and Weekly Inspiration Email! and hop on to the next blog in our challenge

Simply Sketched NextSimply Sketched Previous


Don’t forget to shop using the Code Club Code to receive some great FREE product!

BZNJV4Y4

I will be closing this order on the 30th May 2016


Product List


Shop Now button-001Join my team button-001

To purchase any of the items featured in my projects please use the links above. To join my team of Stampin’ Friends select ‘Join My Team’ or send me a message!

Please support StampinByHannah, and join my Code Club, by using the Hostess code featured in the top right hand of my blog. For orders of over £150 please do not use this code, as you are entitled to your own Hostess benefits!

Sign up to my newsletter here – http://eepurl.com/2if59

Hannah McCurley

Stampin’ Up! UK Independent Demonstrator

12 Weeks of Christmas – Gift Card Gift Box!

Stampin' Up! UK Gift Card Gift Box video tutorial

Stampin' Up! 12 weeks of Christmas

Welcome to my Christmas project series this year! Each and every Sunday between now and the Big Day I be sharing a fun Christmas project; from cute gift packaging, to cards and even some home decor!

I love giving the gift of shopping (especially to awkward 15 year old girls! or boys who just want Games consoles!) but sticking a gift card into a card is super boring! Last year I made pop up gift card cards, but they just didn’t have the right amount of wow factor for me. I wanted a box, and that is what I have for you today.

Stampin' Up! UK Gift Card Gift Box video tutorial

Actually, this box is a really handy size for home-made chocolates, tealights or soaps too – just leave out the gift card insert. Check out the video tutorial for complete instructions, although the measurements can be found at the bottom of this post.

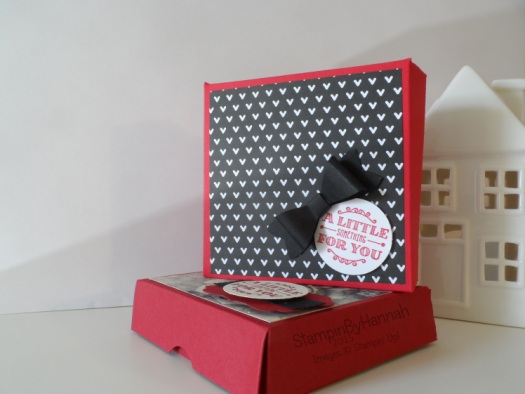
I’ve kept the decoration on this one fairly simple, with a piece of Designer Series Paper. Timeless Elegance on the Cherry Cobbler version, and Everyday Chic on the Real Red one. With some stamped and punched accent pieces (Don’t you just LOVE that bow!)

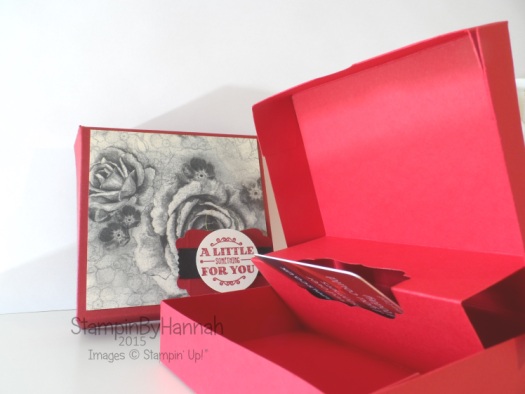
I’ve loving a bit of red this Christmas, but choosing between Real Red and Cherry Cobbler is proving to be a bit of a problem – they are both so beautiful! – so I have used them both here. The Cherry Cobbler Version is also made as a fold flat variation, to allow you to make a few of these and have them stored flat ready for assembly when needed.

Stampin' Up! UK Christmas gift card box

The gift card holder section of this box is an insert, punched with the Decorative Label punch to hold the card.

Measurements:

Box:

Card stock – 11 x 6″ (27.5 x 15 cm)

Score on the long side at 1, 5, 6 and 10″ (2.5, 12.5, 15, and 25 cm)

Score on the short side at 1 and 5″ (2.5 and 12.5 cm)

Insert:

Card stock – 10 x 4″ (25 x 10 cm)

Score on the long side at 3 and 7″ (7.5 x 17.5 cm)

Flip the cardstock over, and score again at 5″ (12.5 cm)

Designer Series Paper – 3 3/4 x 3 3/4″ (9.5 x 9.5 cm)


Shop Now button-001Join my team button-001

To purchase any of the items featured in my projects please use the links above. To join my team of Stampin’ Friends select ‘Join My Team’ or send me a message!

Please support StampinByHannah, and join my Code Club, by using the Hostess code featured in the top right hand of my blog. For orders of over £150 please do not use this code, as you are entitled to your own Hostess benefits!

Sign up to my newsletter here – http://eepurl.com/2if59

Hannah Wilks

Stampin’ Up! UK Independent Demonstrator

Pootlers Blog Hop | Decorating your Christmas Table

Stampin' Up! UK pillow box Christmas favour


bog hop-001

Hello! Welcome to the 3rd Pootler’s Team Blog Hop! I am so pleased you could join us! Everyone has worked so hard to create wonderful projects for you, please follow the hop around and leave comments on the fabulous blogs to come to.

Thanks


I have to admit that although I have been organising this hop for a couple of months, I only managed to actually create my project on Monday! but, never mind, I’m here now

Stampin' Up! UK pillow box designer series paper

If you are one of my regular readers you will know that my box of pre-order goodies sat lonely in my office for 3 weeks while I went off and got married. Coming back from honeymoon and getting back into crafting has taken a few weeks, and several days of playing with the new products, but this pillow box was one of the first things I made. I love cute packaging, but making my own boxes isn’t something that comes naturally to me, so this pillow box die is awesome! Anyway, when it came time to make my Blog Hop project (a littler later than planned) I looked around my craft room for inspiration and came across this little box, and I fell in love all over again!

Stampin' Up! UK pillow box Christmas favour

I made a second pillow box from Cherry Cobbler card stock this time, using the Seasons of Cheer Designer Series Paper as an accent. I will admit that the trees were a bit of an after thought, but they tie the pillow box favour into the rest of the project

Stampin' Up! UK Christmas Table Pootles Blog Hop

If I ever get a Christmas day at home, this is totally what my table is going to look like!

Stampin' Up! UK pillow box cutlery holder

The pillow box die is really versatile. Here I cut the tabs off one end, to create a cutlery holder. I adore this Designer Series Paper, I believe it was hand painted by one of the fabulously talented ladies at the Stampin’ Up! Home Office in Utah, and it is stunning! This tree paper has some wonderful Poinsettias on the reverse that are going to have to find their way onto the centre stage of a project or two! This pillow box is finished with a belly band of Vellum and Silver Glimmer Paper, with a tag and three vellum flowers punched from the Itty Bitty Accents Punch Pack

Stampin' Up! UK Christmas tag

Christmas just wouldn’t be with a tag. Last year I created 12 Tag of Christmas, and I have been thinking about doing something similar again this year, but I’m not sure yet. (Whatever I do will have to start soon though!). This tag features the same Designer Series Paper, Vellum and Glimmer paper combination, with those cute Itty Bitty flowers and the Love Peace Joy Stamp from A Little Something (the stamp set that comes bundled with the pillow box die).

Actually I can’t believe I have got to the end of my blog post without mentioning the Stamps! Shocking!

Hope you enjoy the rest of the hop, hop forward and check out what the wonderful Caroline has created this time.

See you again soon!

bog hop_2-001 bog hop_2_2-001


Shop Now button-001

Join my team button-001

To purchase any of the items featured in my projects please use the links above. To join my team of Stampin’ Friends select ‘Join My Team’ or send me a message!

Please support StampinByHannah, and join my Code Club, by using the Hostess code featured in the top right hand of my blog. For orders of over £150 please do not use this code, as you are entitled to your own Hostess benefits!

Sign up to my newsletter here – http://eepurl.com/2if59

Hannah Wilks

Stampin’ Up! UK Independent Demonstrator


August Free Workshop!

Stampin' Up! UK Wedding cards

Hello!

Welcome to my Free Online Workshop of August. Seeing as I got married on Saturday I thought it only fitting to do a wedding themed workshop while I am away!

Stampin' Up! UK Wedding cards

I have been super busy over the last few months preparing for my wedding; making wedding favours, Orders of Service, invitations, thank you cards, place settings and table plans, as well as working full time and running my Stampin’ Up! business! Things have been completely insanely crazy! and although I am currently lying on a beach you can be sure I am planning some awesome things for when I get back!

Just as I get back into working the Autumn/Winter catalogue launches! As a demonstrator I get a super awesome sneaky peak! and get to order things before it goes live on 1st September. You can get a sneaky peak now too – just by joining my team! Get a head start with your Christmas cards and festive projects, get to order the latest products first, and save money in the process! Awesome. You can find more information about joining Stampin’ Up! on my FAQ, or drop me a message (I will be replying to email while I am away I promise!)

I know, I have been really naughty with this one! Very very rarely do I use anything that is not Stampin’ Up! but I really needed some larger cards for my family Thank you’s, and these 8 x 8 cards just happened to still be in the drawer from my pre-SU crafting days (surely it would be a waste NOT to use them up, right!)

Stampin' Up! Uk Wedding thank you cards

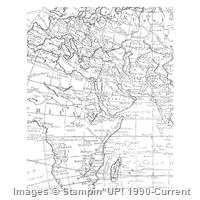
As you can see I have a theme to my wedding projects. My Invitations were made before I became a demonstrator (yes, I really am that organised!) and so didn’t use Stampin’ Up! products! (Shocking, I know!) but they did use a map stamp. I used the World Map Background Stamp on these cards, stamped in Elegant Eggplant onto Whisper White and punched using the Sweetheart Punch, so cute!

Stampin' Up! UK Everything Eleanor Wedding thank you

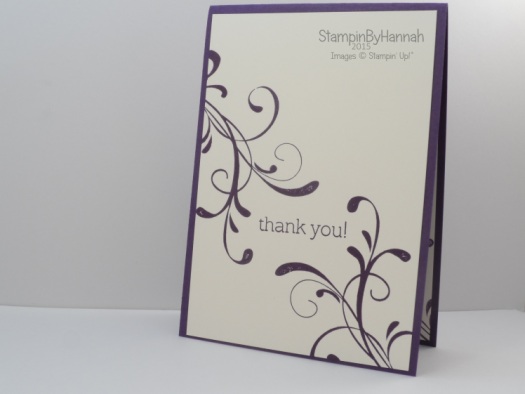
Everything Eleanor just scream wedding to me, and so I couldn’t not use it on my Thank you cards. These are the cards for people that helped us with our day; the church, the hotel, the photographer etc. I love them all, and they all worked so hard! I do hope they like the cards as a special thank you

Stampin' Up! UK wedding favour mini milk carton

My 3D project this month is my wedding favours. I have to admit that these are totally not my design, they come from Papercraft Button and here wonderful YouTube tutorial from a couple of Easters ago! I made these about 18 months ago, all cut and scored, with sticky strip applied just ready for assembly. The ones on my wedding tables also featured a cute heart in that wonderful map print too, and were held together by the Stampin’ Up! clothespins (or pegs!) just like this one

Measurements:

Card stock – 6 1/2 x 4 1/2″ (17.5 x 11.5 cm)

Score on the long side at – 1 1/2, 3, 4 1/2 and 6″ (4, 8, 12 and 16 cm)

Score on the short side at – 1 1/2, 3 and 4 1/8″ (4, 8 and 10.5 cm)

*please note the metric version is slightly bigger than the imperial shown in the video*


Shop Now button-001Join my team button-001

To purchase any of the items featured in my projects please use the links above. To join my team of Stampin’ Friends select ‘Join My Team’ or send me a message!

Please support StampinByHannah, and join my Code Club, by using the Hostess code featured in the top right hand of my blog. For orders of over £150 please do not use this code, as you are entitled to your own Hostess benefits!

Sign up to my newsletter here – http://eepurl.com/2if59

Hannah Wilks

Stampin’ Up! UK Independent Demonstrator

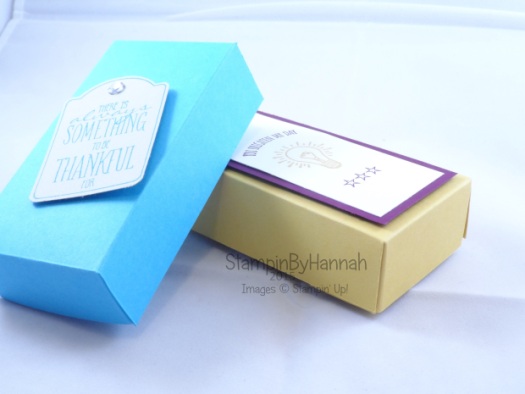
Stampin’ Up! Soap Box!

I think I made this box originally about 6 months ago, and since then it has been sat looking very sad in my prototypes box! That is until now!

This past couple of weeks have been pretty tough going actually, I’ve had an awful cold and have felt utterly rubbish, and so when it came time to prep for this weeks worth of blog projects I had nothing! So, out came my trusty prototypes box and this project leapt out at me! Thank god for being really productive a couple of months ago! (I actually think I might have designed this one whilst waiting for my Stampin’ Up! Starter kit, so actually its more like 8 months ago!)

Stampin' Up! UK How to make your own soap box

Isn’t it cute! and I’ve finally managed to make something in both Imperial and Metric Measurements! Yay!

So, that stamp set – its a Sale-a-bration Freebie! for more information about how to get Sale-a-bration items, just click HERE!

The Imperial Box uses Hello Honey as the box, with a piece of Blackberry Bliss, and some Whisper White. While I used Tempting Turquoise for my video version!

Measurement:

Cardstock – 12 x 4″ (30 x 10 cm)

Score on the long side at 1, 2, 6, 7, and 11″ (2.5, 5, 15, 17.5 and 27.5 cm)

Score on the short side at 1 and 3″ (2.5 7.5 cm)


Hannah Wilks

Stampin’ Up! UK Independent Demonstrator

If you like the project, or any of the products used, would like a catalogue, or to join my team, please contact me, or click on the ‘Shop NOW’ button at the top of the page. You can also find me on Twitter, Facebook, YouTube, Google+, About.me, and Tumblr (Links in the sidebar)

Sign up to our newsletter here – http://eepurl.com/2if59

Thank you for stopping by www.www.stampinbyhannah.co.uk today

x

Take a shot………

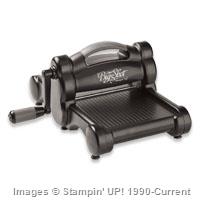
Or just take advantage of the latest Stampin’ Up! awesome deal and get your Stampin’ Up! Big Shot in August, and get a free stamp and framelit bundle, as well as getting 15% off other selected bundles!

This offer, only available for one month, lets you into a whole new world (sorry!) of crafting, giving you even more options for cards and projects. The Big Shot is a great die cutting machine, enabling you to emboss, cut and score, using framelits, bigz dies, embossing folders and other wonderful ways to give your cards more dimension and impact.

The Big Shot allows you to cut and emboss a number of different materials, including; card and paper, vellum, coaster board, window sheet, glimmer paper, foil, felt and many others. Use your Big Shot to create 3D projects using the Stampin’ Up! Bigz Die; Hamburger box, Spiral flowers, gift bows, and designer rosettes. Create embossed cards for your Project Life album. Use stamp and framelit bundles to stamp and cut intricate shapes and images, giving your projects that extra special something!

For the month of August get your Big Shot, with a Stamp and Die bundle, for £87.95, AND get 15% off other selected bundles!


Hannah Wilks

Stampin’ Up! UK Independent Demonstrator

If you like the project, or any of the products used, would like a catalogue, or to join my team, please contact me, or click on the ‘Shop NOW’ button at the top of the page. You can also find me on Twitter, Facebook, YouTube, Google+, About.me, and Tumblr (Links in the sidebar)

Thank you for stopping by www.www.stampinbyhannah.co.uk today

x