Cute Cube Box Tutorial

Welcome to Tuesday’s at StampinByHannah!

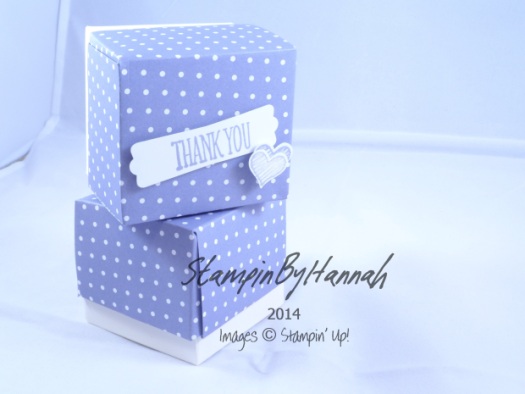
I do hope to post 3D projects on a Tuesday, and as this is the first week of the (almost) new year, I thought I would start now!

Stampin' Up! UK lided cube box envelope punch board

This super cute box uses the Envelope Punch Board (available directly from me and Stampin’ Up!), and is a lovely little box with a separate lid.

This box took me a surprisingly long time to come up with (and a LOT of scrap paper!) but with the help of Craft Owl’s Box Buster I finally made it!

Measurements –

because the EPB works best in imperial I have only listed the imperial measurements

Base

– Cardstock – 6 1/2 x 6 1/2″

– punch and score at 1 7/8″ and again at 4 5/8″ and follow the score lines to punch and score on the other three sides

Lid

– Designer Series paper – 6 x 6″

– punch and score at 1 7/8″ and again at 4″ and follow the score lines to punch and score on the other three sides


I finished this box with some stamping from Something to Say, punched out with the Modern Label Punch, and the Itty Bitty Accents Punch Pack


Hannah Wilks

Stampin’ Up! UK Independent Demonstrator

If you like the project, or any of the products used, would like a catalogue, or to join my team, please contact me, or click on the ‘Shop NOW’ button at the top of the page. You can also find me on Twitter, Facebook, YouTube, Google+, About.me, and Tumblr (Links in the sidebar)

Sign up to our newsletter here – http://eepurl.com/2if59

Thank you for stopping by www.www.stampinbyhannah.co.uk today

x
 

Vellum!!! oh and a 3D project!

Ok, I have a confession to make. I have a problem. I (along with James) cannot leave anything Complimentary in a hotel room!

Recently I had a night away with James, really it was a Stampin’ Up! event, but we turned it into a romantic mid-week break. I love staying in hotels, and seeing as we haven’t had a holiday in a couple of years , we take mini-breaks instead.

But every time we stay away we come home with the hotel complimentary toiletries!

I try and use them up in the gym, but James challenged me to make a bag / box to put them in this time, and seeing as its almost Christmas, and I’m sure I’m not the only one who has a similar problem, I though you could make these as pillow gifts for you house guests over the festive season!

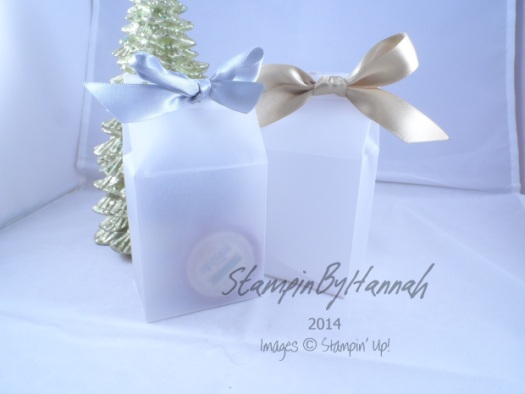
Stampin' Up! UK Vellum Milk carton bag

These are super cute! Don’t you love vellum! and metallic ribbon! These use the Satin Ribbon in Gold and Silver!

Measurements:

Vellum – 6 1/2 x 9″ (

Score on the long side at – 1 3/4, 4 1/4, 6, and 8 1/2 (

Score on the short side at – 1 3/4, 4 3/4, and 6″ (


DISCLAIMER – I hold no responsibility for any damage caused by anyone using my Satin Ribbon Top Tip! Use this tip with GREAT care, and hold your ribbon as far away from any cardstock/paper/vellum or any other material as you can! Never leave a lighter with a child!


Hannah Wilks

Stampin’ Up! UK Independent Demonstrator

If you like the project, or any of the products used, would like a catalogue, or to join my team, please contact me, or click on the ‘Shop NOW’ button at the top of the page. You can also find me on Twitter, Facebook, YouTube, Google+, About.me, and Tumblr (Links in the sidebar)

Sign up to our newsletter here – http://eepurl.com/2if59

Thank you for stopping by www.www.stampinbyhannah.co.uk today

x
 

Christmas Chocolate Treat Bags!

Another 3D project for you today! I have been LOVING making treat bags and gift packaging recently. I have made a whole heap of them for people at work!

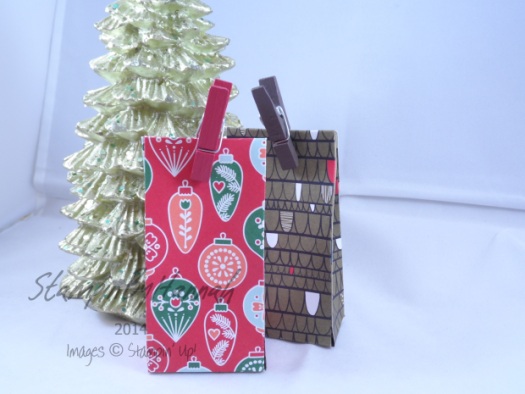
Stampin' Up! UK Chocolate Treat bags for Christmas


These bags are so cute! The original (the back one) uses the Santa and Co. DSP, while the other uses Nordic Noel, and both the bags are held closed with pegs from the Tag a Bag Accessory Kit!

Measurements –

DSP – 6 x 6″ (15.2 x 15.2cm)

Score the 1st side at – 1, 2 3/4, 3 3/4, and 5 1/2″ ( 2.5, 7, 9.5, 14 cm)

Score the 2nd side at – 1 and 4 1/2″ (2.5 and 11.5 cm)


Hannah Wilks

Stampin’ Up! UK Independent Demonstrator

If you like the project, or any of the products used, would like a catalogue, or to join my team, please contact me, or click on the ‘Shop NOW’ button at the top of the page. You can also find me on Twitter, Facebook, YouTube, Google+, About.me, and Tumblr (Links in the sidebar)

Sign up to our newsletter here – http://eepurl.com/2if59

Thank you for stopping by www.www.stampinbyhannah.co.uk today

x
Chocolate Money Wallet

I love chocolate! I mean, there really is a reason why I am overweight, and right now, its Christmas and chocolate is everywhere! (I WILL loose weight in the new year – have to fit into that wedding dress! eeek!)

I found chocolate coins and notes in Tesco’s last week, and just had to make a project for them! There are loads of tutorials for chocolate coins, but the notes?! well, I’d never seen them before!

Stampin' Up! UK chocolate money wallet

These are just so tiny!

The original uses the Trim the Tree DSP, but the one in front is the gorgeous All is Calm paper (so sad to see it leave us soon!), and its that Scalloped Tag Topper Punch again!


Measurements:

Cardstock = 6 x 3 1/2″ (9 x 15.5 cm) (the metric version is slightly bigger)

Score on the long side at: 1/2, 2 3/4, 3 1/4 and 5 1/2″ (1.5, 7, 8.2, 14 cm)

Score on the short side at: 1/2, 2 and 2 1/2″ (1.5, 5, 6.5 cm)


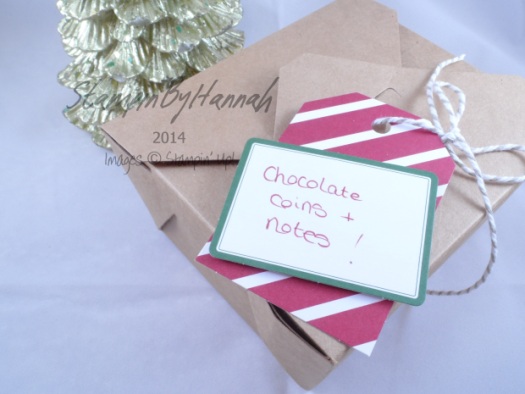
Before I go today, it just had to pop in a picture of the box I used to store these chocolate in (that was before they were all eaten of course!)

Stampin' Up! UK chocolate box takeout boxIts one of the lovely Takeout boxes, with a tag made from the Under the Tree tag a bag accessory kit!

Lovely!


Hannah Wilks

Stampin’ Up! UK Independent Demonstrator

If you like the project, or any of the products used, would like a catalogue, or to join my team, please contact me, or click on the ‘Shop NOW’ button at the top of the page. You can also find me on Twitter, Facebook, YouTube, Google+, About.me, and Tumblr (Links in the sidebar)

Sign up to our newsletter here – http://eepurl.com/2if59

Thank you for stopping by www.www.stampinbyhannah.co.uk today

x
 

Tiny Tealight Box

Hello!

Welcome to another little box post!

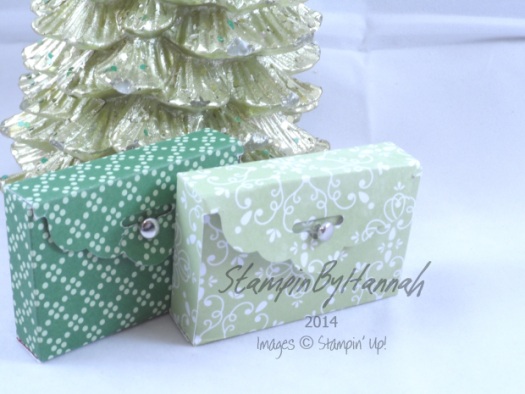
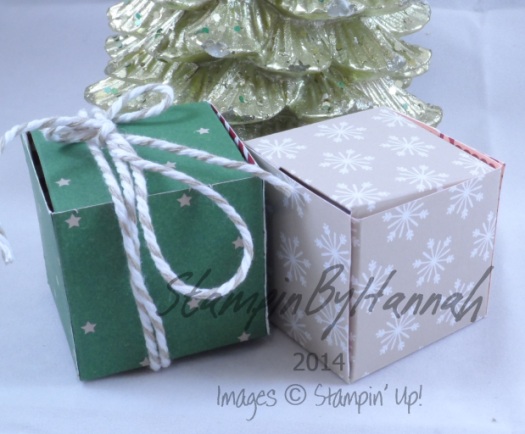
This time, I have created a teeny tiny box for two tealights (ikea ones), ready for your Christmas tables / party favours etc.

Stampin' Up! UK Tiny Tealight Box


They are just so sweet!

Both boxes use the Trim the Tree designer series paper stack, I love these paper! I have used this stack for so many things (including my advent calender!). Each sheet measures 6 1/2 x 4 1/2″, and the stack contains 48 sheets, and 24 different patterns!


Measurements:

Sorry the metric measurements are so exact, but its all down to the tealights 🙁

Cardstock = 6 1/2 x 4 1/2″ (thats one sheet of the dsp!) (11.4 x 16.5 cm)

Score on the long side at: 1 1/2, 3, 4 1/2, and 6″ (3.8, 7.6, 11.4 and 15.2 cm)

Score on the short side at: 1 1/2 and 3″ (3.8 and 7.6 cm)


Hannah Wilks

Stampin’ Up! UK Independent Demonstrator

If you like the project, or any of the products used, would like a catalogue, or to join my team, please contact me, or click on the ‘Shop NOW’ button at the top of the page. You can also find me on Twitter, Facebook, YouTube, Google+, About.me, and Tumblr (Links in the sidebar)

Sign up to our newsletter here – http://eepurl.com/2if59

Thank you for stopping by www.www.stampinbyhannah.co.uk today

x
 

A Gift for you….

I have a series of posts for you for the last few Fridays before Christmas; and they are all little boxes perfect for table favours or stocking treats!

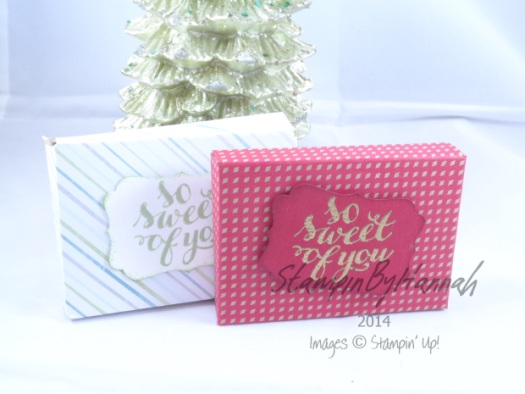
The first of these posts is an Envelope Punch Board project designed to hold a Galaxy Gift for You!

Stampin' Up! UK Galaxy Gift For You Chocolate DSP

The original box uses the All is Calm DSP (its just so pretty), and the stamp is from the Hello There Hostess Stamp Set. The red version uses the Under the Tree Speciality Designer Series Paper and the same stamp set.


Measurements: The Envelope punch board works best in imperial so they are the measurements I will use:

Cardstock measures : 5 1/2 x 5 1/2″

Make the first punch and score at: 2 3/4″ and the second at: 3 1/2″

Use these first score lines as a guide to make the punch and scores on the other 3 sides

Cut away the little squares formed by the Punch board

Fold together around your chocolate and use Glue dots to hold together


Hope you enjoyed this project


Hannah Wilks

Stampin’ Up! UK Independent Demonstrator

If you like the project, or any of the products used, would like a catalogue, or to join my team, please contact me, or click on the ‘Shop NOW’ button at the top of the page. You can also find me on Twitter, Facebook, YouTube, Google+, About.me, and Tumblr (Links in the sidebar)

Sign up to our newsletter here – http://eepurl.com/2if59

Thank you for stopping by www.www.stampinbyhannah.co.uk today

x
 

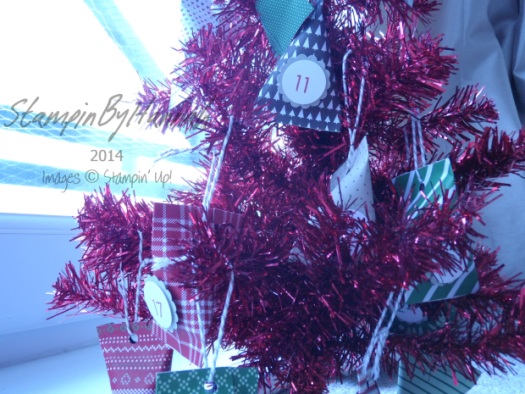
StampinByHannah’s Advent Calender Project 2014

I LOVE Christmas! to be honest with you I love the build up to Christmas more than the day itself!

I particularly love Advent! Now, I don’t know if that is just because of the piles of Chocolate, or that it is part of the whole event that is Christmas!

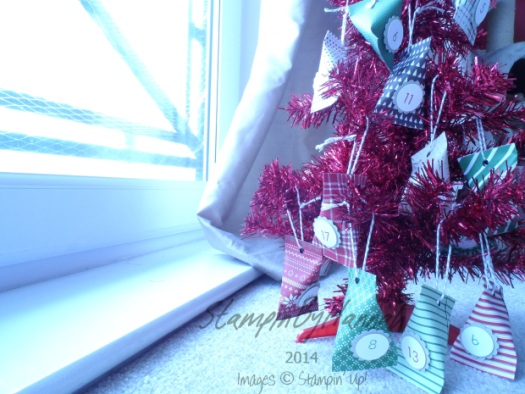
So, this year, my first year of blogging, I thought I would make an Advent Calender! Next year, who know you may get some advent gifts, but this year, its a lovely project!

Stampin' Up! UK advent calender trim the tree

I loved making the Halloween Gift Treat bags in October, and thought they would make perfect little tree ornament (or advent chocolate hanging devices if you will!). And so made 24 miniature treat bags with the Stampin’ Up! Trim the Tree DSP stack (LOVE!!!), some bakers twine (from the Tag a Bag Accessory kit!) and the Back to Basics Alphabet!

Measurements =

DSP – 3 1/2 x 4 1/2″ (9 x 12 cm) which is one of the pieces of the DSP from the Trim the Tree DSP stack cut in half!

Apply sticky strip to one end and both long sides, remove the backing from the sticky strip at the end and roll the DSP into a tube.

Then remove the backing from the sticky strip on one side and pinch together.

Insert your chocolate!

Remove the backing of the sticky strip on the other side and pinch together, at right angles to the other side.

Using a hole punch make a hole in one end and feed through your bakers twine, tying it in a knot to create a loop (so you can hang your treat pouch on the tree!).

Add numbers to each pouch by stamping the numbers 1 – 24 on cardstock (I used the Back to Basics Alphabet for this) and punching out with a 1″ circle punch.

Punch 24 1 1/4″ scallop circles and add one to the back of each number with a dimensionals.

Attach each number to a treat pouch with dimensionals.

Stampin' Up! UK Chocolate advent calender homemade

James is super excited about opening each pouch to find the chocolate inside! (Yes, he’s 24! and my husband to be, and Yes, he is just a big kid! We love Christmas!)


Hannah Wilks

Stampin’ Up! UK Independent Demonstrator

If you like the project, or any of the products used, would like a catalogue, or to join my team, please contact me, or click on the ‘Shop NOW’ button at the top of the page. You can also find me on Twitter, Facebook, YouTube, Google+, About.me, and Tumblr (Links in the sidebar)

Sign up to our newsletter here – http://eepurl.com/2if59

Thank you for stopping by www.www.stampinbyhannah.co.uk today

x
 

Cafe bags and Gift boxes, and an offer from me to you!

I hope you read my post last week about Gift Packaging (its HERE if you want it!), I love our selection of boxes and bags, including the selection of dies and boards so you can design and make your own.

Our pre-made boxes and bags are all in Kraft card (or paper) and can be a little dull – so, I’ve dressed them up!

Stampin' Up! UK Tiny Treat Box

This is our Tiny Treat box, that I have dressed up with some DSP (All is Calm), and some punches. I have also added a box made with the Lost Lagoon Silky Taffeta Ribbon (LOVE!).


Stampin' Up! UK Petite Cafe Bag

This is the Petite Cafe Bag, with some added extras. Once again I’ve just All is Calm DSP (isn’t it just beautiful!) and I’ve simply attached it with some staples!

So, I have an offer for you: If you join my team before Christmas, I will send you both of these project (complete with some goodies), as well as all the usual things that you would expect from me (and Stampin’ Up! UK). For more information about Joining me CLICK HERE!

Hope to speak to you soon


Hannah Wilks

Stampin’ Up! UK Independent Demonstrator

If you like the project, or any of the products used, would like a catalogue, or to join my team, please contact me, or click on the ‘Shop NOW’ button at the top of the page. You can also find me on Twitter, Facebook, YouTube, Google+, About.me, and Tumblr (Links in the sidebar)

Sign up to our newsletter here – http://eepurl.com/2if59

Thank you for stopping by www.www.stampinbyhannah.co.uk today

x


Christmas Wishes Pocket Project

I do love a cute Christmas make – and this would be great to make for you children and grandchildren to remember why they love Christmas, why Christmas is so special, or to teach them a little bit about the Christmas story.

Before you watch the video, I recorded this a couple of weeks ago (and I forgot all about it!) and so I’m sorry for a waffle at the beginning about the Good Greetings offer which has sadly now ended.


I found a similar looking item in my local Craft Superstore, however, I thought I could totally make something similar at home.

Stampin' Up! UK Christmas Wishes Pocket

The measurements:

Cardstock = 8 x 4 1/2″ (20.4 x 11.5 cm)

A piece of cardstock that measures 3 1/4″ x 3 1/4″ (9.5 x 9.5 cm)

and 10 stripes that measure 3/4″ x 5″ (2 x 12.7 cm)

Score the short side at – 1/2″ and 4″ ( 0.6 and 10.2cm)

Score the short side at – 4 1/2″ (11.5cm)

Now, I think this would be a really cute idea to add to your Project Life or December Daily! but the pocket is too big!

So, to make a pocket which fits your project life: You need a piece of cardstock that measure = 6 1/2 x 4″ (16.5 x 10.2 cm), score the short side at 1/2″ and 3 1/2″ (1.2cm and 9cm), and the long side at 4″ (10.2 cm)


Hannah Wilks

Stampin’ Up! UK Independent Demonstrator

If you like the project, or any of the products used, would like a catalogue, or to join my team, please contact me, or click on the ‘Shop NOW’ button at the top of the page. You can also find me on Twitter, Facebook, YouTube, Google+, About.me, and Tumblr (Links in the sidebar)

Sign up to our newsletter here – http://eepurl.com/2if59

Thank you for stopping by www.www.stampinbyhannah.co.uk today

x
Pizza Box Style Chocolate Box!

I do love Chocolate! and papercraft – and how better to combine them, a super cute chocolate box!

Stampin' Up! UK Chocolate box pizza box style


Cardstock Measurements – 4 1/2″ 8

Score on the long edge at – 1″, 3 1/2, 4 1/2″, 7″

Score on the short edge at – 1″ and 3 1/2″

The cardstock for the top of the box measures – 2 1/4″ by 2 1/4″


Hannah Wilks

Stampin’ Up! UK Independent Demonstrator

If you like the project, or any of the products used, would like a catalogue, or to join my team, please contact me, or click on the ‘Shop NOW’ button at the top of the page. You can also find me on Twitter, Facebook, YouTube, Google+, About.me, and Tumblr (Links in the sidebar)

Thank you for stopping by www.www.stampinbyhannah.co.uk today

x