Fancy Fold Friday – Screen Divider Card

Welcome to another Fancy Fold Friday! Each Friday here at StampinByHannah and over on my YouTube, we look at a different Fancy Fold card. I will be putting them all together, probably on a YouTube Playlist at some point, just haven’t quite managed it yet!

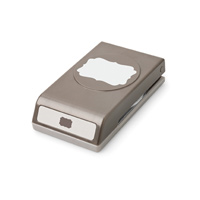
This week during my hunt through Pinterest this style of card caught my eye, an interesting use of a punch!

Stampin' Up! UK screen divider card fancy fold butterfly basics

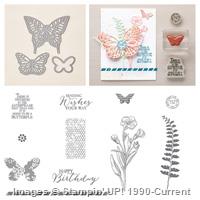
I just love this stamp set! Butter Fly Basics. The combinations of flowers, ferns, and butterflies is just so pretty, and then when you add the accent stamps and sentiments – its great for any occasion!

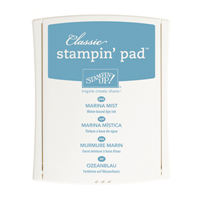
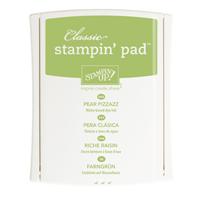
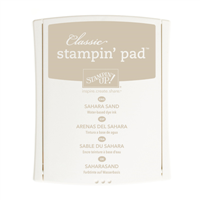
Here I have used Marina Mist, Pear Pizzazz and Sahara Sand to create this layered stamped effect.

Stampin' Up! UK screen divider card

The Screen Divider card is so simple to put together, as it only requires one piece of cardstock and a punch. The trick with this card is using those 4 screens!

Measurements:

Cardstock – 5 3/4 x 11″ (14.8 x 28 cm)

Score on the long side at 2 /34, 5 1/2 and 8 1/4″ (7, 14, and 21 cm)

Fold your cardstock into a W shape, then take one side of the W and pinch them together. Insert this into your Decorative Label punch, lining the edge of the cardstock up with the middle of the punch shape. Punch, then use the punched piece as a guide to help line up the other sides of the card

Designer Series Paper (or cardstock) – 4 pieces measuring 2 1/2 x 4 3/4″ (6.5 x 12 cm)

To create the stamped effect above I cut a piece of Whisper White cardstock to 10 1/4 x 4 3/4″ (26 x 12 cm) and stamped my images, before cutting into 4 equal pieces


Hannah Wilks

Stampin’ Up! UK Independent Demonstrator

If you like the project, or any of the products used, would like a catalogue, or to join my team, please contact me, or click on the ‘Shop NOW’ button at the top of the page. You can also find me on Twitter, Facebook, YouTube, Google+, About.me, and Tumblr (Links in the sidebar)

Sign up to our newsletter here – http://eepurl.com/2if59

Thank you for stopping by www.www.stampinbyhannah.co.uk today

x

Hello There Petal Potpourri!

After using the Hello There Hostess stamp set on Tuesday for my How To Use a Stamp-a-ma-jig, I carried on stamping and the card appeared on my desk! (don’t you just love it when that happens!). Recently I have found myself using more and more of the Subtles and Neutrals collections, I’m sure its my way of trying to force spring to arrive – it is still freezing here! but I love the rich colours of the Regals collection so I’ve pulled out Night of Navy for a few cards recently.Stampin' Up! UK Hostess Hello There Petal PotpourriOne of my favourite stamps from the Spring/Summer catalogue is Petal Potpourri – no fuss stamping, just 4 simple flowers and accents, with a matching punch – what more could a girl ask for! I stamped the solid flower across the cardstock in Night of Navy, and added some Hello There accents in Smoky Slate. The For You sentiment is from the Hello There hostess set, and is punched out with the 1 3/8″ circle punch.

Hello There is a hostess stamp set – have I explained what that means? Hostess sets are exclusively available to those who host parties with me OR if you place an order qualifying for Hostess Credits. To qualify for Hostess Credits you simply need to place an order over £150, and you receive £25 worth of Hostess Credits to spend! awesome!


Hannah Wilks

Stampin’ Up! UK Independent Demonstrator

If you like the project, or any of the products used, would like a catalogue, or to join my team, please contact me, or click on the ‘Shop NOW’ button at the top of the page. You can also find me on Twitter, Facebook, YouTube, Google+, About.me, and Tumblr (Links in the sidebar)

Sign up to our newsletter here – http://eepurl.com/2if59

Thank you for stopping by www.www.stampinbyhannah.co.uk today

x


Pootlers Blog Hop Winner!

The winner of the Pootlers Blog Hop Giveaway is
 
Shirley Waterhouse.
 
Congratulations Shirley!  Please email Keren (keren.howell [at ] ntlworld.com) with your postal address.


How to use a Stamp-a-ma-jig!

I have recently invested (not that it cost very much, but it was definitely worth the spend) in the Stamp-a-ma-jig from Stampin’ Up!

I had not realised how much I would use it, and will openly admit I bought it because I can’t tell you how useful something is without trying it first. I have to say, I think this is a tool that will definitely make it into my top 5 stampers tool kit!

Stampin' Up! UK how to use a stamp-a-ma-jig

There are so many ways to use the Stamp-a-ma-jig, but this is the way I use it most often….

Place the Acrylic Imaging Sheet with the shiny side down onto your grid paper, and butt the handle up against a corner, ensuring the corner of the imaging sheet is into the top corner of the T shape of the handle.

Ink up your stamp in a dark colour (Momento Black works particularly well). Put the corner of your stamping block into the top of the corner of the Stamp-a-ma-jig handle, slide the block down the corner to stamp onto the Imaging sheet. Your stamped image should now be on the imaging sheet

Remove the handle, position the imaging sheet onto your project, so that the image on the imaging sheet is where you want to stamp for real.

Place the handle back onto the corner of the imaging sheet in the same position it was before, and remove the imaging sheet – holding onto the handle ensuring it doesn’t move.

Ink up your stamp and stamp again, putting the corner of the stamping block into the corner of the handle, sliding the block down and back up to ensure a smudge free image.


Hannah Wilks

Stampin’ Up! UK Independent Demonstrator

If you like the project, or any of the products used, would like a catalogue, or to join my team, please contact me, or click on the ‘Shop NOW’ button at the top of the page. You can also find me on Twitter, Facebook, YouTube, Google+, About.me, and Tumblr (Links in the sidebar)

Sign up to our newsletter here – http://eepurl.com/2if59

Thank you for stopping by www.www.stampinbyhannah.co.uk today

x

Sending Wishes your way…..

Ok, So I have a little bit of news… I am a guest designer for a challenge blog soon (I’m not saying which one until nearer the time!) and this card was an attempt at one of the challenges – Clean and Simple – well, if you’ve been coming here for any length of time you’ll know, Clean and Simple is basically all I do. Or, so I thought!

Stampin' Up! UK Butterfly Basics Design Team Perfect Plum

I saw these leaves, from Butterfly Basics, stamped around the card edge on Facebook a few weeks ago (sorry, can’t remember who it was) and stashed the idea in the back of my brain for a rainy day. Well, the time came. I stamped and stamped, and then released this card was the least clean and simple card I have ever made!

To be honest, I could have carried on and added more and more, but James had made tea, so this is where it stayed, but it still is definitely not Clean and Simple!

Back to the drawing board for me…


Hannah Wilks

Stampin’ Up! UK Independent Demonstrator

If you like the project, or any of the products used, would like a catalogue, or to join my team, please contact me, or click on the ‘Shop NOW’ button at the top of the page. You can also find me on Twitter, Facebook, YouTube, Google+, About.me, and Tumblr (Links in the sidebar)

Sign up to our newsletter here – http://eepurl.com/2if59

Thank you for stopping by www.www.stampinbyhannah.co.uk today

x

Sale-a-bration on Sunday – Best. Day. Ever!

Before I get into my card for today, Stampin’ Up! have just added some fantastic new items to Sale-a-bration! 

You can check them out HERE

Sale-a-bration is the biggest sale of the Stampin’ Up! calender, giving you free products each time you spend £45. Now you can choose from either the original Sale-a-bration brochure or from the new flyer, meaning that there are even more great reasons to shop in March! 


Welcome to another Sale-a-bration on Sunday!

I made this card back in January! at my monthly Crafty Crop (click on the Events tab at the top for more information), and then managed to loose it in my office! eek!

But its ok, it survived being abandoned high on a shelf (where I left it to dry!) and its here for you now.

Stampin' Up! UK Sale-a-bration SAB Best Day Ever Best Year EverThis card uses the 2014-2016 In-Colours; Hello Honey, Tangelo Twist and Mossy Meadow, along with the Best Day Ever Stamp set from Sale-a-bration!

I have to say, the photograph doesn’t do this card justice; the reason it had to be left to dry was that there are little beads of Crystal Effects across the stamping on this card, but it doesn’t show up very well on the photo 🙁


Hannah Wilks

Stampin’ Up! UK Independent Demonstrator

If you like the project, or any of the products used, would like a catalogue, or to join my team, please contact me, or click on the ‘Shop NOW’ button at the top of the page. You can also find me on Twitter, Facebook, YouTube, Google+, About.me, and Tumblr (Links in the sidebar)

Sign up to our newsletter here – http://eepurl.com/2if59

Thank you for stopping by www.www.stampinbyhannah.co.uk today

x

Pootlers Blog Hop! – Watercolour Stamping

Pootlers Blog Hop-001Hello! and Welcome to the very first Pootler’s Blog Hop! If you have found your way from Sam’s blog I hope you left a lovely comment, as we have a give-away! Leave a comment on each and every blog post on today’s hop and you could be in with the chance to win a fabulous Sale-a-bration goodie pack!

I have created a series of cards for our hop today, all using the Painted Petals Stamp set from the Spring/Summer Catalogue. This set is great as it allows us to create cards that make us look like watercolour masters – just using stamps!

Stampin' Up! UK Pootles Painted Petals repeat stamping

This first card uses the Painted Petals to repeat stamp. The focal image is stamped in Blackberry Bliss, with Pear Pizzazz leaves. The others are stamped in Wisteria Wonder, in a random pattern across the cardstock. I love the simplicity of this card. The ‘Thank you’ is stamped in Pear Pizzazz, and punched out with the 1 1/4″ circle punch, and layered onto a Blackberry Bliss 1 3/8″ circle.

Stampin' Up! UK painted petals watercolour blackberry bliss

This card uses the 2014-2016 In Colours – Blackberry Bliss and Mossy Meadow. First the flowers were stamped onto the cardstock, then, instead of cleaning off the stamp (like I would normally do) I misted the stamp generously with water, and stamped again over the first stamped image to create a softer watercolour look.

Stampin' Up! UK Pootles blog hop painted petals watercolour video tutorial

These cards though are the main reason for this post! I watched the live streams of a recent Stampin’ Up! event in Florida, and the fabulous Shelli Gardener demonstrating this technique – and I fell in love! I have made a video tutorial of this technique, but it really is quite simple – Stamp your image onto Stampin’ Up! Watercolour Paper, I think a juicy ink pad works best for this, and I would also suggest using a dark / rich colour too – and then spritz it with water, allowing the water to move the ink – dry with your heat tool.

Stampin' Up! UK painted petals watercolour

I had to try it in one of my favourite colours – Lost Lagoon – but I have to say, I think the Blackberry Bliss version worked better, it still made a really pretty card.

Thanks for stopping by StampinByHannah today for this Hop! and I hope to see you again soon.

We’ve got some Blog Candy up for grabs – to be in with a chance of winning a bundle of goodies, including the Best Day Ever stamp set, the Best Year ever paper set and the co-ordinating ribbons and buttons, all you have to do is work your way through the hop before midday on Sunday and leave a comment on every blog.  The winner will be chosen at random and announced in the Pootles Craft Forum and here on Tuesday, 3rd March

Please Click the Link Image below to check out the next blog on our hop!

Pootlers Blog Hop Forward-001 Pootlers Blog Hop backward_2-001


Hannah Wilks

Stampin’ Up! UK Independent Demonstrator

If you like the project, or any of the products used, would like a catalogue, or to join my team, please contact me, or click on the ‘Shop NOW’ button at the top of the page. You can also find me on Twitter, Facebook, YouTube, Google+, About.me, and Tumblr (Links in the sidebar)

Sign up to our newsletter here – http://eepurl.com/2if59

Thank you for stopping by www.www.stampinbyhannah.co.uk today

x

Fancy Fold Friday – Waterfall card

Welcome to another Fancy Fold Friday here at StampinByHannah!

I love doing these fancy fold posts for you all, but I have to say, I need some inspiration, so, would you please be so kind as to leave a comment below with a fancy fold that you would like to see me tackle!

This card is a request from my lovely friend Kathryn.

Stampin' Up! UK Waterfall card Indescribable Gift

Usually a Waterfall card is vertical, but I had to change it up a bit, and so decided to make it sideways, I think it works.

This card uses the Brushed Silver cardstock and Moonlight Designer Series Paper Stack, I love neutral colours at the moment – probably something to do with still being in winter mode – its been so very cold here!

The stamp set I have used it Indescribable Gift, one of the Easter themed sets from the Spring/Summer catalogue. I know that it has been designed with the Blendabilities in mind, but I just think it is the most beautiful line image I can’t bring myself to colour it in! Here I have stamped it in Smokey Slate onto Whisper White, and the sentiment from the same set is stamped in Momento Black (my Favourite black ink!)

Measurements:

Cardbase – cut a piece of A4 length ways – put the cardstock into your trimmer with the short side at the top and cut at 10.5 cm (4 1/8″)

Designer Series Paper – 10 x 14.2 cm (3 7/8″ x 5 1/2″)

Then there are a series of smaller pieces of cardstock –

1 piece – 2.5 x 10.5cm (1 x 4 1/8″)

4 pieces – 5 x 5 cm (2 x 2″)

Cut a piece of Whisper White to 4.5 x 18 cm (1 3/4 x 7″) and stamp along the length, then cut this piece into 4 measuring 4.5 x 4.5 cm (1 3/4 x 1 3/4″)

Cut a piece of Basic Grey cardstock to 5 x 24 cm (2 x 9 1/2″) and score at 5, 7, 9, and 11 cm (2, 2 3/4, 3 1/2, and 4 1/4″) punch the end with the Scalloped Tag Topper Punch

Check the video for full Instructions.


Hannah Wilks

Stampin’ Up! UK Independent Demonstrator

If you like the project, or any of the products used, would like a catalogue, or to join my team, please contact me, or click on the ‘Shop NOW’ button at the top of the page. You can also find me on Twitter, Facebook, YouTube, Google+, About.me, and Tumblr (Links in the sidebar)

Sign up to our newsletter here – http://eepurl.com/2if59

Thank you for stopping by www.www.stampinbyhannah.co.uk today

x

Dotty for Petal Potpourri!

I just love the solid flower image from the Petal Potpourri Stamp set, I’ve stamped it here in Wisteria Wonder AND Old Olive (yes, those leave are just cut from the same flower, stamped in Old Olive!)
Stampin' Up! UK Petal Potpourri large polka dot embossing I am a simple card maker – as in I make simple cards – I may well be a simple person to! (I’ll let you decide on that one!), so I don’t use Embossing folders very often, but this card was just too plain. This is the Large Polka Dot embossing folder, on Basic Gray. Simple, but rich looking!


Hannah Wilks

Stampin’ Up! UK Independent Demonstrator

If you like the project, or any of the products used, would like a catalogue, or to join my team, please contact me, or click on the ‘Shop NOW’ button at the top of the page. You can also find me on Twitter, Facebook, YouTube, Google+, About.me, and Tumblr (Links in the sidebar)

Sign up to our newsletter here – http://eepurl.com/2if59

Thank you for stopping by www.www.stampinbyhannah.co.uk today

x


How to get 6 (metric) cards from one sheet of 12 x 12 Designer Series Paper!

I love 12 x 12 paper! I admit, I am a little addicted, and I don’t actually use it as often as I should!

When I received the Painted Blooms Designer Series Paper I knew I was going to struggle to cut into it, its a gorgeous collection of floral themed papers all hand painted – it is stunning! But I knew I had to use this one particular piece in as large pieces as I could, and making 6 cards from one sheet of DSP was the way to do this.

I know a few US demo’s have made similar videos, but they use slightly different measurements to fit 8 1.2 x 11″ cardstock, rather than our A4

Stampin' Up! UK painted blooms petals giveaway

I just love the look of these cards, all different but definitely a set together!

And I couldn’t bear to split them up so, I’m going to give them away to you – to win these 6 cards all you have to do is place an order with me before midnight on the 28th of February 2015 – and I will select one random winner! awesome!

Stampin' Up! UK Painted Bloom Petals 6 cards from one DSP

But, how do you make them! well, I have a video for that!

Measurements:

For these cards you will need 3 sheets for A4 cardstock cut in half and folded to make 6 cards, and a sheet of 12 x 12 Designer Series Paper

Cut 1.8 cm (3/4″) from the bottom of the 12 x 12 DSP

Cut your DSP in half at 14.3 cm (5 13/16″)

Then cut each piece into 10 cm (3 7/8″) pieces, you will have two little slivers of DSP left over


Hannah Wilks

Stampin’ Up! UK Independent Demonstrator

If you like the project, or any of the products used, would like a catalogue, or to join my team, please contact me, or click on the ‘Shop NOW’ button at the top of the page. You can also find me on Twitter, Facebook, YouTube, Google+, About.me, and Tumblr (Links in the sidebar)

Sign up to our newsletter here – http://eepurl.com/2if59

Thank you for stopping by www.www.stampinbyhannah.co.uk today

x