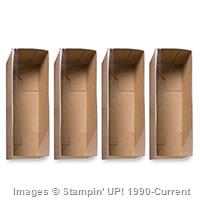
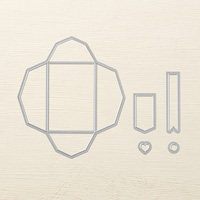
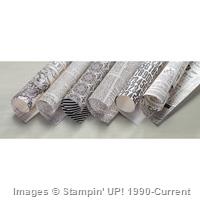
I call these Cookie Boxes, although they are really called Tag a Bag Gift Boxes, but they are food safe, and coordinate with the Tag a Bag accessory kits. I use them for all sorts of things, table bins at classes, boxes for gifts, storage for pens and gift tags and loads of other things too!
I made these for a class a few months ago, and thought they are super cute, and would look awesome in our new in colours!
Measurements:
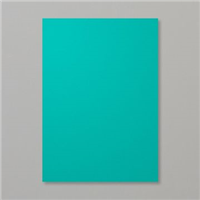
Card stock – 10 x 2 1/2″ (25.5 x 6.5 cm)
Score on the long side at 2 1/2, 4 3/4, 7 1/4, and 9 1/2″ (6.5, 12, 18.5, ans 24 cm)
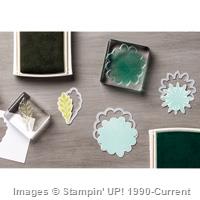
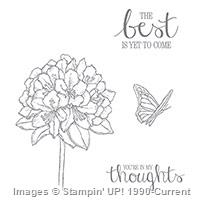
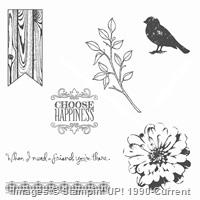
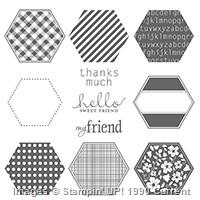
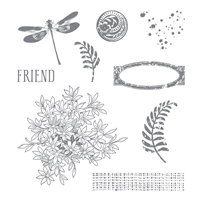
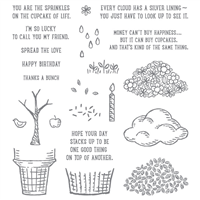
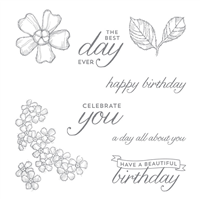
The stamps here are Flower Patch, which are a great photopolymer set that coordinate with the Flower Fair framelits. These look really complicate to line up, but if you look carefully you will find that each flower has a petal that not the same as the others and allow you to line up the stamped images with the framelits
To purchase any of the items featured in my projects please use the links above. To join my team of Stampin’ Friends select ‘Join My Team’ or send me a message!
Please support StampinByHannah by using the Hostess code featured in the top right hand of my blog. For orders of over £150 please do not use this code, as you are entitled to your own Hostess benefits!
I love this sentiment, it is so true! I am loving my journey as a Stampin’ Up! demonstrator, and I know the best is yet to come!
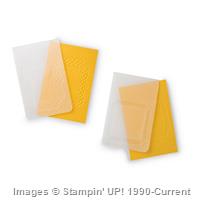
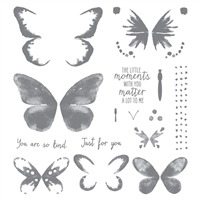
The flower here is stamped in Stazon Black on Vellum, and then coloured using Watermelon Wonder and Cucumber Crush using my Blender Pens. The blender pens work amazingly on Vellum, because its a very smooth surface the ink takes longer to dry which means you have longer to blend them with the blender pen. Let me know if you fancy a tutorial video on this!
The vellum is mounted on Whisper White card stock, but with the stamped image facing the card stock, giving a softer look. The sentiment is also stamped in Stazon ink but on the outside of the vellum, so its darker than the lines of the flower. The Vellum is stuck onto the card stock using Fast Fuse – Fast Fuse is completely clear and so is great for using with vellum, still I always try and apply it under a coloured section or embellishment
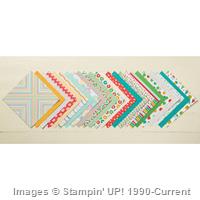
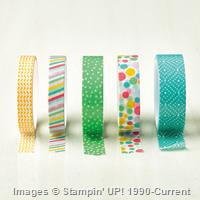
I love the designer series paper mount too, its a sheet from the Cherry on Top DSP stack, and the card is finished with a couple of pieces of Cherry on Top Washi Tape
Just before I go, you only have a few more days to book onto my latest Technique Class using An Open Heart – Class costs £10 – Booking closes on Monday!
To purchase any of the items featured in my projects please use the links above. To join my team of Stampin’ Friends select ‘Join My Team’ or send me a message!
Please support StampinByHannah by using the Hostess code featured in the top right hand of my blog. For orders of over £150 please do not use this code, as you are entitled to your own Hostess benefits!
Hey there folks! hope you are having a great week, its super busy around here this week as I prepare for my team training event on Saturday! I am so excited to share some great projects with my team, I’m sure I’ll show you what we made next week!
Weekly Deals
As always I’ll start my Week In Review with this weeks Weekly Deals, these items are available on a special offer for this week only! This deal is always available, but the products change from week to week, they are always worth checking out!
This week not only have they selected 3 great stamp sets! (I am loving that Six-Sided Sampler, there are some awesome ideas for that one on Pinterest!), but also that punch is one of my favourites! It coordinates with the Crazy About You stamp set that I just adore! I can’t live without my Fast Fuse, I am sure it will be hitting my basket this week!
What’s on your next order?
Classes and Workshops
Have you seen that I have added an extra tab under ‘Classes and Workshops’? I thought it might be nice for you to see at a glance all the classes I currently have available for the following month!
There is now less that a week until booking closes for my July technique class. This month we are using An Open Heart to make 5 (yes, that’s more cards that usual!) gorgeous cards for all occasions.
I am also offering two other classes in July; a kit class, this month making the wonderful Perpetual Birthday Calendar, and a Stamp-a-Stack – making 10 easy to make birthday cards in a flash!
Well, heaps actually! I worked at the day job last weekend, so have been spending the first few days of this week playing catch-up. I have a super exciting post coming on Saturday that I have been working really hard to sort out, which is now ready to go! eeek! I am so excited about that one! As well as planning for Team Training, and starting to get ahead with the blog ready for being away for 3 weeks!
Wedding plans are also really taking shape now, less that 7 weeks to go! We’ve been on a bit of a crash diet this week, trying to get ready for that bikini on the honeymoon! I must get back to the shop to try my dress on again. My Orders of Service are arriving today so I really should get on with making the covers, but I think I’ll save that for Sunday when the madness has calmed.
Before I go…
Just wanted to make a final reminder that the Stampin’ Up! joining offer runs until the 30th June – get yourself 2 FREE stamp sets when you sign up and pay just £99! I have a full post about it HERE or jump straight to the FAQ and SIGN UP!
To purchase any of the items featured in my projects please use the links above. To join my team of Stampin’ Friends select ‘Join My Team’ or send me a message!
Please support StampinByHannah by using the Hostess code featured in the top right hand of my blog. For orders of over £150 please do not use this code, as you are entitled to your own Hostess benefits!
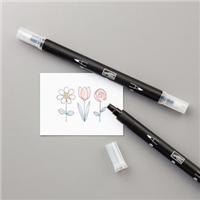
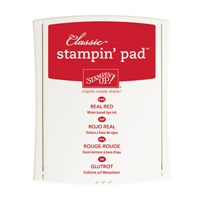
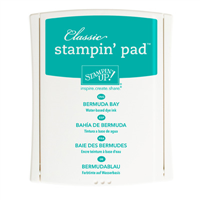
I find myself reaching for my Stampin’ Write markers often. They are the same ink as the Stampin’ Up! Classic Ink you’ll find in our ink pads, but in the convenience of a pen. There are so many techniques that use these pens; from watercolouring to stamping, using them like felt tips, or just a quick ink.
I use Stampin’ Write makers for technique like this one quite often, they are a great way to ink a stamp with several colours; whether you are colouring a bird or flower, or just creating a great background like this one.
The Stampin’ Write makers have two tips; a fine point great for journalling in you Project Life albums, and a brush tip wonderful for colouring images or stamps.
How To:
Select a few Stampin’ Write markers; here I have used Melon Mambo, Rich Razzleberry, Bermuda Bay and Island Indigo.
Using the brush tip of your marker on its side, scribble the colour into your stamp
Once your stamp is covered in ink, spritz with water
Stamp onto your card stock (I used Whisper White for this card, but it works wonderfully with Watercolour paper too!), holding the stamp to the card stock for a few seconds to allow the ink to soak into the paper
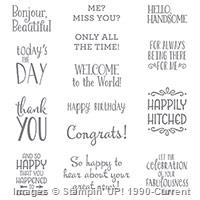
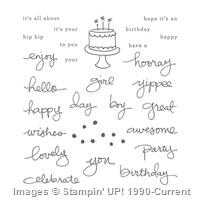
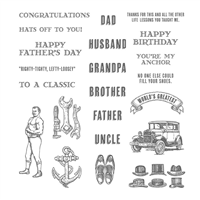
The sentiments used here are both from the I Think You’re Great stamp set, and are stamped in Tip Top Taupe before being fussy cut with my Paper Snips and added to the card with some Dimensionals
I think my favourite is the ‘Way to Go’ card, what about you?
To purchase any of the items featured in my projects please use the links above. To join my team of Stampin’ Friends select ‘Join My Team’ or send me a message!
Please support StampinByHannah by using the Hostess code featured in the top right hand of my blog. For orders of over £150 please do not use this code, as you are entitled to your own Hostess benefits!
I know I have mentioned this months fantastic joining offer from Stampin’ Up! but I thought I would pop in today and talk about it properly.
We all love a bargain, and I think the Stampin’ Up! Starter Kit is the greatest bargain! To start with you get to choose £130 worth of items from the brand new Annual Catalogue, and pay just £99! and then you get 20% discount on all future purchases for the life of your demonstratorship
Then there is the wonderful friendships, inspiration and community you get just by being a part of our group! Not only are you joining a close group of friendly crafters, but also a wider community of inspiring friends from around the world. I run a private facebook group for my team, but you will also be a part of Pootles team group too, and Stampin’ Up! private forum – Stampin’ Connection where stampers from around the world discuss and share, bringing you instant project ideas, encouragement and friendships
I know what you’re thinking, but I’d have to sell stuff. Well, no, not really. To continue to receive that great 20% discount (and get sneak peaks and the chance to attend some awesome Stampin’ Up! events) you have to sell £270 of catalogue priced products each quarter. When you take off your discount, thats only £75 per month! and Stampin’ Up! don’t mind who buys either, whether its you or a friend, customers or your mum!
Convinced? Shall I tell you more about the offer this month?
I always send a little something to those who join my team. This month’s team gift includes a note book covered in Cherry on Top DSP, with matching bag, a Swatch Book, and something secret!
Well, this month is awesome because not only do you get all of that (and more besides!) but Stampin’ Up! will also throw in 2 free stamp sets of your choice! Awesome!
But what do you choose? This is where I though I would help!
When I’m looking at free stamp sets, I tend to choose more expensive ones, that I wouldn’t necessarily buy for myself. Last time I had free stamp sets (yes, that’s another perk of being a demonstrator, you get free stuff, all year round!) I grabbed the Big News stamp set, in Wood Mount, that would have cost me £40!
To purchase any of the items featured in my projects please use the links above. To join my team of Stampin’ Friends select ‘Join My Team’ or send me a message!
Please support StampinByHannah by using the Hostess code featured in the top right hand of my blog. For orders of over £150 please do not use this code, as you are entitled to your own Hostess benefits!
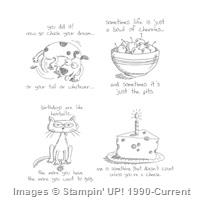
I made this card with a special friend in mind, actually I bought the stamp set with her in mind! I know I’ll get plenty of use out of it, actually, I have already used another one of the stamps for a Thank you card.
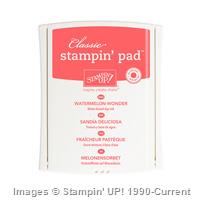
I need to work out the white balance on my camera when trying to photograph Watermelon Wonder, for some reason it turned everything else pink! However, you get the picture!
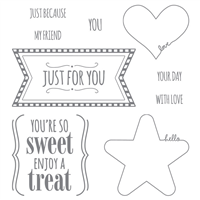
I love this stamp set, its only a set of four stamps, but they are such cute images and great sentiments, I couldn’t help myself, and I’m so glad it’s still in the Annual Catalogue. Have you got your copy of the latest Annual Catalogue yet by the way? If not (and you’re in the UK) I’m still sending them out, so just leave your details HERE!
I stamped in Stazon Black ink onto shimmery White Card Stock, and then remembered I wanted to heat emboss this ready for water-colouring, so I pulled out my Stamp-a-ma-jig to ensure correct alignment and stamped over it again in Versamark, and heat embossed in Clear Stampin’ Emboss powder. I added water to the cat, and dropped Tip Top Taupe into the water with a paintbrush. I did a little bit of blending, but really not very much.
The layers are matted off set towards the top, something I think just makes this card just a little different, cute huh!
To purchase any of the items featured in my projects please use the links above. To join my team of Stampin’ Friends select ‘Join My Team’ or send me a message!
Please support StampinByHannah by using the Hostess code featured in the top right hand of my blog. For orders of over £150 please do not use this code, as you are entitled to your own Hostess benefits!
I can’t believe we are already at week 3 of my Cardmaking 101 series; saying that, I have a heap of posts in the planning for you! I can see this series lasting a while, please feel free to drop me a message or leave a comment if you have any card making questions, and I will do my best in answer them in a future Cardmaking 101!
This week I thought it might be helpful to discuss the different types of stamps. Now, before we getting into the post proper, I just want to remind you that I am a Stampin’ Up! demonstrator, and so I will be discussing there products!
Wood Mount Stamps
Ok, so Wood Mount – this refers to Red Rubber stamps mounted onto wooden blocks. There are some real advantages to these stamps; the main one being that the blocks are pre-mounted, no scrabbling around searching for the perfectly sized block each time – they are already there! Stampin’ Up!’s Wood Mounted stamps arrive as a sheet of red rubber stamps, a series of wooden blocks, and a sheet of stickers. Before you can stamp you must pop the stamps out of the sheet and work out which stamp matches which block (I’ve made this sound complicated, its really not – its usually pretty obvious which stamp goes with which block). The stamps are pre-glued, and you peel the backing paper off the stamps and stick them onto the blocks. The stickers are then stuck onto the other side of the wooden block for identification.
I love my wood mount stamps, however, they are more expensive, and they take much more space to store – although they do sit next to your clear mount stamps on your shelf.
Clear Mount Stamps
Like Wood Mount stamps, Clear mount are our classic red rubber. I am totally a red rubber girl – I just love the quality and feel of red rubber stamps. Clear mount stamps require Clear blocks to allow you to stamp, you mount and un-mount them at each use. Stampin’ Up! clear mount stamps also come with a sheet of stickers, however, I find that they affect the cling if not perfectly applied to the stamp meaning that the fall off the blocks half way through stamping! So I tend to just put the sheet of stickers inside the slip cover on my stamp cases and leave them there! Saying this, I am a Clear mount person – I love the red rubber, and the value of the clear mount wins every single time!
Photopolymer
Stampin’ Up! Photopolyer stamps are fantastic! They are the same quality as the classic red rubber, but allow you to see through the stamps for perfect alignment every time! I recommend Photopolymer for layering stamps and sentiments. Some sets are available only in Photopolymer, however, more and more sets are available in all three options. Photopolymer stamps are generally packaged in our DVD sized clear mount stamp cases, although if there are lots of stamps they sometimes come in the bigger Wood Mount cases, but they still sit nicely with your other stamps on the shelf. Photopolyer stamps are a great price, and come between two sheets of Window Sheet. Be warned though, Photopolymer stamps have a habit of ‘wondering off’ your desk and into the bin as they get stuck to things and can be difficult to see! Photopolymer also tends to stain over time, particularly if you use red/pink ink, this doesn’t affect the stamp and will not transfer to your next project.
To purchase any of the items featured in my projects please use the links above. To join my team of Stampin’ Friends select ‘Join My Team’ or send me a message!
Please support StampinByHannah by using the Hostess code featured in the top right hand of my blog. For orders of over £150 please do not use this code, as you are entitled to your own Hostess benefits!
Oh yes, It’s that time again! Playing along with Freshly Made Sketches again this week with #191!
This sketch scared the pants off me! So much white space! I love white space, I really do, and most of my cards feature expanses of white space, but to see a sketch with so much white was just frightening!
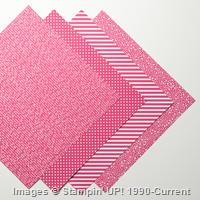
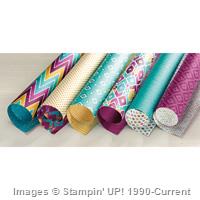
I’ve had a stack of card stock sat out on my shelf this week, and the Real Red piece shouted at me for this card. As soon as I saw the two little strips on the sketch I knew I wanted to use some Designer Series Paper, so I pulled Typeset – I love this paper, its so pretty but I hadn’t used it on a card before! I know, its shocking, but putting DSP on cards is something I struggle with – I am a total stamper at heart.
Initially I grabbed Guy Greetings for my sentiment, but I quickly changed my mind to the lovely new Endless Birthday Wishes. I uses a ruler and pencil to draw a line across the piece of Very Vanilla card stock, and I stamped the sentiment in Real Red on the line. Sometimes I find this way to get a straight line quicker than pulling out my Stamp-a-ma-jig!
I almost thought the card was finished, but it just felt a little too clean! I’ve been playing with the Birthday Blossoms preparing for my Stamp-a-Stack for July, so pulled it again for these awesome flowers punched with the Pansy Punch.
To purchase any of the items featured in my projects please use the links above. To join my team of Stampin’ Friends select ‘Join My Team’ or send me a message!
Please support StampinByHannah by using the Hostess code featured in the top right hand of my blog. For orders of over £150 please do not use this code, as you are entitled to your own Hostess benefits!
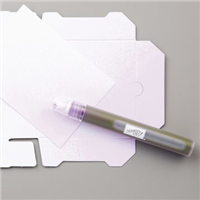
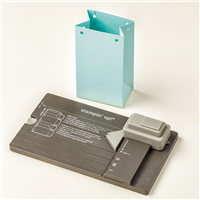
I love a simple gift bag, and with the Gift Bag Punch Board Stampin’ Up!® has made making super cute bags super easy! I know I will be using this punch board lots in the coming months (and even more around Christmas!) but I wanted to give you a quick guide to using the board before we drive into more complex projects with it!
How To:
The gift box punch board has the instructions printed onto it so you can refer back at each use, but I thought I would share some tips.
The punch board includes a great scoring tool / bone folder – always store it back into the board so you don’t loose it! It is so easy to loose a great tool like this in your crafty mess
The width of the paper or card stock is important: a small gift back uses 10″ (25.4 cm) wide DSP, and the S line on the board. A medium sized bag uses 11″ (27.9 cm) wide DSP and the M line on the board. A Large bag uses 12″ (30.5 cm) wide DSP and the L line on the board. The length of the DSP (or card stock) is not important, and just varies the height of the final bag, the board suggests using lengths between 4″ (10 cm) and 12″ (30.5 cm) In the video the card stock that I used was 10 x 6″ (25.4 x 15 cm)
The punch may be a little stiff, use the board on a table and stand to punch.
To purchase any of the items featured in my projects please use the links above. To join my team of Stampin’ Friends select ‘Join My Team’ or send me a message!
Please support StampinByHannah by using the Hostess code featured in the top right hand of my blog. For orders of over £150 please do not use this code, as you are entitled to your own Hostess benefits!
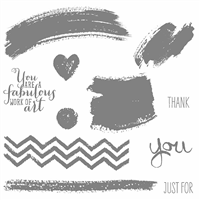
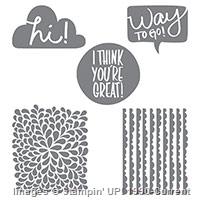
I have been playing with ink a lot recently, making a great big mess, but having loads of fun too! I get a lot of inspiration from watching some of the wonderful card makers on YouTube (Jennifer McGuire and Kristina Werner are two of my all time favourites!) and I recently spotted this super cool technique, Ink Smooshing (I haven’t done a tutorial for this one, but check out this great video from Kristina)To create this card I first heat embossed that great sentiment from I Think You’re Great using Clear embossing powder.
I used three colours of ink; Bermuda Bay, Crushed Curry, and Melon Mambo. I use either my ink pads or re-inkers to put ink onto a large clear block or the glass of my desk top, an add water using an water spritzer. One colour at a time I make my ink / water mixture and pick up the mix using the clear sheet that comes with our Photopolymer stamps – you could just as easily using a piece of window sheet or other packaging – and smoosh the ink onto the watercolour paper. I added the Crushed Curry first, then repeated the process with Melon Mambo, and finally Bermuda Bay.
One of the great things about Stmapin’ Up! inks is how they work with water. Not only can you water colour with them, but also once your ink has dried you can drop water onto the ink, and wick away some of the colour – creating this great effect.
To purchase any of the items featured in my projects please use the links above. To join my team of Stampin’ Friends select ‘Join My Team’ or send me a message!
Please support StampinByHannah by using the Hostess code featured in the top right hand of my blog. For orders of over £150 please do not use this code, as you are entitled to your own Hostess benefits!


