Fancy Fold Friday – Thinlit edition…..

Ok, So I thought I had finished Fancy Fold Friday (I’m planning on bringing it back soon, I just haven’t got round to making any Fancy Fold cards recently!), and then I found this on my desk.

I know that this really is cheating, but people are always so impressed with these cards, and they just look so complicated to make, but really they are so easy, and its all down to a die!

Stampin' Up! UK Circle Thinlit Festival of Trees

This card is created using the Circle  Card Thinlit die. Stampin’ Up! have 3 of these ‘flip card’ creating dies at the moment, this circle one, a label one, and a great snowflake one! Each die comes with a number of other dies to create a great card. These dies are wonderful! Trying to made a ‘flip card’ by hand is a right pain! This die, not only cuts the card to the right size, but cuts the flip shape AND creates the score lines! and all I had to do was run it through my Big Shot!

To create this card I cut a piece of Real Red cardstock to the slightly bigger than the Circle Card Thinlit die, and ran it though my Big Shot. I also grabbed the scallop circle die from the same die set and a piece of Old Olive cardstock, and ran that through the Big Shot too!

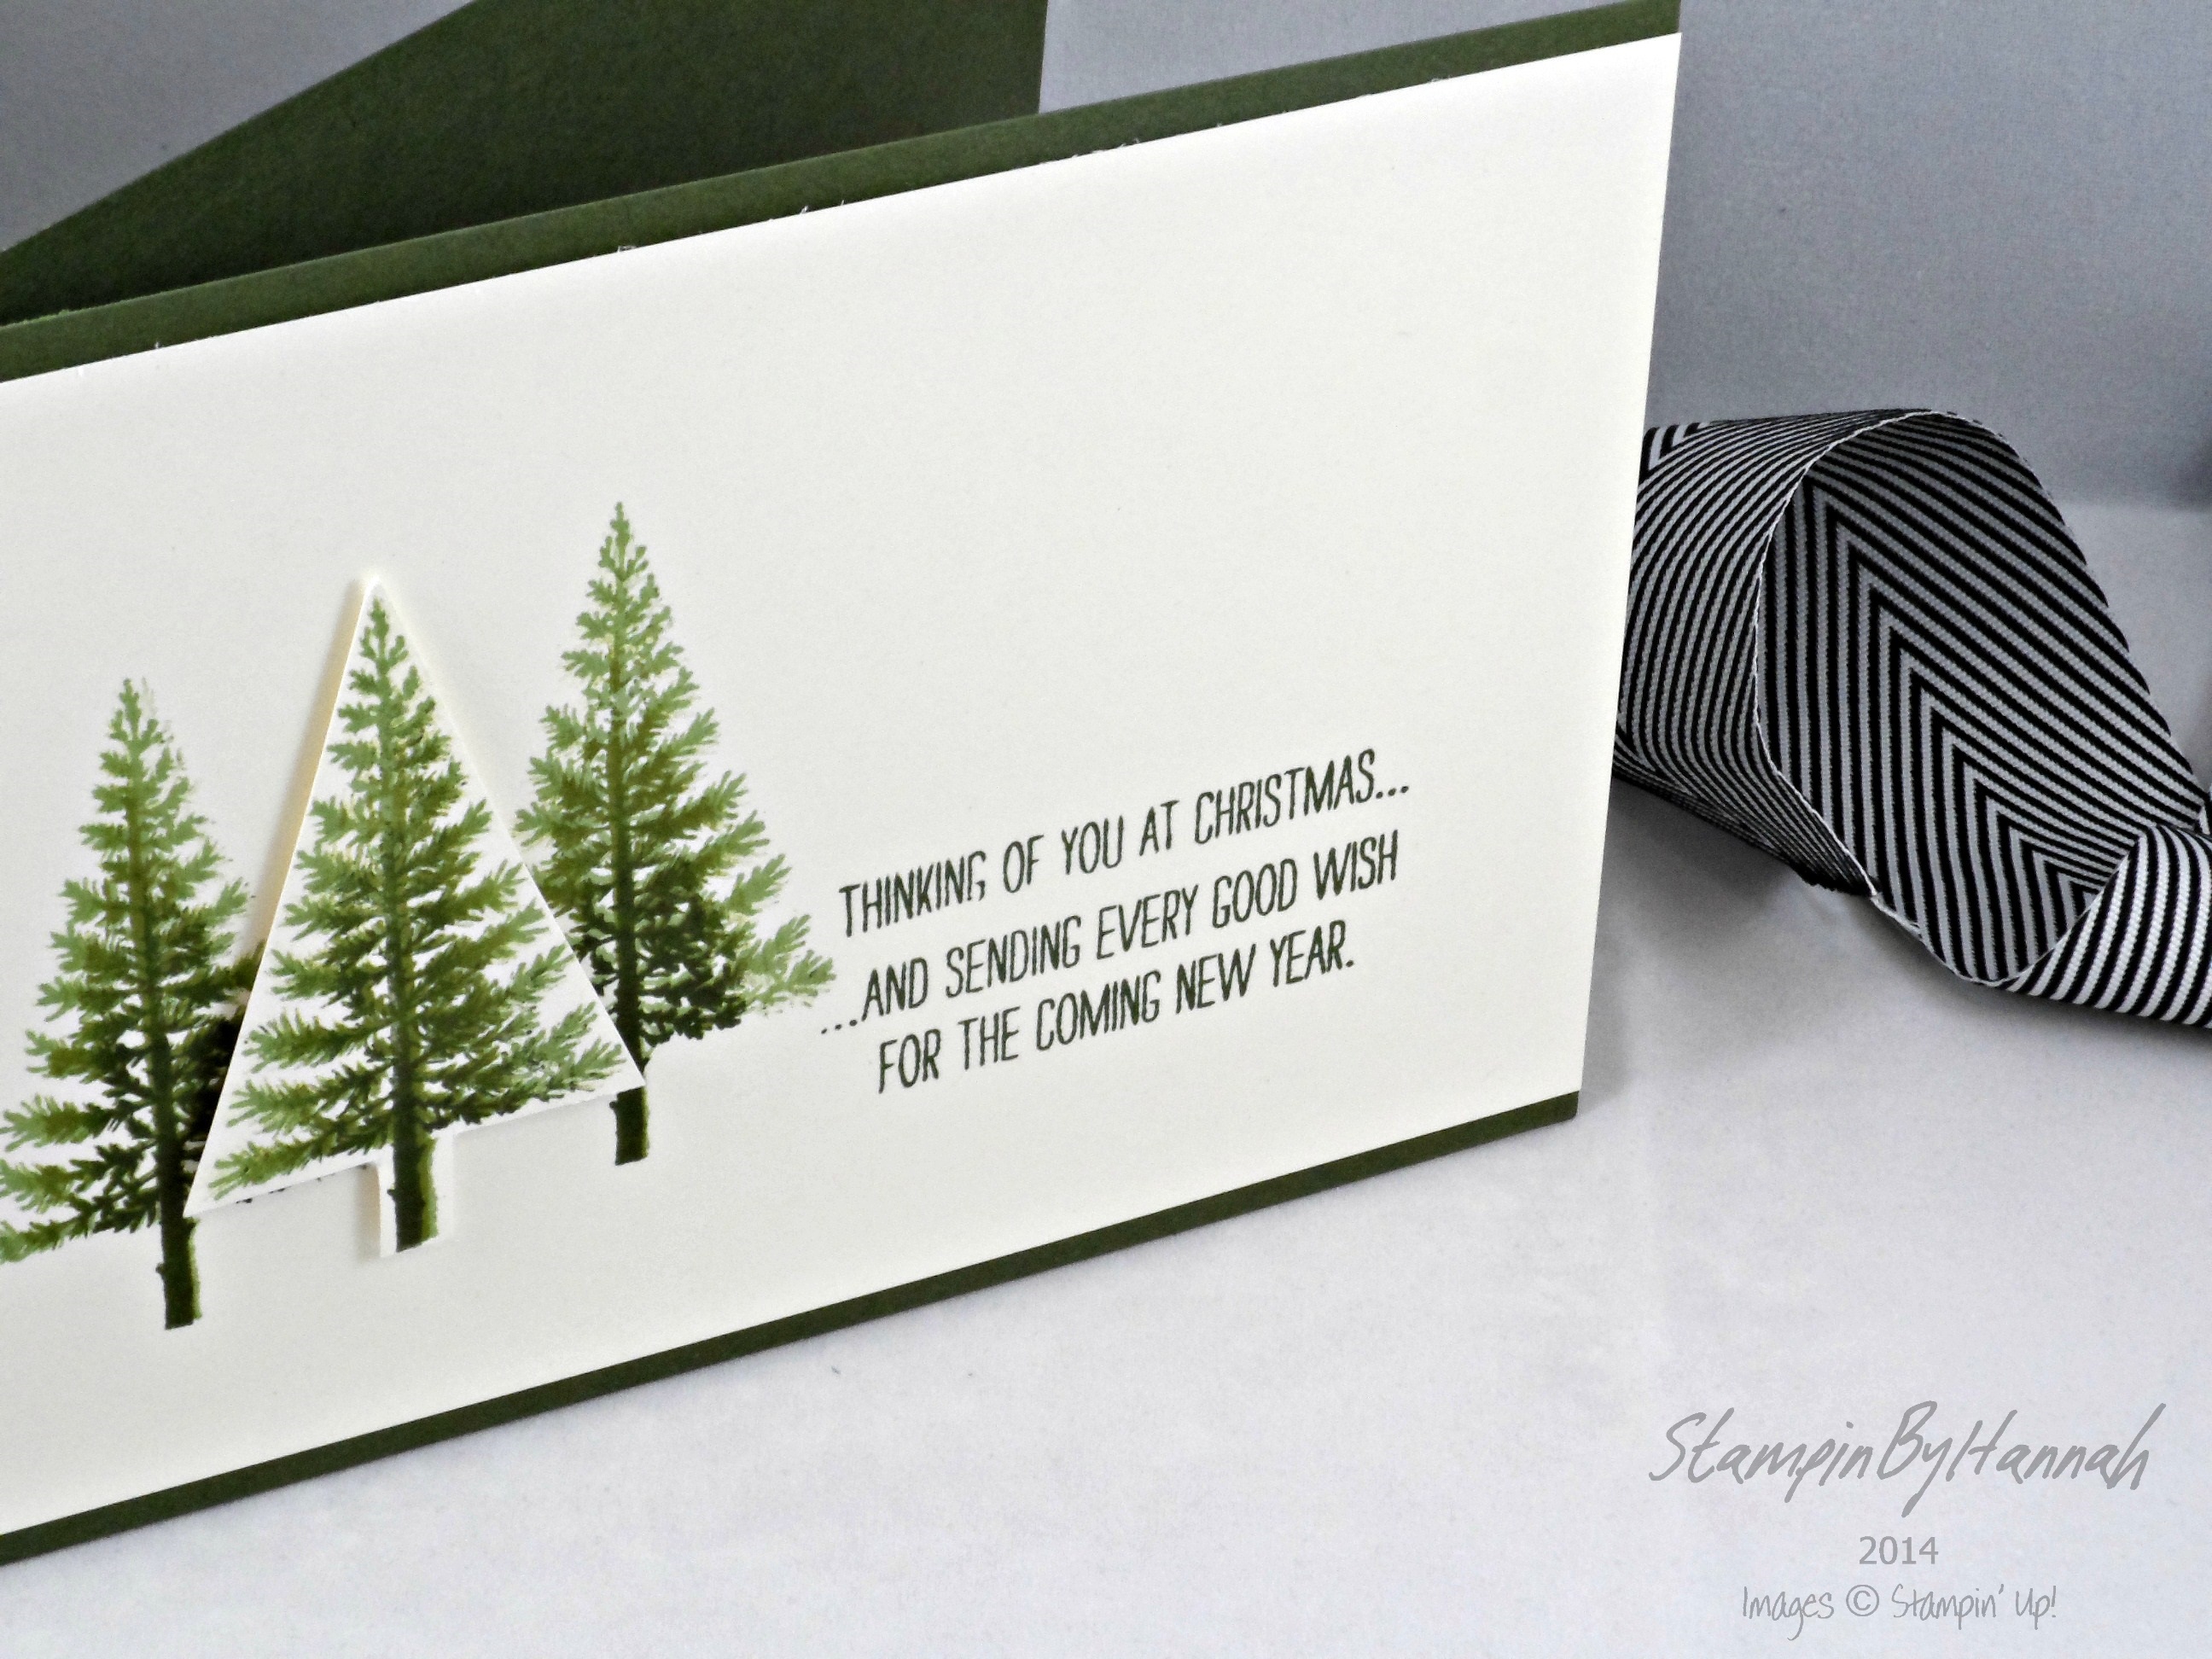
I couldnt make one of these cards without using my favourite Festival of Trees stamp set, this time stamped in Pear Pizzazz, Old Olive, and Real Red. The sentiment is also from the same stamp set, stamped in Real Red, and cut into a cute little banner.

The tricky bit of this card is cutting that DSP! The paper I have used here is from Santa and Co. (that one with the crazy dancing Santas!). To ensure that the DSP fits the card, I used the Circle Card Thinlit die again, but this time cut the DSP rather than cardstock. Then cut along the score lines to give me two pieces; one for the front and the other for the inside! Then its just a case of adding Snail adhesive and sticking it all together!

Over the next few weeks I will be revisiting some of my previous Fancy Fold cards, and adding videos! Like my Facebook page or Subscribe to my YouTube to stay up to date and get my latest projects straight away.


Hannah Wilks

Stampin’ Up! UK Independent Demonstrator

If you like the project, or any of the products used, would like a catalogue, or to join my team, please contact me, or click on the ‘Shop NOW’ button at the top of the page. You can also find me on Twitter, Facebook, YouTube, Google+, About.me, and Tumblr (Links in the sidebar)

Sign up to our newsletter here – http://eepurl.com/2if59

Thank you for stopping by www.www.stampinbyhannah.co.uk today

x

Christmas Wishes Pocket Project

I do love a cute Christmas make – and this would be great to make for you children and grandchildren to remember why they love Christmas, why Christmas is so special, or to teach them a little bit about the Christmas story.

Before you watch the video, I recorded this a couple of weeks ago (and I forgot all about it!) and so I’m sorry for a waffle at the beginning about the Good Greetings offer which has sadly now ended.


I found a similar looking item in my local Craft Superstore, however, I thought I could totally make something similar at home.

Stampin' Up! UK Christmas Wishes Pocket

The measurements:

Cardstock = 8 x 4 1/2″ (20.4 x 11.5 cm)

A piece of cardstock that measures 3 1/4″ x 3 1/4″ (9.5 x 9.5 cm)

and 10 stripes that measure 3/4″ x 5″ (2 x 12.7 cm)

Score the short side at – 1/2″ and 4″ ( 0.6 and 10.2cm)

Score the short side at – 4 1/2″ (11.5cm)

Now, I think this would be a really cute idea to add to your Project Life or December Daily! but the pocket is too big!

So, to make a pocket which fits your project life: You need a piece of cardstock that measure = 6 1/2 x 4″ (16.5 x 10.2 cm), score the short side at 1/2″ and 3 1/2″ (1.2cm and 9cm), and the long side at 4″ (10.2 cm)


Hannah Wilks

Stampin’ Up! UK Independent Demonstrator

If you like the project, or any of the products used, would like a catalogue, or to join my team, please contact me, or click on the ‘Shop NOW’ button at the top of the page. You can also find me on Twitter, Facebook, YouTube, Google+, About.me, and Tumblr (Links in the sidebar)

Sign up to our newsletter here – http://eepurl.com/2if59

Thank you for stopping by www.www.stampinbyhannah.co.uk today

x

A Polar Pool Party…..

I love making Christmas cards, I take a heap of time over them every year. Most years I have made 50+ of the same card, this year, my first Christmas as a Stampin’ Up! UK demonstrator, I have made so many Christmas cards as samples, I don’t have to stand at my desk for hours over a weekend making all my cards! This is super exciting! I know it’s a small thing, but it just reminds me of the many reasons why being a Stampin’ Up! UK demonstrator is just the most awesome thing I have ever done!

Stampin' Up! UK White Christmas Pool PartySo, this is another one of my many Christmas cards!

I cut a piece of Pool Party cardstock in half, and folded it in half to create this side folding, but wide card. I stamped the trees from White Christmas in Pool party ink, on Very Vanilla cardstock, before adding the ‘Merry Christmas’ banner and polar bear in Smokey Slate. I added the Very Vanilla stamped piece onto the card base, but there was something missing.

I cut a lot of my cardstock down a little when making card bases (I just find it easier when doing ‘layer maths’) and so have a stack of strips of cardstock left over, which of course I keep! I added one of these cardstock strips in Smokey Slate to the top of the card, and added some of the ‘snow’ stamps from White Christmas.

Thats another Christmas card made, all ready for my family, friends or customers!


Hannah Wilks

Stampin’ Up! UK Independent Demonstrator

If you like the project, or any of the products used, would like a catalogue, or to join my team, please contact me, or click on the ‘Shop NOW’ button at the top of the page. You can also find me on Twitter, Facebook, YouTube, Google+, About.me, and Tumblr (Links in the sidebar)

Sign up to our newsletter here – http://eepurl.com/2if59

Thank you for stopping by www.www.stampinbyhannah.co.uk today

x

12 Tags of Christmas – Merry….

Its Monday! And in the lead up to Christmas, that only means one thing…… its time for another 12 tags of Christmas!

Stampin' Up! UK 12 tags of Christmas Seasonally Scattered

This tag is super duper simple!

The tag base is a 2″ x 6″ piece of Whisper White cardstock, punched with the Scalloped Tag topper punch.

I just adore the Seasonally Scattered stamp set, I will be so sad when it leaves us in January, but for now I’m planning on using it for as long as possible! So I used the Merry Stamp, in Real Red Ink, its just so beautiful!

I added some sparkle (I’m sorry, the picture does NOT do this one justice at all!) by dotting my 2-way glue pen around the image, and added some lovely glitter. I don’t use glitter all that often, I love sparkle but I generally opt for jewels and rhinestones over glitter, but every time I bust out the glitter I remember how much I love it, and wonder why it doesn’t get used more!

The string on this tag is the white bakers twine from the Tag a Bag accessory kit from the annual catalogue.


Hannah Wilks

Stampin’ Up! UK Independent Demonstrator

If you like the project, or any of the products used, would like a catalogue, or to join my team, please contact me, or click on the ‘Shop NOW’ button at the top of the page. You can also find me on Twitter, Facebook, YouTube, Google+, About.me, and Tumblr (Links in the sidebar)

Sign up to our newsletter here – http://eepurl.com/2if59

Thank you for stopping by www.www.stampinbyhannah.co.uk today

x

Gift packaging options from Stampin’ Up! UK

Stampin' Up! UK Gift Packaging Options

Christmas is coming! eek! I’m sure your all like me and completely disorganised when it comes to Christmas gifts! I try really hard to find the perfect present for each person, but most of the time I run out of time and people end up with gift cards and novelty items! This year I’m really hoping to be better, I’m just starting to write my lists, and organise my gift wrap, tags, and cards.

I thought I would take you on a little tour of the gift packaging items available from Stampin’ Up! this year, both from the annual and seasonal catalogues.

As well as the items I mentioned, there are also some Dies available to create your own boxes and gift card pockets, as well as the Gift Box Punch Board (and Envelope Punch Board) which make gift wrapping super easy and loads of fun! Who knew the wrapping could be as much fun as the present inside!


Hannah Wilks

Stampin’ Up! UK Independent Demonstrator

If you like the project, or any of the products used, would like a catalogue, or to join my team, please contact me, or click on the ‘Shop NOW’ button at the top of the page. You can also find me on Twitter, Facebook, YouTube, Google+, About.me, and Tumblr (Links in the sidebar)

Thank you for stopping by www.www.stampinbyhannah.co.uk today

x


White Reindeer …..

I just love the White Christmas stamp set, and although the trees are lovely, my favourite part of the stamp set is the ‘little detail’ stamps; the snow, the car, the snowman, and this great reindeer!

Stampin' Up! UK White Christmas dear

This card uses a Smokey Slate card base, with a Whisper White stamped panel.

I stamped the trees, banner, and sentiment in Smokey Slate, as well as a reindeer. I then created a mask and covered the hills, in order to protect the snow scene while I used a Finger Dauber to ink the sky using Soft Sky ink. I then stamped the reindeer again on a piece of scrap Whisper White cardstock, and fussy cut it (but not the antlers! I’m not that crazy!), before layering the reindeer over the original stamped reindeer with a dimensional!

Isn’t it cute!

Hannah Wilks

Stampin’ Up! UK Independent Demonstrator

If you like the project, or any of the products used, would like a catalogue, or to join my team, please contact me, or click on the ‘Shop NOW’ button at the top of the page. You can also find me on Twitter, Facebook, YouTube, Google+, About.me, and Tumblr (Links in the sidebar)

Thank you for stopping by www.www.stampinbyhannah.co.uk today

x


12 Tags of Christmas – White Christmas

And so continues the 12 Tags of Christmas!

As usual I have punched  a 6×2″ strip of cardstock with the Scalloped Tag Topper Punch, but this time I have also punched a 5 3/4 x 2″ piece to layer, before rounding the corners of both pieces with the Project Life by Stampin’ Up! corner rounder punch.


Stampin' Up! UK 12 tags of christmas


This week, I have used the White Christmas stamp set, stamped in Early Espresso, on to Very Vanilla cardstock. The To and From stamp is from Festival of Trees. I have then mounted the Very Vanilla piece onto Cherry Cobbler card stock with Dimensionals.

Stampin' Up! UK 12 tags of christmas


The top of this tag is a little different from the others so far. I have threaded Cherry Cobbler 1″ Sheer Linen Ribbon through the tag, and tied it together with some very thin ribbon that I have to admit, I have no idea where it came from!! eek!

I love this simple tag (most of the tags in this series are quite simple really, quick and easy projects are the order of the day around Christmas!)


Hannah Wilks

Stampin’ Up! UK Independent Demonstrator

If you like the project, or any of the products used, would like a catalogue, or to join my team, please contact me, or click on the ‘Shop NOW’ button at the top of the page. You can also find me on Twitter, Facebook, YouTube, Google+, About.me, and Tumblr (Links in the sidebar)

Thank you for stopping by www.www.stampinbyhannah.co.uk today

x

because no Festival is complete without some Gold (buttons)

Well, its Thursday, which means we’re nearly at the end of our Festival of Trees week here at StampinByHannah, I still love this stamp set. I’ve made classic and modern cards, and used both traditional and non-traditional colour schemes.

Today we return to the traditional looking Christmas Card – with Garden Green, Real Red, and …. Gold!!!

Stampin' Up! UK Festival of Trees Gold Buttons

This card uses a card base of Garden Green, with the tree also stamped in the same ink. The DSP is from the Trim The Tree Designer Series Paper Stack (awesome papers, great value for money!), in Sahara Sand. I’ve then added some of the Real Red Woven Ribbon (super pretty) and  a few of the Gold Basic Metal Buttons!

So simple, but super effective!

Check back tomorrow for our last day of our Festival of Trees week!

x


Hannah Wilks

Stampin’ Up! UK Independent Demonstrator

If you like the project, or any of the products used, would like a catalogue, or to join my team, please contact me, or click on the ‘Shop NOW’ button at the top of the page. You can also find me on Twitter, Facebook, YouTube, Google+, About.me, and Tumblr (Links in the sidebar)

Thank you for stopping by www.www.stampinbyhannah.co.uk today

x

Forest of Festival of Trees

Continuing our journey with the Festival of Trees, today I have a more technique based card.

Stampin' Up! UK Festival of Trees gradient stamping

This card is a Mossy Meadow card base, with Very Vanilla card front. The Trees are triple stamped – first stamped in Pear Pizzazz, the Old Olive and finally Mossy Meadow – but each time some ink is removed from the stamp before stamping, using a microfibre cloth. This means that the Pear Pizzazz layer is the whole tree, then ink up the stamp with Old Olive – rubbing the very edges of the stamp with your cloth to remove the ink from the tips of the leaves, then stamp. As Festival of Trees is a Photopolymer stamp set this is super easy, but you could use the Stamp-a-ma-jig to make this even easier. Then ink the stamp again with Mossy Meadow this time, removing all the ink except the very middle / trunk of the tree. This technique creates a lovely gradated image.

The sentiment on this card is from White Christmas

Dont forget to check back again tomorrow for another Festival of Trees project

x


Hannah Wilks

Stampin’ Up! UK Independent Demonstrator

If you like the project, or any of the products used, would like a catalogue, or to join my team, please contact me, or click on the ‘Shop NOW’ button at the top of the page. You can also find me on Twitter, Facebook, YouTube, Google+, About.me, and Tumblr (Links in the sidebar)

Thank you for stopping by www.www.stampinbyhannah.co.uk today

x

12 Tags of Christmas! Festival Style!

Well, we’re really getting into it now! 11 weeks to go!

This tag is uses the Festival of Trees Stamp set – well, it is Festival of Trees week here @ StampinByHannah!

Stampin' Up! UK Festival of Trees

I made these tree using 3 of the stamps from the set – the solid tree shape, and the two complimenting stamps; the tree and the baubles! Made in two colours – traditional; using Pear Pizzazz, Old Olive and Real Red, and a non-traditional colour way of Soft Sky, Lost Lagoon and Smokey Slate!

I love these tags. The tags themselves are super simpe – 2×6″ Very Vanilla cardstock, punched at one end using the Scallop Tag Topper punch.

Easy Peasy!


Thanks for reading,

see you again tomorrow for more ideas using the Festival of Trees!


Hannah Wilks

Stampin’ Up! UK Independent Demonstrator

If you like the project, or any of the products used, would like a catalogue, or to join my team, please contact me, or click on the ‘Shop NOW’ button at the top of the page. You can also find me on Twitter, Facebook, YouTube, Google+, About.me, and Tumblr (Links in the sidebar)

Thank you for stopping by www.www.stampinbyhannah.co.uk today

x