InspireINK | Valentines with Enduring Beauty

InspirInk Blog Hop Header Stampin' Up! team blog hop

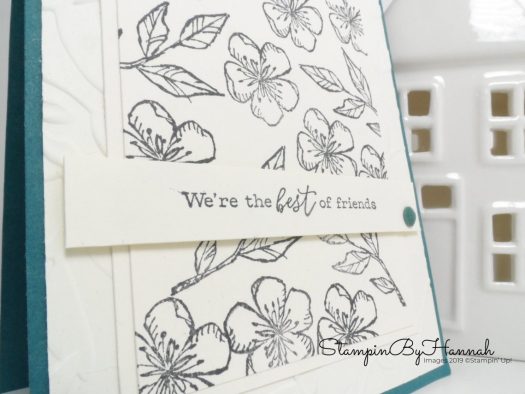
Hello! Welcome to StampinByHannah for the first InspireINK of 2024. This month we have a valentines theme, and I’ve gone for something pretty, and soppy!

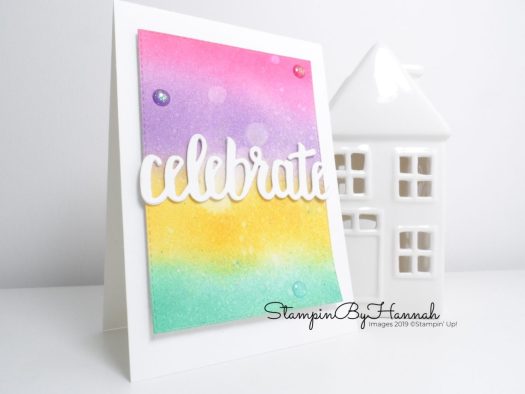
I am loving the Enduring Beauty bundle, this fabulous bundle includes the stamps, dies and a fabulous set of masks that help to create this beautifully colour effect.

The colour combination here is Bubble Bath and Fresh Freesia, Parakeet Party and Granny Apple Green.

SHOP ONLINE 24/7 http://www.stampinbyhannah.stampinup.net

Sign up to my newsletter here – http://bit.ly/StampinInspirationEmails

To find more information about joining my team of Stampin’ Friends – http://bit.ly/2k5XA6n

For more details

Check out my blog http://www.stampinbyhannah.co.uk

Facebook http://www.facebook.com/stampinbyhannah

Twitter http://www.twitter.com/stampinbyhannah

Technique Tuesday | Fancy Fold with Irresistible Blooms

Hello! Welcome to StampinByHannah for this months Technique Tuesday Blog Hop. This month’s theme is Fancy Fold, and whilst I absolutely LOVE a Fancy Fold, time hasn’t been on my side this month, and so I’ve kept things simple with a Z-Fold.

I really love this colour combination; Lost Lagoon, Pretty Peacock and Sweet Sorbet. The Designer Series Paper is Hello, Irresistible… and it’s currently on Sale! You can find all the papers on Sale HERE.

Measurements; (Sorry, but I work in A4 and in centimetres)

Card Base; 21 x 14.8 cm, scored on the long side at 10.5 and 5.25 cm

Basic White layers; 2 pieces that measure 14.3 x 4.8 cm, and 1 piece that measures 10 x 14.3 cm

Designer Series Paper; 2 pieces that measure 13.8 x 4.3 cm, and 1 piece that measures 5 x 13.8 cm

Thanks so much for stopping by today, but before you leave StampinByHannah today, please do consider subscribing to my emails, or following me on Instagram!

Shop Stampin' Up! UK Teesside North East Stockton on Tees
Joining Stampin' Up! UK Starter Kit

To purchase any of the items featured in my projects please use the links above. To join my team of Stampin’ Friends select ‘Join My Team’ or send me a message!

Sign up to my newsletter for weekly updates from me!

Hannah McCurley

Repeat stamping with Free as a Bird

Hey folks! If you’ve been visiting my blog for a while you’ll know that I’m a big fan of techniques, but I haven’t really shared any for a while. Time to correct that then, today’s card uses repeat stamping to create a panel using Free as a Bird.

Repeat stamping using Free as a Bird from Stampin' Up! with StampinByHannah

I also love the Free as a Bird stamp set (and the coordinating Bird Ballard suite), and for all I really like the birds in this set, its the little stamps that really make my heart happy. I shared THIS card using the little flower stamps a couple of months ago, and it’s taken me far too long to use them front and centre on a card again!

Simple stamping with Free as a bird from Stampin' Up! with StampinByHannah

Really this card is pretty simple, just some stamping, an embossing folder and a couple of layers of card stock. I think that this type of card are my favourite to make too, simple but effective.

Repeat stamping is a simple technique, the only thing you need to remember to be successful at it is to stamp the larger images first and then fill in the gaps with the smaller ones. It is of course, also easier using Photopolymer stamps as you can see exactly were you’re stamping. Here all the stamping is in Memento Black ink, and the card base is Pretty Peacock

Product List


Shop Stampin' Up! UK Teesside North East Stockton on Tees   Joining Stampin' Up! UK Starter Kit

To purchase any of the items featured in my projects please use the links above. To join my team of Stampin’ Friends select ‘Join My Team’ or send me a message!

Please support StampinByHannah, and enter my Code Club Code. For orders of over £150 please do not use this code, as you are entitled to your own Hostess benefits!

Sign up to my newsletter for regular updates from me!

Hannah McCurley

Make It Monday | Stained Glass Technique with Beautiful Day

I am forever inspired by the work of other demonstrators. Last week I shared THIS card inspired by a fellow demonstrator on Instagram, and today I though I would share another card I made after seeing THIS fun card using the Stained Glass Technique from my Demonstrator friend Stacey Marsh.

Fun Stained Glass Card Making technique using Beautiful Day from Stampin' Up! with StampinByHannah

This technique is so fun, and so simple! In fact, I know I’ve shared it before, but this time I’ve made a subtle but significant change.

To start the Stained Glass Technique, heat emboss the large butterfly stamp from Beautiful Day onto a piece of Vellum using White Stampin’ Emboss powder. Then, on the reverse of the vellum, colour the butterflies using Stampin’ Blends. Last time I used Stampin’ Write Markers; which works just as well, however Blends dry quicker and therefore the risk of smudging the ink is much reduced.

Thinking of you butterfly card using Beautiful Day from Stampin' Up! with StampinByHannah

To make the Blackberry Bliss Blend Colouring really POP I the mounted the Vellum onto a piece of Whisper White, and then added this to a card base of Blackberry Bliss.

The sentiment is also from Beautiful Day, and has been heat embossed in White onto Blackberry Bliss. To complete the card, I wanted to add something extra, and in rummaging through my stash of embellishments I found the Clear Epoxy Dots and thought they would be perfect!

Product List


Shop Stampin' Up! UK Teesside North East Stockton on Tees   Joining Stampin' Up! UK Starter Kit

To purchase any of the items featured in my projects please use the links above. To join my team of Stampin’ Friends select ‘Join My Team’ or send me a message!

Please support StampinByHannah, and enter my Code Club Code. For orders of over £150 please do not use this code, as you are entitled to your own Hostess benefits!

Sign up to my newsletter for regular updates from me!

Hannah McCurley

Make It Monday | Petal Palette Floating Frame Card

Over recent weeks the ‘Floating Frame’ card has gone somewhat viral on Facebook and Pinterest! I LOVE the idea, but I have to say I am not over keen on spending a fortune on Glad Press and Seal to get the technique to work. So, I had a think about how I could do this technique with things that are already in my craft room…. and hey, Washi Tape to the rescue!

Fun Floating Frame Technique using Washi Tape and Petal Palette from Stampin' Up! with StampinByHannah

I also couldn’t miss the chance to use the retiring Petal Palette stamp set one last time before the end of May, although I can already see some new stamp sets that are coming in the upcoming Annual catalogue that will work just as well.

This card has a few steps, and while I rest up and wait for baby to arrive I don’t have the energy to film a video for you. Instead, I thought I would break it down into steps…

How to create a Floating Frame Card…

  • Stamp the Petal Palette floral corner stamp in Memento Ink and use Blends to colour. I’ve used the Blackberry Bliss due and Granny Apple Green, with a hint of Flirty Flamingo here.
  • Use the coordinating dies to cut out the stamped images.
  • Then, using your grid paper as a guide, arrange the floral corners into a sort of loose frame shape.
  • Select 2 of the Rectangle Stitched Dies (I would suggest using two that aren’t particularly close in size) and arrange them on top of the die cuts, creating a frame.
  • Take a long-ish piece of Washi Tape and stick it onto your arm or clothes to remove some of the stick. Then take small pieces off this long tape and stick the dies to the die cuts.
  • Run the floral corners and stitched dies through your die cutting machine.
  • Before removing the Washi Tape, remove the pieces of die cut outside of the frame and add Dimensionals to the frame pieces.
  • Adhere to your card front, and then remove your Washi Tape and dies.
Floating frames card using Petal Palette and Stitched All Around from Stampin' Up! with StampinByHannah

The sentiment is take from a different stamp set; Stitched All Around (which is going forward into the new catalogue), stamped in Blackberry Bliss to coordinate with the Floral corners and card base.

Product List


Shop Stampin' Up! UK Teesside North East Stockton on Tees   Joining Stampin' Up! UK Starter Kit

To purchase any of the items featured in my projects please use the links above. To join my team of Stampin’ Friends select ‘Join My Team’ or send me a message!

Please support StampinByHannah, and enter my Code Club Code. For orders of over £150 please do not use this code, as you are entitled to your own Hostess benefits!

Sign up to my newsletter for regular updates from me!

Hannah McCurley

Celebrate with Ink Blending!

A few weeks ago my fabulous friend Amanda shared THIS fun card, and I just HAD to have a go at creating my own version.

I am such a sucker for a good technique, and I love some ink blending, but I haven’t done it for ages. Amanda’s card used a really pretty colour combination that I had not considered before and so I also used the same…

Ink Blended Celebrate card using Stampin' Up! supplies with StampinByHannah

I used a sponge (or 4) to add Melon Mambo, Highland Heather, Mango Melody and Coastal Cabana onto a piece of Shimmery White card stock. This method of Ink Blending starts off looking quite subtle, but the more ink you add the brighter the colours become. Once I had the ink nice and bright, I took some water and dropped it onto the piece to create a fun watercolour-y look, and add some texture.

I then left it to dry, before using the Stitched Rectangles to die cut this piece out.

How to create a pretty ink blended congratulations card using Stampin' Up! products with StampinByHannah

The ink blended panel is then popped up onto a Thick Whisper White card base with some dimensionals.

The sentiment is die cut from the Celebrate You thinlits dies which are sadly retiring at the end of May. I die cut 4 of these, and used another retiring item, the Multi-Purpose Adhesive Sheets, to glue them together and give some more dimension to the card.

This card is finished with a trio of Glitter Enamel Shapes.

Product List
Shop Stampin' Up! UK Teesside North East Stockton on Tees   Joining Stampin' Up! UK Starter Kit

To purchase any of the items featured in my projects please use the links above. To join my team of Stampin’ Friends select ‘Join My Team’ or send me a message!

Please support StampinByHannah, and enter my Code Club Code. For orders of over £150 please do not use this code, as you are entitled to your own Hostess benefits!

Sign up to my newsletter for weekly updates from me!

Hannah McCurley