Technique Tuesday | Craft Ink and Stencils

Stampin' Up! UK Dots and Stripes Stencil Craft Ink Video Tutorial

I love this technique! I think its one of those techniques I’ve picked up from YouTube, but I can’t remember who from or when! I know, really useful! but its OK because as always on a Tuesday I have a video tutorial for you!

Stampin' Up! UK Dots and Stripes Stencil Craft Ink Video Tutorial

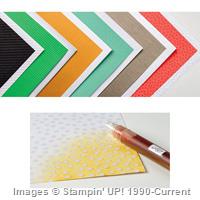
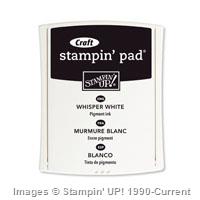
This card uses our Whisper White Craft Ink, along with the Dots and Stripes Decorative Masks to create this completely flat, yet 3D effect! What to see how, check the tutorial below

How To:

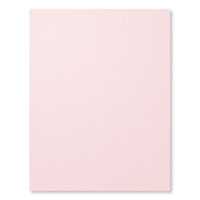
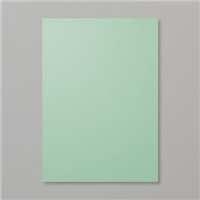
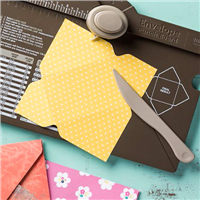
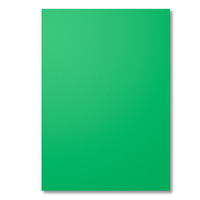
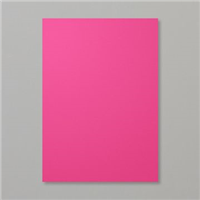
Create your card base by cutting a piece of Melon Mambo Card stock in half, and folding in half

Using sticky notes, or re-positionable adhesive, stick the card base to your grid paper. Lay your decorative mask over the top and use sticky notes (or tape) to hold in place

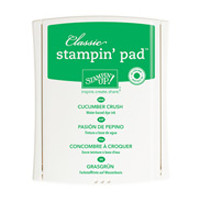
Using Whisper White Craft Ink and a Sponge Dauber, dab the ink over the holes in the mask. Once your card front is covered remove and clean the mask.

Leave the card base to dry

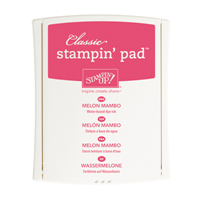
Once the Whisper White Craft Ink has dried, lay the mask back over your card base, off setting it slightly. Ink in the same way using Melon Mambo Ink

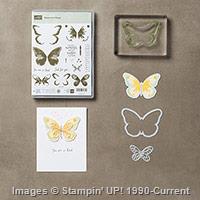
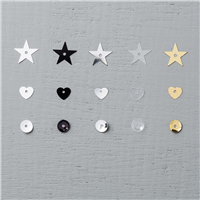
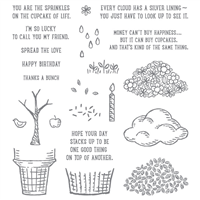
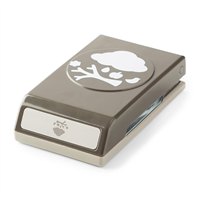
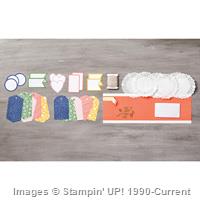
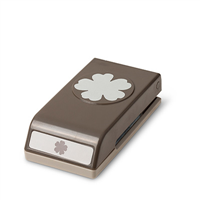
The card is finished with that fabulous Die Cut ‘Thanks’ from the Hello You Thinlits dies, and three Birthday Blossoms punched with the Pansy Punch


Don’t forget to shop using the Code Club Code to receive some great FREE product! 

2JTHMV6W

I will be closing this order on the 30th August 2015


Shop Now button-001Join my team button-001

To purchase any of the items featured in my projects please use the links above. To join my team of Stampin’ Friends select ‘Join My Team’ or send me a message!

Please support StampinByHannah, and join my Code Club, by using the Hostess code featured in the top right hand of my blog. For orders of over £150 please do not use this code, as you are entitled to your own Hostess benefits!

Sign up to my newsletter here – http://eepurl.com/2if59

Hannah Wilks

Stampin’ Up! UK Independent Demonstrator

Everything Eleanor

Stampin' Up! UK Everything Eleanor Thank you card

Unless you are brand new here you will know that my Wedding is fast approaching (actually, its on Saturday!!!!) and I have been busy making Thank You cards, gifts and boxes like a mad woman for weeks (and months!), but I have also been super busily working away on some really cool things that are going to be going on on my blog and my Facebook page while I’m away; including my Free On-line Workshop for August!

Seeing as when the workshop goes live I will be lying on a beach on my honeymoon, I thought I would share some of my Wedding related projects this month; thank you cards, my Wedding favours that sort of thing. While I was playing around with stamps and ink, and planning the workshop this card appeared as if by crafty magic on my desk.

Stampin' Up! UK Everything Eleanor Thank you cardThis card uses two stamp sets actually – Everything Eleanor which I will be featuring in that On-line Workshop, and Me = Grateful (also coming to some classes near you soon!)

The swirl from Everything Eleanor is stamped in Elegant Eggplant onto Whisper White card stock, and matted onto a card base of Elegant Eggplant too. That ‘Thank You’ sentiment is gorgeous isn’t it? It actually is part of a bigger stamp in the Me = Grateful Stamp set, the whole stamp says – Thank You for seeing me through some dark days…’ – and while that is lovely, it isn’t really appropriate for our Wedding themed card. There are two ways of stamping part of a sentiment stamp – both of which is use often – either; mask off part of the stamp with Washi tape or a Sticky note, or grab for your marker pens! Well, this sentiment is heat embossed in Gold, and while our Stampin’ Up!® inks do hold embossing powder, I grabbed my Versamark pen (unfortunately not sold by SU, but you can find it HERE) and just inked the part of the stamp I wanted.

A super quick and simple, elegant Thank You card.

What do you think? (let me know in the comments section below!)


Shop Now button-001Join my team button-001

To purchase any of the items featured in my projects please use the links above. To join my team of Stampin’ Friends select ‘Join My Team’ or send me a message!

Please support StampinByHannah, and join my Code Club, by using the Hostess code featured in the top right hand of my blog. For orders of over £150 please do not use this code, as you are entitled to your own Hostess benefits!

Sign up to my newsletter here – http://eepurl.com/2if59

Hannah Wilks

Stampin’ Up! UK Independent Demonstrator

Tall Tealight box using Pretty Petals

Stampin' Up! UK tealight box

I have had these tea-lights sat on my desk for months! I found these beautiful Pink Pirouette coloured tea-lights in Primark, for £1! and had to bring them home to make a box! I love it when I find items that perfectly match Stampin’ Up! colours, it makes gift giving so damn easy!

Stampin' Up! UK box tutorial pretty petals

These boxes hold 6 supermarket sized tea-lights, and are super quick and easy to make. Check out the video tutorial below if you don’t believe me!

Measurements:
(I’m sorry I haven’t got the metric measurements for this one, yet!)

Base –

Card stock – 7 x 4 1/2″

Score on the long side first at 1 5/8, 3 1/4, 4 7/8 and 6 1/2″

Score on the short side at 1 5/8″

Lid –

Card stock – 5 11/16 x 5 11/16″ (this measurement is really important to make sure your lid slips over your base!)

Score on all four sides at 2″

Designer Series Paper –

1 piece that measures 1 1/2 x 1 1/2″

4 pieces that measure 1 1/2 x 1 3/4″

Stampin' Up! UK tealight box

I can’t believe I have got this far into the blog post without mentioning that adorable Designer Series Paper! I did not think that this DSP was for me – it has a weird colour combination; Basic Black (which is what put me off!) Calypso Coral, Mint Macaron, Old Olive, Pacific Point and Very Vanilla. I am very much a Whisper White girl; I use Very Vanilla occasionally but I go through miles more Whisper White. So between the Basic Black and the Very Vanilla – I had decided that the Pretty Petals DSP stack was not for me! that was until I received a sample in a product share – I am converted! These papers are gorgeous! You have got to grab a pack (its only £7.25) and find out for yourself!


Shop Now button-001Join my team button-001

To purchase any of the items featured in my projects please use the links above. To join my team of Stampin’ Friends select ‘Join My Team’ or send me a message!

Please support StampinByHannah, and join my Code Club, by using the Hostess code featured in the top right hand of my blog. For orders of over £150 please do not use this code, as you are entitled to your own Hostess benefits!

Sign up to my newsletter here – http://eepurl.com/2if59

Hannah Wilks

Stampin’ Up! UK Independent Demonstrator

Watercolour Wings

Stampin' Up! UK Watercolor Wings class

I have a great card for you today, I really really love this one! I have been having so much fun making loads of cards with the Watercolour Wings stamp set.

I recently took part in the Pootlers Blog Hop where I used this stamp set and die bundle to create 3 colourful cards, but today I’m keeping things a little more monotone.

Stampin' Up! UK Watercolor Wings class

I tried really hard to get this card to photograph properly, but white on white is tricky! The card base uses the brand new Thick Whisper White card stock – this card is great for card bases, and is exactly same colour as the regular Whisper White card stock, and it is lovely! but photographing, not so much!

I am loving me a bit of monotone this week (I hadn’t released that Tuesdays cards were the same colours until I sat down to write this post!) The butterfly is stamped using all three of the butterfly layers in the set, the large background butterfly is in Pool Party, the outer edges are in Mint Macaron, and the body and details are in Bermuda Bay.

Stampin' Up! UK Watercolour Wings

I love the detail stamps that come in this stamp set; that trio of dots is just so handy. Here I have used it to create a background in Mint Macaron (stamped off once). The card is finished with that lovely sentiment stamped in Mint Macaron, and the addition of two of the smaller Bold Butterflies in Mint Macaron and Vellum along with three rhinestones.

What do you think? Do you have any white on white photography tips for me? I know I have plenty more cards using my Thick Whisper White!


Dont forget to shop using the Code Club Code to receive some great FREE product! 

XEQGUA4P

I will be closing this order on the 30th July 2015 (that’s tonight!)


Shop Now button-001Join my team button-001

To purchase any of the items featured in my projects please use the links above. To join my team of Stampin’ Friends select ‘Join My Team’ or send me a message!

Please support StampinByHannah, and join my Code Club, by using the Hostess code featured in the top right hand of my blog. For orders of over £150 please do not use this code, as you are entitled to your own Hostess benefits!

Sign up to my newsletter here – http://eepurl.com/2if59

Hannah Wilks

Stampin’ Up! UK Independent Demonstrator


Week In Review…..

Good Afternoon, so sorry this weeks post is a little late. I’ve been stuck working night shifts (insert very very sad face here), they really don’t agree with me and it takes me a few days to get back into the swing of things, plus I’ve been out for lunch with my almost-mother-in-law (and food always comes first!)

Weekly Deals

This is the last week of Bonus Deals, there are some great items this week so grab them while you can – limited supply again this week!

Supply List

Built for Free Using:My Stampin Blog

 Did you catch my Technique Tuesday yesterday featuring that fab Colour Me Irresistible Designer Series Paper? I love this stuff, you get some pre-coloured sheets and some that you can ink and spritz yourself to make your own custom Designer Series Paper complete with embossed resist patterns – Awesome! The Pretty Petals DSP stack is proving to be very popular so I would grab it at that great price before it sells out!

What Have I been Up To?

Like I said, I’ve been on nights this week so I haven’t been up to much really. All the wedding prep is now done so with 10 days to go I can relax a little.
I’ve been planning for classes and workshops coming in the Autumn, I will be updating the timetable soon so keep your eyes pealed.
Demonstrator pre-order starts next week for the Autumn/Winter catalogue – I know it doesn’t feel like we’ve had summer yet and we are already talking Christmas! – You can join in the pre-order too by joining my team today! Just drop me a message or check out the Join My Team page!
Well, that’s it for today folks! I will be sending my monthly newsletter over the weekend so keep checking your inboxes for some special newsletter only projects and news! You can sign up for my newsletter at any time by using the link at the bottom of this post, or by selecting the Subscribe to my Newsletter!
Speak to you again next week

Shop Now button-001Join my team button-001To purchase any of the items featured in my projects please use the links above. To join my team of Stampin’ Friends select ‘Join My Team’ or send me a message!

Please support StampinByHannah, and join my Code Club, by using the Hostess code featured in the top right hand of my blog. For orders of over £150 please do not use this code, as you are entitled to your own Hostess benefits!

Sign up to my newsletter here – http://eepurl.com/2if59

Hannah Wilks

Stampin’ Up! UK Independent Demonstrator

Technique Tuesday | Colour Me Irresistible

Stampin' Up! UK Sprinkles of life colour me irresistible;l

I’m a bit concerned that this fantastic Designer Series Paper may have passed you by in the Annual Catalogue this year! It can be found at the very top of page 142, it just looks like a series of coloured chevrons – but take a closer look! Its the most wonderful Designer Series Paper – do you remember the Irresistibly Yours DSP from Sale-a-bration this year? Well, its like that – but better! You get 12 sheets, all with fabulous patterns in ink resist embossing, but some are pre-coloured, while others are white – all ready for you, a sponge and your favourite ink!

Stampin' Up! UK Sprinkles of life colour me irresistible;l

Paired here with the wonderful Sprinkles of Life Stamp set, I can’t choose which version of the paper is my favourite! The one on the left uses the pre-coloured Colour Me Irresistible paper, while the right had card features the DSP that has been coloured by me with my trusty sponge and some Mint Macaron Ink!

Have I mentioned about the Sprinkles of Life stamp set by the way? Not only is it super cute! but also £2 is donated to Ronald Macdonald House Charities here in the UK for each stamp set sold! Awesome right! RMHC do fantastic work, keeping parents and sick children close together during some of the worst times, providing houses near to hospitals.

Stampin' Up! Colour me Irresistable Color

What’s your favourite version of this card?


Shop Now button-001Join my team button-001

To purchase any of the items featured in my projects please use the links above. To join my team of Stampin’ Friends select ‘Join My Team’ or send me a message!

Please support StampinByHannah, and join my Code Club, by using the Hostess code featured in the top right hand of my blog. For orders of over £150 please do not use this code, as you are entitled to your own Hostess benefits!

Sign up to my newsletter here – http://eepurl.com/2if59

Hannah Wilks

Stampin’ Up! UK Independent Demonstrator

Layered Letters

Stampin' Up! UK Layered Letters Work of Art

I have had great fun playing with the Layered Letters Alphabet Stamp set! but there are other stamp set that sit on my shelves, that I LOVE but just don’t seem to get the ‘mat time’ that they deserve! Work of Art is one of these stamp sets, I love it, but I really struggle to use it as often as I should – but I thought it might work well with Layered Letters

And guess what….

Stampin' Up! UK Layered Letters Work of Art

It does!

A nice, simple card for a Monday! We are in the middle of school leaver / exam / results season and Congrats cards are always a handy thing to have on stand-by!

The stamping is in Cucumber Crush, Crushed Curry and Pacific Point, onto a layer of Very Vanilla, and a card base of Pacific Point. I have to say, I don’t know where this colour combination came from, I’m trying to experiment with colour at the moment – just pulling a few random ink pads out and stamping away – and what is so great about Stampin’ Up! inks is that they ALL work together, even combinations you wouldn’t expect!

What’s your favourite colour combinations this week?


Dont forget to shop using the Code Club Code to receive some great FREE product! 

XEQGUA4P

I will be closing this order on the 30th July 2015


Shop Now button-001Join my team button-001

To purchase any of the items featured in my projects please use the links above. To join my team of Stampin’ Friends select ‘Join My Team’ or send me a message!

Please support StampinByHannah, and join my Code Club, by using the Hostess code featured in the top right hand of my blog. For orders of over £150 please do not use this code, as you are entitled to your own Hostess benefits!

Sign up to my newsletter here – http://eepurl.com/2if59

Hannah Wilks

Stampin’ Up! UK Independent Demonstrator


Cardmaking 101 – Lets Make a Card!

Stampin' Up! UK Freshly Made Sketches

Hello!

Did you catch my mistake last week? I have complete wedding brain at the moment and managed to film this video on the wrong week! magic! but its ok, because I’ve filmed another tutorial for you this week!

I love using sketches as a quick and easy way to make a card, I will often hit Pinterest or check the latest challenges on some of my favourite challenge blogs. Sketches make card making so super quick and easy, and also stretch my card making into areas I would never have explored. Do you ‘get’ how much I love sketches! and I would love you to love sketches too!

So, this is a Cardmaking 101 – but one with a difference, because today we are actually going to make a card! So far we have explored tools, adhesives, and accessories. We have talked about stamps and stamping. But we have never actually made a card! until today. This is also the last Cardmaking 101 for a couple of months, but it will return bigger and better than ever in the Autumn – is there something you really want to learn? or a technique you would love to try but just don’t know where to start? Let me know so I can feature them as part of my next Cardmaking 101 series (or should that be Cardmaking 102?!)

Ok, so shall I stop waffling and get on with making a card!

Freshly Made Sketches #196 Cardmaking  101

This is our sketch for today, Sketch #196 from Freshly Made Sketches!

I always start by looking at the sketch, turning it around and changing the shapes. The key to using sketches is not to think of the shapes as boxes (or flowers, or butterflies) but just as shapes, shapes that your stamps can fill

Next I turn to my stamp shelves, trying to place my stamps into that shape. Sometimes I will use a stamp and punch combination for this, or sometimes I just use my current favourite!

Once I have collected my supplies and grab the sketch again. Cut my card stock, and begin to assemble my card

Stampin' Up! UK Cardmaking 101 Watercolour thank you

Here I have used the Watercolor Thank You, along with a piece of the Neutrals Designer Series Paper. I recently received a pack of the Metal Rimmed Peals, and just HAD to find away of using them!

So, what do you think? I would love to see your latest make, show me on my Facebook page!


Shop Now button-001Join my team button-001

To purchase any of the items featured in my projects please use the links above. To join my team of Stampin’ Friends select ‘Join My Team’ or send me a message!

Please support StampinByHannah, and join my Code Club, by using the Hostess code featured in the top right hand of my blog. For orders of over £150 please do not use this code, as you are entitled to your own Hostess benefits!

Sign up to my newsletter here – http://eepurl.com/2if59

Hannah Wilks

Stampin’ Up! UK Independent Demonstrator


Gift Bag Punch Board Bag with Flap

Gift bag punch board project

I’m sorry, I know the title of this post is a bit of a mouthful. However, I’m at a bit of a loss of what else to call it!

I’m loving the new Gift Bag Punch Board! I think it’s proving to be almost as versatile as the Envelop Gift Board (that I truly adore!) and I have several projects and videos coming in the next few weeks!

Stampin' Up! UK Gift bag punch board

I am also sorry for my terrible bows! That satin ribbon is still my nemesis! however, the 1″ dotted lace trim (in the new In-Colours) tied like a dream! I think I need to watch some more bow tying tutorials to master that satin ribbon though!

Measurements:

Card stock (although, this would work just as well with Designer Series Paper) – 10″ x 8 1/4″ (25.5 x 21 cm) or a piece of A4 cut on the long side to 10″ (25.5 cm)

Follow the instructions on the Gift Bag punch board to make a Small bag

Once you have the basic gift bag punched and scored, turn your card stock around and repeat the steps in reverse order, so that you end up with symmetrical flaps on both sides

Fold the flaps down on one side and use the other side of the punch board to punch holes as described on the board

Stampin' Up! UK gift bag with flap

These bags are super simple to make, although I’m sure I have made it look trickier than it is in the video (lots of ‘bloopers’ recently!), why not grab your board and have a go, I would love to see what you create!

Pop over and post your creations on my Facebook page


Dont forget to shop using the Code Club Code to receive some great FREE product!

XEQGUA4P

I will be closing this order on the 30th July 2015


Shop Now button-001Join my team button-001

To purchase any of the items featured in my projects please use the links above. To join my team of Stampin’ Friends select ‘Join My Team’ or send me a message!

Please support StampinByHannah, and join my Code Club, by using the Hostess code featured in the top right hand of my blog. For orders of over £150 please do not use this code, as you are entitled to your own Hostess benefits!

Sign up to my newsletter here – http://eepurl.com/2if59

Hannah Wilks

Stampin’ Up! UK Independent Demonstrator

Tag a bag…… of a card!

Stampin' Up! UK tag a bag endless thanks

I have previously mentioned my love for the Tag A Bag Accessories kits, I even have a video on the latest one (available HERE!).

They are just so versatile. Not only do I use them to label gifts, but I use them to label things in my craft room (those sticky strips are awfully handy!) and I even use them to make cards! And they only cost £7.25!

Stampin' Up! UK tag a bag card accessory kit

This card also features the Endless Wishes Stamp set, with the sentiment stamped in Calypso Coral onto one of the pieces from the kit. I also stamped some leaves behind the doily but they are a bit tricky to see, even up close.

Stampin' Up! UK tag a bag endless thanks

What a simple, cute, quick card!

Love it!


Dont forget to shop using the Code Club Code to receive some great FREE product!

XEQGUA4P

I will be closing this order on the 30th July 2015


Shop Now button-001Join my team button-001

To purchase any of the items featured in my projects please use the links above. To join my team of Stampin’ Friends select ‘Join My Team’ or send me a message!

Please support StampinByHannah, and join my Code Club, by using the Hostess code featured in the top right hand of my blog. For orders of over £150 please do not use this code, as you are entitled to your own Hostess benefits!

Sign up to my newsletter here – http://eepurl.com/2if59

Hannah Wilks

Stampin’ Up! UK Independent Demonstrator