Fancy Fold Friday – Twist Turn Card

Its that time again! Fancy Fold Friday Time – and now we’re getting complex!

This week its the super cute Twist Turn Card!

I love this card, it make such a great birthday card, and is the perfect size to hold a gift card. Actually, while we’re on that – I love giving gift cards as gifts – who doesn’t love the gift of shopping?! lol, ok, but sometimes gift cards are really handy gifts (thinking here of any gamers in your life, I don’t know about you but I think £40 is an expensive gift, but I don’t mind contributing!) So, we give James’ younger brother gift cards, but trying to find a way to package them in a way that’s not really boring is a bit of a challenge. When I gave him a Twist Turn card for his birthday this year, I got a ‘ooooh, cool!’ a great compliment from a 13 year old I do believe! So, I haven’t included a way of attaching your gift card into the card, but that’s really because I use the Stampin’ Up! 2-way glue pen – if you use this adhesive when its wet (and blue) its permanent, but leave it to dry (and turn clear) it becomes re-positionable – and great for holding a gift card!

Stampin' Up! UK Twist Turn Card Gift card holder

Ok, so, to the card! The card base (Hello Honey, if you were wondering!), is cut to 8 1/4″ by 5 1/4″, score it on the long side at 2 5/8″ and 3 1/2″, and on the short side at 2 5/8″. Then, you need to make two diagonal score lines. Orientate the cardstock with the short side at the top, with the two score lines going horizontally near the bottom, draw a score line from the bottom score line at the edge of the cardstock, to the middle of the next score line, repeat on both sides – giving you an arrow pointing away from you. Fold on all the score lines. Stampin' Up! UK Twist Turn Card Gift card holder
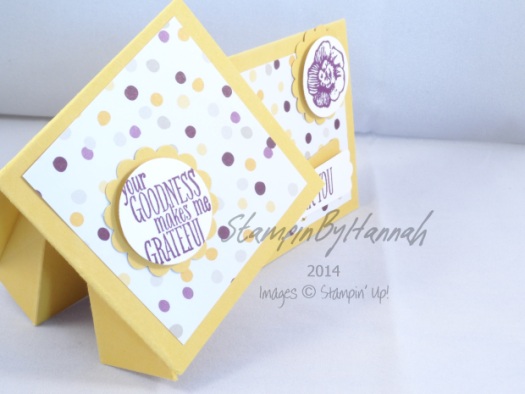
 

The folds should be burnished well, of the card wont stand up well. The DSP used here is from the Moonlight DSP stack (LOVE!), and the stamps are from Everything Eleanor, and Something to Say, punched out uisng the 1″ circle punch, scallop circle punch, and Modern Label punch.

Let me know if you want a video tutorial for this (or anything other card)

See you again next week

x


Hannah Wilks

Stampin’ Up! UK Independent Demonstrator

If you like the project, or any of the products used, would like a catalogue, or to join my team, please contact me, or click on the ‘Shop NOW’ button at the top of the page. You can also find me on Twitter, Facebook, YouTube, Google+, About.me, and Tumblr (Links in the sidebar)

Thank you for stopping by www.www.stampinbyhannah.co.uk today

x
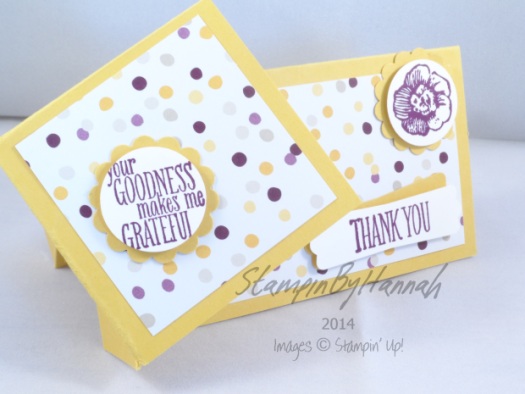
 

Fancy Fold Friday – Halloween Card in a Box!

Happy Halloween!

and Happy Fancy Fold Friday!

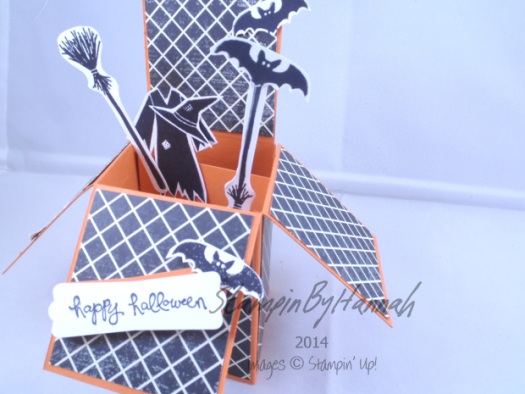
This week I thought I would knock things up a gear and give you a card in a box!

I love these cards! When I’ve made them for people, everyone is always stunned by them!

Stampin' Up! UK Card in a Box Halloween

Isnt it fab!

Ok, So the measurements for this fab project:

Cardstock = 9 x 5 inches (23 x 13 cm) and two pieces measuring 3 x 2″ (8 x 5cm)

DSP = 4 3/4 x 1 7/8″ (12 x 4 1/2cm), 4 pieces that measure 2 x 2 1/8″ (5 x 5.2cm) and 3 pieces that measure 2 x 2 5/8″ (5 x 6.5cm)

Score the Cardstock on the short edge at 2 3/4″ (7cm) and on the long side at 2 1/8″, 4 1/4″, 6 3/8″ and 8 1/2″ (thats every 5.2cm!)

I’ve used Tangelo Twist (I LOVE that orange!) and Flashback DSP for this box, and have fussy cut the images from the Tee-Hee-Hee stamp set for the embellishments! (how cute are those bats!) All the stamping is done using Staz-on Ink

Check the video for full instructions!


DISCLAIMER – I work in Inches, all metric measurements are approximate!

The sentiment used on this card is from Good Greetings – which is still available for FREE with an qualifying order placed before the end of October!

Hannah Wilks

Stampin’ Up! UK Independent Demonstrator

If you like the project, or any of the products used, would like a catalogue, or to join my team, please contact me, or click on the ‘Shop NOW’ button at the top of the page. You can also find me on Twitter, Facebook, YouTube, Google+, About.me, and Tumblr (Links in the sidebar)

Thank you for stopping by www.www.stampinbyhannah.co.uk today

x
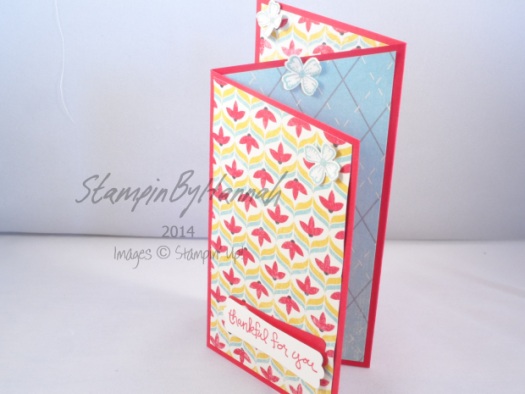
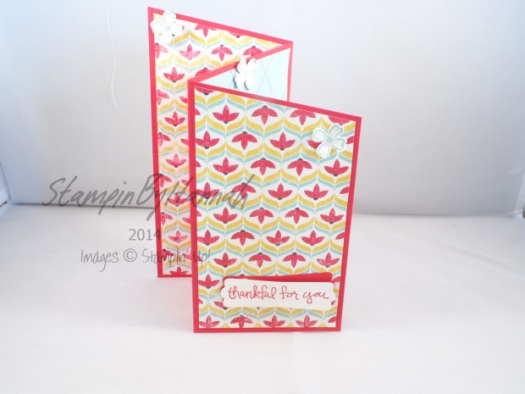
Fancy Fold Friday – Centre Step Card

Hello! Welcome to another Fancy Fold Friday!

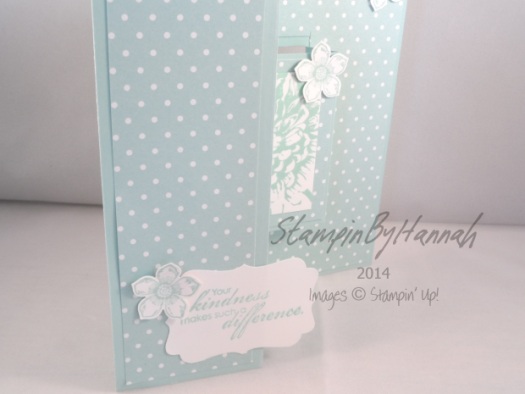
This card was so complicated! I very very nearly gave up with it all together, and I’ve got to say that the DSP dimensions were pure luck! However, i decided I would share the basic structure of the card with you.

Stampin' Up! UK Centre Step Card

This card uses Pool Party Cardstock cut to 8 1/4″ by 5 3/4″. You’re going to need to grab that Stampin’ Trimmer for this one! Cut two lines in the card stock, the first at 1 3/4″ from 1 3/4 to 4 3/4″ and then at 4 1/4″ from 1 3/4 to 4 3/4″. This should give you two slits in your piece of card. Then score along the long edge at 2″, at the start of the two slits (between the two slits ONLY!), at 4 1/8″ either side of the cuts, and between the two slits at 5 3/4″ and at the end of the slits.

Stampin' Up! UK Centre Step Card

This card also features stamps from Blooming with Kindness and Petite Petals (along with the Petite Petal punch) and the Sentiment is punch using the Decorative Label Punch

Let me know in the comments below if you want a video tutorial on some of the fancy folds featured as part of Fancy Fold Friday!

See you again next week

x


Hannah Wilks

Stampin’ Up! UK Independent Demonstrator

If you like the project, or any of the products used, would like a catalogue, or to join my team, please contact me, or click on the ‘Shop NOW’ button at the top of the page. You can also find me on Twitter, Facebook, YouTube, Google+, About.me, and Tumblr (Links in the sidebar)

Thank you for stopping by www.www.stampinbyhannah.co.uk today

x

Fancy Fold Friday – Steps of a Festival!

So, this is the last post of our week of Festival of Trees 🙁

I really do love this stamp set (can you tell!) and I’m sure I have plenty of crafting left with it before it leaves us on January 5th 2015

As its Fancy Fold Friday, I couldnt end the week without doing a Fancy Fold Festival of Trees card – this week, Stepper Cards!

FFF - stepper 1

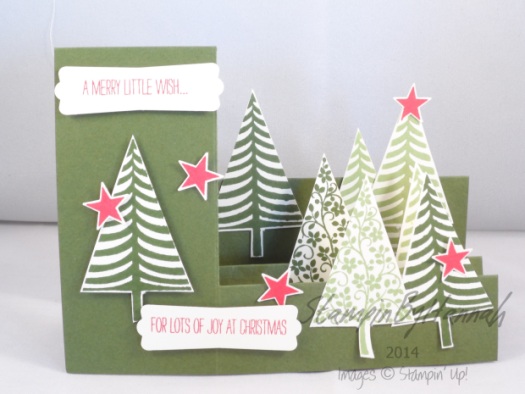
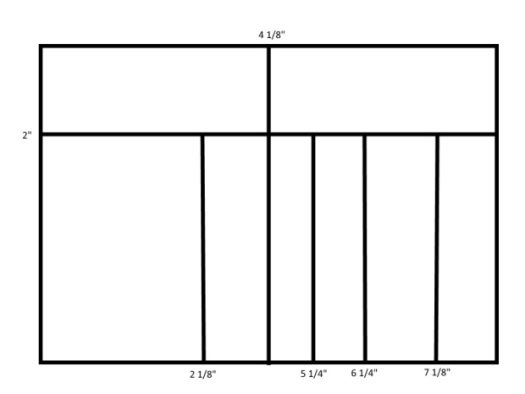
This card is a little complex to cut and score. The cardbase (here in Mossy Meadow) is cut to 8 1/4 by 5 3/4, and is scored on the short side at 2″, and on the long side at 4 1/8″, and 2 1/8, 5 1/4. 6 1/4/ ad 7 1/8 to the 2″ score line.

Side Stepper Card Score Dimentions

Using you Stampin’ Trimmer, cut the 2″ score line between the 2 1/8″ score line and 7 1/8″. The next trick is folding. Fold the 7 1/8″ score line away from you, folding the other lines like a concertina, ensuring that the 4 1/8″ score line on the unscored side is also folded away from you.

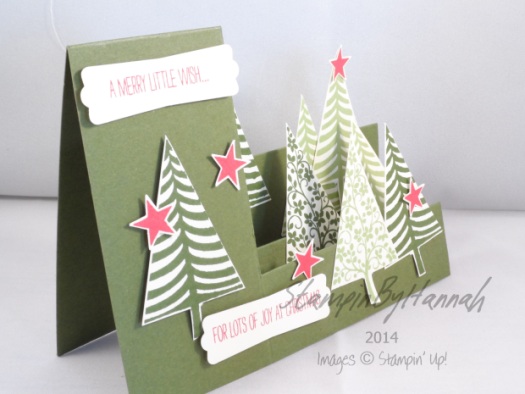
This should give you a side stepper card!

As it is Festival of Trees week, I have decorated my Side Stepper as a forest, using two of the tree stamps, the star and both of the sentiments.

FFF - stepper 2

Have I mentioned how much I love how Stampin’ Up! products coordinate – the festival of trees star stamp which works perfectly with the star punch from the Itty Bitty Accents Punch Pack! LOVE IT!

In addition to the Mossy Meadow cardstock, this card features Very Vanilla cardstock, and Mossy Meadow, Pear Pizzazz and Real Red inks!

Can wait for next week!

x


Hannah Wilks

Stampin’ Up! UK Independent Demonstrator

If you like the project, or any of the products used, would like a catalogue, or to join my team, please contact me, or click on the ‘Shop NOW’ button at the top of the page. You can also find me on Twitter, Facebook, YouTube, Google+, About.me, and Tumblr (Links in the sidebar)

Thank you for stopping by www.www.stampinbyhannah.co.uk today

x


Fancy Fold Friday – Zig Zag Fold

Hello! Welcome to the second in my series of ‘fancy fold’ cards!

This week, I’ve made a Zig-Zag fold card, using Real Red and Flashback DSP.

I do love designer series paper – I love patterns, and colour, and really I’m just a stationary geek! (yes, I love staples and paperclips too!), but I really struggle to use DSP on cards! I love using it for scrapbooking, I use masses of 12×12 papers on layouts and in Project Life, but on cards, I get a little stuck!

Stampin' Up! UK Zig Zag fold card Flashback DSP

This card, although it looks complex, is really simple to create. The cardbase is cut at 8 1/4 by 5 3/4, then (and this is the only complicated bit!) you need to line one corner of the cardstock up with the top corner of your papertrimmer, then line the corner diagonally opposite to it up with the 4″ line on your trimmer – this will create the slopping angle to the top of the card. The card is then embellished with the Flashback DSP cut the same as the cardbase, before trimming 1/2″ from the bottom edge, and cut into 2 1/2″ strips.

FFF - zig zag 1

The card was then completed with three punched flowers, stamped using the Something to Say stamp set, and punched using the Itty Bitty Accents punch pack. The sentiment is only available until the end of October, place an order (or host a party) of over £200, and earn this stamp set for FREE! its so super cute, and has some lovely sentiments for Christmas and Halloween crafting.

See you again next week

x


Hannah Wilks

Stampin’ Up! UK Independent Demonstrator

If you like the project, or any of the products used, would like a catalogue, or to join my team, please contact me, or click on the ‘Shop NOW’ button at the top of the page. You can also find me on Twitter, Facebook, YouTube, Google+, About.me, and Tumblr (Links in the sidebar)

Thank you for stopping by www.www.stampinbyhannah.co.uk today

x

Fancy Fold Friday – Easel Card

HELLO!

Welcome to fancy fold friday!

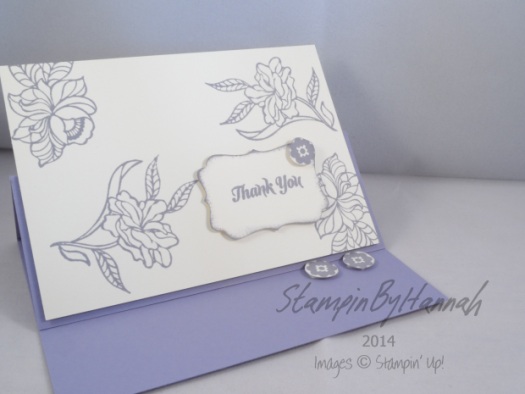
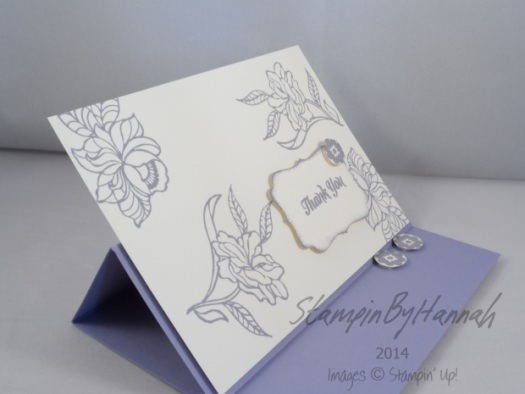
Once again, trying something new here! I have a few of these posts lined up over the next few weeks, looking at card folds that make your cards stand out from the other cards on the mantel piece. I thought we’d start simple – a easel card

Stampin' Up UK Wisteria Wonder Bouquet Toss Thank You card

Easel cards are super simple to create. This card base (in Wisteria Wonder) is cut to 8 1/4 by 5 1/2 (about half an A4). The card is scored at 2 1/4 and 4 1/8th, creating a triangle of cardstock. Another piece of cardstock (this time in Very Vanilla) is attached to one of the short sides of the triangle to create a taller card. The stamp set used here is Bouquet Toss – a set that, although designed for weddings (and that ties into the Always and Forever wedding stationary templates in MDS), is a lovely feminine stamp set for Thank You cards, Birthdays, and Congratulations cards. The small flowers (although fussy cut here) work wonderfully with the 1/2″ circle punch, to create ‘pegs’ to hold the card up when displayed.

Stampin' Up UK Wisteria Wonder Bouquet Toss Thank You card


I’m really loving simple colour combinations at the moment, and have found myself making a lot of cards with only two or maybe three colours!

Can’t wait to see you again next week!


Hannah Wilks

Stampin’ Up! UK Independent Demonstrator

If you like the project, or any of the products used, would like a catalogue, or to join my team, please contact me, or click on the ‘Shop NOW’ button at the top of the page. You can also find me on Twitter, Facebook, YouTube, Google+, About.me, and Tumblr (Links in the sidebar)

Thank you for stopping by www.www.stampinbyhannah.co.uk today

x