StampinByHannah Christmas Countdown Giant Tealight box using Envelope Punch Board
Finally! I am back with another Christmas Countdown projects. I adore doing these projects, Christmas is such an exciting time; particularly in my house where my husband turns into a great big kid!
How cute are these boxes? They are so simple to make, check the video for all the details…
Measurements:
Designer Series Paper; 8-5/8 x 8-5/8″
Punch and score using the envelope punch board at 3-3/4 and 4-7/8″
Short and sweet today but I hope that you enjoy….
Oh, before I go, I have a fun Facebook Live planned for Sunday… don’t miss it!
To purchase any of the items featured in my projects please use the links above. To join my team of Stampin’ Friends select ‘Join My Team’ or send me a message!
Please support StampinByHannah, and enter my Code Club Code. For orders of over £150 please do not use this code, as you are entitled to your own Hostess benefits!
Sign up to my newsletter for weekly updates from me!
StampinByHannah International Blog Highlights Teacher Gifts!
Welcome to StampinByHannah today for the August Blog Highlight! I adore taking part in these every month and was totally honoured to be chosen as a top pick in July! You can see the winners blog hop from last month HERE!
I think Kylie has set us a really tough challenge this month! It might just be me though… Teacher Gifts?! Now, for us here in the UK, this is a little late as the kids are all currently off school for the summer. But, I don’t have any children either… so the whole thing is a bit lost on me to be honest! However, I’m always up for a challenge…. so, Teacher Gifts it is, and Teacher Gifts you have got!
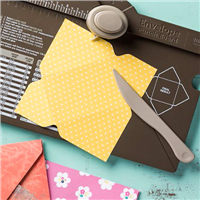
These are really simple little gifts, because I understand that you need something quick, and probably multiples of them for all those fabulous Teaching Assistants (I know about those… my mother and mother in law both work in schools!). So, I’ve these cute boxes are made in a snap using the Envelope Punch Board, and each hold 4 individually wrapped tea bags.
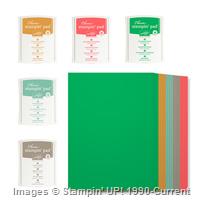
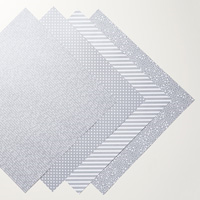
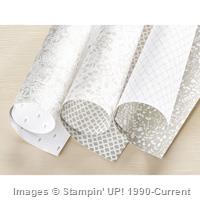
The Designer Series Paper is called Share What You Love, and because it’s a heavier weight than most of the Stampin’ Up! Designer Series Paper it’s great for boxes and bags! I’ve even taken a sanding block to it for a fun shabby effect.
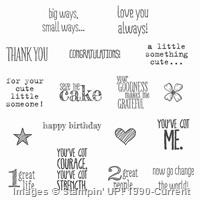
The sentiment and dies are taken from the Stitched All Around bundle. I am in LOVE with these stamps and dies! This sentiment is particularly special to me; as I used to sing this song to a resident every single morning… it always made her smile, and she would sing along to. I left that job back in April, and I know that that lady has since passed (not wanting to bring this post down!)… but it’s one of the reason’s why I LOVE my day job! I know that I’m a nurse, rather than a teacher…. but these would make awesome nurses gifts!
Measurements:
Designer Series Paper; 6-3/8 x 6-3/8″
Punch and Score at 2-1/2″ and the 4″ on on the first side, then use these lines as a guide to punch and score the other 3 sides.
Pop over to Kylie’s Blog to see the other Blog Highlight Entries and VOTE for your favourites too!
To purchase any of the items featured in my projects please use the links above. To join my team of Stampin’ Friends select ‘Join My Team’ or send me a message!
Please support StampinByHannah, and enter my Code Club Code. For orders of over £150 please do not use this code, as you are entitled to your own Hostess benefits!
Sign up to my newsletter for weekly updates from me!
Hello! Well, this weekend was a busy one…. I have been away on a Team Crafty Retreat with my Stampin’ Sisters. I LOVE spending time with my crafty buddies, talking stamping, and making lots and lots of pretty things…. I will be sharing more of what we got up to later in the week, along with my little team swap!
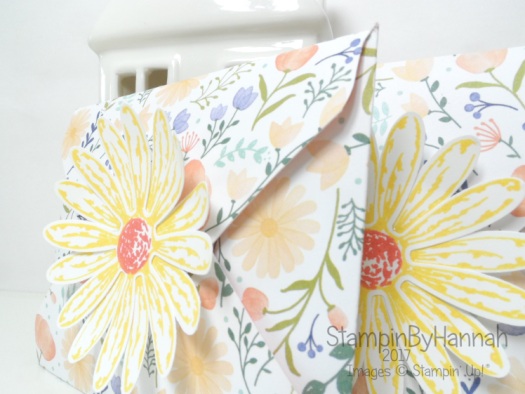
Back to today, I have a quick video for you this week! I made a stack of these cute envelopes for the lovely ladies who shopped with me in May, I hope they arrived safely!
Ok, so I have a confession to make…. I filmed this weeks ago, and I haven’t been able to post it because this fabulous Daisy Punch is currently out of stock! I hate showing you things that you can’t get your hands on…. but I have run out of filmed projects! I know, I know, I really need to get back on top of things this week…. Filming days already scheduled for Saturday! I hope that the punch will be back really soon… in the meantime though, the stamp set is available, as is that super pretty Designer Series Paper!
Measurements:
Designer Series Paper – 5 3/4 x 5 3/4″
Punch and score using the Envelope Punch Board at – 2 5/8″
To purchase any of the items featured in my projects please use the links above. To join my team of Stampin’ Friends select ‘Join My Team’ or send me a message!
Please support StampinByHannah, and enter my Code Club Code. For orders of over £150 please do not use this code, as you are entitled to your own Hostess benefits!
Welcome to another Pinkies Blog Hop! As it’s World Card Making Day today, we hope everyone will get some time to craft, and we’ve created some lovely projects to help inspire you to create your own beautiful card. Simply use the buttons at the end of each post to keep hopping!
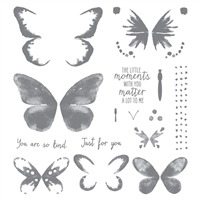
I hope you’re enjoying our hop today. This is my first Pinkies Blog Hop (and hopefully not my last!) and I wanted to create something that would describe my style of crafting for this event. There are so many great stamp sets in this years Annual catalogue that picking one favourite is incredibly difficult, but I think Watercolour Wings is probably one of my most used. Its such a easy set to use, although the effect looks complicated. The butterflies are stamped from 5 different stamps – 4 layering butterfly wings, and a body – and each one is stamped in one colour!
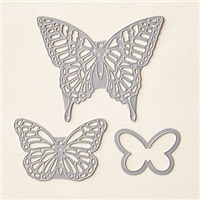
So the first, most solid stamp is inked and stamped off onto scrap paper 3 times before being stamped onto the card stock, the next stamp is stamped off twice, the 3rd stamp is stamped off once, and the final image is stamped straight onto the butterfly to create a lovely layered image. These butterflies also coordinate with the Butterflies Thinlits Die set – which is awesome because fussy cutting isn’t my friend!
The note cards themselves are 3 x 3″ cards in four of the most recent In-Colours; Mint Macaron, Watermelon Wonder, Cucumber Crush and Delightful Dijon. Complete with a layer of the same card stock measuring 2 3/4″ square, matching butterfly and sentiment piece.
The Thank you sentiment is taken from Something to Say, stamped in Tip Top Taupe and punched out with the Washi Label punch. I found the punch a little long for the sentiment so inserted the punched piece back into the punch for a bit of a trim, before mounting on a full sized punch of the Washi Label.
I couldn’t finish this project without making a pocket for the cards to go in, and without using my favourite item from the Autumn/Winter catalogue this year – The Pillow Box Die of course! I have used the die so much in the past few weeks, I’m sure regular readers of my blog are sick of the sight of it! Here I have created a Pillow Pocket by only putting the die off the edge of my card stock before cutting, so only one end has the pillow box closure. Finished with a belly band of Gold Designer Series Paper from the Neutrals Designer Series Paper Stack and another one of those butterflies in Tip Top Taupe.
Oh, and of course no set of note cards would be complete without some envelopes, so I used the same Designer Series Paper to create 4 envelopes with the Envelope Punch Board.
Thanks so much for stopping by today, and I hope you enjoy the rest of the hop!
To purchase any of the items featured in my projects please use the links above. To join my team of Stampin’ Friends select ‘Join My Team’ or send me a message!
Please support StampinByHannah, and join my Code Club, by using the Hostess code featured in the top right hand of my blog. For orders of over £150 please do not use this code, as you are entitled to your own Hostess benefits!
I’m sorry, I know the title of this post is a bit of a mouthful. However, I’m at a bit of a loss of what else to call it!
I’m loving the new Gift Bag Punch Board! I think it’s proving to be almost as versatile as the Envelop Gift Board (that I truly adore!) and I have several projects and videos coming in the next few weeks!
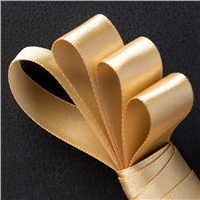
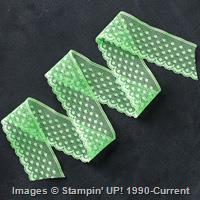
I am also sorry for my terrible bows! That satin ribbon is still my nemesis! however, the 1″ dotted lace trim (in the new In-Colours) tied like a dream! I think I need to watch some more bow tying tutorials to master that satin ribbon though!
Measurements:
Card stock (although, this would work just as well with Designer Series Paper) – 10″ x 8 1/4″ (25.5 x 21 cm) or a piece of A4 cut on the long side to 10″ (25.5 cm)
Follow the instructions on the Gift Bag punch board to make a Small bag
Once you have the basic gift bag punched and scored, turn your card stock around and repeat the steps in reverse order, so that you end up with symmetrical flaps on both sides
Fold the flaps down on one side and use the other side of the punch board to punch holes as described on the board
These bags are super simple to make, although I’m sure I have made it look trickier than it is in the video (lots of ‘bloopers’ recently!), why not grab your board and have a go, I would love to see what you create!
Pop over and post your creations on my Facebook page
Dont forget to shop using the Code Club Code to receive some great FREE product!
XEQGUA4P
I will be closing this order on the 30th July 2015
To purchase any of the items featured in my projects please use the links above. To join my team of Stampin’ Friends select ‘Join My Team’ or send me a message!
Please support StampinByHannah, and join my Code Club, by using the Hostess code featured in the top right hand of my blog. For orders of over £150 please do not use this code, as you are entitled to your own Hostess benefits!
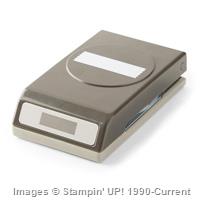
I think the Envelope Punch Board is awesome! I really do, it’s such a great tool and I use it all the time; not only for envelopes but boxes and bows too! I was putting together the blog posts for this week, and realised how perfect it would be to have all your wedding stationary completely coordinating – even down to the envelopes. And then I thought, we have the most perfect tool for that! So, here we are; How to Make an Envelope using the Envelope Punch Board!
What great Designer Series Paper to work with too, I have been loving this Sahara Sand / Whisper White combination recently, and I think it makes great neutral wedding stationary. In fact I have some of this paper hoarded away ready for the Wedding Album! (Its getting rather close now!)
Measurements:
To create an envelope perfectly sized for a A6 card, you will need a piece of Designer Series Paper that measures 8 1/4 x 8 1/4″.
Now, I know, normally I try to give you both metric and imperial measurements, however, when your using the Envelope Punch Board, the imperial measurements are much easier to see and use, so this time, I’m sticking with inches!
Insert you Designer Series Paper into your punch board punch, and line the left hand side of the paper up with the 3 5/8″ mark.
Punch and score using the scoring tool provided.
Turn your Designer Series Paper a quarter turn and line the previously made score line up with the guide on the punch, and punch and score again. Repeat this on all 4 sides.
Turn your Envelope Punch Board around and use the reverse side of the punch to round the corners of your envelope.
Fold and burnish your score lines using the side of the scoring tool.
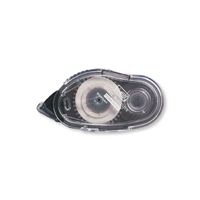
Use your adhesive of choice to stick your envelope together, using a glue dot to secure the top flap (once your handmade card is inside, of course!)
To purchase any of the items featured in my projects please use the links above. To join my team of Stampin’ Friends select ‘Join My Team’ or send me a message!
Please support StampinByHannah by using the Hostess code featured in the top right hand of my blog. For orders of over £150 please do not use this code, as you are entitled to your own Hostess benefits!
I do hope to post 3D projects on a Tuesday, and as this is the first week of the (almost) new year, I thought I would start now!
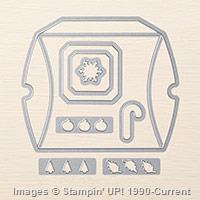
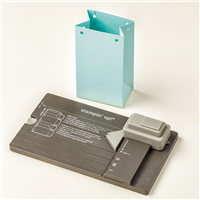
This super cute box uses the Envelope Punch Board (available directly from me and Stampin’ Up!), and is a lovely little box with a separate lid.
This box took me a surprisingly long time to come up with (and a LOT of scrap paper!) but with the help of Craft Owl’s Box Buster I finally made it!
Measurements –
because the EPB works best in imperial I have only listed the imperial measurements
Base
– Cardstock – 6 1/2 x 6 1/2″
– punch and score at 1 7/8″ and again at 4 5/8″ and follow the score lines to punch and score on the other three sides
Lid
– Designer Series paper – 6 x 6″
– punch and score at 1 7/8″ and again at 4″ and follow the score lines to punch and score on the other three sides
I finished this box with some stamping from Something to Say, punched out with the Modern Label Punch, and the Itty Bitty Accents Punch Pack
Hannah Wilks
Stampin’ Up! UK Independent Demonstrator
If you like the project, or any of the products used, would like a catalogue, or to join my team, please contact me, or click on the ‘Shop NOW’ button at the top of the page. You can also find me on Twitter, Facebook, YouTube, Google+, About.me, and Tumblr (Links in the sidebar)
I have a series of posts for you for the last few Fridays before Christmas; and they are all little boxes perfect for table favours or stocking treats!
The first of these posts is an Envelope Punch Board project designed to hold a Galaxy Gift for You!
Measurements: The Envelope punch board works best in imperial so they are the measurements I will use:
Cardstock measures : 5 1/2 x 5 1/2″
Make the first punch and score at: 2 3/4″ and the second at: 3 1/2″
Use these first score lines as a guide to make the punch and scores on the other 3 sides
Cut away the little squares formed by the Punch board
Fold together around your chocolate and use Glue dots to hold together
Hope you enjoyed this project
Hannah Wilks
Stampin’ Up! UK Independent Demonstrator
If you like the project, or any of the products used, would like a catalogue, or to join my team, please contact me, or click on the ‘Shop NOW’ button at the top of the page. You can also find me on Twitter, Facebook, YouTube, Google+, About.me, and Tumblr (Links in the sidebar)
I thought I would share my favourite products and projects from the month of October!
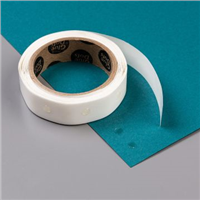
First of all, my favourite project – my desk bin! (check out the instructions HERE!) – I love this thing! it sits on my desk, and collects all of those annoying little bits; red liner tape, the backing from my dimensionals, scraps….. helps me keep my desk clean, tidy and organised (and no, I still haven’t emptied it!
My favourite stamps from October are the Good Greetings set (that were on offer during September and October, and were my pick of the month!) I used this set on everything in October, I love the handwritten font, and there are some lovely sentiments and phrases too
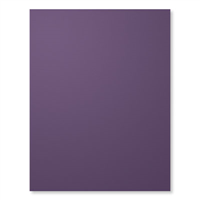
My favourite colour this month was a little bit of a surprise to me! I bought the Subtles Cardstock Collection pack for the first time, and this Marina Mist just jumped out at me, it is just the perfect mid-tone blue! LOVE!
And of course, I couldn’t get through this first Favourites post without mentioning my favourite tool! The Envelope Punch Board! this only arrived in my craft room in October (I dont really know why I hadn’t grabbed it before!) it is just awesome, I have LOADS of crafty projects using this board coming to you really soon!
Thanks for watching and reading, stay tuned for my November Product of the Month, coming really soon!
If you like the project, or any of the products used, would like a catalogue, or to join my team, please contact me, or click on the ‘Shop NOW’ button at the top of the page. You can also find me on Twitter, Facebook, YouTube, Google+, About.me, and Tumblr (Links in the sidebar)


 Specialty Designer Series Paper")


 Solid Ribbon")