To You and Yours Shaker Card Kit

Stampin' Up! To you and your shaker card kit top tips

I am loving the Project Kits in this years catalogues! They are all so simple to put together – so simple in fact that most of them can be put together in a couple of hours, surrounded by your friends – if you want to book a Party with me between the 4th and 10th of November you can select 2 FREE stamp sets from my basket of Stamping Goodies AND I can give you a hand to put your chosen kit together too! So, book your party today!

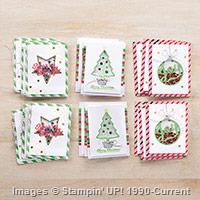
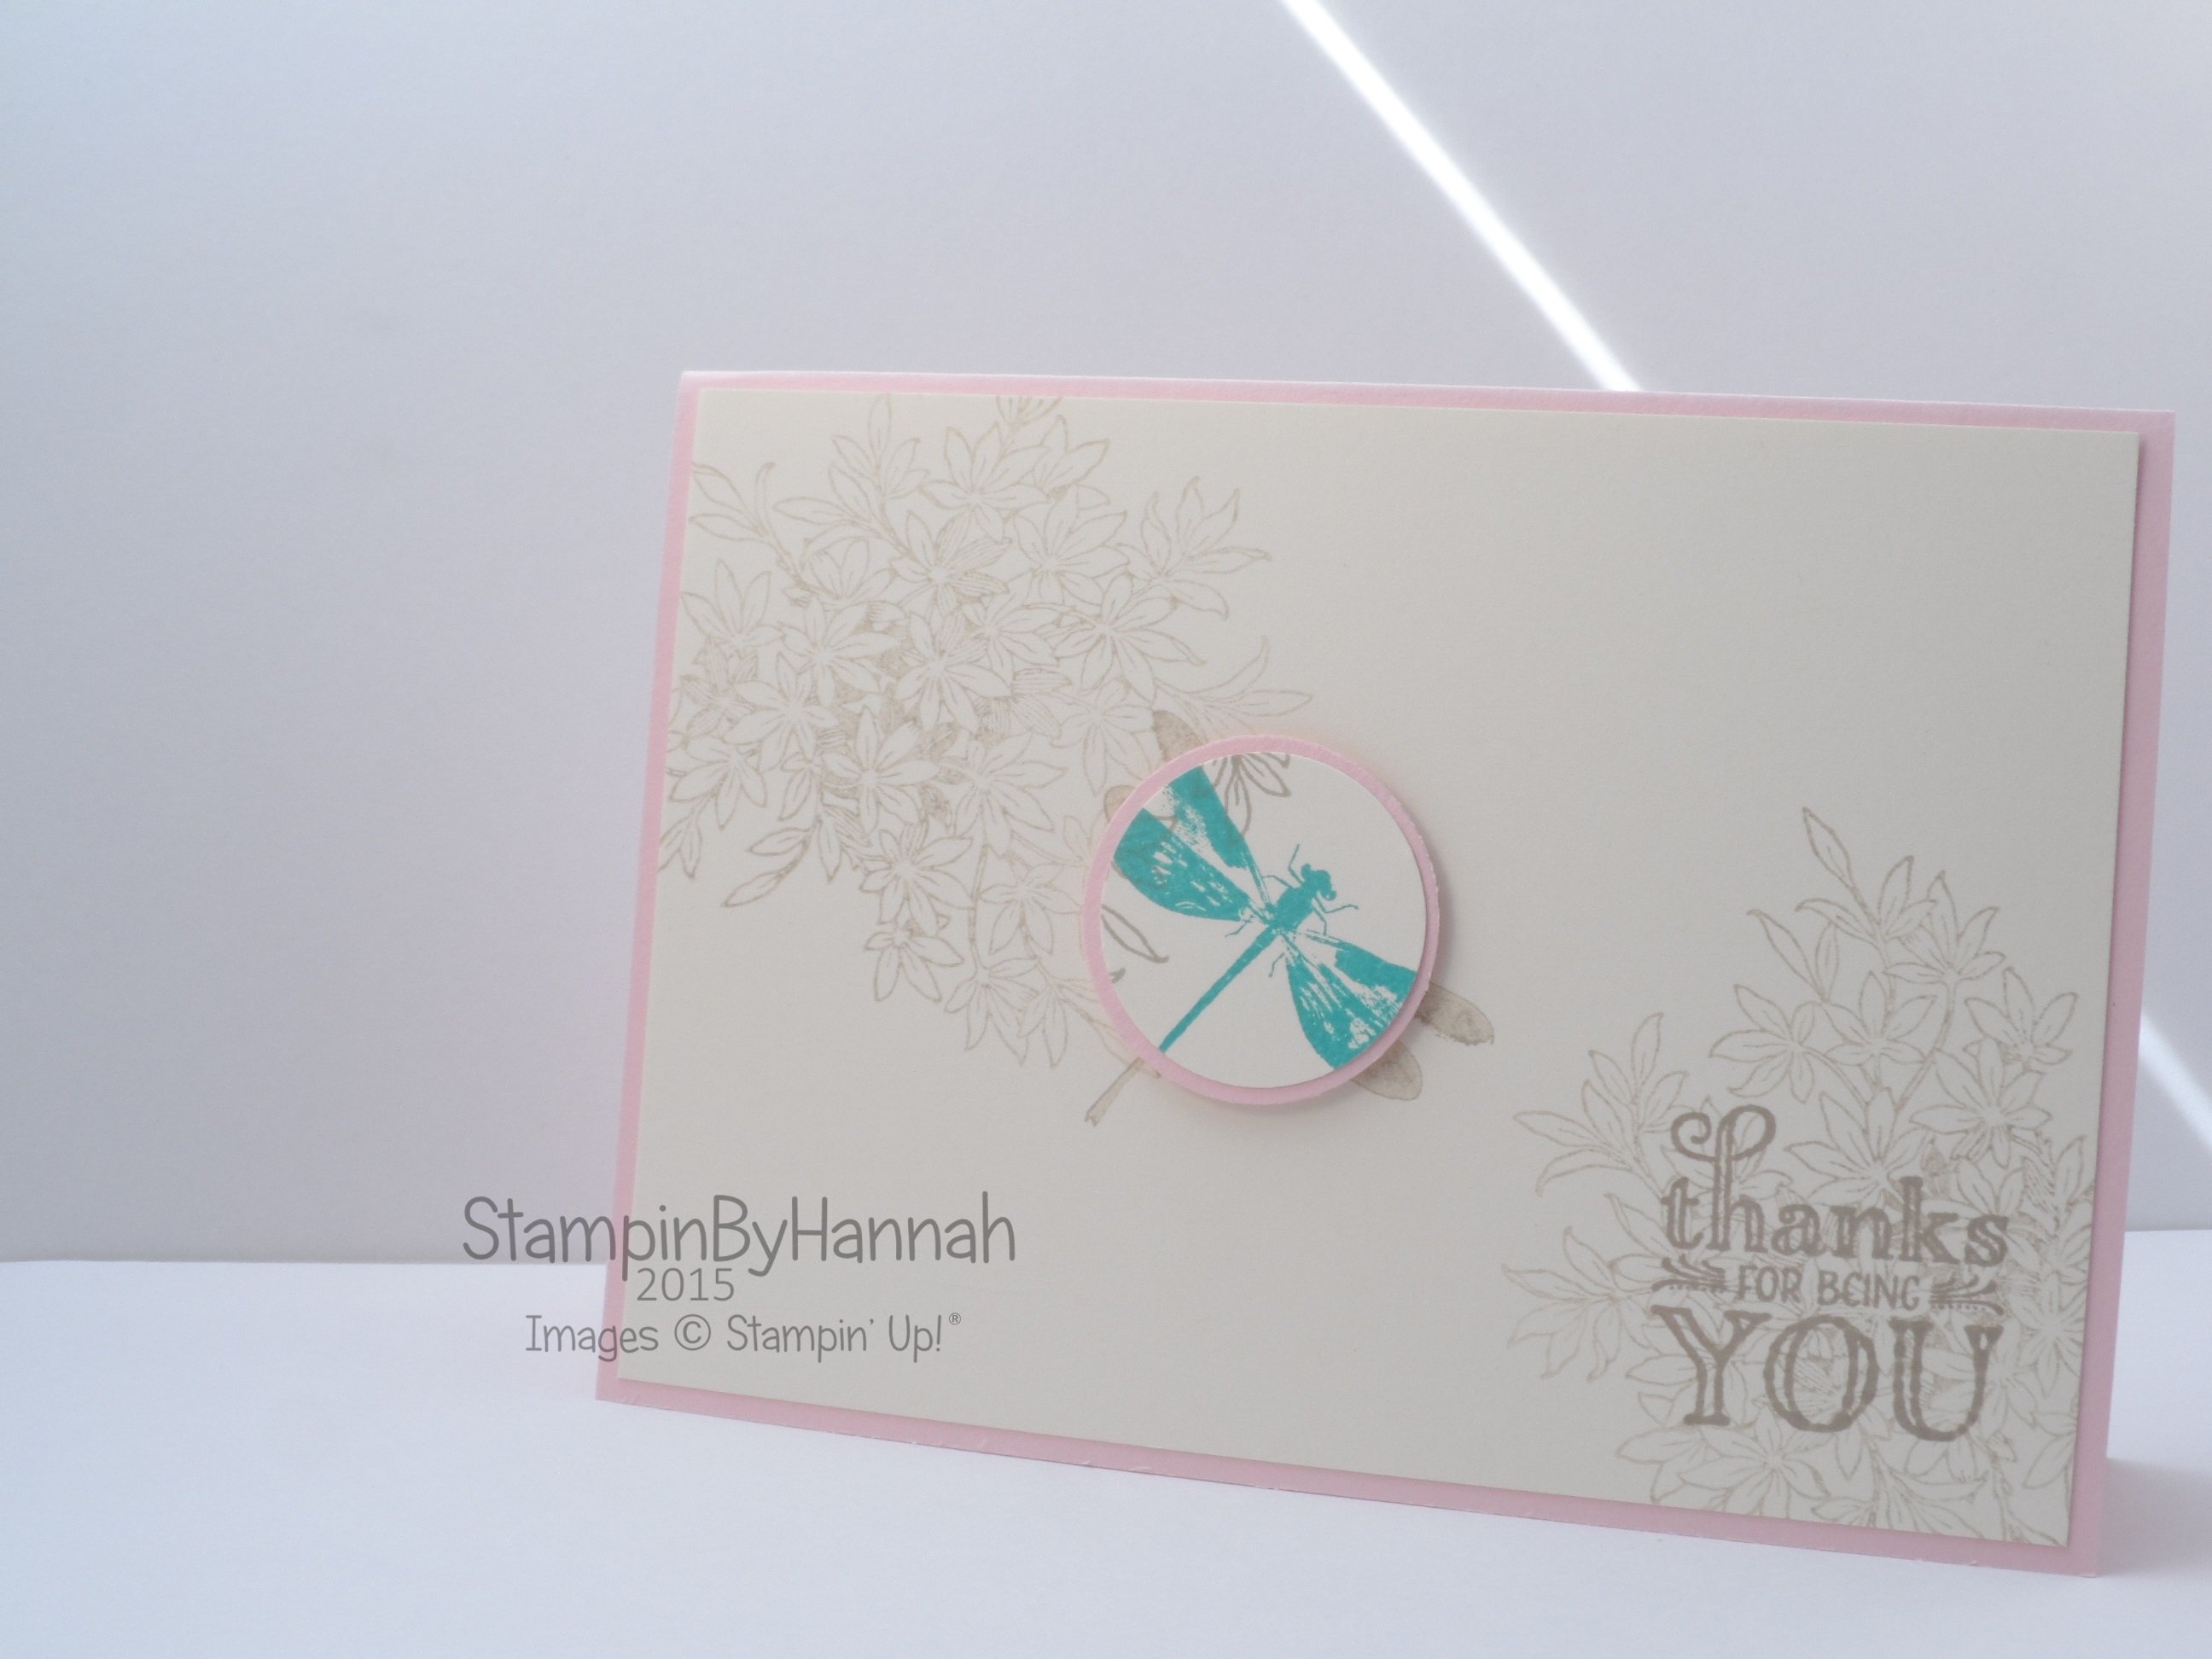
The To You and Yours Shaker Card Kit really stood out to me in the Autumn / Winter catalogue as a kit I needed to get home and put together before I could offer it to you as a class – Is it really as easy as Stampin’ Up!® make it look?

YES!

Stampin' Up! To you and your shaker card kit top tips

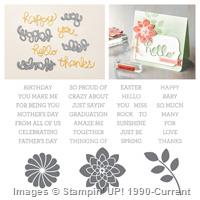
This kit gets you 18 cards (with envelopes) 6 of each of 3 designs. Stampin’ Up!® have even made a really handy video of how to put the kit together – along with both written and photographic instructions provided in the kit.

Stampin' Up! UK shaker card kit

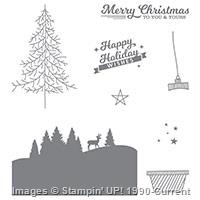
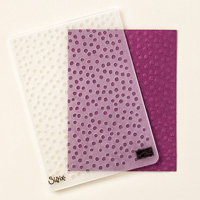
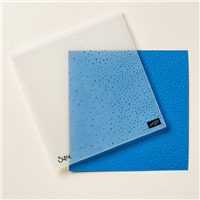
The kit features gorgeous foiled card bases, and a lovely selection of different shaker shapes and elements to make your 18 cards. You could totally mix it up a bit and put the Glass Glitter in the Joy Bauble, or put the Joy sticker on the Star shape.

Stampin' Up! UK classes and parties Teesside

For me the highlight of this kit is the Dimensional Strips, they make creating your shaker shape so easy – just remember to butt the ends up close together on the cards where your using that Glass Glitter or you might find you have an empty shaker card and an envelope full of sparkles by the time they reach the recipient!

I found that adding some Crystal Effects liquid glue at the joints of the Dimensionals also helped (even if it was only peace of mind) to keep that Glass Glitter contained!

I thought I would make a quick video showing you just how easy it is to make these cards, but of course my camera had other ideas! hope you enjoy the Voiceover, and horrendous bow tying at the end! (there is a reason why the others don’t have their bit of bakers twine!)Stampin' Up! UK Shaker card video tutorial

Shaker Card Top Tips:

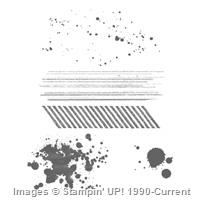
  • Start by applying your outline stickers, these are easier to apply than they look, and make the cards look super professional too!
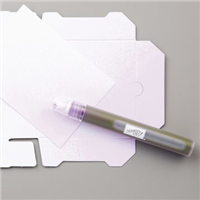
  • Complete all the stamping before you start gluing your window sheets to your shaker frames
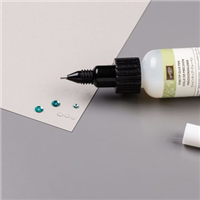
  • Use Tombow or Crystal Effects to add your Window Sheet – DO NOT be tempted to use your Fine-Tip Glue Pen, this glue is FAR too running and makes a major mess, check the video if you don’t believe me!
  • Assemble the Christmas Tree cards first, as suggested by Stampin’ Up!®, as you need to add 6 sequins to each tree, and to get that messy Glass Glitter out of the way!
  • Ensure your Dimensional Strips are butted tight up against each other, and add a liquid glue between to create a full seal (and allow to dry) before pouring your Glass Glitter onto the stamped tree – then line your shaker frame up over the top – otherwise your stamped tree might not match your shaker window!
  • Add the sentiment stickers last!
  • Have FUN!

StampinByHannah Parties at home Teesside Stockton on Tees Craft Cardmaking Classes


Shop Now button-001Join my team button-001

To purchase any of the items featured in my projects please use the links above. To join my team of Stampin’ Friends select ‘Join My Team’ or send me a message!

Please support StampinByHannah, and join my Code Club, by using the Hostess code featured in the top right hand of my blog. For orders of over £150 please do not use this code, as you are entitled to your own Hostess benefits!

Sign up to my newsletter here – http://eepurl.com/2if59

Hannah Wilks

Stampin’ Up! UK Independent Demonstrator


Technique Tuesday | Watercolour Background

Stampin' Up! UK Watercolour background video tutorial

One of my favourite things to do is play with colour. I love pulling inks out of my Colour Caddy and seeing how they work together, look next to each other and compliment each other to make some fabulous projects! Adding water to out Stampin’ Up!® inks is also pretty high up there on my list of favourite techniques at the moment, either using the inks as watercolour or making a colourful mess – I just love it!

Stampin' Up! UK Watercolour background video tutorial

I created this card completely on video – I am trying to remember to turn on the camera when I am playing with inks and paper, you just never know if the card is going to turn into a masterpiece or a complete mess!

Colour is so important in card making, but Stampin’ Up!® make it so simple; with colour families of matching colours and coordinating products that all work together to help you create wonderful cards, and other items too.

So, before I waffle on forever about how much I LOVE Stampin’ Up!’s® colour palate, shall we watch the video tutorial?

See, creating this brightly coloured background is super simple; just four colour of ink and a heap of water. The colours used here are Daffodil Delight, Delightful Dijon, Pumpkin Pie, and Watermelon Wonder. I did need to add some extra Watermelon Wonder as it began is dry pink, but with some extra ink added we succeeded in creating a lovely orange/coral tone for this card.

The stamping here is from Best Thoughts, one of the lovely Hostess Exclusives for this year – place an order of £150 or more to purchase this set, or host a party. Speaking of which have you heard about my latest Party offering? Book a party between 4th and 10th November 2015 and choose 2 FREE stamp set from my basket of Stamping Goodies! check the ad below for more details!


StampinByHannah Parties at home Teesside Stockton on Tees Craft Cardmaking Classes


Shop Now button-001Join my team button-001

To purchase any of the items featured in my projects please use the links above. To join my team of Stampin’ Friends select ‘Join My Team’ or send me a message!

Please support StampinByHannah, and join my Code Club, by using the Hostess code featured in the top right hand of my blog. For orders of over £150 please do not use this code, as you are entitled to your own Hostess benefits!

Sign up to my newsletter here – http://eepurl.com/2if59

Hannah Wilks

Stampin’ Up! UK Independent Demonstrator

12 Weeks of Christmas | Mass Produced Christmas Card

Stampin' Up! UK Santa's gifts mass produced christmas card video tutorial

Stampin' Up! 12 weeks of Christmas

Welcome to the second Week of 12 Weeks of Christmas! I make all the Christmas cards that I send each year, which means making about 150 cards leading up to the Festive Season. Anyway of making that task easier is fine by me! Last year I made around 50 Christmas cards for my blog which were all received by family and friends, this year I am planning to sell more of these at Christmas fairs and events, and so need a few more cards!

I often use mass production techniques when I’m making multiples of a particular card, for customer Thank you’s or Wedding Stationary, and will do the same this year with my Christmas cards.

Stampin' Up! 12 Weeks of Christmas Santas gifts

This features a super cute Rudolph (that’s a reindeer!) from the Santa’s Gift stamp set. Before you go grabbing for your Autumn / Winter catalogue thinking you’ve missed something, this stamp set is taken from the Christmas section in the Annual Catalogue. I have added some colour to Rudolph using a Blender pen and Stampin’ Write Markers in Real Red and Cherry Cobbler.

Check out the video for the full mass production experience!

These cards are really easy to produce, and would make a great family project for a rainy Saturday afternoon. I’m a big believer in getting children crafting, get them winding the handle on the big shot, or colouring Rudolph’s scarf! They’re have great fun!

The cards are finished by added a dot of Fine Tip Glue to Rudolph’s nose, they would look so cute with some glitter added too!

Stampin' Up! UK Santa's gifts mass produced christmas card video tutorial

Mass Production Top Tips:

  • Cut all your card stock first, this card uses 4 pieces of card stock – a Cherry Cobbler card base (half a piece of A4, scored at 10.5 cm), a Very Vanilla layer (14.2 x 10 cm), a Basic Grey matt (10.5 x 8.5 cm), and a Very Vanilla topper (10 x 8 cm)
  • Do each stage of the process in its entirety – Run all the Very Vanilla layers through the big shot, before stamping all the Rudolphs, colour all the scarfs etc.
  • Find your rhythm – fold and score, fold and score….
  • Do anything that requires drying time last! (like adding Fine Tip Glue to Rudolphs nose!)
  • Have Fun!

Don’t forget to shop using the Code Club Code to receive some great FREE product! 

TDNKQPDY

I will be closing this order on the 30th October 2015


Supply List

Built for Free Using:  My Stampin Blog


Shop Now button-001Join my team button-001

To purchase any of the items featured in my projects please use the links above. To join my team of Stampin’ Friends select ‘Join My Team’ or send me a message!

Please support StampinByHannah, and join my Code Club, by using the Hostess code featured in the top right hand of my blog. For orders of over £150 please do not use this code, as you are entitled to your own Hostess benefits!

Sign up to my newsletter here – http://eepurl.com/2if59

Hannah Wilks

Stampin’ Up! UK Independent Demonstrator

Technique Tuesday | Faux In-lay Die Cutting

I have recently fallen head of heals in love with my Big Shot machine again. My Big Shot was one of those big ticket items I bought when I started crafting 5 years ago, and I have to admit it didn’t get the love and attention it deserved. However, since becoming a Stampin’ Up! demonstrator last year, the amount of use my Big Shot gets keeps increasing, and I am the first to admit that its starting to get tired through over use! I am in desperate need of new cutting plates since my current set are now sporting the ‘stained glass’ effect, and I am forever tightening the handle. I might have to buy it some Christmas presents this year!

Stampin' Up! UK Faux InLay Die Cutting Technique Tuesday

I really enjoy the In-lay die cutting technique, but trying to get all those pieces back into the paper can be a bit of a pain. I have recently tried a few different types of Faux In-Lay Die Cutting, using both the big shot AND punches!

There is a Big Shot add on that is a must for this one, the Premium Crease Pad. Designed to help form the creases when using Bigz Dies, the crease pad stops the die from cutting all the way through your card stock, leaving an embossed effect. This works on both detailed dies, like the Hello You Thinlits, and Butterflies Thinlit dies (love those!) as well as framelit dies, like the Flower Fayre dies that coordinated with the Flower Patch stamps

Stampin' Up! UK Faux In Lay Die cutting video tutorial

In-layed punching is super simple, and is really effective with stamped images, or Designer Series Paper. Keep your eyes on a blog for some more of this technique for sure!


Don’t forget to shop using the Code Club Code to receive some great FREE product!

JNUHVBUJ

I will be closing this order on the 30th September 2015


Supply List

Built for Free Using:  My Stampin Blog


Shop Now button-001Join my team button-001To purchase any of the items featured in my projects please use the links above. To join my team of Stampin’ Friends select ‘Join My Team’ or send me a message!

Please support StampinByHannah, and join my Code Club, by using the Hostess code featured in the top right hand of my blog. For orders of over £150 please do not use this code, as you are entitled to your own Hostess benefits!

Sign up to my newsletter here – http://eepurl.com/2if59

Hannah Wilks

Stampin’ Up! UK Independent Demonstrator

Festive Fireplace Week – Tealight Holder

Stampin' Up! UK Festive Fireplace Tealights

Stampin Up! Festive Fireplace Week

Welcome to the final post in my Festive Fireplace week blog series, I do hope you have enjoyed it and found some inspiration. You can find all the other projects in this weeks worth of posts by searching for ‘Festive Fireplace’ in my search bar

Stampin' Up! UK Festive Fireplace Candles cat Christmas

This project comes with a bit of a disclaimer – DO NOT put real tealights inside! Please use electric tealights for this, I will not be held responsible for any accidents caused by this project!

Right, with that out of the way, fancy making one?

They are really simple to make, and I am loving the cat with the bow collar too. The Chocolate Chip version uses Very Vanilla, Cherry Cobbler and Tip Top Taupe, while the Soft Sky version uses Whisper White, Pear Pizzazz and Sahara Sand

Stampin' Up! UK Festive Fireplace Tealights

Measurements:

Card stock – 11 3/4 x 3″ (29 x 7.5 cm)

Score on the long side at 5″ (12.5 cm) rotate by 180 degrees and score 5″ again

Stamp your fireplace on both sides, lining the bottom edge up with the score lines you have just made, and cut out the centre of the fireplaces with a craft knife and metal ruler

Use Tear’n’Tape to attach vellum behind the fireplaces, and add mantle pieces, cats and any other decor items.

Form into a tent shape, rounding the corner with the Project Life by Stampin’ Up! corner punch, and joining the tops together with a staple.

Cover the staple with a bow, and insert your electric tealight


Stampin' Up! Uk at home class Wonderland vellum cardmaking workshop


Shop Now button-001Join my team button-001

To purchase any of the items featured in my projects please use the links above. To join my team of Stampin’ Friends select ‘Join My Team’ or send me a message!

Please support StampinByHannah, and join my Code Club, by using the Hostess code featured in the top right hand of my blog. For orders of over £150 please do not use this code, as you are entitled to your own Hostess benefits!

Sign up to my newsletter here – http://eepurl.com/2if59

Hannah Wilks

Stampin’ Up! UK Independent Demonstrator

Chocolate Wrappers using Merry Moments DSP

Stampin' Up! UK chocolate wrapper merry moments

Ok, so we have finally launched the Autumn / Winter Stampin’ Up!® catalogue, and it is jam crammed packed full of great Christmas project ideas, awesome stamps, and some lovely ideas of autumn and winter birthdays too! I have a series of amazing projects, classes and videos coming for you in the next couple of months and I hope you love this catalogue as much as I do!

Stampin' Up! UK chocolate wrapper merry moments

I have to say though, no one love chocolate as much as I do (seriously, there is a reason I am touch over weight!), and when I spotted these chocolate bars in the supermarket a few months ago, I knew they had to come home with me and feature on my blog! Believe me they didn’t last long after this photo was taken!

Measurements:

Card stock – 7 3/4 x 6 3/4″ (20 x 17 cm)

Score on the long side first at 3 1/8, 3 5/8, 6 3/4 and 7 1/4″ (8, 9.5, 17.5 and 19 cm)

Score on the short side at 1/2″ (1.5 cm)

Designer Series Paper – 6 x 2 7/8″ (15 x 7 cm)

What’s your favourite Designer Series Paper from the new Autumn / Winter catalogue? Not seen it yet, click the link in the side bar on the right to download your copy, or request a paper one by clicking the link in the top menu!


Shop Now button-001Join my team button-001

To purchase any of the items featured in my projects please use the links above. To join my team of Stampin’ Friends select ‘Join My Team’ or send me a message!

Please support StampinByHannah, and join my Code Club, by using the Hostess code featured in the top right hand of my blog. For orders of over £150 please do not use this code, as you are entitled to your own Hostess benefits!

Sign up to my newsletter here – http://eepurl.com/2if59

Hannah Wilks

Stampin’ Up! UK Independent Demonstrator


Christmas Countdown | White Christmas

Stampin' Up! Uk White Christmas Watercolour Video tutorial

This is another one of those stamp sets that carried over from last years Autumn/Winter release, and I am so pleased I just love it! The new Autumn / Winter catalogue goes live on Tuesday! I have posted out catalogues to those who received a Annual one, but if you haven’t got yours yet, let me know by requesting on using the button at the top of the page!

Stampin' Up! UK White Christmas

How cute is this polar bear! I masked him off and applied a watercolour wash of Soft Sky to get this cute watercolour card. Check out the video below for full details

What do you think? I’m loving that pop of Pear Pizzazz myself!


Shop Now button-001Join my team button-001

To purchase any of the items featured in my projects please use the links above. To join my team of Stampin’ Friends select ‘Join My Team’ or send me a message!

Please support StampinByHannah, and join my Code Club, by using the Hostess code featured in the top right hand of my blog. For orders of over £150 please do not use this code, as you are entitled to your own Hostess benefits!

Sign up to my newsletter here – http://eepurl.com/2if59

Hannah Wilks

Stampin’ Up! UK Independent Demonstrator

Divided Sweetie Box

Stampin' JUp! divided sweetie box video tutorial

I just LOVE this box! I think it would be great for Christmas or Easter gift giving and you could totally dress it up with some cute ribbon or a bit of punch work.

Stampin' Up! UK sweetie box video tutorial

The sweeties in the box are some I bought from Amazon for the sweetie bar at out Wedding, but they just weren’t quite right – but they found there use! I still have a heap of them left so you never know who might be receiving some soon (maybe some lovely Stampin@Home participants, maybe!).

Measurements:

Box Base –

card stock; 6 x 6″ (15.2 x 15.2 cm)

Score at 1″ (2.5 cm) on all four sides

Box Lid –

card stock; 5 9/16th x 5 9/16th (14.1 x 14.1 cm) I know these measurements are a little awkward but they make for the perfect lid that doesn’t fall off!

Score on all four sides at 3/4″ (2cm)

Now we need to cut that hole in the lid. My Stampin’ Trimmer is a European version, and only has metric measurements on the trimmer arm, so sorry but I only have metric measurements for this bit.

Insert the box lid into the trimmer and line up the first side at 10.2 cm, using the cutting blade on the trimmer to cut from 4 cm to 10.2 cm. Repeat this on all four sides and the centre square should just pop out!

Box Inserts –

I’ve used a different colour of card stock for the insides to add contrast, you could keep all the pieces the same colour if desired!

One piece of card stock measuring 4 x 5 1/2″ (10 x 14 cm)

Score on the long side at 2″ (5 cm) on both sides, flip over at score at 2 3/4″ (7 cm)

One piece of card stock measuring 2 x 5 1/2″ (5 x 14 cm)

Score on the long side at 2″ (5 cm) on both sides, flip over at score at 2 3/4″ (7 cm)

Stampin' JUp! divided sweetie box video tutorial

What do you think? Is there a tutorial you would really like to see, let me know in the comments section below


Don’t forget to shop using the Code Club Code to receive some great FREE product! 

2JTHMV6W

I will be closing this order on the 30th August 2015


Shop Now button-001Join my team button-001

To purchase any of the items featured in my projects please use the links above. To join my team of Stampin’ Friends select ‘Join My Team’ or send me a message!

Please support StampinByHannah, and join my Code Club, by using the Hostess code featured in the top right hand of my blog. For orders of over £150 please do not use this code, as you are entitled to your own Hostess benefits!

Sign up to my newsletter here – http://eepurl.com/2if59

Hannah Wilks

Stampin’ Up! UK Independent Demonstrator


Technique Tuesday | Spotlight Stamping

Stampin' Up! UK Technique Tuesday Awesomely Artisitic

Are you enjoying Technique Tuesday? you know if you make one of my projects I would LOVE to see it, why not share it with me on my Facebook page.

I spotted a card using this technique on a Facebook group a few weeks ago, and I’m really super sorry that I can’t remember who it was, so if it was you – please comment below so I can give you credit!

Stampin' Up! UK Technique Tuesday Awesomely Artisitic
Oh yes, I’ve been using Awesomely Artistic again! this time I’ve paired it with Me = Grateful to make some lovely Thank You cards.

How to:

Using Awesomely Artistic, stamp the background of the card using a pale ink. I’ve used Sahara Sand on Very Vanilla, and Smoky Slate on Whisper White here, stamped off once

Add you sentiment using Me = Grateful

On a scrap piece of card stock, the same colour as your background piece stamp the background image again, this time in full strength ink. I have stamped the floral arrangement in Sahara Sand or Smokey Slate, and the added the Dragonfly in a bold colour.

The trick here is to carefully stamp the dragonfly so the images line up with the background piece when you’ve punched them out.

Stampin' Up! Awesomely Artistic Spotlight Stamping


Shop Now button-001Join my team button-001

To purchase any of the items featured in my projects please use the links above. To join my team of Stampin’ Friends select ‘Join My Team’ or send me a message!

Please support StampinByHannah, and join my Code Club, by using the Hostess code featured in the top right hand of my blog. For orders of over £150 please do not use this code, as you are entitled to your own Hostess benefits!

Sign up to my newsletter here – http://eepurl.com/2if59

Hannah Wilks

Stampin’ Up! UK Independent Demonstrator

Christmas Countdown | Santa’s Gifts!

Stampin' Up! Christmas Countdown Santa's Gifts

Ok, so have you started on your Christmas cards yet? No?! well, don’t worry because this coming week I will be sending out a small mountain of Autumn/Winter Catalogues – let me know that you want one by adding your name to the list!

Stampin' Up! Christmas Countdown Santa's Gifts

This card however, uses a stamp set you can get your hands on right now! have you found the Christmas section of the Annual Catalogue, it is AWESOME! I love this cute Santa, carrying a present or a candy cane! This stamp set also features a sweet little Rudolph I just can’t wait to use!

I’m sorry if this video was a little odd. I did some editing on this one (unusual for me) and I was trying out a new editing programme, think I will be returning to my normal editing suite next week!

Stampin' Up! Santa's Gifts

I have coloured Santa in here using my Stampin’ Write markers in Real Red, Cherry Cobbler, Smokey Slate, Basic Black and Garden Green. I don’t even attempt blending with my markers, instead I just add a bit of a darker colour to create some shadow – nice, simple colouring in!


Shop Now button-001Join my team button-001

To purchase any of the items featured in my projects please use the links above. To join my team of Stampin’ Friends select ‘Join My Team’ or send me a message!

Please support StampinByHannah, and join my Code Club, by using the Hostess code featured in the top right hand of my blog. For orders of over £150 please do not use this code, as you are entitled to your own Hostess benefits!

Sign up to my newsletter here – http://eepurl.com/2if59

Hannah Wilks

Stampin’ Up! UK Independent Demonstrator