How to use the Stampin’ Up! Gift Bag Punch Board

Stampin' Up! UK Gift bag punch board tutorial

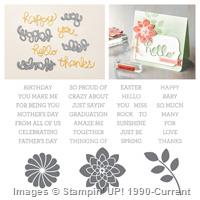
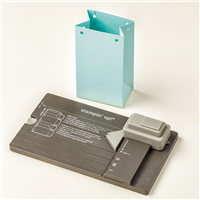
I love a simple gift bag, and with the Gift Bag Punch Board Stampin’ Up!® has made making super cute bags super easy! I know I will be using this punch board lots in the coming months (and even more around Christmas!) but I wanted to give you a quick guide to using the board before we drive into more complex projects with it!

How To:

The gift box punch board has the instructions printed onto it so you can refer back at each use, but I thought I would share some tips.

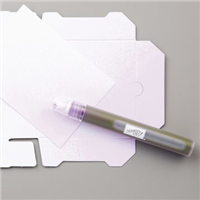
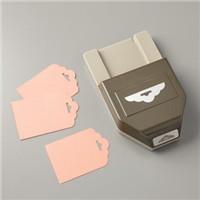
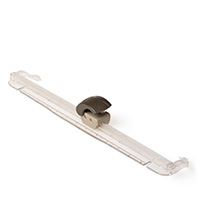
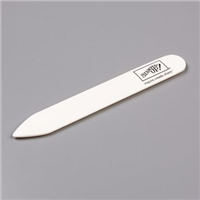
The punch board includes a great scoring tool / bone folder – always store it back into the board so you don’t loose it! It is so easy to loose a great tool like this in your crafty mess

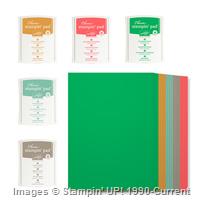
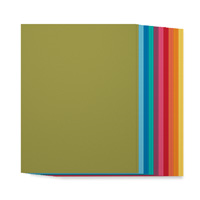
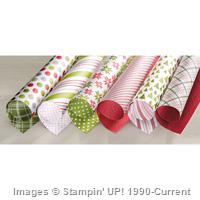
The width of the paper or card stock is important: a small gift back uses 10″ (25.4 cm) wide DSP, and the S line on the board. A medium sized bag uses 11″ (27.9 cm) wide DSP and the M line on the board. A Large bag uses 12″ (30.5 cm) wide DSP and the L line on the board. The length of the DSP (or card stock) is not important, and just varies the height of the final bag, the board suggests using lengths between 4″ (10 cm) and 12″ (30.5 cm) In the video the card stock that I used was 10 x 6″ (25.4 x 15 cm)

The punch may be a little stiff, use the board on a table and stand to punch.

Have fun!


Shop Now button-001Join my team button-001

To purchase any of the items featured in my projects please use the links above. To join my team of Stampin’ Friends select ‘Join My Team’ or send me a message!

Please support StampinByHannah by using the Hostess code featured in the top right hand of my blog. For orders of over £150 please do not use this code, as you are entitled to your own Hostess benefits!

Sign up to my newsletter here – http://eepurl.com/2if59

Hannah Wilks

Stampin’ Up! UK Independent Demonstrator


I Think You’re Great!

Stampin' Up! UK I think your great ink smooshing

I have been playing with ink a lot recently, making a great big mess, but having loads of fun too! I get a lot of inspiration from watching some of the wonderful card makers on YouTube (Jennifer McGuire and Kristina Werner are two of my all time favourites!) and I recently spotted this super cool technique, Ink Smooshing (I haven’t done a tutorial for this one, but check out this great video from Kristina)Stampin' Up! UK I think your great ink smooshingTo create this card I first heat embossed that great sentiment from I Think You’re Great using Clear embossing powder.

I used three colours of ink; Bermuda Bay, Crushed Curry, and Melon Mambo. I use either my ink pads or re-inkers to put ink onto a large clear block or the glass of my desk top, an add water using an water spritzer. One colour at a time I make my ink / water mixture and pick up the mix using the clear sheet that comes with our Photopolymer stamps – you could just as easily using a piece of window sheet or other packaging – and smoosh the ink onto the watercolour paper. I added the Crushed Curry first, then repeated the process with Melon Mambo, and finally Bermuda Bay.

One of the great things about Stmapin’ Up! inks is how they work with water. Not only can you water colour with them, but also once your ink has dried you can drop water onto the ink, and wick away some of the colour – creating this great effect.

What’s your favourite technique at the moment?


Shop Now button-001Join my team button-001

To purchase any of the items featured in my projects please use the links above. To join my team of Stampin’ Friends select ‘Join My Team’ or send me a message!

Please support StampinByHannah by using the Hostess code featured in the top right hand of my blog. For orders of over £150 please do not use this code, as you are entitled to your own Hostess benefits!

Sign up to my newsletter here – http://eepurl.com/2if59

Hannah Wilks

Stampin’ Up! UK Independent Demonstrator


June Online Workshop! Butterfly Basics…and a fancy fold!

Stampin' Up! UK Butterfly Basics Corner fold card

Hello!

Welcome to another Free Online Workshop! I am loving doing these, and am hopefully going to do one every couple of months. Let me know what you think and what you would like to see featured in these longer tutorials using the comments section at the end of the post

Stampin' Up! UK Free workshop

This time I have focused on the Butterfly Basics stamp set, I was so please to find it had carried over into the brand new Annual Catalogue! You can find it in the Artistic Expression section, page 124, where it is featured with the Butterflies Thinlits dies in a great bundle that saves you 15%!

Both the cards and the tag here use the brand new In-Colours; Mint Macaron, Delightful Dijon, Watermelon Wonder, Cucumber Crush, and Tip Top Taupe. These new colours are great additions, to the current range of colours, filling in gaps in Bright colours, and adding a wonderful new neutral. In-Colours change every year, and run for 2 years, adding 10 wonderful colours to our line, and giving your more options for projects.  In Colours are available on a great deal too! You can purchase all the ink pads and a multi-pack of card stock for the price of just the ink pads – that’s free card stock folks! Awesome!

Stampin' Up! UK Corner Fold Fancy Fold card butterfly basics free workshop class

Before you get to the workshop, I just wanted to mention the great joining offer this month from Stampin’ Up! Get 2 free stamp sets with your starter kit, just for signing up! Have I mentioned the great deal that is the starter kit – If you have a wish list of over £100 I urge you to think about becoming a demonstrator, there is no pressure to sell anything, you are more than welcome to be a hobby demonstrator and just get the 20% off! But if you have a wish list of over £100, you can pay just £99 and get to pick £130 worth of great products (anything from the current catalogue!), and those two free stamp sets of your choice! how cool is that!

Fancy Fold How To:

I love this corner fold card, I have to give credit to Dawn Griffiths, I have resized the card to fit A4 card stock 🙂

Cut a piece of A4 card stock in half, and fold in half to create your card base

Unfold your card base and insert, long side at the top, into your Stampin’ Trimmer. Cut at 13 cm from 2 to 8 cm using the trimmer attachment as a guide

Turn your card base so the short side is down at the top, and cut at 8 cm from 2 to 8 cm

Fold down the corner of the card, leaving the cut corner flat.

Inside pieces:

Watermelon Wonder – 14.2 x 10 cm

Whisper White – 13.8 x 9.5 cm

Outside pieces:

Watermelon Wonder – 6 x 6 cm

Whisper White – 5.5 x 5.5 cm

Stampin' Up! UK Butterfly Basics Corner fold card


As I mentioned in the tutorial, any order placed using the Hostess Code will receive a card kit with all the card stock pieces ready for you to make these 3 projects

4REM7CHQ

Thank you for supporting StampinByHannah

Please note this is a different code to my Code Club Code! Chose your code carefully!


Shop Now button-001Join my team button-001

To purchase any of the items featured in my projects please use the links above. To join my team of Stampin’ Friends select ‘Join My Team’ or send me a message!

Please support StampinByHannah by using the Hostess code featured in the top right hand of my blog. For orders of over £150 please do not use this code, as you are entitled to your own Hostess benefits!

Sign up to my newsletter here – http://eepurl.com/2if59

Hannah Wilks

Stampin’ Up! UK Independent Demonstrator


Ink and Embossing

Stampin' Up! UK letterpress ink Embossing folders

I have been loving playing with lots of techniques recently, and you may remember a few weeks ago I shared a great stamping technique using your embossing folders. Well, I’ve been doing it again, but this time I’ve added my Big Shot!

Stampin' Up! UK letterpress ink Embossing folders


This card uses the Large Polka Dot Embossing Folder, along with the Crazy About You stamp set. I am so pleased this set has carried over into our Annual Catalogue, It has a great collection of words and phrases to create some great sentiments, and it will be featuring on my Father’s Day cards this year (Nope, I still haven’t made them yet! Eeeek!). That Crazy About You set also includes  that lovely flower image, which coordinates with the Flower Medallion Punch (another carry over item!)

Instructions:

Cut your card base and Whisper White (Or Very Vanilla) matt layer.

Grab your chosen Embossing folder, and ink up the side which presses down into the card stock when you run it through your Big Shot – in this case, I inked up the Polka Dots side of the folder. Run your ink pad carefully across the embossing folder as not to get ink on the sunken areas

Insert your card stock layer into the embossing folder, closing the folder carefully so not to move the card stock inside

Run this through your Big Shot using your normal Embossing Folder sandwich

Stampin' Up! UK embossing folders decorative dotsThe ‘Thanks’ was stamped on Whisper White, and punched out using the 1 1/4″ circle punch, and layered with the Flower Medallion with dimensionals.


Shop Now button-001Join my team button-001

To purchase any of the items featured in my projects please use the links above. To join my team of Stampin’ Friends select ‘Join My Team’ or send me a message!

Please support StampinByHannah by using the Hostess code featured in the top right hand of my blog. For orders of over £150 please do not use this code, as you are entitled to your own Hostess benefits!

Sign up to my newsletter here – http://eepurl.com/2if59

Hannah Wilks

Stampin’ Up! UK Independent Demonstrator


Cardmaking 101 – Tools for Cardmaking

Cardmaking 101 - tools for card making

Cardmaking class UK free

Welcome to the second in my series of Card making 101 – this week I thought we would look at some of the tools I most regularly use in my card making.

Stampin' Up! UK Stampin' Trimmer Cardmaking 101


Tools are so important, they say you judge a craftsman by his tools – and card making is a craft! I have used a heap of trimmers over the years, but the Stampin’ Trimmer is by far the best! I just love the wide foot-bed, this means that to cut a card base (which is what I use my trimmer for by far the most!) I don’t need to swing out the extension arm. Saying that I love that this trimmer extends to 14″ – way more that I will ever need. The blades are so easy to replace, and you get to choose between the standard trimmer blades or the rotary attachment!

A good pair of scissors is so important, and I would suggest two pair – a good pair of long scissors for cutting along the score lines of boxes and bags, and a pair of paper snips for fussy cutting, and detailed bits. A separate pair of scissors for cutting ribbon is also a good idea as paper will dull the blades and make ribbon cutting difficult. The Stampin’ Paper Snips are excellent, blades sharp right to the tip and comfortable hold.

Stampin' Up! UK paper snips

I also use my scissors for picking up jewels and pearls, candy dots and other little sticky things. But I mostly grab for my paper piercing tool for these sorts of jobs, I’m sure if you have seen some of my YouTube tutorials you will have seen me do this. A paper piercing tool is also great for adding pierced details to your cards and projects, as well as getting all those fiddly bits out of your dies when die cutting.

I think one of the most important card making tools is a good bone folder. For years I had a cheap plastic bone folder, and it wasn’t until I started with Stampin’ Up! that I changed to a ‘proper’ one, what a difference! A clean, crisp edge to all folded projects, cards and boxes. My plastic bone folder has now be relegated to re-inking ink pads!

Stampin' Up! UK paper piercing

The most random tool in my kit though must be my emery board! I use this so much, and it has several uses! Mostly it gets used when my trimmer blade needs changing, when card stock starts to cut a little fluffy, an emery board is great for sanding away the rough edges. Or for when you want that distressed look. Or when you catch a finger nail with your paper snips!


I hope you are finding these posts helpful, and if you have any questions about card making, stamping or Stampin’ Up! either drop me a message via my contact me page, or leave me a comment below

Supply List

Built for Free Using:  My Stampin Blog


Shop Now button-001Join my team button-001To purchase any of the items featured in my projects please use the links above. To join my team of Stampin’ Friends select ‘Join My Team’ or send me a message!

Please support StampinByHannah by using the Hostess code featured in the top right hand of my blog. For orders of over £150 please do not use this code, as you are entitled to your own Hostess benefits!

Sign up to my newsletter here – http://eepurl.com/2if59

Hannah Wilks

Stampin’ Up! UK Independent Demonstrator

Cardmaking 101 – how to cut a card-base

cardmaking 101

Cardmaking class UK free

Today marks the start of my completely free weekly card-making class here at StampinByHannah. This class has been in the planning for ages and I am so pleased I am finally ready to share it with you.

Each week, on a Sunday, a new tutorial will be released focusing on card making basics; hints and tips, tools, techniques and useful information to help you to make amazing projects. I am so excited! shall we begin?

cardmaking 101 - how to cut a card base

This week I thought we would start at the beginning; how to cut yourself a card base. I know that not everyone will cut there own card bases, but I think its a useful thing to know, particularly as then your not stuck with white or cream cards all the time – lets get some colour in here!

How to:

I use A4 card stock, I know that these measurements will not be useful for everyone, particularly those who use 8.5×11″ however, I live in the UK and A4 is all we have

There are two ways to cut a card base, depending on the style of card you wish to create. I frequently use tent fold cards and so cut my A4 length ways at 10.5 cm to create two long skinny pieces of card stock, I don’t tend to score in the middle for these and find that folding them in half and burnishing with my bone folder is enough

The other common card base is a ‘book style’ card, and for these I cut my A4 width-ways at 14.8 cm, scoring them in half at 10.5 cm and folding to create my card

These two methods create the same size card; 14.8 x 10.5 cm

To create a layer for the front of your card, take an A4 piece of Whisper White and cut at 10 cm, and 14.2 cm to create a slightly smaller piece that will fit beautifully on the front of the card base you have already created.

To create further layers reduce the size of your card stock by 0.5 cm each time, the next layer would therefore be 9.5 x 13.8 cm, the next 9 x 13.2 cm, and the next 8.5 x 12.8


I hope this has been useful, if you have any card making questions or queries please let me know and I will endeavour to answer your questions in later editions of Cardmaking 101


Shop Now button-001Join my team button-001

To purchase any of the items featured in my projects please use the links above. To join my team of Stampin’ Friends select ‘Join My Team’ or send me a message!

Please support StampinByHannah by using the Hostess code featured in the top right hand of my blog. For orders of over £150 please do not use this code, as you are entitled to your own Hostess benefits!

Sign up to my newsletter here – http://eepurl.com/2if59

Hannah Wilks

Stampin’ Up! UK Independent Demonstrator

How to Cover a Jotter Sized Notebook

I love making gifts for customers, each month each customer receives a handmade card, and maybe even a little something extra! I used to send these out so they would arrive with your order, but I can’t keep up, so now, I have a posting day at the end of each month – if you have ordered recently and haven’t received anything from me, let me know! It might be that you have made a ‘No Contact’ order, in which case, you’ll need to log back into your Stampin’ Up! account and change your preferences, as I am unable to contact anyone who leaves a No Contact order – even if it is to say ‘Thanks!’


So, onto the post for today, I made these for the ladies that attended my March Techniques Class last week!

Stampin' Up! UK how to cover a jotter customer gifts

I am always writing lists, and so love a good notepad, even more when they are pretty!

They use the stamp set from my April Techniques class – Regarding Dahlias, for the stamped front cover. I have personalised each one with the attendees first initial using the Sophisticated Serifs! (LOVE!) And they are so easy to make!

Measurements:

I would suggest that you measure your notepads carefully and alter these measurements to fit.

The notepads I bought were Jotter Sized (aka: very random!). Measure the height and depth of your notepad and add an 1 1/2″ (3 cm) to find the length of cardstock you need and then take the width for the notepad for the width of cardstock.

My notebooks measure : 21 x 7 x 0.4 cm (8 5/16 x 2 13/16 x 1/8″)

and so my cover measures  24 x 7 cm (9 1/2 x 2 13/16)

Scored on the long side at 21.3 and 21.8 cm (8 3/8 and 8 9/16″)

The Whisper White layer for stamping measures 21.5 x 6.5 cm (2 9/16 x 8″)


Hannah Wilks

Stampin’ Up! UK Independent Demonstrator

If you like the project, or any of the products used, would like a catalogue, or to join my team, please contact me, or click on the ‘Shop NOW’ button at the top of the page. You can also find me on Twitter, Facebook, YouTube, Google+, About.me, and Tumblr (Links in the sidebar)

Sign up to our newsletter here – http://eepurl.com/2if59

Thank you for stopping by www.www.stampinbyhannah.co.uk today

x

How to use a Stamp-a-ma-jig!

I have recently invested (not that it cost very much, but it was definitely worth the spend) in the Stamp-a-ma-jig from Stampin’ Up!

I had not realised how much I would use it, and will openly admit I bought it because I can’t tell you how useful something is without trying it first. I have to say, I think this is a tool that will definitely make it into my top 5 stampers tool kit!

Stampin' Up! UK how to use a stamp-a-ma-jig

There are so many ways to use the Stamp-a-ma-jig, but this is the way I use it most often….

Place the Acrylic Imaging Sheet with the shiny side down onto your grid paper, and butt the handle up against a corner, ensuring the corner of the imaging sheet is into the top corner of the T shape of the handle.

Ink up your stamp in a dark colour (Momento Black works particularly well). Put the corner of your stamping block into the top of the corner of the Stamp-a-ma-jig handle, slide the block down the corner to stamp onto the Imaging sheet. Your stamped image should now be on the imaging sheet

Remove the handle, position the imaging sheet onto your project, so that the image on the imaging sheet is where you want to stamp for real.

Place the handle back onto the corner of the imaging sheet in the same position it was before, and remove the imaging sheet – holding onto the handle ensuring it doesn’t move.

Ink up your stamp and stamp again, putting the corner of the stamping block into the corner of the handle, sliding the block down and back up to ensure a smudge free image.


Hannah Wilks

Stampin’ Up! UK Independent Demonstrator

If you like the project, or any of the products used, would like a catalogue, or to join my team, please contact me, or click on the ‘Shop NOW’ button at the top of the page. You can also find me on Twitter, Facebook, YouTube, Google+, About.me, and Tumblr (Links in the sidebar)

Sign up to our newsletter here – http://eepurl.com/2if59

Thank you for stopping by www.www.stampinbyhannah.co.uk today

x

Salted Caramel Bag – Video Tutorial

I got this bag as part of a Christmas gift; it originally contained Salted Caramel (hence the title!), and I loved the shape so much I just had to recreate it.

I have to say now, that this bag is a little awkward, mainly due to some strange score lines, but I hope that the video will explain all.

Stampin' Up! UK large gift bag StampinByHannah

I used the lovely Sweet Taffy Designer Series Paper from the annual catalogue for this gift bag, with stamping using the Petal Potpourri and Something Wonderful (Sale-a-bration item!).

Measurements –

Cardstock = 12 x 11 1/2″ (30.5 x 29 cm)

Score on the long side at – 2 and 9″ (5 and 22.5 cm)

Score on the short side at – 2, 5 1/2, 7 1/2, 11″ (5, 14, 19, 28 cm)

Then turn the cardstock back so that the long side is at the top, with the 2″  (5 cm) score line on the left and score at 5″(12.5 cm) – but only between the narrow score lines.

The back on the short side score at 1″ and at 6 1/2″ (2.5 and 16.5 cm) but stop about 1″ about the 5″ score line (down 15 cm). At the end of these score lines, score triangles.

Stamped cardstock – 6 1/4 x 3″ (16.5 x 7.5 cm)

Layer – 6 1/2 x 3 1/4 (17 x 8 cm)

PS: Sorry I’m so snuffly in the video – I thought this cold had packed its bags and was leaving, but then it turned around and came back! *off to lie on the sofa!*


Vellum!!! oh and a 3D project!

Ok, I have a confession to make. I have a problem. I (along with James) cannot leave anything Complimentary in a hotel room!

Recently I had a night away with James, really it was a Stampin’ Up! event, but we turned it into a romantic mid-week break. I love staying in hotels, and seeing as we haven’t had a holiday in a couple of years , we take mini-breaks instead.

But every time we stay away we come home with the hotel complimentary toiletries!

I try and use them up in the gym, but James challenged me to make a bag / box to put them in this time, and seeing as its almost Christmas, and I’m sure I’m not the only one who has a similar problem, I though you could make these as pillow gifts for you house guests over the festive season!

Stampin' Up! UK Vellum Milk carton bag

These are super cute! Don’t you love vellum! and metallic ribbon! These use the Satin Ribbon in Gold and Silver!

Measurements:

Vellum – 6 1/2 x 9″ (

Score on the long side at – 1 3/4, 4 1/4, 6, and 8 1/2 (

Score on the short side at – 1 3/4, 4 3/4, and 6″ (


DISCLAIMER – I hold no responsibility for any damage caused by anyone using my Satin Ribbon Top Tip! Use this tip with GREAT care, and hold your ribbon as far away from any cardstock/paper/vellum or any other material as you can! Never leave a lighter with a child!


Hannah Wilks

Stampin’ Up! UK Independent Demonstrator

If you like the project, or any of the products used, would like a catalogue, or to join my team, please contact me, or click on the ‘Shop NOW’ button at the top of the page. You can also find me on Twitter, Facebook, YouTube, Google+, About.me, and Tumblr (Links in the sidebar)

Sign up to our newsletter here – http://eepurl.com/2if59

Thank you for stopping by www.www.stampinbyhannah.co.uk today

x