Pinkies Blog Hop | Pillow Box Note Card Collection

Stampin' Up! UK Watercolour Wings Note Card Collection

Blog hop logo

Welcome to another Pinkies Blog Hop! As it’s World Card Making Day today, we hope everyone will get some time to craft, and we’ve created some lovely projects to help inspire you to create your own beautiful card. Simply use the buttons at the end of each post to keep hopping!

Stampin' Up! UK Watercolour Wings Note Card Collection

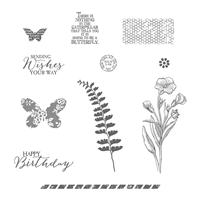
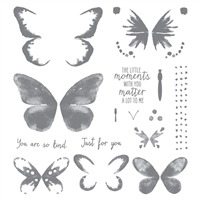
I hope you’re enjoying our hop today. This is my first Pinkies Blog Hop (and hopefully not my last!) and I wanted to create something that would describe my style of crafting for this event. There are so many great stamp sets in this years Annual catalogue that picking one favourite is incredibly difficult, but I think Watercolour Wings is probably one of my most used. Its such a easy set to use, although the effect looks complicated. The butterflies are stamped from 5 different stamps – 4 layering butterfly wings, and a body – and each one is stamped in one colour!

Stampin' Up! UK Pinkies Blog Hop World Card Making Day

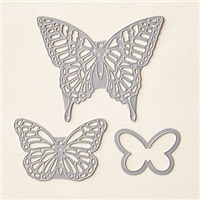
So the first, most solid stamp is inked and stamped off onto scrap paper 3 times before being stamped onto the card stock, the next stamp is stamped off twice, the 3rd stamp is stamped off once, and the final image is stamped straight onto the butterfly to create a lovely layered image. These butterflies also coordinate with the Butterflies Thinlits Die set – which is awesome because fussy cutting isn’t my friend!

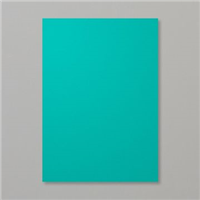
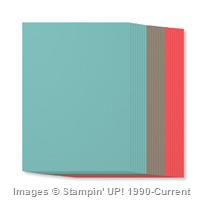
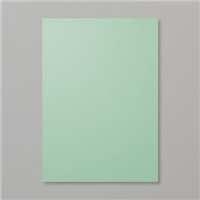
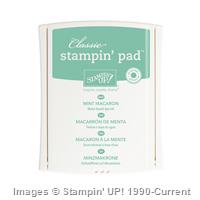
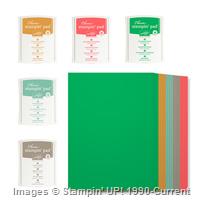
The note cards themselves are 3 x 3″ cards in four of the most recent In-Colours; Mint Macaron, Watermelon Wonder, Cucumber Crush and Delightful Dijon. Complete with a layer of the same card stock measuring 2 3/4″ square, matching butterfly and sentiment piece.

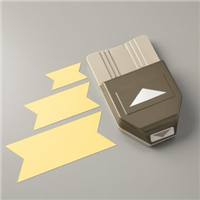
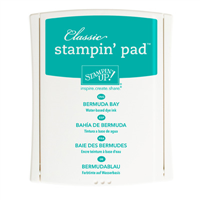
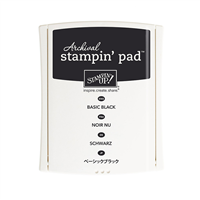
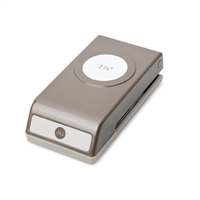
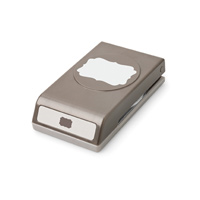
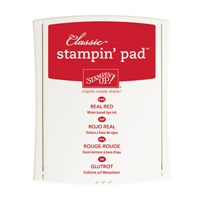
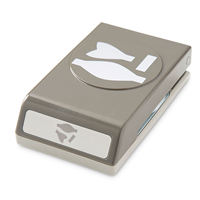
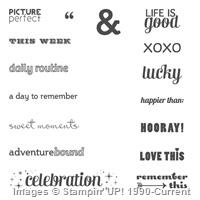
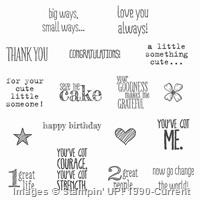
The Thank you sentiment is taken from Something to Say, stamped in Tip Top Taupe and punched out with the Washi Label punch. I found the punch a little long for the sentiment so inserted the punched piece back into the punch for a bit of a trim, before mounting on a full sized punch of the Washi Label.

Stampin' Up! UK World Card Making Day 2015

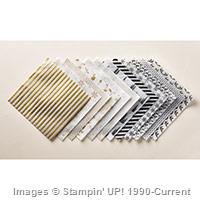
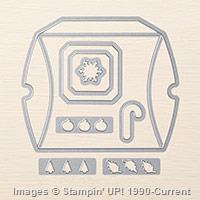
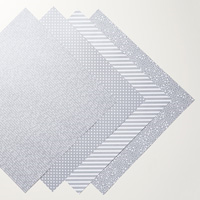
I couldn’t finish this project without making a pocket for the cards to go in, and without using my favourite item from the Autumn/Winter catalogue this year – The Pillow Box Die of course! I have used the die so much in the past few weeks, I’m sure regular readers of my blog are sick of the sight of it! Here I have created a Pillow Pocket by only putting the die off the edge of my card stock before cutting, so only one end has the pillow box closure. Finished with a belly band of Gold Designer Series Paper from the Neutrals Designer Series Paper Stack and another one of those butterflies in Tip Top Taupe.

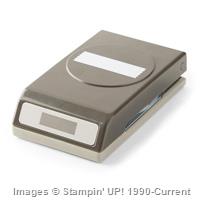
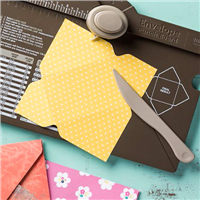
Oh, and of course no set of note cards would be complete without some envelopes, so I used the same Designer Series Paper to create 4 envelopes with the Envelope Punch Board.

Thanks so much for stopping by today, and I hope you enjoy the rest of the hop!

Blog hop nextBlog hop previous


Shop Now button-001Join my team button-001

To purchase any of the items featured in my projects please use the links above. To join my team of Stampin’ Friends select ‘Join My Team’ or send me a message!

Please support StampinByHannah, and join my Code Club, by using the Hostess code featured in the top right hand of my blog. For orders of over £150 please do not use this code, as you are entitled to your own Hostess benefits!

Sign up to my newsletter here – http://eepurl.com/2if59

Hannah Wilks

Stampin’ Up! UK Independent Demonstrator

Kindness Project – Sweetie Boxes

Stampin' Up! UK Sweeties Box Video Tutoria

I love sharing my papercrafting with other people, I always make sweetie parcels and little gifts for my work colleagues at Christmas and special events, but until recently that’s where my sharing stopped! Shock I know, that was until I came across The Kindness Projects – and from now on people I come across will be getting little token gifts from me – a cashier in the supermarket, the doctor’s receptionist, the lovely chap that delivers my Stampin’ Up! goodies!

So, what are my token gifts – well, I thought I would go with some sweeties start with, and I have a pile left over from the sweetie bar at the Wedding, so I’ll be working my way through these first.

The first sweeties that I pulled out of the stack were my favourites  – Parma Violets! (just remind me of my childhood! LOVE them!) and so this box was created!

Stampin' Up! UK Sweeties Box Video Tutoria

Aren’t they Cute! I adore this Designer Series Paper, Sweet Li’l Thing, it’s designed with Children in mind, but I just cannot resist those Strawberries! I made a card with this same paper last week. The prints are adorable, and I love the colour combination too – Hello Honey, Pool Party, Tangelo Twist, Tip Top Taupe, Very Vanilla and Watermelon Wonder – I don’t think I would have come up with that colour combination on my own, but I have to say it will be one that is staying in my Colour Combo Bank from now on!

And they are so quick and easy to make with only a teeny tiny bit of Designer Series Paper too! Awesome!

These boxes have been finished with a ‘Thank You’ from Something to Say, punched with my favourite punch (this week!) the Washi Label Punch, and some flowers from the Itty Bitty Accents Punch pack (and a few Candy Dots!)

Stampin' Up! UK Kindness Projects Parma Violets Box Video Tutorial

Measurements:

Designer Series Paper : 4 1/2 x 5 1/2″ (11.5 x 14 cm)

Score on the long side at 1 and 4 1/2″ (2.5 and 11.5 cm)

Score on the short side at 1, 2, 3 and 4″ (2.5, 5, .5 and 10 cm)

Don’t forget to round the corners on the lid to ensure a good close


Shop Now button-001Join my team button-001

To purchase any of the items featured in my projects please use the links above. To join my team of Stampin’ Friends select ‘Join My Team’ or send me a message!

Please support StampinByHannah, and join my Code Club, by using the Hostess code featured in the top right hand of my blog. For orders of over £150 please do not use this code, as you are entitled to your own Hostess benefits!

Sign up to my newsletter here – http://eepurl.com/2if59

Hannah Wilks

Stampin’ Up! UK Independent Demonstrator

CASing the Artisan Design Team!

Stampin' Up! UK Artisan Design Team Sprinkles of Life Happy Birthday CASE card

There are so many great things about being a Stampin’ Up!® demonstrator, one being the amazing about of inspiration – not only does each demonstrator regularly receive an Exclusive magazine filled with ideas and tips, but also the worldwide community of demonstrators share so many wonderful ideas through our Exclusive Social network – Stampin’ Connection. And then there is the Stampin’ Up! Artisan Design Team, a group of demonstrators hand-picked by Stampin’ Up! to provide inspiration to us and you!

I have been loving following the Design Team blog hops this year, and have taken a huge amount of inspiration from each and every one of them, but I have never copied a card – until now!

Stampin' Up! UK Artisan Design Team Sprinkles of Life Happy Birthday CASE card

I’ll let you follow the link to Alison’s original version of this card, from where I have taken my inspiration today.

This card uses the wonderful Sprinkles of Life stamp set – this years Ronald MacDonald House Charities Stamp Set – on watercolour paper to create a lovely watercoloured look, and punched out with the coordinating Tree Builder Punch (without a tree in sight!)

The Ice Cream itself is watercoloured using Marina Mist ink, while the cone is in Hello Honey. And the Blushing Bride watercolour circle is a bit of a cheat! I have yet to invest in the Circle Thinlits dies (though they are way up there on my list) so this circle is actually hand cut, using the base of a refill bottle of Stampin’ Mist as a template!


Shop Now button-001Join my team button-001

To purchase any of the items featured in my projects please use the links above. To join my team of Stampin’ Friends select ‘Join My Team’ or send me a message!

Please support StampinByHannah, and join my Code Club, by using the Hostess code featured in the top right hand of my blog. For orders of over £150 please do not use this code, as you are entitled to your own Hostess benefits!

Sign up to my newsletter here – http://eepurl.com/2if59

Hannah Wilks

Stampin’ Up! UK Independent Demonstrator

October Sketch Challenge!

Stampin' Up! UK SchoolHouse Designer Series Paper Sketch Challenge Boys Birthday card

I have something new for you today. I have been trying to work out what I was going to do on a Wednesday, I have loved writing my Week In Review posts but at the moment getting the time on a Wednesday morning or Tuesday night to write them is a bit of a nightmare, I’m about to change day job too and week days are going to be busy! So, have been trying to think of something to do instead, and I love a good card making challenge, so…..

Welcome to the first of a series of posts this month focusing on one sketch! The October Sketch Challenge!

Each and Every Wednesday in October I will be bringing you another card based on the same sketch. Now I know it’s not technically October until tomorrow, but what’s wrong with a bit of a head start!

StampinByHannah October Sketch Challenge

I have challenged my team with this sketch too, and cannot wait to see what they create with it! I would LOVE to see your creations, post them to my Facebook page! or share the link to your blog post with me in the comments below!

So, what have I done with the sketch then?

Stampin' Up! UK SchoolHouse Designer Series Paper Sketch Challenge Boys Birthday card

I have taken a literal look at this card to start the month, and have created this card – perfect for a little boy’s birthday!

One of my personal challenges this month is to use more of my huge stack of Designer Series Paper (sitting and stroking it isn’t good enough any more, I need to get it onto some projects!) and this card uses the School House Designer Series Paper from the Annual Catalogue, with a simple ‘Happy Birthday’ sentiment from Guy Greetings

What will you make?


Shop Now button-001Join my team button-001

To purchase any of the items featured in my projects please use the links above. To join my team of Stampin’ Friends select ‘Join My Team’ or send me a message!

Please support StampinByHannah, and join my Code Club, by using the Hostess code featured in the top right hand of my blog. For orders of over £150 please do not use this code, as you are entitled to your own Hostess benefits!

Sign up to my newsletter here – http://eepurl.com/2if59

Hannah Wilks

Stampin’ Up! UK Independent Demonstrator

Technique Tuesday| Acrylic Block Stamping

Stampin' Up! UK Butterfly Basics Watercolour Stamping

Watercolour is BIG news at the moment in card-making. Watercoloured backgrounds and images are really popular. At Stampin’ Up!® we have a great kit featuring the watercolour look (Watercolour Wishes) and have several stamp sets that allow you to look like a watercolour master without any of the mess – which is awesome, but I love playing with ink and water! But I understand that it can be a tricky look to pull off.

Well, today I have  quick and easy watercolour background technique for you that doesn’t even need a paint brush!

Stampin' Up! UK Acrylic Block Stamping Technique Tuesday Video Tutorial

This technique is super simple, but as always I have created a video tutorial for you.

The new Basic Black Archival Ink is great for this technique, it gives a crisp true black image, great for sentiments and silhouette images like the ones on the card above. But also it is awesome for watercolour techniques as it doesn’t bleed or run with water, and so has become my go to black for stamped imaged that I am planning to watercolour. This card would have worked just as well if I had used Memento or Stazon as the black stamping is done after the watercolour panel is dry.

My favourite card stock for this technique is the Shimmery White, as its slightly thicker than our standard Whisper White card stock, and allows you a little more time before the ink dries than Watercolor Paper. Plus, you get that lovely shimmery finish! I can see another packet of this coming home with me really soon!

Stampin' Up! UK Butterfly Basics Watercolour Stamping

Top Tips:

  • Pull out your Stampin’ Pierce matt to stamp on, to ensure a full block of colour
  • Ink up your Acrylic Block and stamp directly onto your card stock without water for a darker, more textured look
  • Add water to your inked Acrylic Block before stamping to create the watercolour effect
  • Allow the water to dry naturally, hit it with your heat gun, or dab off the water with a clean cloth for different effects
  • Stamp over your watercolour panel with a black inked imaged for a cool silhouette effect

The stamp set I have used on this card is Butterfly Basics – definitely one of my favourites this year – lovely for feminine birthdays and other occasions, and it coordinated with two die sets and several other sets of stamps too!


Stampin' Up! Starter Kit offer


Shop Now button-001Join my team button-001

To purchase any of the items featured in my projects please use the links above. To join my team of Stampin’ Friends select ‘Join My Team’ or send me a message!

Please support StampinByHannah, and join my Code Club, by using the Hostess code featured in the top right hand of my blog. For orders of over £150 please do not use this code, as you are entitled to your own Hostess benefits!

Sign up to my newsletter here – http://eepurl.com/2if59

Hannah Wilks

Stampin’ Up! UK Independent Demonstrator

Halloween Shaker Card and Pillow Box

Stampin' Up! Halloween Pillow Box

I will admit now, I’m not really one of Halloween. I’m not a fan of dressing up at the best of times, and the idea of then going out in the cold – no thanks! And seeing as I live in a 3rd floor flat, I don’t really get trick or treaters either (all the more sweeties for me!) but I couldn’t resist making this card and pillow box combo.

Stampin' Up! Halloween Pillow Box

The Square Pillow Box die is definitely one of my favs from the latest catalogue, made with card stock it’s just so clean and crisp. This one is a little different, with those cute pumpkins die cut from the front and some Tangelo Twist card stock added behind. Oh, and can you see the sneaky spiders, they are stamped in Versamark for a tone on tone look.

Stampin' Up! Halloween Shaker Card

The card also uses the same dies, the window is cut from the larger of the two squares in the collection, and the shaker pieces are those same pumpkins cut from Tangelo Twist and Basic Black card stock. I am loving the shaker card craze at the moment (have you seen our Shaker Card Kit?! It is AWESOME!) and they are so easy using the edge pieces from Dimensionals.

Trick of Treat is taken from A Little Something – the stamp set that you can buy with the Square Pillow Box die for 15% off! – and is stamped in Whisper White Craft Ink, punched with the 1 3/8″ circle punch


Shop Now button-001Join my team button-001

To purchase any of the items featured in my projects please use the links above. To join my team of Stampin’ Friends select ‘Join My Team’ or send me a message!

Please support StampinByHannah, and join my Code Club, by using the Hostess code featured in the top right hand of my blog. For orders of over £150 please do not use this code, as you are entitled to your own Hostess benefits!

Sign up to my newsletter here – http://eepurl.com/2if59

Hannah Wilks

Stampin’ Up! UK Independent Demonstrator

12 Weeks of Christmas – Gift Card Gift Box!

Stampin' Up! UK Gift Card Gift Box video tutorial

Stampin' Up! 12 weeks of Christmas

Welcome to my Christmas project series this year! Each and every Sunday between now and the Big Day I be sharing a fun Christmas project; from cute gift packaging, to cards and even some home decor!

I love giving the gift of shopping (especially to awkward 15 year old girls! or boys who just want Games consoles!) but sticking a gift card into a card is super boring! Last year I made pop up gift card cards, but they just didn’t have the right amount of wow factor for me. I wanted a box, and that is what I have for you today.

Stampin' Up! UK Gift Card Gift Box video tutorial

Actually, this box is a really handy size for home-made chocolates, tealights or soaps too – just leave out the gift card insert. Check out the video tutorial for complete instructions, although the measurements can be found at the bottom of this post.

I’ve kept the decoration on this one fairly simple, with a piece of Designer Series Paper. Timeless Elegance on the Cherry Cobbler version, and Everyday Chic on the Real Red one. With some stamped and punched accent pieces (Don’t you just LOVE that bow!)

I’ve loving a bit of red this Christmas, but choosing between Real Red and Cherry Cobbler is proving to be a bit of a problem – they are both so beautiful! – so I have used them both here. The Cherry Cobbler Version is also made as a fold flat variation, to allow you to make a few of these and have them stored flat ready for assembly when needed.

Stampin' Up! UK Christmas gift card box

The gift card holder section of this box is an insert, punched with the Decorative Label punch to hold the card.

Measurements:

Box:

Card stock – 11 x 6″ (27.5 x 15 cm)

Score on the long side at 1, 5, 6 and 10″ (2.5, 12.5, 15, and 25 cm)

Score on the short side at 1 and 5″ (2.5 and 12.5 cm)

Insert:

Card stock – 10 x 4″ (25 x 10 cm)

Score on the long side at 3 and 7″ (7.5 x 17.5 cm)

Flip the cardstock over, and score again at 5″ (12.5 cm)

Designer Series Paper – 3 3/4 x 3 3/4″ (9.5 x 9.5 cm)


Shop Now button-001Join my team button-001

To purchase any of the items featured in my projects please use the links above. To join my team of Stampin’ Friends select ‘Join My Team’ or send me a message!

Please support StampinByHannah, and join my Code Club, by using the Hostess code featured in the top right hand of my blog. For orders of over £150 please do not use this code, as you are entitled to your own Hostess benefits!

Sign up to my newsletter here – http://eepurl.com/2if59

Hannah Wilks

Stampin’ Up! UK Independent Demonstrator

Sweet Lil’ Things Card

Stampin' Up! UK Sweet Lil Things Card

I have been loving playing with Designer Series Paper recently. Usually I buy it, and it sits in my craft room, looking very pretty but without any purpose! Stampin' Up! UK Sweet Lil Things Card

I think this paper is so cute, those foxes melt my heart. I have another project coming next week featuring those strawberries too (actually that’s where this card came from, that piece of Strawberry paper is an off cut! waste not want not!)

The stamp on this one comes from a Project Life by Stampin’ Up! set, Remember This, and it fits wonderfully into the Washi Label punch. Well, it does, but its a little long. No problem, just punch it out as normal and then insert the punched label back into the punch, line it up again and make it shorter – good hey?

What do you think?


Supply List

Built for Free Using:  My Stampin Blog


Shop Now button-001Join my team button-001To purchase any of the items featured in my projects please use the links above. To join my team of Stampin’ Friends select ‘Join My Team’ or send me a message!

Please support StampinByHannah, and join my Code Club, by using the Hostess code featured in the top right hand of my blog. For orders of over £150 please do not use this code, as you are entitled to your own Hostess benefits!

Sign up to my newsletter here – http://eepurl.com/2if59

Hannah Wilks

Stampin’ Up! UK Independent Demonstrator

Vellum Pillow Box

I am still loving the Square Pillow Box die! I could make these all day, they are so simple and quick to put together. I was sat in my craft room the other day thinking of other variations of this great die, and realised that I hadn’t made an all vellum version! Shocking!

Stampin' Up! UK Square Pillow box top tips

This vellum is stunning (my photo does not do it justice!). I have been playing around with my photo skills again, and am trying natural light and some props at the moment, still needs work I think!

Ok, so Square Pillow Box top tips!

  • The die will cut two pieces of Designer Series Paper or Vellum, but only one piece of card stock at a time.
  • Fold and burnish the pieces well with your fingers, and a bone folder on the straight edges
  • Use Tear & Tape to ensure the whole length of the tabs are covered with adhesive
  • Lie the two pieces of the Pillow Box face down on your desk next to each other, and line up one edge at a time
  • Use Glue dots to stick the flaps together if needed
  • Make them super pretty by using the extra dies and coordinating stamp set!


Shop Now button-001Join my team button-001

To purchase any of the items featured in my projects please use the links above. To join my team of Stampin’ Friends select ‘Join My Team’ or send me a message!

Please support StampinByHannah, and join my Code Club, by using the Hostess code featured in the top right hand of my blog. For orders of over £150 please do not use this code, as you are entitled to your own Hostess benefits!

Sign up to my newsletter here – http://eepurl.com/2if59

Hannah Wilks

Stampin’ Up! UK Independent Demonstrator

Have a Beautiful Birthday

Stampin' Up! UK Birthday Blossoms 2nd Generation Stamping

I know I mentioned this earlier in the month, but I have quite a few family birthdays coming up, and I know that the most commonly made type of greetings card is a birthday card, so you will be seeing many more birthday care inspiration coming from me over the next few months (when I’m not thinking about Christmas!)

Stampin' Up! UK Birthday Blossoms 2nd Generation Stamping

This card uses the Birthday Blossoms Stamp Set, that I quite simply just adore! It is the perfect mix of delicate and sketchy, and it coordinates with a couple of punches too!

I kept this card super simple, sticking to just Mint Macaron ink and Whisper White card stock, with the variation in colour coming from the stamping technique used. This card features Second Generation Stamping, to create a layered effect with the flowers and leaves. This is super simple to do; ink up your chose stamp and stamp it off once (or twice for an even paler version) onto some scrap paper before stamping onto your project.

Keeping it simple with a sentiment from the stamp stamp set and three trio’s of Jewel Rhinestones

A beautiful card for James’ Beautiful Grandma


Shop Now button-001Join my team button-001

To purchase any of the items featured in my projects please use the links above. To join my team of Stampin’ Friends select ‘Join My Team’ or send me a message!

Please support StampinByHannah, and join my Code Club, by using the Hostess code featured in the top right hand of my blog. For orders of over £150 please do not use this code, as you are entitled to your own Hostess benefits!

Sign up to my newsletter here – http://eepurl.com/2if59

Hannah Wilks

Stampin’ Up! UK Independent Demonstrator