Cardmaking 101 – how to cut a card-base

cardmaking 101

Cardmaking class UK free

Today marks the start of my completely free weekly card-making class here at StampinByHannah. This class has been in the planning for ages and I am so pleased I am finally ready to share it with you.

Each week, on a Sunday, a new tutorial will be released focusing on card making basics; hints and tips, tools, techniques and useful information to help you to make amazing projects. I am so excited! shall we begin?

cardmaking 101 - how to cut a card base

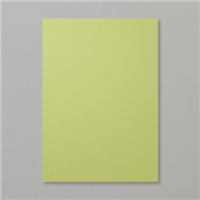
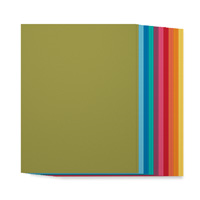
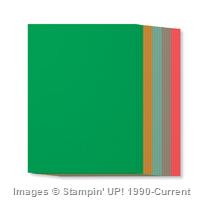
This week I thought we would start at the beginning; how to cut yourself a card base. I know that not everyone will cut there own card bases, but I think its a useful thing to know, particularly as then your not stuck with white or cream cards all the time – lets get some colour in here!

How to:

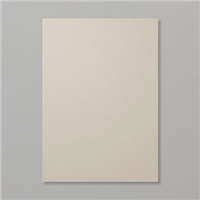
I use A4 card stock, I know that these measurements will not be useful for everyone, particularly those who use 8.5×11″ however, I live in the UK and A4 is all we have

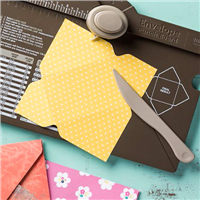
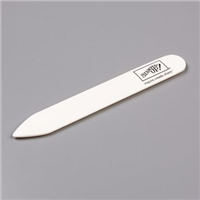
There are two ways to cut a card base, depending on the style of card you wish to create. I frequently use tent fold cards and so cut my A4 length ways at 10.5 cm to create two long skinny pieces of card stock, I don’t tend to score in the middle for these and find that folding them in half and burnishing with my bone folder is enough

The other common card base is a ‘book style’ card, and for these I cut my A4 width-ways at 14.8 cm, scoring them in half at 10.5 cm and folding to create my card

These two methods create the same size card; 14.8 x 10.5 cm

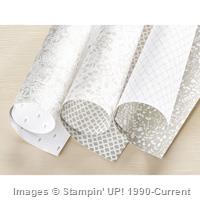
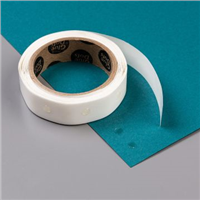
To create a layer for the front of your card, take an A4 piece of Whisper White and cut at 10 cm, and 14.2 cm to create a slightly smaller piece that will fit beautifully on the front of the card base you have already created.

To create further layers reduce the size of your card stock by 0.5 cm each time, the next layer would therefore be 9.5 x 13.8 cm, the next 9 x 13.2 cm, and the next 8.5 x 12.8


I hope this has been useful, if you have any card making questions or queries please let me know and I will endeavour to answer your questions in later editions of Cardmaking 101


Shop Now button-001Join my team button-001

To purchase any of the items featured in my projects please use the links above. To join my team of Stampin’ Friends select ‘Join My Team’ or send me a message!

Please support StampinByHannah by using the Hostess code featured in the top right hand of my blog. For orders of over £150 please do not use this code, as you are entitled to your own Hostess benefits!

Sign up to my newsletter here – http://eepurl.com/2if59

Hannah Wilks

Stampin’ Up! UK Independent Demonstrator

Swatch Book

Stampin' Up! UK swatch book

If you have been following me for a while you may remember last year, when I shared my Customised Colour Coach. Well, can you imagine my sadness, when the colour coach was retired this week! I know, I don’t really know how I am going to cope! well, better now I have made this;

My Swatch Book!

Stampin' Up! UK swatch book

I just love a good swatch! I use them often when I’m choosing colours for projects (an even more often when I’m creating items for customer orders!) And when I spotted the Layered Letters Alphabet in the latest catalogue, I just knew I had the perfect swatch stamp too!

So, I have created 3 PDF’s for you to download and make your own Stampin’ Up! swatch book. The first file contains swatch cards for all 4 colour families, that’s 36 ink pad colours, while the 2nd is for the current In-Colours (2014-2016 and 2015-2017), and the 3rd download contains the swatch spots for the previous two sets of In-Colours!

Colour Swatches – Colour Families

Colour Swatches – In Colours

Colour Swatches – In Colours – previous

To create my swatch book:

First print the PDF files onto Whisper White card stock

Using the Layered Letters Alphabet stamp set, and the rectangular stamp, swatch each ink colour in the coordinating swatch spot.

Cut the swatches into 2″ squares by cutting along the lines of the template.

Make a hole in the top left hand corner of each swatch using the 1/4″ handheld punch and keep the swatches together with an O ring (I used these ones from Amazon)#


As mentioned in the video, Stampin’ Up! are currently running a great joining offer. Sign up between now and the 30th June 2015, and Stampin’ Up! will add an additional two stamp sets of your choosing into your Starter Kit for FREE! Awesome! For each person who joins my team during this promotion I will not only be sending you my usual new demo goodies, but I will also add a completed swatch book!


Shop Now button-001Join my team button-001

To purchase any of the items featured in my projects please use the links above. To join my team of Stampin’ Friends select ‘Join My Team’ or send me a message!

Please support StampinByHannah by using the Hostess code featured in the top right hand of my blog. For orders of over £150 please do not use this code, as you are entitled to your own Hostess benefits!

Sign up to my newsletter here – http://eepurl.com/2if59

Hannah Wilks

Stampin’ Up! UK Independent Demonstrator

Weekly Deals, Joining Offers, Classes and Workshops…..and more!

Stampin' Up! UK Free Stamps

I have a heap of things to tell you about today! Yesterday was the launch of the brand new Stampin’ Up! catalogue! Yay! I am still sending catalogues out for free (provided you are in the UK) just complete this form for a copy, or there is a digital PDF download version available in the sidebar. My monthly newsletter is due to hit your inboxes today (or tomorrow depending on some external factors – like how fast YouTube is feeling today!), you can subscribe at any time by using the link found at the end of all of my blog posts.

Stampin' Up! UK Weekly dealsThis weeks deal selection is great! I always love a good embossing folder – this week we have two! You guys already know what a fan of tag topper punches I am, this ornate one is carrying over from the Spring/Summer catalogue, and is a great addition to your punch collection. The handpicked framelits dies are also a carry over item, and coordinate with two of the brand new stamp sets in the new Annual Catalogue! And who can live without some gold sequins!

Stampin' Up! UK Free Stamps

In addition to the new catalogue, yesterday we also launched a brand new Joining offer!

If you decide to join Stampin’ Up! in June, you will get to choose TWO free stamp sets in your Starter kit – that’t any two stamp sets in the annual catalogue, for FREE! Awesome right! I have waffled and waffled about the joys of being part of Stampin’ Up! I have a heap of information about joining on my Join My Team page. And I am available by email and phone if you have any questions.

I also have my own joining offer this month, and all new team members will receive and extra special goody bag! (but I’m not telling you what’s in it! stay tuned for more information on that one!)

Stampin' Up! UK Teesside Classes and Workshops Cardmaking

I have updated the Classes and Workshops page. You can now see a full list of Classes, Workshops, and events through until the end of the year. If you live locally to me and have ordered a catalogue, this timetable was also included.

I have changed my classes slightly this time, and will be holding a Techniques Class each month, with Kit classes and Stamp-a-Stack events in some months. Unfortunately there will be no classes or events in August as I get married and go on honeymoon, the blog will still be updated regularly during this time.

Check out my classes and workshops using the link at the top of the page.


I think that’s probably enough information to bombard you with today, I’m working this morning, but am looking forward to a girly lunch and shopping afternoon, followed by a gym session with James. I have recently challenged him – he thinks he can get me to run 5K by the time we get married, for all I’m the one doing the training, I’m not sure!

Have a great day, speak to you all again soon

x


Shop Now button-001Join my team button-001

To purchase any of the items featured in my projects please use the links above. To join my team of Stampin’ Friends select ‘Join My Team’ or send me a message!

Please support StampinByHannah by using the Hostess code featured in the top right hand of my blog. For orders of over £150 please do not use this code, as you are entitled to your own Hostess benefits!

Sign up to my newsletter here – http://eepurl.com/2if59

Hannah Wilks

Stampin’ Up! UK Independent Demonstrator

Kissing Technique….

Stampin' Up! UK I think your great kissing

Before your mind wonders off somewhere else, I’m talking Stamp Kissing today, I am not about to discuss romance or any other life lessons!

Today is the launch of the brand new Stampin’ Up! catalogue – have you got your copy yet? if not, get a physical copy here or a digital version there.

There are heaps of great stamps, tools, and new in-colours in this catalogue. I will be doing a full catalogue tour for newsletter subscribers this month. Not a newsletter subscriber yet, why not! but you can sign up here, or in the link at the bottom of this post.

Stampin' Up! UK I think your great kissing

Ok, so onto the technique for today. How great is this card! and its so simple to create. I love the kissing technique, it allows you to add pattern to solid stamps. Check out the video tutorial below for visual instructions,.

The Kissing Technique:

For this technique you need two stamps, one solid and one patterned. I love that Stampin’ Up! this year has stamp sets specifically for certain techniques and this stamp set, I Think You’re Great, is designed with Stamp Kissing in mind.

Ink up your solid stamp

Kiss the two stamps together, I do this by laying the patterned stamp face up on my desk, and stamping the solid stamp onto it. Don’t wiggle the stamps, use a straight down and straight up movement, otherwise your pattern will blur.

Stamp the solid stamp onto your project.


Shop Now button-001Join my team button-001

To purchase any of the items featured in my projects please use the links above. To join my team of Stampin’ Friends select ‘Join My Team’ or send me a message!

Please support StampinByHannah by using the Hostess code featured in the top right hand of my blog. For orders of over £150 please do not use this code, as you are entitled to your own Hostess benefits!

Sign up to my newsletter here – http://eepurl.com/2if59

Hannah Wilks

Stampin’ Up! UK Independent Demonstrator

Farewell Painted Petals!

Stampin' Up! Indescribable gift painted petals

Just in case you have been living under a rock, tomorrow is the launch of the brand new Stampin’ Up! catalogue! which also means that tomorrow is the last day of the current annual catalogue, spring/summer catalogue, and the retiring list! so, today I’m saying goodbye to a heap of items, but tomorrow is HELLO! to a brand new set of stamps, in-colours, catalogues, tools, and heaps of those great items!

So, when I was planning out this coming fortnight, I had a great plan to do a blog post saying goodbye to Painted Petals – I have LOVED using this stamp set! and it has totally inspired me to try watercolour properly. However, when I came to making this weeks blog projects inspiration for using Painted Petals completed deserted me! I know, I know, I probably shouldn’t admit to being completely un-inspired, however, as you can see, I did manage to make a card!

Stampin' Up! Indescribable gift painted petals

I returned to my stamp stash, and pulled the other sets that are retiring from the Spring/Summer catalogue, and found Indescribable Gift. I have loved using this floral stamp too! Although I have used the sentiments from this set, the floral image is one of my most used stamps from this past few months. I have used the Painted Petals here, but just for the sentiment in the end.

The card base here is Blackberry Bliss, and I have used Shimmery White card stock for the layer. I adore this card stock, I have to admit it’s one of those things that has been sat in my card stock drawer for a few months completely unused, but I recently discovered that its great for water-colouring on, and seeing as I have run out of Watercolour paper, Shimmery Water card stock is very handy (and cheaper!).

I stamped the Indescribable Gift in Rose Red, stamped off once, before very carefully but loosely water-colouring using Rose Red, Wild Wasabi, and Crumb Cake. When water-colouring an image, you should use a waterproof ink (like Stazon) because Stampin’ Up! ink is water-based, it will move when water is applied to it, so either carefully water-colour (like I did here) or use a Stazon inkpad.

Which stamp set was your favourite from this years Spring/Summer catalogue?


Shop Now button-001Join my team button-001

To purchase any of the items featured in my projects please use the links above. To join my team of Stampin’ Friends select ‘Join My Team’ or send me a message!

Please support StampinByHannah by using the Hostess code featured in the top right hand of my blog. For orders of over £150 please do not use this code, as you are entitled to your own Hostess benefits!

Sign up to my newsletter here – http://eepurl.com/2if59

Hannah Wilks

Stampin’ Up! UK Independent Demonstrator

Freshly Made Sketches #188 – Something to Say….

Stampin' Up! UK something to say itty bitty accents petite petals

I’m here on a Saturday again joining in over at Freshly Made Sketches, I have been really enjoying using sketches to push my cardmaking out of my comfort zone. I have to admit, when I first looked at the sketch for this week, I panicked! I don’t tend to make cards with lots of layers, I don’t really know why, because I think I should!

Stampin' Up! freshly made sketches


So, the very first thing I do when I get my hands on a new sketch is to stand in front of my stamp sets. This week I came up with nothing, I try and check the sketch early in the week, after its release on Tuesday. This week when I looked on Tuesday night, I stood in front of those stamp sets, and stood, and stood. Inspiration escaped me. Completely.

Stampin' Up! UK something to say itty bitty accents petite petals

I grabbed the sketch again on Friday, and took more notice of the images. I try to just see shape when I look at a sketch, and I’m always tempted to turn things around. But this week, just getting something made was more important. So the flowers jumped out at me, and I ran through my collection looking for small floral stamps with coordinating punches – Petite Petals and Something To Say. I actually started from punches, and then looked for stamps to coordinate;  Petite Petals and Itty Bitty Accents Punch Pack.

In order to keep things simple I decided to stick to two colours (plus Whisper White) and used Pear Pizzazz card stock and ink, along with Early Espresso for depth.


Shop Now button-001Join my team button-001

To purchase any of the items featured in my projects please use the links above. To join my team of Stampin’ Friends select ‘Join My Team’ or send me a message!

Please support StampinByHannah by using the Hostess code featured in the top right hand of my blog. For orders of over £150 please do not use this code, as you are entitled to your own Hostess benefits!

Sign up to my newsletter here – http://eepurl.com/2if59

Hannah Wilks

Stampin’ Up! UK Independent Demonstrator

Wedding Week – Wedding Favours

Stampin' Up! UK lided box video tutorial

I have recently put together my wedding favours, and I wish I could say that these are they, but they’re not. They are super cute little milk cartons, and I absolutely love them, but they are not these.

These would be perfect as Wedding Favours, and would hold a good amount of sugared almonds or other confectionery. I have once again pulled out the Something Borrowed Designer Series Paper – this paper retires on the 2nd June (that’s next Tuesday!) so grab it now while you still have the chance.

Stampin' Up! UK wedding favours something borrowed designer series paper

I love a monotone look for weddings, simple colours to make sure people are looking in the right place i.e.: at the bride and groom! and this paper is just perfect for that, detailed enough to be stunning, but not too complex that it shouts too loud.

Measurements:

Base – Card stock = 6 x 6 ” (15 x 15 cm)

score on all 4 sides at 2 ” (5 cm)

Lid – Designer Series Paper = 5 1/16 x 5 1/16″ (12.8 x 12.8 cm)

score on all 4 side at 1 1/2″ (3.8 cm)

Stampin' Up! UK lided box video tutorial


Shop Now button-001Join my team button-001

To purchase any of the items featured in my projects please use the links above. To join my team of Stampin’ Friends select ‘Join My Team’ or send me a message!

Please support StampinByHannah by using the Hostess code featured in the top right hand of my blog. For orders of over £150 please do not use this code, as you are entitled to your own Hostess benefits!

Sign up to my newsletter here – http://eepurl.com/2if59

Hannah Wilks

Stampin’ Up! UK Independent Demonstrator

Wedding Week – Congrats to you two….

Stampin' Up! UK wedding card

I hope you are enjoying my week of Wedding themed projects!

Today I thought we would move away from being part of the wedding party, and make a card as a wedding guest – the perfect congratulations card. I get married in August and if I receive just one hand stamped card like this one I will be a super happy bride! Saying that I won’t be opening any cards until 3 weeks after the wedding, after several members of my family have been cat sitting in my house, so I might even get this card!

Stampin' Up! UK wedding card

Its another super simple card from me, I’m loving white space at the moment. I’m not sure if that’s just my style (it always was when I made 12×12 scrapbook layouts) or whether its just because my head is so full of wedding planning and work that I need some space somewhere!

Using the Your Perfect Day stamp set (about to retire! so grab it now!) the cake is stamped in Sahara sand stamped off once. The Congrats was then stamped over the top in Versamark ink and heat embossed in gold.

So pretty


Shop Now button-001Join my team button-001

To purchase any of the items featured in my projects please use the links above. To join my team of Stampin’ Friends select ‘Join My Team’ or send me a message!

Please support StampinByHannah by using the Hostess code featured in the top right hand of my blog. For orders of over £150 please do not use this code, as you are entitled to your own Hostess benefits!

Sign up to my newsletter here – http://eepurl.com/2if59

Hannah Wilks

Stampin’ Up! UK Independent Demonstrator

Weekly deals and more……

Stampin' Up! Weekly deals

I just love Wednesdays! Awesome new Weekly Deals are released, and I get to talk to you all about some great things happening!

First of all, lets start with this weeks deals shall we

Weekly Deals

This weeks deals are a great selection of items! All are from the Spring/Summer Catalogue, and will not be available after next Wednesday! So grab them now, while you can, for a  great price!

New Catalogue

We are now less that a week away from the launch of the brand new Stampin’ Up! Catalogue! Yay! I’ve been sending out catalogues this week, but still have some left, so if you want a FREE copy there are two ways to get one!

1. Come to my Catalogue Launch Party! – 3rd June 2015 – 7pm – in Stockton-on-Tees (at my house!) – RSVP via Facebook, and I will contact you all with my details. I love doing these events, we have a bit of stamping, some bargains, and the chance to see some of of the new products before anyone else!

2. Or, if you can’t make it to the party, fill in my Request a Catalogue form, and I will post one out to you 🙂


News

Things are super busy around here at the moment; new catalogue launch time is always a little crazy, but I’m also finishing up an order of 75 Orders of Service, prepping to make another 70 Orders of Service for my own wedding, sorting out flowers and hen parties, trying to organise James and fit in my full time job! But it’s all good fun! I’m hoping to start sharing some more of these type of blog posts over the next few months, on a Wednesday, live blogging style!

oh, and before I go, keep your eyes peeled for a great Stampin’ Up! Joining offer coming next week!


Shop Now button-001Join my team button-001

To purchase any of the items featured in my projects please use the links above. To join my team of Stampin’ Friends select ‘Join My Team’ or send me a message!

Please support StampinByHannah by using the Hostess code featured in the top right hand of my blog. For orders of over £150 please do not use this code, as you are entitled to your own Hostess benefits!

Sign up to my newsletter here – http://eepurl.com/2if59

Hannah Wilks

Stampin’ Up! UK Independent Demonstrator


Wedding Week – Create your own Envelopes

Stampin' Up! UK Envelope Punch Board Something Borrowed

I think the Envelope Punch Board is awesome! I really do, it’s such a great tool and I use it all the time; not only for envelopes but boxes and bows too! I was putting together the blog posts for this week, and realised how perfect it would be to have all your wedding stationary completely coordinating – even down to the envelopes. And then I thought, we have the most perfect tool for that! So, here we are; How to Make an Envelope using the Envelope Punch Board!

Stampin' Up! UK Envelope Punch Board Something Borrowed

What great Designer Series Paper to work with too, I have been loving this Sahara Sand / Whisper White combination recently, and I think it makes great neutral wedding stationary. In fact I have some of this paper hoarded away ready for the Wedding Album! (Its getting rather close now!)

Measurements:

To create an envelope perfectly sized for a A6 card, you will need a piece of Designer Series Paper that measures 8 1/4 x 8 1/4″.

Now, I know, normally I try to give you both metric and imperial measurements, however, when your using the Envelope Punch Board, the imperial measurements are much easier to see and use, so this time, I’m sticking with inches!

Insert you Designer Series Paper into your punch board punch, and line the left hand side of the paper up with the 3 5/8″ mark.

Punch and score using the scoring tool provided.

Turn your Designer Series Paper a quarter turn and line the previously made score line up with the guide on the punch, and punch and score again. Repeat this on all 4 sides.

Turn your Envelope Punch Board around and use the reverse side of the punch to round the corners of your envelope.

Fold and burnish your score lines using the side of the scoring tool.

Use your adhesive of choice to stick your envelope together, using a glue dot to secure the top flap (once your handmade card is inside, of course!)


Shop Now button-001Join my team button-001

To purchase any of the items featured in my projects please use the links above. To join my team of Stampin’ Friends select ‘Join My Team’ or send me a message!

Please support StampinByHannah by using the Hostess code featured in the top right hand of my blog. For orders of over £150 please do not use this code, as you are entitled to your own Hostess benefits!

Sign up to my newsletter here – http://eepurl.com/2if59

Hannah Wilks

Stampin’ Up! UK Independent Demonstrator