Bottle Labels!

Before we get into the blog post today I want to remind you about the retiring list – I know that the Designer Series Paper I have used below is on this list – it may no longer be available, and I’m sorry if it’s not – but go and check out the bargains before its too late!


I regularly give bottles of wine away as gifts – particularly at the moment where I have some wonderful people running around doing fantastic things in preparation for the wedding (really not long to go now!) But a bottle of wine on its own is boring, so I had to put my own stamp (get it!) on it!

Stampin' Up! UK wine gift tag

They are so simply to make (check out the video below!) and use a tiny piece of card stock, and an even smaller piece of Designer Series Paper, but they make such a difference to a boring bottle.

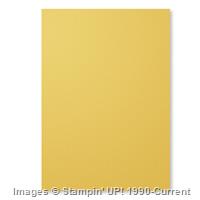
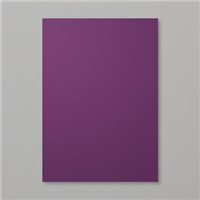
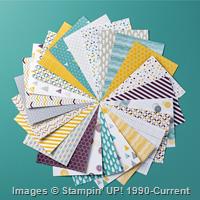
These ones use the 2014-2016 In Colours Blackberry Bliss and Hello Honey, and the now sadly retiring Moonlight Designer Series Paper stack. I really am sad to see this paper go, BUT I have seen the next Stampin’ Up! annual catalogue, and I have to say, the papers that are replacing Moonlight are AWESOME! Actually the whole catalogue is fantastic! Want to see it now? Join my team, and get to add some sneak peaks to your Starter Kit!

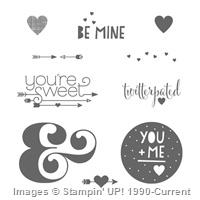
The stamps featured here are from You Plus Me, which really is Valentines day themed, however, I think the sentiments work well here (after all, that bottle of wine, that one, that one was mine!)

Measurements:

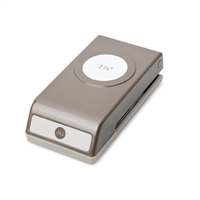
Card stock – 20 x 7 cm, score at 6.5 cm on the long side, and use a 1 3/8″ circle punch to make a whole in the smaller side.

Designer Series Paper – 13 x 6.5 cm


Shop Now button-001Join my team button-001

To purchase any of the items featured in my projects please use the links above. To join my team of Stampin’ Friends select ‘Join My Team’ or send me a message!

Please support StampinByHannah by using the Hostess code featured in the top right hand of my blog. For orders of over £150 please do not use this code, as you are entitled to your own Hostess benefits!

Sign up to my newsletter here – http://eepurl.com/2if59

Hannah Wilks

Stampin’ Up! UK Independent Demonstrator


Fancy Fold Friday – Twist Turn Card

Its that time again! Fancy Fold Friday Time – and now we’re getting complex!

This week its the super cute Twist Turn Card!

I love this card, it make such a great birthday card, and is the perfect size to hold a gift card. Actually, while we’re on that – I love giving gift cards as gifts – who doesn’t love the gift of shopping?! lol, ok, but sometimes gift cards are really handy gifts (thinking here of any gamers in your life, I don’t know about you but I think £40 is an expensive gift, but I don’t mind contributing!) So, we give James’ younger brother gift cards, but trying to find a way to package them in a way that’s not really boring is a bit of a challenge. When I gave him a Twist Turn card for his birthday this year, I got a ‘ooooh, cool!’ a great compliment from a 13 year old I do believe! So, I haven’t included a way of attaching your gift card into the card, but that’s really because I use the Stampin’ Up! 2-way glue pen – if you use this adhesive when its wet (and blue) its permanent, but leave it to dry (and turn clear) it becomes re-positionable – and great for holding a gift card!

Stampin' Up! UK Twist Turn Card Gift card holder

Ok, so, to the card! The card base (Hello Honey, if you were wondering!), is cut to 8 1/4″ by 5 1/4″, score it on the long side at 2 5/8″ and 3 1/2″, and on the short side at 2 5/8″. Then, you need to make two diagonal score lines. Orientate the cardstock with the short side at the top, with the two score lines going horizontally near the bottom, draw a score line from the bottom score line at the edge of the cardstock, to the middle of the next score line, repeat on both sides – giving you an arrow pointing away from you. Fold on all the score lines. Stampin' Up! UK Twist Turn Card Gift card holder


The folds should be burnished well, of the card wont stand up well. The DSP used here is from the Moonlight DSP stack (LOVE!), and the stamps are from Everything Eleanor, and Something to Say, punched out uisng the 1″ circle punch, scallop circle punch, and Modern Label punch.

Let me know if you want a video tutorial for this (or anything other card)

See you again next week

x


Hannah Wilks

Stampin’ Up! UK Independent Demonstrator

If you like the project, or any of the products used, would like a catalogue, or to join my team, please contact me, or click on the ‘Shop NOW’ button at the top of the page. You can also find me on Twitter, Facebook, YouTube, Google+, About.me, and Tumblr (Links in the sidebar)

Thank you for stopping by www.www.stampinbyhannah.co.uk today

x