Masked Ink Blending

Stampin' Up! UK Butterfly Basics Birthday Card

Hello there! Firstly, I have to apologise for the lateness of this post, I really don’t know what is happening to me at the moment but my energy is at an all time low. After hosting my monthly Card Class last night, I just could not get motivated to move this morning!

The card I’m sharing today has been working its way out of my brain since I checked the Global Design Project Blog on Monday, I’m just glad I got to make it before the challenge closed!Global Design Project Sketch Challenge 30I always enjoy a sketch challenge, but this card formed in my head (after I’d checked the Global Design Project Blog) but I didn’t put the 2 together until yesterday.

Stampin' Up! UK Global Design Project Butterfly Basics

Now, trying to photograph a mainly white card is tricky, I hope you can forgive my slightly shaky skills.

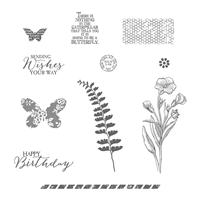
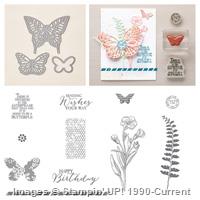
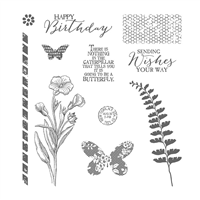
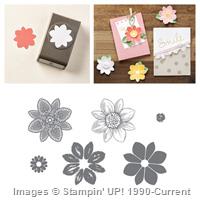
At class last night the ladies were working through the current Annual catalogue working out their orders and someone mentioned that they loved this stamp set. I have to admit that my copy has been gathering dust slightly over the past few months, but it is definitely one of my all time favourites, I’m not sure if its the font, or the fern, or those flowers, or the fact that it coordinates with two die sets, but I love it!

Stampin' Up! UK Butterfly Basics Birthday Card

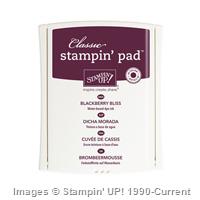
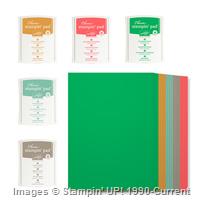
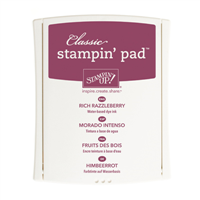
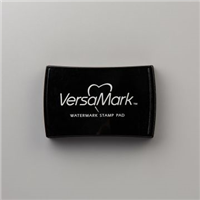
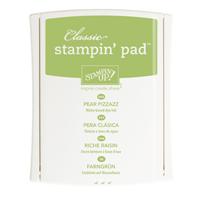
Ok, So the sentiment is from Butterfly Basics, and is stamped in Blackberry Bliss (retiring soon!). After the ink was dry, I used a 1″ strip of sticky note tape as a mask and covered that sentiment, before ink blending over the sentiment with Sahara sand ink and my sponge. I love this technique at the moment, I get to get all inky but I still get to see sharp white on my card!

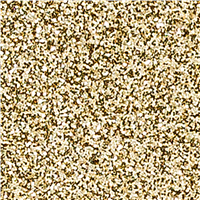
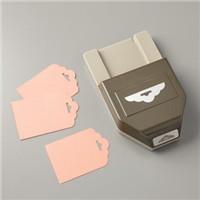
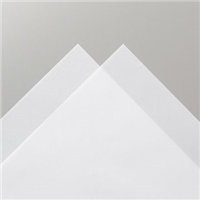
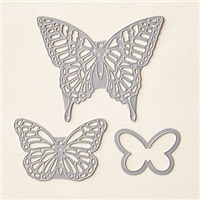
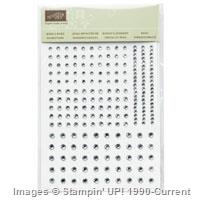
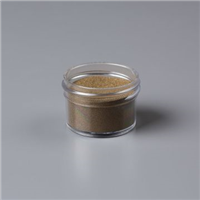
The butterfly is die cut from Pear Pizzazz card stock, and the card is finished with 3 dots of Gold Glimmer paper punched with the 1/4″ and 1/8″ handheld punches (the same as I did on this card earlier in the week!)

Thanks for checking out my blog today, and I will be back soon with another card featuring this awesome stamp set!


Don’t forget to shop using the Code Club Code to receive some great FREE product! 

7AXEMZNA

I will be closing this order on the 30th April 2016


Product List


Shop Now button-001Join my team button-001

To purchase any of the items featured in my projects please use the links above. To join my team of Stampin’ Friends select ‘Join My Team’ or send me a message!

Please support StampinByHannah, and join my Code Club, by using the Hostess code featured in the top right hand of my blog. For orders of over £150 please do not use this code, as you are entitled to your own Hostess benefits!

Sign up to my newsletter here – http://eepurl.com/2if59

Hannah McCurley

Stampin’ Up! UK Independent Demonstrator

Technique Tuesday| Acrylic Block Stamping

Stampin' Up! UK Butterfly Basics Watercolour Stamping

Watercolour is BIG news at the moment in card-making. Watercoloured backgrounds and images are really popular. At Stampin’ Up!® we have a great kit featuring the watercolour look (Watercolour Wishes) and have several stamp sets that allow you to look like a watercolour master without any of the mess – which is awesome, but I love playing with ink and water! But I understand that it can be a tricky look to pull off.

Well, today I have  quick and easy watercolour background technique for you that doesn’t even need a paint brush!

Stampin' Up! UK Acrylic Block Stamping Technique Tuesday Video Tutorial

This technique is super simple, but as always I have created a video tutorial for you.

The new Basic Black Archival Ink is great for this technique, it gives a crisp true black image, great for sentiments and silhouette images like the ones on the card above. But also it is awesome for watercolour techniques as it doesn’t bleed or run with water, and so has become my go to black for stamped imaged that I am planning to watercolour. This card would have worked just as well if I had used Memento or Stazon as the black stamping is done after the watercolour panel is dry.

My favourite card stock for this technique is the Shimmery White, as its slightly thicker than our standard Whisper White card stock, and allows you a little more time before the ink dries than Watercolor Paper. Plus, you get that lovely shimmery finish! I can see another packet of this coming home with me really soon!

Stampin' Up! UK Butterfly Basics Watercolour Stamping

Top Tips:

  • Pull out your Stampin’ Pierce matt to stamp on, to ensure a full block of colour
  • Ink up your Acrylic Block and stamp directly onto your card stock without water for a darker, more textured look
  • Add water to your inked Acrylic Block before stamping to create the watercolour effect
  • Allow the water to dry naturally, hit it with your heat gun, or dab off the water with a clean cloth for different effects
  • Stamp over your watercolour panel with a black inked imaged for a cool silhouette effect

The stamp set I have used on this card is Butterfly Basics – definitely one of my favourites this year – lovely for feminine birthdays and other occasions, and it coordinated with two die sets and several other sets of stamps too!


Stampin' Up! Starter Kit offer


Shop Now button-001Join my team button-001

To purchase any of the items featured in my projects please use the links above. To join my team of Stampin’ Friends select ‘Join My Team’ or send me a message!

Please support StampinByHannah, and join my Code Club, by using the Hostess code featured in the top right hand of my blog. For orders of over £150 please do not use this code, as you are entitled to your own Hostess benefits!

Sign up to my newsletter here – http://eepurl.com/2if59

Hannah Wilks

Stampin’ Up! UK Independent Demonstrator

June Online Workshop! Butterfly Basics…and a fancy fold!

Stampin' Up! UK Butterfly Basics Corner fold card

Hello!

Welcome to another Free Online Workshop! I am loving doing these, and am hopefully going to do one every couple of months. Let me know what you think and what you would like to see featured in these longer tutorials using the comments section at the end of the post

Stampin' Up! UK Free workshop

This time I have focused on the Butterfly Basics stamp set, I was so please to find it had carried over into the brand new Annual Catalogue! You can find it in the Artistic Expression section, page 124, where it is featured with the Butterflies Thinlits dies in a great bundle that saves you 15%!

Both the cards and the tag here use the brand new In-Colours; Mint Macaron, Delightful Dijon, Watermelon Wonder, Cucumber Crush, and Tip Top Taupe. These new colours are great additions, to the current range of colours, filling in gaps in Bright colours, and adding a wonderful new neutral. In-Colours change every year, and run for 2 years, adding 10 wonderful colours to our line, and giving your more options for projects.  In Colours are available on a great deal too! You can purchase all the ink pads and a multi-pack of card stock for the price of just the ink pads – that’s free card stock folks! Awesome!

Stampin' Up! UK Corner Fold Fancy Fold card butterfly basics free workshop class

Before you get to the workshop, I just wanted to mention the great joining offer this month from Stampin’ Up! Get 2 free stamp sets with your starter kit, just for signing up! Have I mentioned the great deal that is the starter kit – If you have a wish list of over £100 I urge you to think about becoming a demonstrator, there is no pressure to sell anything, you are more than welcome to be a hobby demonstrator and just get the 20% off! But if you have a wish list of over £100, you can pay just £99 and get to pick £130 worth of great products (anything from the current catalogue!), and those two free stamp sets of your choice! how cool is that!

Fancy Fold How To:

I love this corner fold card, I have to give credit to Dawn Griffiths, I have resized the card to fit A4 card stock 🙂

Cut a piece of A4 card stock in half, and fold in half to create your card base

Unfold your card base and insert, long side at the top, into your Stampin’ Trimmer. Cut at 13 cm from 2 to 8 cm using the trimmer attachment as a guide

Turn your card base so the short side is down at the top, and cut at 8 cm from 2 to 8 cm

Fold down the corner of the card, leaving the cut corner flat.

Inside pieces:

Watermelon Wonder – 14.2 x 10 cm

Whisper White – 13.8 x 9.5 cm

Outside pieces:

Watermelon Wonder – 6 x 6 cm

Whisper White – 5.5 x 5.5 cm

Stampin' Up! UK Butterfly Basics Corner fold card


As I mentioned in the tutorial, any order placed using the Hostess Code will receive a card kit with all the card stock pieces ready for you to make these 3 projects

4REM7CHQ

Thank you for supporting StampinByHannah

Please note this is a different code to my Code Club Code! Chose your code carefully!


Shop Now button-001Join my team button-001

To purchase any of the items featured in my projects please use the links above. To join my team of Stampin’ Friends select ‘Join My Team’ or send me a message!

Please support StampinByHannah by using the Hostess code featured in the top right hand of my blog. For orders of over £150 please do not use this code, as you are entitled to your own Hostess benefits!

Sign up to my newsletter here – http://eepurl.com/2if59

Hannah Wilks

Stampin’ Up! UK Independent Demonstrator


Collage stamping

One of my favourite stamp sets from the current Spring/Summer catalogue is Butterfly Basics. I have created a whole heap of cards with this set, and I’m sure I have plenty more cards with this set left to create (yes, it’s in the new Annual Catalogue too! Yay!)

Stampin' Up! UK butterfly basics collage

I have really enjoyed the pieces of this stamp set, both individually and collaged together  – like the card here. Almost all the stamps from the set are stamped on this 5 x 5″ square card in Sahara Sand. The only different colour used is Early Espresso for the Happy Birthday.

The card is finished with a beautiful butterfly die cut from Early Espresso from the Butterflies Thinlits dies. I usually bend the wings of these butterflies to create some dimension, however, this time I decided to use my bone folder to create a curved wing. To create this look run the wings of the butterfly around the bone folder as if you were curling ribbon. I love the effect this gives.


Shop Now button-001Join my team button-001

To purchase any of the items featured in my projects please use the links above. To join my team of Stampin’ Friends select ‘Join My Team’ or send me a message!

Please support StampinByHannah by using the Hostess code featured in the top right hand of my blog. For orders of over £150 please do not use this code, as you are entitled to your own Hostess benefits!

Sign up to my newsletter here – http://eepurl.com/2if59

Hannah Wilks

Stampin’ Up! UK Independent Demonstrator

Watercolour Stamping

As you may be able to tell I love watercolouring with my stamps; either sprintzing water onto my inked stamp, adding water to a stamped image or using my inks to colour an image, and I just couldn’t let this card onto the blog without a very short video!

Stampin' Up! UK watercolour butterfly basics

Isn’t this card just so pretty!

I do have a bit of a top tip for using that sentiment; use the top edge of the stamp to ensure your stamp is stamped straight, if you line the top edge of the stamp up with the top of you block when positioning, you can then line the block up with your card stock to ensure your sentiment is straight.

Stampin' Up! UK butterfly basics video tutorialHow to:

Cut your sheet of Early Espresso card stock in half, and fold in half to create your card base. Measure the front or your card and cut a piece of Stampin’ Up! watercolour paper to half a centimetre (or 1/4″) shorter and narrower

Ink the fern stamp up with Sahara Sand ink and stamp 3 times in the bottom right hand corner of your watercolour paper.

Ink you flower stamp up with Rich Razzleberry, and mist with water, the amount of water you mist the more the ink will move, causing the two different effects as seen above, stamp over the top of the ferns. Allow this to dry, either naturally or with the assistance of a heat tool.

Ink the postage label in Early Espresso and stamp three times around the flowers.

Stamp the sentiment in the bottom left using Early Espresso.

Mount the watercolour paper to the front or your card base using Fast Fuse adhesive.


Shop Now button-001Join my team button-001

To purchase any of the items featured in my projects please use the links above. To join my team of Stampin’ Friends select ‘Join My Team’ or send me a message!

Please support StampinByHannah by using the Hostess code featured in the top right hand of my blog. For orders of over £150 please do not use this code, as you are entitled to your own Hostess benefits!

Sign up to my newsletter here – http://eepurl.com/2if59

Hannah Wilks

Stampin’ Up! UK Independent Demonstrator


There is nothing in the Caterpillar….

That tells you it is going to be a butterfly, however, there are no Caterpillars in sight here, just beautiful butterflies!

Stampin' Up! UK Butterfly Basics die cut butterflyWe are just a few short weeks away from launching our brand new set of In-Colours, I thought I would use one of the current In-Colours – just to prove that I still love them! This is Blackberry Bliss, a gorgeous rich purple (I am still totally in love with this colour). I have to say, I have already seen the next set of In-Colours, and by the time you read this I will have them in my inky fingers, and I think they are great additions to our colour line. In-Colours stick around for 2 years, so Blackberry Bliss (and Hello Honey, Lost Lagoon, Mossy Meadow, and Tangelo Twist) is still around for another 12 months! Yay!

This card uses the Butterfly Basics bundle (that’s carrying over into the new Annual catalogue by the way!). The Butterfly is die cut from BlackBerry Bliss card stock, and Vellum, while the other elements are stamped in Blackberry Bliss ink onto Very Vanilla card stock.

So pretty, and really simple to stamp to!


Shop Now button-001Join my team button-001

To purchase any of the items featured in my projects please use the links above. To join my team of Stampin’ Friends select ‘Join My Team’ or send me a message!

Please support StampinByHannah by using the Hostess code featured in the top right hand of my blog. For orders of over £150 please do not use this code, as you are entitled to your own Hostess benefits!

Sign up to my newsletter here – http://eepurl.com/2if59

Hannah Wilks

Stampin’ Up! UK Independent Demonstrator


Partial Die Cutting Zig Zag Card

Welcome to Technique Tuesday – the day of the week where I show you how to create a card using a new technique! This week, I’m using Partial Die Cutting to create this lovely card with Butterfly Basics!

Stampin' Up! UK partial die cutting technique video butterfly basics

This card is really simple to make. The trick comes when running your die cutting sandwich through your Big Shot. Create your die cutting sandwich as normal – Magnetic Platform, Cutting Plate, card stock, die – but position your top cutting plate carefully – aligning the edge of the plate with where you want your die cut to stop. Remember your die will only cut where there is pressure – no plate = no pressure! Check out the video to see what I mean.

Instructions:

Cut a piece of A4 card in half, and fold in half to create your card base. Then open your card base, and mark a centre line down the inside front cover. Stamp your butterflies down this line – using a Stamp-a-ma-jig to ensure correct positioning.

Create your die cutting sandwich, lining up your die with your stamped butterflies, and lining the edge of your top place up with your centre line. Run this sandwich through your Big Shot. Repeat for all three butterflies, before finishing the card by stamping the insides or adding any desired embellishments.


Shop Now button-001Join my team button-001

To purchase any of the items featured in my projects please use the links above. To join my team of Stampin’ Friends select ‘Join My Team’ or send me a message!

Please support StampinByHannah by using the Hostess code featured in the top right hand of my blog. For orders of over £150 please do not use this code, as you are entitled to your own Hostess benefits!

Sign up to my newsletter here – http://eepurl.com/2if59

Hannah Wilks

Stampin’ Up! UK Independent Demonstrator


Clean and Simple…

A few weeks ago I mentioned my Guest Design Team Member spot at Fantasy Stampers. Well, today is my final project.

The challenge this time was clean and simple – something I surprisingly really struggled with! I even managed to make a card so far removed from clean and simple that I have already blogged about it!

Stampin' Up! UK Butterfly Basics Blackberry Bliss

So, this was my final card. The floral image is taken from Butterfly Basics and is coloured slightly with one of our blender pens. The sentiment is from the same set, heat embossed in gold.

I added a trio of rhinestones, and as I made this card about 2 months ago (when I was organised! wishful thinking at the moment!) I used the now discontinued Blendabilities Markers in Wisteria Wonder to colour them. While it is a shame about the Blendabilities, I know that Stampin’ Up! have some awesome things just around the corner. Check back in Tuesday for this year Retiring List – all those lovely items that will be leaving us when the new Annual Catalogue Launches on 2nd June!

Thanks to Fantasy Stampers for having me this month. I have loved being a Guest DT!


Shop Now button-001

Join my team button-001

To purchase any of the items featured in my projects please use the links above. To join my team of Stampin’ Friends select ‘Join My Team’ or send me a message!

Please support StampinByHannah by using the Hostess code featured in the top right hand of my blog. For orders of over £150 please do not use this code, as you are entitled to your own Hostess benefits!

Sign up to my newsletter here – http://eepurl.com/2if59

Hannah Wilks

Stampin’ Up! UK Independent Demonstrator

Party time!

I thought I had already shared this card, I can’t believe its been sat, neglected on my computer for weeks!

About a month ago, Stampin’ Up! challenged me to book two parties as part of Sale-a-bration. Well, Sale-a-bration is now over, but I did have two parties in March, and this the card we made.

Stampin' Up! UK Party make and take

One of my parties had never stamped before, and this card was perfect. I love a simple card, but this one has a little bit of wow with the stamped and punch flower. I even shared my secret for straight stamping: lie your stamp rubber side down on your grid paper, ensuring that the straight edge of the stamp is in line with one of the lines – position your clear block over the top, lining the bottom edge up with one of the grid lines, and push onto the stamp. Now, when you line the bottom edge of you block up with the bottom edge of your paper, your stamp is straight!

Do you fancy holding a Stampin’ event? Fancy Stampin’ with me? contact me for more information


Hannah Wilks

Stampin’ Up! UK Independent Demonstrator

If you like the project, or any of the products used, would like a catalogue, or to join my team, please contact me, or click on the ‘Shop NOW’ button at the top of the page. You can also find me on Twitter, Facebook, YouTube, Google+, About.me, and Tumblr (Links in the sidebar)

Sign up to our newsletter here – http://eepurl.com/2if59

Thank you for stopping by www.www.stampinbyhannah.co.uk today

x

Blackberry Birthdays

Hello!

I’m so glad you’ve joined me this week on StampinByHannah! I’m starting to mix things up a little around here. I’ve got a video tutorial for tomorrow, but Fancy Fold Friday is taking a little break. I’m still working out what is going to take its place though, any suggestions of anything you would like to see message me!
Stampin' Up! UK Something Lacy Birthday card


I made this birthday card for James’ best friend, Sophie a few weeks ago. The Something Lacy background stamp is stamped in Blackberry Bliss onto Sahara Sand card stock. I love the sketchy effect created here, although I will have to admit I’m not totally sure how it happened – another one of those fabulous crafty accidents!

The ‘Happy Birthday’ is taken from Butterfly Basics, and is heat embossed in Gold onto Vellum. Adhered with a careful application of Tombo glue 🙂


Hannah Wilks

Stampin’ Up! UK Independent Demonstrator

If you like the project, or any of the products used, would like a catalogue, or to join my team, please contact me, or click on the ‘Shop NOW’ button at the top of the page. You can also find me on Twitter, Facebook, YouTube, Google+, About.me, and Tumblr (Links in the sidebar)

Sign up to our newsletter here – http://eepurl.com/2if59

Thank you for stopping by www.www.stampinbyhannah.co.uk today

x