StampinByHannah’s Advent Calender Project 2014

I LOVE Christmas! to be honest with you I love the build up to Christmas more than the day itself!

I particularly love Advent! Now, I don’t know if that is just because of the piles of Chocolate, or that it is part of the whole event that is Christmas!

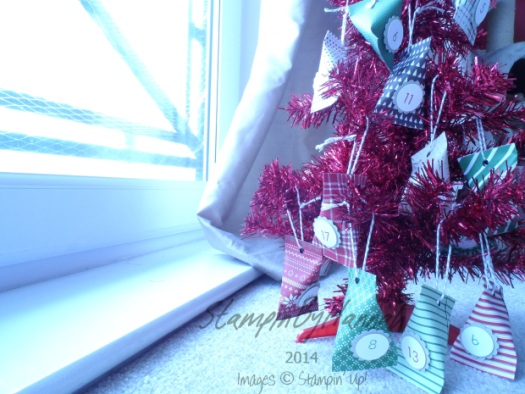
So, this year, my first year of blogging, I thought I would make an Advent Calender! Next year, who know you may get some advent gifts, but this year, its a lovely project!

Stampin' Up! UK advent calender trim the tree

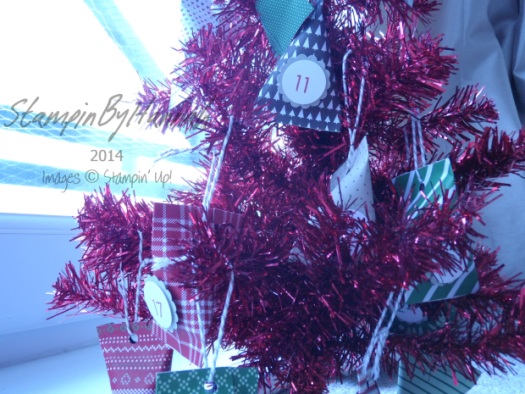
I loved making the Halloween Gift Treat bags in October, and thought they would make perfect little tree ornament (or advent chocolate hanging devices if you will!). And so made 24 miniature treat bags with the Stampin’ Up! Trim the Tree DSP stack (LOVE!!!), some bakers twine (from the Tag a Bag Accessory kit!) and the Back to Basics Alphabet!

Measurements =

DSP – 3 1/2 x 4 1/2″ (9 x 12 cm) which is one of the pieces of the DSP from the Trim the Tree DSP stack cut in half!

Apply sticky strip to one end and both long sides, remove the backing from the sticky strip at the end and roll the DSP into a tube.

Then remove the backing from the sticky strip on one side and pinch together.

Insert your chocolate!

Remove the backing of the sticky strip on the other side and pinch together, at right angles to the other side.

Using a hole punch make a hole in one end and feed through your bakers twine, tying it in a knot to create a loop (so you can hang your treat pouch on the tree!).

Add numbers to each pouch by stamping the numbers 1 – 24 on cardstock (I used the Back to Basics Alphabet for this) and punching out with a 1″ circle punch.

Punch 24 1 1/4″ scallop circles and add one to the back of each number with a dimensionals.

Attach each number to a treat pouch with dimensionals.

Stampin' Up! UK Chocolate advent calender homemade

James is super excited about opening each pouch to find the chocolate inside! (Yes, he’s 24! and my husband to be, and Yes, he is just a big kid! We love Christmas!)


Hannah Wilks

Stampin’ Up! UK Independent Demonstrator

If you like the project, or any of the products used, would like a catalogue, or to join my team, please contact me, or click on the ‘Shop NOW’ button at the top of the page. You can also find me on Twitter, Facebook, YouTube, Google+, About.me, and Tumblr (Links in the sidebar)

Sign up to our newsletter here – http://eepurl.com/2if59

Thank you for stopping by www.www.stampinbyhannah.co.uk today

x
 

Christmas Wishes Pocket Project

I do love a cute Christmas make – and this would be great to make for you children and grandchildren to remember why they love Christmas, why Christmas is so special, or to teach them a little bit about the Christmas story.

Before you watch the video, I recorded this a couple of weeks ago (and I forgot all about it!) and so I’m sorry for a waffle at the beginning about the Good Greetings offer which has sadly now ended.


I found a similar looking item in my local Craft Superstore, however, I thought I could totally make something similar at home.

Stampin' Up! UK Christmas Wishes Pocket

The measurements:

Cardstock = 8 x 4 1/2″ (20.4 x 11.5 cm)

A piece of cardstock that measures 3 1/4″ x 3 1/4″ (9.5 x 9.5 cm)

and 10 stripes that measure 3/4″ x 5″ (2 x 12.7 cm)

Score the short side at – 1/2″ and 4″ ( 0.6 and 10.2cm)

Score the short side at – 4 1/2″ (11.5cm)

Now, I think this would be a really cute idea to add to your Project Life or December Daily! but the pocket is too big!

So, to make a pocket which fits your project life: You need a piece of cardstock that measure = 6 1/2 x 4″ (16.5 x 10.2 cm), score the short side at 1/2″ and 3 1/2″ (1.2cm and 9cm), and the long side at 4″ (10.2 cm)


Hannah Wilks

Stampin’ Up! UK Independent Demonstrator

If you like the project, or any of the products used, would like a catalogue, or to join my team, please contact me, or click on the ‘Shop NOW’ button at the top of the page. You can also find me on Twitter, Facebook, YouTube, Google+, About.me, and Tumblr (Links in the sidebar)

Sign up to our newsletter here – http://eepurl.com/2if59

Thank you for stopping by www.www.stampinbyhannah.co.uk today

x
Personalised Wedding Cards!

Back in wedding mode again today! These are some cards I made for a friend, as thank you cards for the special ladies involved in her wedding – flower girls, bridesmaids, and the mothers!

I was so exicted when I took the order for these! Her colour scheme was white, pale pink and grey, so I took that and ran with it!

Stampin' Up! UK Wedding Everything Eleanor

I used Whisper White, Smokey Slate and Pink Pirouette, along with Everything Eleanor (isnt it the most gorgeous set for weddings!) and the Back to Basic Alphabet to personalise the cards. The flowers are a mix of Petite Petals and Itty Bitty Accents, and they are finished off with the coordinating stamp and some Pearl Basic Jewels

Stampin' Up! UK Wedding Everything Eleanor

These bridesmaids cards use Smokey Slate as the card base, and the same stamp sets as before. Each card has the bridesmaids name on, handstamped using that Back to Basics Alphabet

Stampin' Up! UK Wedding Everything Eleanor

The last set of cards are the ones I made for the Flower girls. Once again they use Everything Eleanor and Back to Basics, but this time I decided to make them a little more fun, and used the bird stamp to add an extra litte something.

Each of the cards was also stamped with a coordinating stamp inside, and also on the envelope.

I love making cards with purpose like these. Having just finished my own wedding invitations though, I might have to have a little break from weddings…….. ok thats enough of a break! I do love a good wedding, dont you?


Hannah Wilks

Stampin’ Up! UK Independent Demonstrator

If you like the project, or any of the products used, would like a catalogue, or to join my team, please contact me, or click on the ‘Shop NOW’ button at the top of the page. You can also find me on Twitter, Facebook, YouTube, Google+, About.me, and Tumblr (Links in the sidebar)

Thank you for stopping by www.www.stampinbyhannah.co.uk today

x