Alternative Uses for the Watercolour Wishes Card Kit

Stampin' Up! UK Watercolour wishes gift packaging

The Watercolour wishes kit is awesome! I can’t remember if I have mentioned it much before, but this years Stampin’ Up!® kits are amazing. We have instant crafting satisfaction 8 times in the annual catalogue and 3 times in the brand new Autumn/Winter book too! That’s a whole lot of crafting! From cards, to stationary, to home decor there is something for everyone.

Stampin' Up! UK Watercolour Wishes Thanks Card

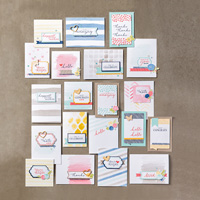
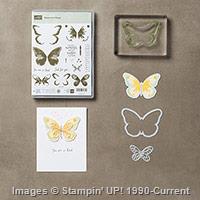
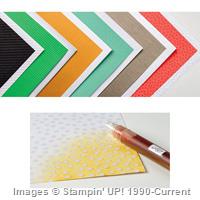
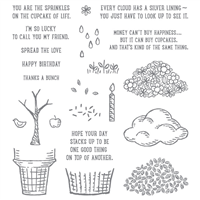
My favourite kit by far is the Watercolour Wishes card kit, which makes 20 unique cards all featuring the totally on trend Watercolour look but without any of the mess! I have got to mention the stamp set that comes with this kit, it features 12 stamps covering all your most important everyday card making occasions

The great folks at Stampin’ Up!® have made a video to show you what’s in the kit and what the cards look like if you follow the instructions

However, I had to find some alternative uses for this kit. I just don’t need all that many cards (not when I make cards for my blog, and customers, and custom orders!), but I do use cute bits of packaging for gifts and things

Stampin' Up! UK Watercolour wishes gift packaging

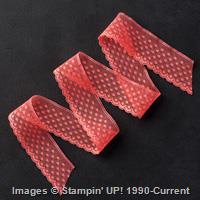
Aren’t they cute! I will admit to using the kit to make a different card, but I could not resist making that heart card into a sweet card for my new husband (not that there was an old one!) I also used one of the larger cards in the kit to make a handy folder style gift, just adding some of our lovely Watermelon Wonder Dotted Lace Trim as a closure.

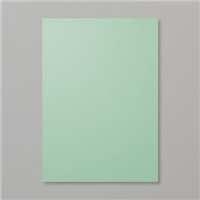
That box is such a handy size. Taking one of the larger cards score at 1″ on all four cards, before creating the box base from a piece of Thick Whisper White card stock.

Measurements:

Lid – 8 1/2 x 5 1/2

scored on all four sides at 1″

Base – 9 7/16th x6 7/16th

scored on all four sides at 1 1/2″

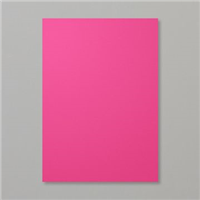
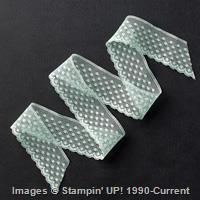
The belly band was created by cutting a 1 1/2″ strip off the long side of a piece of A4 Watermelon Wonder card stock, and helps to hide the score line on the top of the box (it should have been a card remember!)

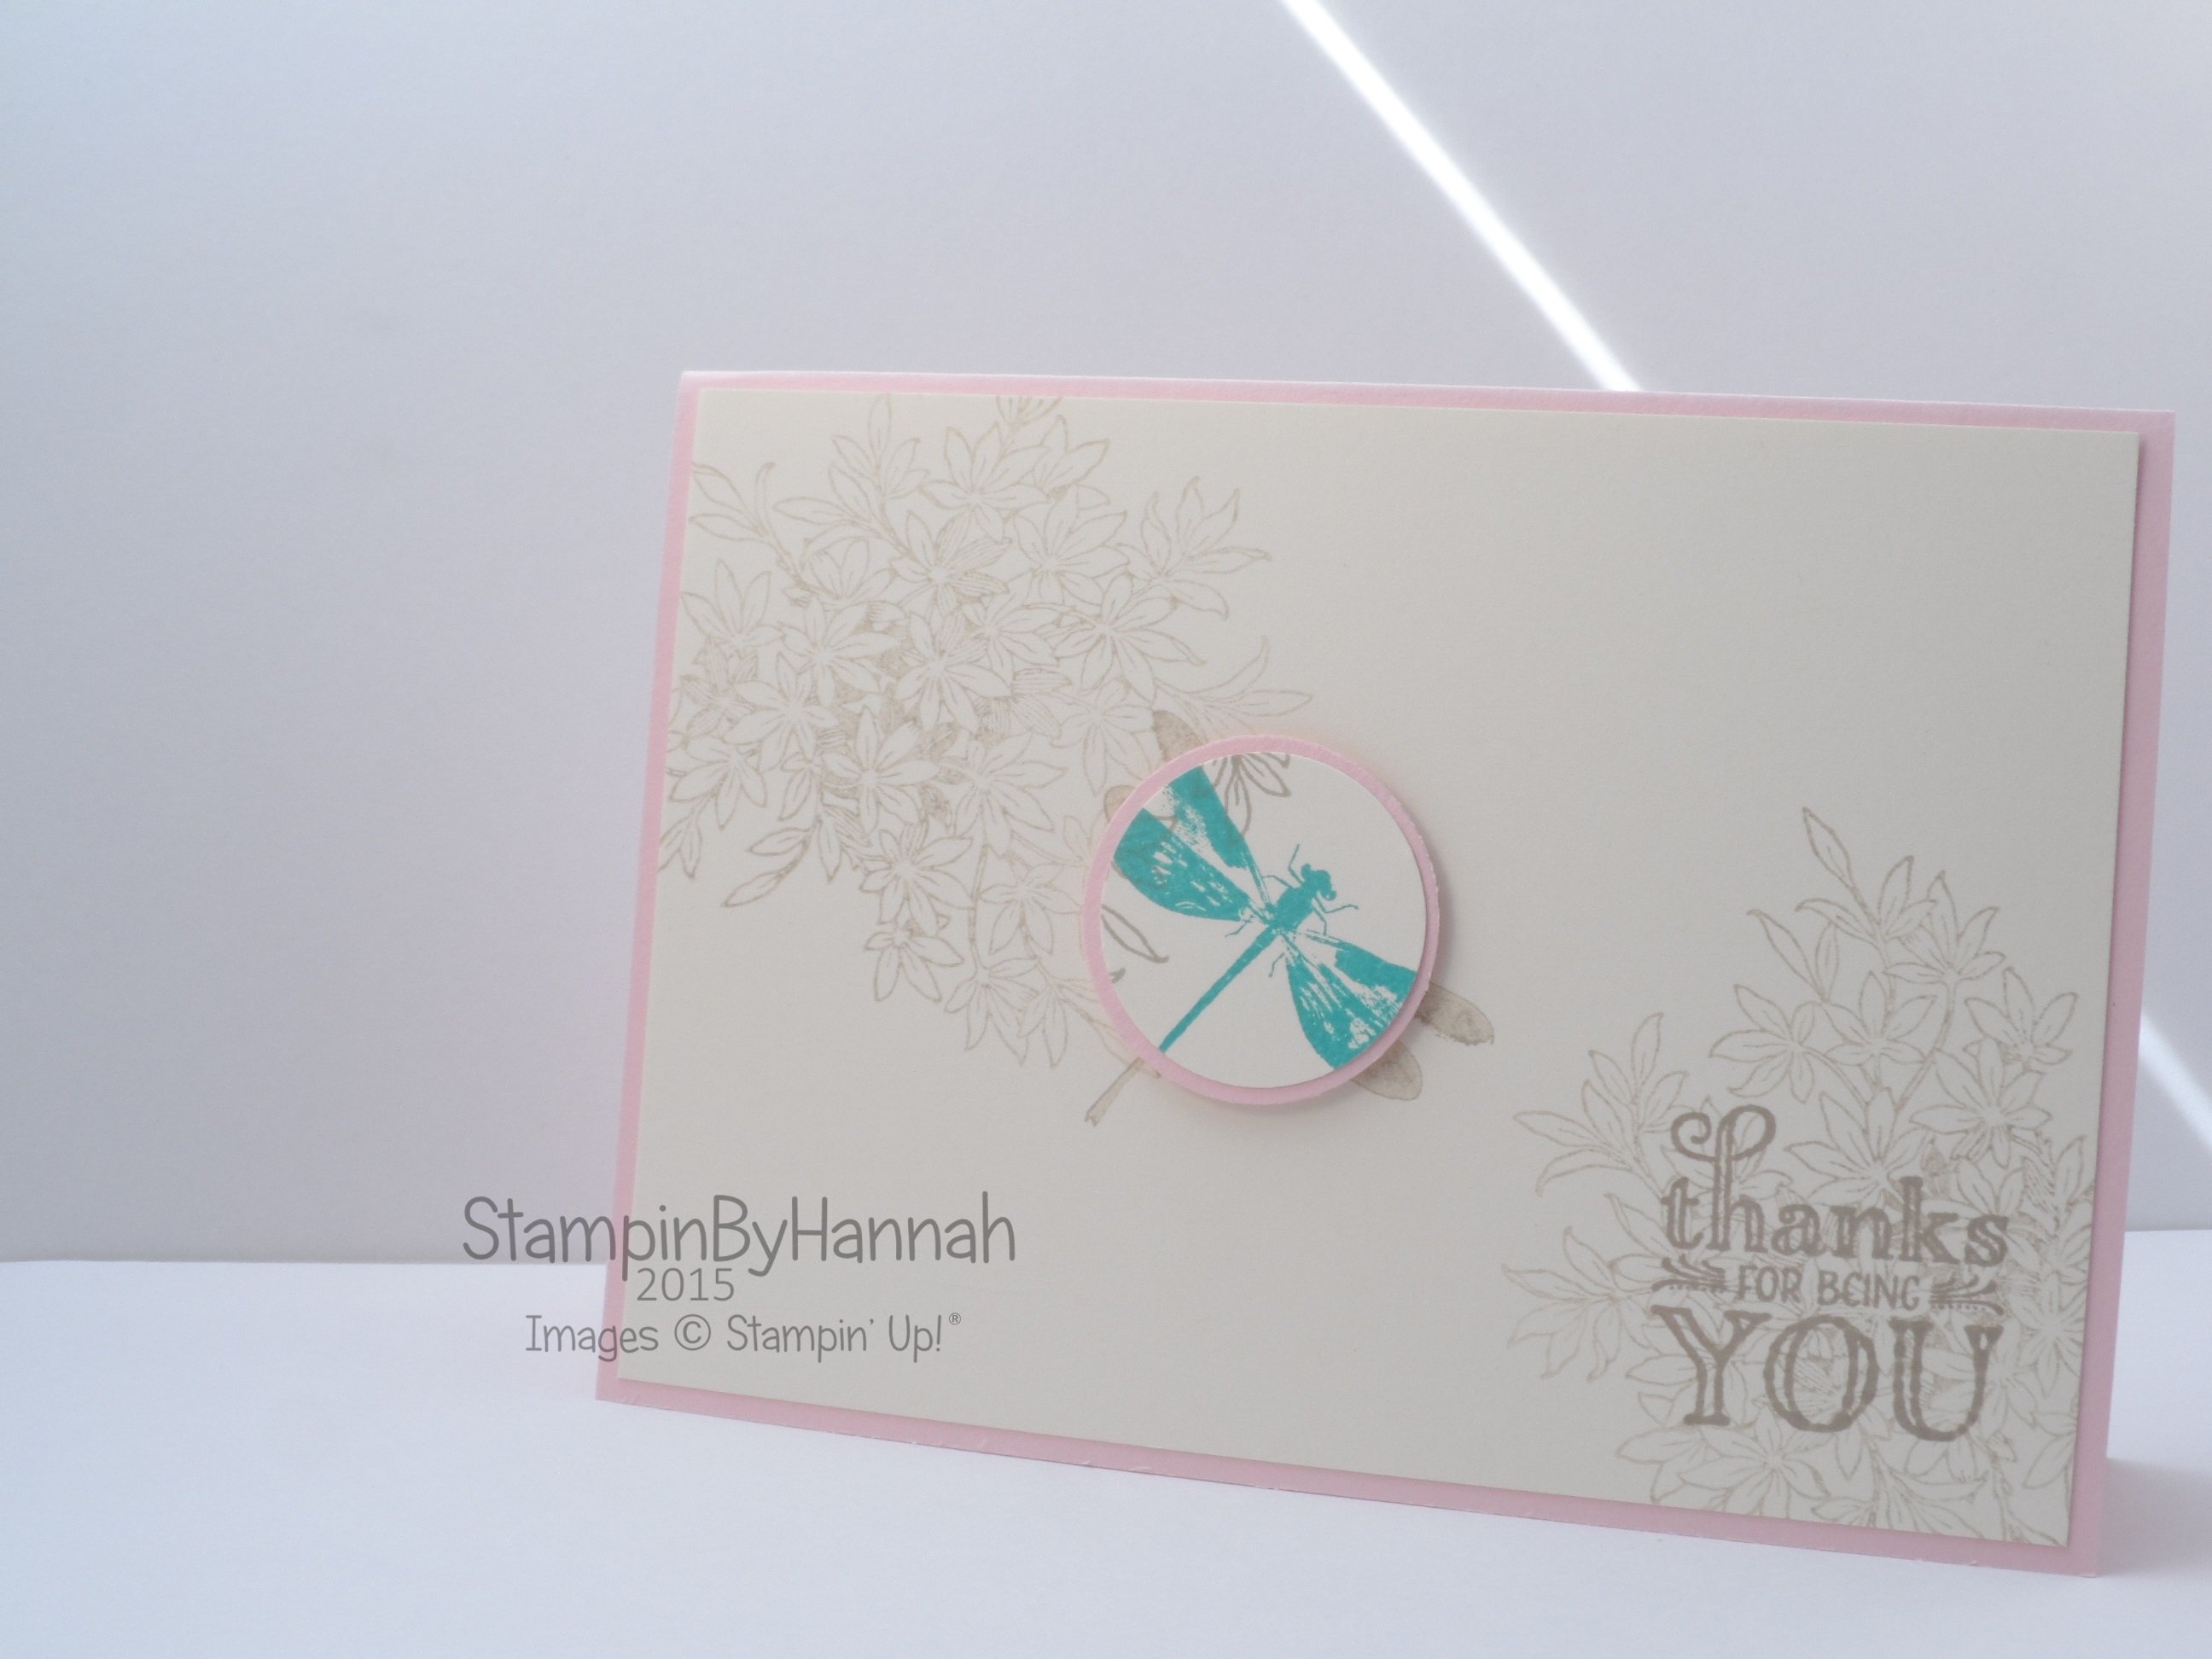
All three projects were finished using a couple of the embellishments from the kit; Washi Tape, Wooden Elements and Sequins!


Shop Now button-001Join my team button-001

To purchase any of the items featured in my projects please use the links above. To join my team of Stampin’ Friends select ‘Join My Team’ or send me a message!

Please support StampinByHannah, and join my Code Club, by using the Hostess code featured in the top right hand of my blog. For orders of over £150 please do not use this code, as you are entitled to your own Hostess benefits!

Sign up to my newsletter here – http://eepurl.com/2if59

Hannah Wilks

Stampin’ Up! UK Independent Demonstrator

Chocolate Wrappers using Merry Moments DSP

Stampin' Up! UK chocolate wrapper merry moments

Ok, so we have finally launched the Autumn / Winter Stampin’ Up!® catalogue, and it is jam crammed packed full of great Christmas project ideas, awesome stamps, and some lovely ideas of autumn and winter birthdays too! I have a series of amazing projects, classes and videos coming for you in the next couple of months and I hope you love this catalogue as much as I do!

Stampin' Up! UK chocolate wrapper merry moments

I have to say though, no one love chocolate as much as I do (seriously, there is a reason I am touch over weight!), and when I spotted these chocolate bars in the supermarket a few months ago, I knew they had to come home with me and feature on my blog! Believe me they didn’t last long after this photo was taken!

Measurements:

Card stock – 7 3/4 x 6 3/4″ (20 x 17 cm)

Score on the long side first at 3 1/8, 3 5/8, 6 3/4 and 7 1/4″ (8, 9.5, 17.5 and 19 cm)

Score on the short side at 1/2″ (1.5 cm)

Designer Series Paper – 6 x 2 7/8″ (15 x 7 cm)

What’s your favourite Designer Series Paper from the new Autumn / Winter catalogue? Not seen it yet, click the link in the side bar on the right to download your copy, or request a paper one by clicking the link in the top menu!


Shop Now button-001Join my team button-001

To purchase any of the items featured in my projects please use the links above. To join my team of Stampin’ Friends select ‘Join My Team’ or send me a message!

Please support StampinByHannah, and join my Code Club, by using the Hostess code featured in the top right hand of my blog. For orders of over £150 please do not use this code, as you are entitled to your own Hostess benefits!

Sign up to my newsletter here – http://eepurl.com/2if59

Hannah Wilks

Stampin’ Up! UK Independent Demonstrator


Divided Sweetie Box

Stampin' JUp! divided sweetie box video tutorial

I just LOVE this box! I think it would be great for Christmas or Easter gift giving and you could totally dress it up with some cute ribbon or a bit of punch work.

Stampin' Up! UK sweetie box video tutorial

The sweeties in the box are some I bought from Amazon for the sweetie bar at out Wedding, but they just weren’t quite right – but they found there use! I still have a heap of them left so you never know who might be receiving some soon (maybe some lovely Stampin@Home participants, maybe!).

Measurements:

Box Base –

card stock; 6 x 6″ (15.2 x 15.2 cm)

Score at 1″ (2.5 cm) on all four sides

Box Lid –

card stock; 5 9/16th x 5 9/16th (14.1 x 14.1 cm) I know these measurements are a little awkward but they make for the perfect lid that doesn’t fall off!

Score on all four sides at 3/4″ (2cm)

Now we need to cut that hole in the lid. My Stampin’ Trimmer is a European version, and only has metric measurements on the trimmer arm, so sorry but I only have metric measurements for this bit.

Insert the box lid into the trimmer and line up the first side at 10.2 cm, using the cutting blade on the trimmer to cut from 4 cm to 10.2 cm. Repeat this on all four sides and the centre square should just pop out!

Box Inserts –

I’ve used a different colour of card stock for the insides to add contrast, you could keep all the pieces the same colour if desired!

One piece of card stock measuring 4 x 5 1/2″ (10 x 14 cm)

Score on the long side at 2″ (5 cm) on both sides, flip over at score at 2 3/4″ (7 cm)

One piece of card stock measuring 2 x 5 1/2″ (5 x 14 cm)

Score on the long side at 2″ (5 cm) on both sides, flip over at score at 2 3/4″ (7 cm)

Stampin' JUp! divided sweetie box video tutorial

What do you think? Is there a tutorial you would really like to see, let me know in the comments section below


Don’t forget to shop using the Code Club Code to receive some great FREE product! 

2JTHMV6W

I will be closing this order on the 30th August 2015


Shop Now button-001Join my team button-001

To purchase any of the items featured in my projects please use the links above. To join my team of Stampin’ Friends select ‘Join My Team’ or send me a message!

Please support StampinByHannah, and join my Code Club, by using the Hostess code featured in the top right hand of my blog. For orders of over £150 please do not use this code, as you are entitled to your own Hostess benefits!

Sign up to my newsletter here – http://eepurl.com/2if59

Hannah Wilks

Stampin’ Up! UK Independent Demonstrator


Technique Tuesday | Spotlight Stamping

Stampin' Up! UK Technique Tuesday Awesomely Artisitic

Are you enjoying Technique Tuesday? you know if you make one of my projects I would LOVE to see it, why not share it with me on my Facebook page.

I spotted a card using this technique on a Facebook group a few weeks ago, and I’m really super sorry that I can’t remember who it was, so if it was you – please comment below so I can give you credit!

Stampin' Up! UK Technique Tuesday Awesomely Artisitic
Oh yes, I’ve been using Awesomely Artistic again! this time I’ve paired it with Me = Grateful to make some lovely Thank You cards.

How to:

Using Awesomely Artistic, stamp the background of the card using a pale ink. I’ve used Sahara Sand on Very Vanilla, and Smoky Slate on Whisper White here, stamped off once

Add you sentiment using Me = Grateful

On a scrap piece of card stock, the same colour as your background piece stamp the background image again, this time in full strength ink. I have stamped the floral arrangement in Sahara Sand or Smokey Slate, and the added the Dragonfly in a bold colour.

The trick here is to carefully stamp the dragonfly so the images line up with the background piece when you’ve punched them out.

Stampin' Up! Awesomely Artistic Spotlight Stamping


Shop Now button-001Join my team button-001

To purchase any of the items featured in my projects please use the links above. To join my team of Stampin’ Friends select ‘Join My Team’ or send me a message!

Please support StampinByHannah, and join my Code Club, by using the Hostess code featured in the top right hand of my blog. For orders of over £150 please do not use this code, as you are entitled to your own Hostess benefits!

Sign up to my newsletter here – http://eepurl.com/2if59

Hannah Wilks

Stampin’ Up! UK Independent Demonstrator

Decorated Frames….. and some stamping too!

Stampin' Up! Decorated Frames Home decor stamping butterflies

Hi! Welcome to StampinByHannah! I hope you enjoy my blog, feel free to have a poke around, leave some likes, and follow along with some tutorials! Check out my latest Classes in the menu bar at the top of the page, and I can’t wait to hear from you!

Todays project was planned as one thing, but changed along the way to be something a little bit different! Stampin' Up! UK watercolour wings stamping tutorial

My big plan was a video tutorial decorating this photo frame. However, I started making my sample, added the two butterflies and a bow of Dotted Lace trim, and decided it as so gorgeous it didn’t really need any more – or really warrant a video tutorial either! However, the butterflies IN the frame (also beautiful!) could do with some explanation! The frame came from Asda for about £1.50

I am loving the Watercolour Wings bundle. This great stamp set, comes complete with two dies, one to cut the whole stamped butterfly and another smaller to coordinate with the Butterfly Thinlits dies.

Stampin' Up! Decorated Frames Home decor stamping butterflies

There are so many ink colours here. The framed version uses; Mint Macaron, Bermuda Bay, Delightful Dijon, Wisteria Wonder and Soft Sky. While the un-framed one uses; Lost Lagoon, Mint Macaron, Pink Pirouette, Melon Mambo and Crushed Curry.

The Watercolour Wings stamp set includes three stamps to make this butterfly (plus four to layer a smaller butterfly, some accent pieces and sentiments). The most solid stamp should be stamped first, with the detailed pieces layering over the top. This is a photopolymer stamp set, so layering up those stamped images is super easy too!

Stampin' Up! UK watercolour WIngs

I couldn’t leave without a close up of that lovely die-cut on the frame. The larger butterfly is from the Butterflies Thinlits dies set, and is die cut from Wisteria Wonder Card stock, with the smaller Mint Macaron butterfly from the Bold Butterflies thinlits layered onto with some Tombow glue. The 1″ Dotted Lace Trim ties into a beautiful bow too. I used Tombow to adhere the embellishment to the frame, and left it to dry overnight.

Beautiful!


Stampin' Up! UK classes mail order watercolour wings


Shop Now button-001Join my team button-001

To purchase any of the items featured in my projects please use the links above. To join my team of Stampin’ Friends select ‘Join My Team’ or send me a message!

Please support StampinByHannah, and join my Code Club, by using the Hostess code featured in the top right hand of my blog. For orders of over £150 please do not use this code, as you are entitled to your own Hostess benefits!

Sign up to my newsletter here – http://eepurl.com/2if59

Hannah Wilks

Stampin’ Up! UK Independent Demonstrator

Technique Tuesday | Colour Me Irresistible

Stampin' Up! UK Sprinkles of life colour me irresistible;l

I’m a bit concerned that this fantastic Designer Series Paper may have passed you by in the Annual Catalogue this year! It can be found at the very top of page 142, it just looks like a series of coloured chevrons – but take a closer look! Its the most wonderful Designer Series Paper – do you remember the Irresistibly Yours DSP from Sale-a-bration this year? Well, its like that – but better! You get 12 sheets, all with fabulous patterns in ink resist embossing, but some are pre-coloured, while others are white – all ready for you, a sponge and your favourite ink!

Stampin' Up! UK Sprinkles of life colour me irresistible;l

Paired here with the wonderful Sprinkles of Life Stamp set, I can’t choose which version of the paper is my favourite! The one on the left uses the pre-coloured Colour Me Irresistible paper, while the right had card features the DSP that has been coloured by me with my trusty sponge and some Mint Macaron Ink!

Have I mentioned about the Sprinkles of Life stamp set by the way? Not only is it super cute! but also £2 is donated to Ronald Macdonald House Charities here in the UK for each stamp set sold! Awesome right! RMHC do fantastic work, keeping parents and sick children close together during some of the worst times, providing houses near to hospitals.

Stampin' Up! Colour me Irresistable Color

What’s your favourite version of this card?


Shop Now button-001Join my team button-001

To purchase any of the items featured in my projects please use the links above. To join my team of Stampin’ Friends select ‘Join My Team’ or send me a message!

Please support StampinByHannah, and join my Code Club, by using the Hostess code featured in the top right hand of my blog. For orders of over £150 please do not use this code, as you are entitled to your own Hostess benefits!

Sign up to my newsletter here – http://eepurl.com/2if59

Hannah Wilks

Stampin’ Up! UK Independent Demonstrator

Ink Splatter Two Ways

Stampin' Up! UK Ink Splatter Gorgeous Grunge Watercolour Thank you

Slightly different style of video for you today. I am going to try some different videos over the next few weeks, thinking of trying some ‘craft along’ type videos. I wanted to show you the two ways I most commonly make ink splatters. I love this look, although I don’t share it very often, I do use both of these methods to create this effect

Stampin' Up! UK Ink Splatter Gorgeous Grunge Watercolour Thank you

As you will see in the video I wasn’t really sure where I was going with this card. I had pulled this stamp, as well as as Cucumber Crush and Watermelon Wonder inks, the card base and a Whisper White matt.

There are two different types of ink splatter here (well, its almost three, but I want you to ignore the large Cucumber Crush Splat for the moment).

The Watermelon Wonder ink splatters are watered down ink, splattered onto the card stock with a paint brush, whilst the Cucumber Crush ones are a stamp! Can you tell the difference? because I can’t! How cool is that!

What do you think? Which is your favourite ink splat method?


Shop Now button-001Join my team button-001

To purchase any of the items featured in my projects please use the links above. To join my team of Stampin’ Friends select ‘Join My Team’ or send me a message!

Please support StampinByHannah by using the Hostess code featured in the top right hand of my blog. For orders of over £150 please do not use this code, as you are entitled to your own Hostess benefits!

Sign up to my newsletter here – http://eepurl.com/2if59

Hannah Wilks

Stampin’ Up! UK Independent Demonstrator


Cardmaking 101 – How to Stamp

Cardmaking class UK free

Hello!

Welcome to another episode of Cardmaking 101! This week we are looking at ‘how to stamp!’

I think this is one of those things that new card makers can really struggle with, getting a clear, crisp image, and avoiding those dreaded inky halo’s.

Stampin' Up! UK how to stamp tutorial

I think the best way to explain this one is in video, but the key really is a smooth action (and practice!) getting the stamp mounted properly on your block, and stamping down and straight up – No Rocking!

check out the video to see what I mean

If you have any burning card making 101 questions please let me know in the comments below, or email me via the Contact Me button at the top of the page. Thanks


Shop Now button-001Join my team button-001

To purchase any of the items featured in my projects please use the links above. To join my team of Stampin’ Friends select ‘Join My Team’ or send me a message!

Please support StampinByHannah by using the Hostess code featured in the top right hand of my blog. For orders of over £150 please do not use this code, as you are entitled to your own Hostess benefits!

Sign up to my newsletter here – http://eepurl.com/2if59

Hannah Wilks

Stampin’ Up! UK Independent Demonstrator

Pootler’s Blog Hop | Watercolour Wings

Stampin' Up! UK Watercolour wings cards

Pootlers Blog Hop-001

Hello!

Welcome to the Pootler’s blog hop! I am so excited for this hop, the lovely ladies in the team have worked so hard to create some wonderful projects (I’ve had a sneak peak, so impressed!). Please take your time around the hop, the girls would love some comments too!

Thanks


When I first saw this years catalogue this stamp set really intrigued me. The image in the catalogue is very dark, but the sample is amazing! I have to say though, I wasn’t completely convinced until I saw Sarah Berry’s lovely creations at Regional Training back in May; she created a series of wonderful cards using this set and gave us some great tips too!

Srtampin' Up! UK Watercolour Wings

Isn’t it lovely? I just love the layered nature of these stamps. The set includes two butterflies, one large and one small, over 3 stamps so you get a multi-layered image. This card I have also used one of the accent pieces to create a background and used one of the sentiment stamps. The butterfly has been die cut using the coordinating Bold Butterfly framelits dies, although the set also coordinates with the Butterflies Framelits (and Butterfly Basics!)

Stampin' Up! UK Pootles Blog Hop

I love this card! Instead of stamping the solid layer of the butterfly, I created a mask using copier paper and used my Sponge Daubers to create the butterfly. You can see this better in the video!

I created this set of three cards after making one; also using the masking technique to create the butterfly first, then adding layers. This time I only added the detailed stamp using White Craft Ink.

Stampin' Up! UK Watercolour wings video

Which card is your favourite, I have to say I think the one I created in the video is mine, I’m just loving the Watermelon Wonder colour!

Pootlers Blog Hop Forward-001Pootlers Blog Hop backward_2-001


Shop Now button-001Join my team button-001

To purchase any of the items featured in my projects please use the links above. To join my team of Stampin’ Friends select ‘Join My Team’ or send me a message!

Please support StampinByHannah by using the Hostess code featured in the top right hand of my blog. For orders of over £150 please do not use this code, as you are entitled to your own Hostess benefits!

Sign up to my newsletter here – http://eepurl.com/2if59

Hannah Wilks

Stampin’ Up! UK Independent Demonstrator

Watercolour Stamping with Stampin’ Write Markers

Stampin' Up! UK Watercolour stamping markers I think you're great

I find myself reaching for my Stampin’ Write markers often. They are the same ink as the Stampin’ Up! Classic Ink you’ll find in our ink pads, but in the convenience of a pen. There are so many techniques that use these pens; from watercolouring to stamping, using them like felt tips, or just a quick ink.

Stampin' Up! UK Watercolour stamping markers I think you're great

I use Stampin’ Write makers for technique like this one quite often, they are a great way to ink a stamp with several colours; whether you are colouring a bird or flower, or just creating a great background like this one.

The Stampin’ Write makers have two tips; a fine point great for journalling in you Project Life albums, and a brush tip wonderful for colouring images or stamps.

How To:

Select a few Stampin’ Write markers; here I have used Melon Mambo, Rich Razzleberry, Bermuda Bay and Island Indigo.

Using the brush tip of your marker on its side, scribble the colour into your stamp

Once your stamp is covered in ink, spritz with water

Stamp onto your card stock (I used Whisper White for this card, but it works wonderfully with Watercolour paper too!), holding the stamp to the card stock for a few seconds to allow the ink to soak into the paper

Stampin' Up! UK I think you're great

The sentiments used here are both from the I Think You’re Great stamp set, and are stamped in Tip Top Taupe before being fussy cut with my Paper Snips and added to the card with some Dimensionals

I think my favourite is the ‘Way to Go’ card, what about you?


Shop Now button-001Join my team button-001

To purchase any of the items featured in my projects please use the links above. To join my team of Stampin’ Friends select ‘Join My Team’ or send me a message!

Please support StampinByHannah by using the Hostess code featured in the top right hand of my blog. For orders of over £150 please do not use this code, as you are entitled to your own Hostess benefits!

Sign up to my newsletter here – http://eepurl.com/2if59

Hannah Wilks

Stampin’ Up! UK Independent Demonstrator