Mini Milk Carton

I was away last week visiting some family in Bristol, and we popped out for a loaf of bread. The shop most local to my grandparents is Lidl, and I have to admit, I have never been through the door (I usual opt to drive to the nearest big name supermarket up the road), but for a loaf of bread we decided we’d give it a try. Well, it may have been the most expensive loaf of bread I have ever bought! Because I found the Easter Chocolates!

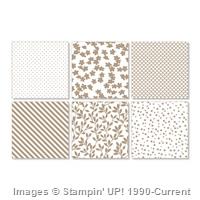
One of the many things I love about Stampin’ Up! is the colour selection, and when I spotted these eggs they called out to me in Stampin’ Up! colours – Pichachio Pudding! Crisp Cantaloupe! So Saffron!

Stampin' Up! UK Easter Egg Milk Carton

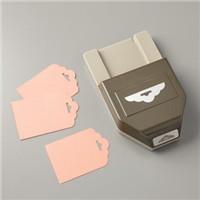
These boxes could hold way more than the 3 eggs I have put in, but I stupidly only bought one pack! Silly me!

Measurements:

Cardstock – 5 7/8 x 8 1/4″ (14.8 x 21 cm)

Score on the long side at 2, 4, 6, and 8″ (5, 10, 15, and 20 cm)

Score on the short side at 2, 4 1/4 and 5 1/2″ (5, 10.5, and 14 cm)


Hannah Wilks

Stampin’ Up! UK Independent Demonstrator

If you like the project, or any of the products used, would like a catalogue, or to join my team, please contact me, or click on the ‘Shop NOW’ button at the top of the page. You can also find me on Twitter, Facebook, YouTube, Google+, About.me, and Tumblr (Links in the sidebar)

Sign up to our newsletter here – http://eepurl.com/2if59

Thank you for stopping by www.www.stampinbyhannah.co.uk today

x

How to Cover a Jotter Sized Notebook

I love making gifts for customers, each month each customer receives a handmade card, and maybe even a little something extra! I used to send these out so they would arrive with your order, but I can’t keep up, so now, I have a posting day at the end of each month – if you have ordered recently and haven’t received anything from me, let me know! It might be that you have made a ‘No Contact’ order, in which case, you’ll need to log back into your Stampin’ Up! account and change your preferences, as I am unable to contact anyone who leaves a No Contact order – even if it is to say ‘Thanks!’


So, onto the post for today, I made these for the ladies that attended my March Techniques Class last week!

Stampin' Up! UK how to cover a jotter customer gifts

I am always writing lists, and so love a good notepad, even more when they are pretty!

They use the stamp set from my April Techniques class – Regarding Dahlias, for the stamped front cover. I have personalised each one with the attendees first initial using the Sophisticated Serifs! (LOVE!) And they are so easy to make!

Measurements:

I would suggest that you measure your notepads carefully and alter these measurements to fit.

The notepads I bought were Jotter Sized (aka: very random!). Measure the height and depth of your notepad and add an 1 1/2″ (3 cm) to find the length of cardstock you need and then take the width for the notepad for the width of cardstock.

My notebooks measure : 21 x 7 x 0.4 cm (8 5/16 x 2 13/16 x 1/8″)

and so my cover measures  24 x 7 cm (9 1/2 x 2 13/16)

Scored on the long side at 21.3 and 21.8 cm (8 3/8 and 8 9/16″)

The Whisper White layer for stamping measures 21.5 x 6.5 cm (2 9/16 x 8″)


Hannah Wilks

Stampin’ Up! UK Independent Demonstrator

If you like the project, or any of the products used, would like a catalogue, or to join my team, please contact me, or click on the ‘Shop NOW’ button at the top of the page. You can also find me on Twitter, Facebook, YouTube, Google+, About.me, and Tumblr (Links in the sidebar)

Sign up to our newsletter here – http://eepurl.com/2if59

Thank you for stopping by www.www.stampinbyhannah.co.uk today

x

Irresistible Creme Egg!

Sale-a-bration is the 3 month long BIG sale from Stampin’ Up! Finishing on 31st March 2015, it gives you a choice of 14 FREE items to choose from when you order £45, and each £45 spend gives you an extra item – so if you spend £90 you choose 2 gifts, £130 – 3 gifts etc. etc. Check out my Sale-a-bration page for more information!


I LOVE LOVE LOVE this Designer Series Paper! It is simply Stunning!

Irresistibly Yours is one of the great Sale-a-bration products this year. Stampin’ Up! describe it as a ‘White Paper with a glossy white pattern … perfect for colouring with a variety of techniques – colouring reveals the pattern.’ When this first arrived even I was slightly underwhelmed! But once you’re brave and apply ink to it! WOW!

Stampin' Up! UK Irresistibly Yours Sale-a-bration SAB Creme Egg

Can you see what I can see? Yes, Easter IS coming! and what is the best thing about Easter (other than the meaning!) yes, that’t right – Creme Eggs! Each year James argues with me that you can get Creme Eggs after Easter, and every single year I am right when they disappear from the shelves! I love them!

I knew Creme Eggs HAD to feature in my build up to Easter. And this DSP is the perfect way to showcase them.

Stampin' Up! UK Sale-a-bration Creme Egg Holder

Measurements:

Cardstock (or Irresistibly Yours Designer Series Paper!) 2 x 10 5/8″ (2.5 x 27 cm)

Score on the long side at 4 1/4″ (10.7 cm) on each side

Insert the each end into the Scalloped Tag Topper Punch

Score a 3 x 3″ (7.5 x 7.5 cm) piece of cardstock (or the same DSP) on each side at 1/2″ (1.2 cm)

Cut a 1″ circle in the centre of the square ready to hold your egg!


This beautiful Designer Series Paper could be yours for FREE when you order £45! LOVE it!


Hannah Wilks

Stampin’ Up! UK Independent Demonstrator

If you like the project, or any of the products used, would like a catalogue, or to join my team, please contact me, or click on the ‘Shop NOW’ button at the top of the page. You can also find me on Twitter, Facebook, YouTube, Google+, About.me, and Tumblr (Links in the sidebar)

Sign up to our newsletter here – http://eepurl.com/2if59

Thank you for stopping by www.www.stampinbyhannah.co.uk today

x

Ambassador’s Chocolate box! using Stampin’ Up! UK products – video Tutorial

I love taking packaging as inspiration for handmade projects, a few weeks ago I was shopping with a friend and spotted a long thin box of chocolates, and just knew I had to buy it and re-create it. Now, that box wasn’t all that exciting, but using an existing box makes it much easier to re-engineer a box to fit the same items! So, the original box held 5 chocolates, my version holds 3, but I think 3 of these indulgent chocolates is enough!

Stampin' Up! UK Ferrero Rocher box chocolate video tutorial

I have made this box a few times now, with punched out sections, and designer series paper, but may favourite has to be this Brushed Gold version. The photo doesn’t do the colour of this cardstock justice, but I think I managed to capture the shine in the video.

I also grabbed one of the new wedding themed stamp sets from the Spring/Summer catalogue for the stamped sentiment – Your Perfect Day, punched out perfectly (pun intended) with the 1 1/4″ circle punch. I just love the look of these two punched layered on top of each other, the bottom layer is a 1 3/8″ circle punched from Blackberry Bliss cardstock (love that colour!)

Measurements:

Cardstock = 8 1/4 x 6 1/2″ (21 x 17 cm)

Score on the long side first at – 1/2, 2, 6 1/4 and 7 3/4″ (1 , 5, 16, and 20 cm)

Score on the short side at 1/2, 2, 3 1/2 and 5″ (1, 5, 9, 13 cm)

Measurements for Designer Series Paper:

4 pieces cut to 1 1/4 x 4″ (3 x 10 cm)

2 pieces cut to 1 1/4 x 1 1/4″ (3 x 3 cm)


Hannah Wilks

Stampin’ Up! UK Independent Demonstrator

If you like the project, or any of the products used, would like a catalogue, or to join my team, please contact me, or click on the ‘Shop NOW’ button at the top of the page. You can also find me on Twitter, Facebook, YouTube, Google+, About.me, and Tumblr (Links in the sidebar)

Sign up to our newsletter here – http://eepurl.com/2if59

Thank you for stopping by www.www.stampinbyhannah.co.uk today

x

Valentines Seam Bag

Valentines isn’t as big a holiday in the UK as it is in the USA – in fact it barely registers at all. I don’t think I have ever been out for a Valentines dinner, there are two reasons for that; first restaurants appear to increase their prices on this one night of the year, and that I have been at work for most of the Valentines since James and I have been together (I’m on nights this year, passion killer or what!)

So, instead of going all out, we tend to have a quite night in with a nice dinner during the week. This year I have a couple of little things to make this evening a little more special, including this little table gift.

Stampin' Up! UK stacked with love Valentines treat bags

This bag uses the Stacked with Love Designer Series Paper Stack, a lovely selection of love themed papers in that lovely 6 1/2 x 4 1/2″ size, perfect for card fronts (and cute little bags!)

This DSP comes bundled with the You Plus Me stamp set, and I featured both as part of my February Techniques class.

Measurements:

DSP – 6 1/2 x 4 1/2″

Score the long side at 2 3/8″ and 4 1/8″

Score on the short side at 1 3/8 and 3 1/8″

I have also used the Sweetheart Punch, You Plus Me and Itty Bitty Accents Punch Pack.


Hannah Wilks

Stampin’ Up! UK Independent Demonstrator

If you like the project, or any of the products used, would like a catalogue, or to join my team, please contact me, or click on the ‘Shop NOW’ button at the top of the page. You can also find me on Twitter, Facebook, YouTube, Google+, About.me, and Tumblr (Links in the sidebar)

Sign up to our newsletter here – http://eepurl.com/2if59

Thank you for stopping by www.www.stampinbyhannah.co.uk today

x

Mini Egg Basket

Ok, so I have a confession to make. I am a chocoholic! and seeing as I am currently on the biggest Wedding diet of the Century my chocolate intake is very very limited! So, I’m making boxes and bags to put chocolate in instead! lol, have to get my fix somewhere!

So, this is my Mini-Egg basket

Stampin' Up! UK Mini Eggs Basket Easter Sale-a-bration

It’s it cute! I love it! Not only is it adorable in the Best Year Ever Designer Series Paper (part of Sale-a-bration) but its super quick to make, AND they fold flat for storage! awesome!

Measurements:

Designer Series Paper = 6 x 5″

Score on the long side at – 1/2, 1, 2 1/2, 3 1/2, 5 and 5 1/2″

Score on the short side at – 1 and 4″

To enable this basket to fold flat you need to create some extra score lines. Holding the paper with the long side at the top, fold the two horizontal scores in wards. The two score lines in the centre need to fold to meet the score lines you have just folded. The video shows this better than I can explain it.


The basket when assembled holds 6-9 Mini Eggs, yum!


Hannah Wilks

Stampin’ Up! UK Independent Demonstrator

If you like the project, or any of the products used, would like a catalogue, or to join my team, please contact me, or click on the ‘Shop NOW’ button at the top of the page. You can also find me on Twitter, Facebook, YouTube, Google+, About.me, and Tumblr (Links in the sidebar)

Sign up to our newsletter here – http://eepurl.com/2if59

Thank you for stopping by www.www.stampinbyhannah.co.uk today

x

Stampin’ Up! Chocolate Box!

Hope everyone is having a great week! Inspiration struck me last week whilst be very naughty and stuffing my face full of chocolate (supposed to be on a diet …. its not going well!). I just loved the dimensions of the box the chocolates came in, however, it was far to big to make from a sheet of 12 x 12, so I set about making a smaller version, and here it is!

Stampin' Up! UK Chocolate box Simply Wonderful Sale-a-bration

Its a lovely box, and although I designed it for chocolates I didn’t have any on hand when filming the tutorial, so I filled it with sweeties instead!

The original version used the Something Borrowed Designer Series Paper but its currently on back order 🙁 which is a shame as it is so beautiful, So I swapped it for a piece of the Sweet Dreams designer series paper instead. I think this DSP is great! It forms part of the Baby Suite (see page 39 of the Spring Summer catalogue) and it does have some baby themed accessories, however, the papers themselves are a lovely selection of generic patterns. One side uses boy colours – Lost Lagoon, Basic Gray – while the other side features more girly hues – Crisp Cantaloupe and Hello Honey.

The stamp is from Simply Wonderful, one of the sets available as part of Sale-a-bration! I love the coordination of Sale-a-bration products this year, not only do we have stamps, papers and accessories that coordinate with each other, but we also have stamp sets that are great used with some of the punches in the annual catalogue! This set in particular works great with the Extra-Large Oval punch, and the Decorative Label punch too!

Measurements:

Cardstock (or Designer Series Paper) – 12 x 5 3/4″ (30.5 x 14.5 cm)

Score on the long side at – 1, 4 1/2, 6 1/2 and 10″ (2.5, 11.5, 16.5 and 25.5 cm)

Score on the short side at – 2, 3 1/4 and 5 1/4″ (5, 8.5 and 13 cm)


Hannah Wilks

Stampin’ Up! UK Independent Demonstrator

If you like the project, or any of the products used, would like a catalogue, or to join my team, please contact me, or click on the ‘Shop NOW’ button at the top of the page. You can also find me on Twitter, Facebook, YouTube, Google+, About.me, and Tumblr (Links in the sidebar)

Sign up to our newsletter here – http://eepurl.com/2if59

Thank you for stopping by www.www.stampinbyhannah.co.uk today

x

Fancy Fold Friday – Box Card

Welcome to another Fancy Fold Friday.

This card is the result of a conversation I had a few weeks before Christmas with one of my Stampin’ Up! Pootles team mates. She had spotted this card, and could find what it was called or a tutorial for it. What followed was a quick mess around with some copy paper (a disaster by the way) and a quick hunt on Pinterest. We found this tutorial, and I just knew I had to do my own version; I have altered the measurements in order to fit the card into a C6 envelope.

Stampin' Up! UK Box Card Video Tutorial


The card above uses Elegant Eggplant cardstock, with the Something Borrowed Designer Series Paper and stamps from Your Perfect Day.

I’m sorry, but I haven’t currently got the metric measurements of this card. I have tried but I wasn’t very successful. So its imperial only for the time being.

Measurements:

Cardstock = 8 1/4 x 10!

Score on the Long Side at – 2, 3 1/2, 6 1/2, and 8″, marking the cardstock at 5″

Score on the Short Side at – 1 1/2 and 6 3/4″

Score triangles from the 5″ marks to the points where the score lines meet.


Hannah Wilks

Stampin’ Up! UK Independent Demonstrator

If you like the project, or any of the products used, would like a catalogue, or to join my team, please contact me, or click on the ‘Shop NOW’ button at the top of the page. You can also find me on Twitter, Facebook, YouTube, Google+, About.me, and Tumblr (Links in the sidebar)

Sign up to our newsletter here – http://eepurl.com/2if59

Thank you for stopping by www.www.stampinbyhannah.co.uk today

x

Salted Caramel Bag – Video Tutorial

I got this bag as part of a Christmas gift; it originally contained Salted Caramel (hence the title!), and I loved the shape so much I just had to recreate it.

I have to say now, that this bag is a little awkward, mainly due to some strange score lines, but I hope that the video will explain all.

Stampin' Up! UK large gift bag StampinByHannah

I used the lovely Sweet Taffy Designer Series Paper from the annual catalogue for this gift bag, with stamping using the Petal Potpourri and Something Wonderful (Sale-a-bration item!).

Measurements –

Cardstock = 12 x 11 1/2″ (30.5 x 29 cm)

Score on the long side at – 2 and 9″ (5 and 22.5 cm)

Score on the short side at – 2, 5 1/2, 7 1/2, 11″ (5, 14, 19, 28 cm)

Then turn the cardstock back so that the long side is at the top, with the 2″  (5 cm) score line on the left and score at 5″(12.5 cm) – but only between the narrow score lines.

The back on the short side score at 1″ and at 6 1/2″ (2.5 and 16.5 cm) but stop about 1″ about the 5″ score line (down 15 cm). At the end of these score lines, score triangles.

Stamped cardstock – 6 1/4 x 3″ (16.5 x 7.5 cm)

Layer – 6 1/2 x 3 1/4 (17 x 8 cm)

PS: Sorry I’m so snuffly in the video – I thought this cold had packed its bags and was leaving, but then it turned around and came back! *off to lie on the sofa!*


Fancy Fold Friday – Pop-up Gift Card Card Tutorial!

Ok, so before I start, I give Michelle Last full credit for this project, I just think its awesome and HAD to share! (HERE is her version)

Stampin' Up! UK Pop up gift card card

This gift card holder (or gift card card if you will) is super cool! I used this design to hold all the gift cards we gave as Christmas gifts.

Measurements:

Cardstock – 5 3/4″ x 11 3/4″ (14.8 x 29.7cm)

Fold the card in half, and score both ends at 4 1/8″ (10.5cm)

Designer Series Paper – 5 5/8 x 4″ (14.3 x 10 cm)

Whisper White – 5 3/8 x 3 3/4″ (13.8 x 9.5 cm)


I have finished my version with stamping from Work of Art and Something to Say Stamp sets, in the 2014-2016 In-Colours.


Hannah Wilks

Stampin’ Up! UK Independent Demonstrator

If you like the project, or any of the products used, would like a catalogue, or to join my team, please contact me, or click on the ‘Shop NOW’ button at the top of the page. You can also find me on Twitter, Facebook, YouTube, Google+, About.me, and Tumblr (Links in the sidebar)

Sign up to our newsletter here – http://eepurl.com/2if59

Thank you for stopping by www.www.stampinbyhannah.co.uk today

x